* Eclipse Spring 프로젝트 생성 및 초기 개발환경 구축하는 방법 참고
# 개발환경
| 항목 | 내용 |
|---|---|
| Language | Java 11 |
| Backend IDE | Eclipse 2023-12 |
| Spring | 5.3.36 |
| Tomcat | 9.0.105 |
| DataBase | MySQL 8.0.33 (MyBatis 3.5.15) |
| Build Tool | Maven 3.8.x (설정파일 : pom.xml) |
| Frontend IDE | VSCode |
| Vue.js | 3.16.4 |
📌 Backend 일부 수정
* 백엔드 전체 코드 :
https://velog.io/@ryuneng2/Spring-스프링-프로젝트-간단-DB-조회-로직-백엔드-ver
> Controller에 @CrossOrigin 추가
package com.calendarapp.controller;

import java.util.List;

import org.springframework.beans.factory.annotation.Autowired;
import org.springframework.web.bind.annotation.CrossOrigin;
import org.springframework.web.bind.annotation.GetMapping;
import org.springframework.web.bind.annotation.RequestMapping;
import org.springframework.web.bind.annotation.RestController;

import com.calendarapp.service.ScheduleService;
import com.calendarapp.vo.Schedule;

@RestController
@CrossOrigin(origins = "http://localhost:5173") // 추가
@RequestMapping("/api/schedules")
public class ScheduleController {

	@Autowired
	private ScheduleService scheduleService;

	@GetMapping
	public List<Schedule> getSchedules() {

		return scheduleService.getSchedules();
	}
}
📌 Vue.js 설치 및 Vue3 프로젝트 생성
1. Node.js 다운로드
2. cmd로 설치 및 버전 확인
node -vnpm -v- 프로젝트 생성
0) 프로젝트 생성할 경로로 이동cd [디렉토리]
1)npm init vue@latest
2) 프로젝트 이름 입력 후 엔터
3) 엔터 - 설치 후 디렉토리 이동해서 실행 테스트
1)cd [디렉토리]
2)npm install
3)npm run dev
✔️ npm 오류 발생 시 해결방법
-
⚠️ 오류
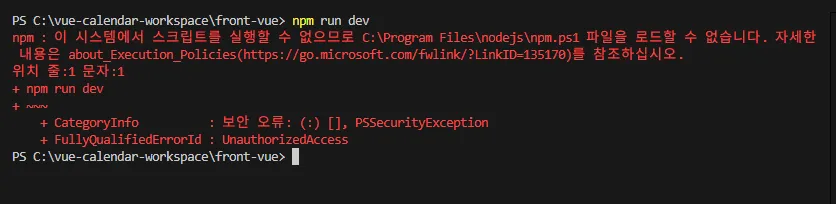
-
💡 해결 방법
- PowerShell을 관리자 권한으로 실행
Get-ExecutionPolicy명령어 입력 (현재 정책 확인)- 보통 Restricted나 RemoteSigned일 가능성이 있는데,
RemoteSigned 이상이어야 npm.ps1 실행이 가능해진다.
- 보통 Restricted나 RemoteSigned일 가능성이 있는데,
Set-ExecutionPolicy RemoteSigned -Scope CurrentUser명령어 입력- -Scope CurrentUser는 현재 사용자에게만 적용하므로 안전하다.
변경을 허용할지 묻는 메시지가 뜨면Y또는예를 입력
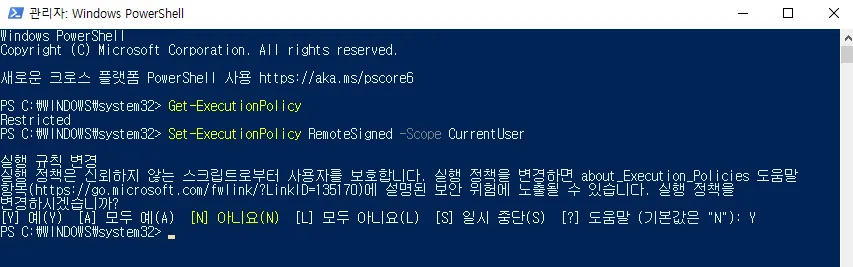
- ✅ 해결 후 정상 실행 완료

3. 실행 성공 확인
- http://localhost:5173/ 접속 시 Vue3 기본 화면이 나오면 정상적으로 실행된 것이다.
📌 Frontend 구현
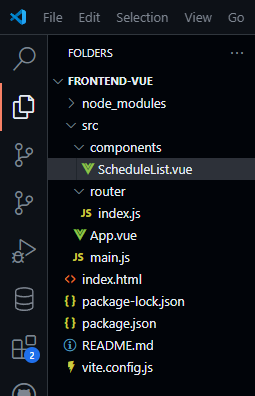
> 디렉토리 구조
0. 의존성 설치
1) 터미널 > Frontend 최상위 디렉토리 경로 진입
2) npm 설치
npm install명령어 입력
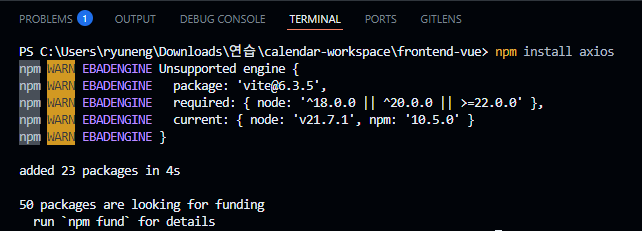
3) Axios 설치
npm install axios명령어 입력
4) Vue Router 설치
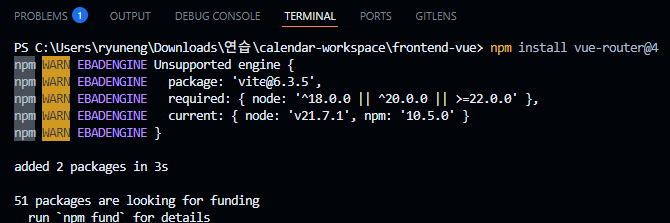
npm install vue-router@4명령어 입력
1. App.vue
- 기본 뼈대가 되는 컴포넌트
- 보통 여기서 전체 레이아웃 (헤더, 푸터 등)을 구성한다.
<template>
<div id="app">
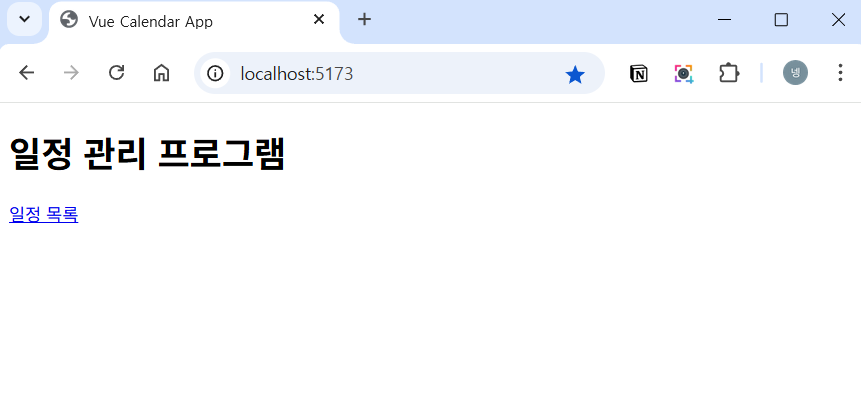
<h1>일정 관리 프로그램</h1>
<nav>
<router-link to="/list">일정 목록</router-link>
</nav>
<router-view /> <!-- 라우팅되는 컴포넌트가 표시되는 영역 -->
</div>
</template>2. router/index.js
- 어떤 URL에서 어떤 컴포넌트를 보여줄지 정의하는 라우터 영역
import { createRouter, createWebHistory } from 'vue-router';
import ScheduleList from '../components/ScheduleList.vue';

const routes = [
    { path: '/list', component: ScheduleList }
  ];

const router = createRouter({
  history: createWebHistory(),
  routes
});

export default router;
3. Vue 컴포넌트 (ScheduleList.vue)
- 실제로 보여줄 UI 및 데이터를 다루는 컴포넌트 (백엔드와 연동되는 로직 작성)
<template>
    <div>
      <h2>일정 목록</h2>
      <ul>
        <li v-for="schedule in schedules" :key="schedule.id">
            {{ schedule.id }}. {{ schedule.title }}
        </li>
      </ul>
    </div>
  </template>

  <script>
  import axios from 'axios';

  export default {
    name: 'ScheduleList',
    data() {
      return {
        schedules: []
      };
    },
    mounted() {
      axios.get('http://localhost:8080/api/schedules') // Spring 서버 포트
        .then(response => {
          this.schedules = response.data;
        })
        .catch(error => {
          console.error('일정 조회 실패:', error);
        });
    }
  };
  </script>
4. main.js
- Vue 앱의 진입점 (보통 초기에 한 번 설정해두면 이후에는 자주 수정하지 않음)
- 라우터, 상태관리, 전역 설정 등을 등록한다.
import { createApp } from 'vue';
import App from './App.vue';
import router from './router';

const app = createApp(App);
app.use(router);
app.mount('#app');
5. index.html
- 실제 브라우저에 표시되는 기본 HTML
- main.js를 통해 여기에 Vue 앱이 마운트된다.
<!DOCTYPE html>
<html lang="ko">
  <head>
    <meta charset="UTF-8">
    <title>Vue Calendar App</title>
  </head>
  <body>
    <div id="app"></div>
    <script type="module" src="/src/main.js"></script>
  </body>
</html>
💡 실행
- Backend 서버가 실행되어 있는 상태여야 함
1. 터미널 > Frontend 최상위 디렉토리 경로 진입
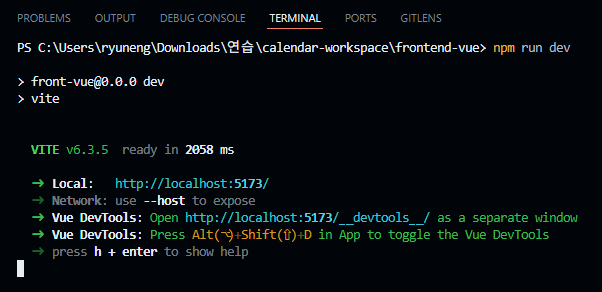
2. npm run dev 명령어 입력
3. 브라우저 접속
- 메인 URL : http://localhost:5173/
- 일정 리스트 URL : http://localhost:5173/list

DB에 저장된 일정 목록이 성공적으로 조회되는 것을 확인할 수 있다 !

학습용 커스터마이징 간단 개발자 사전