회원가입 , 로그인 구현
1. Confirmation URL 방식
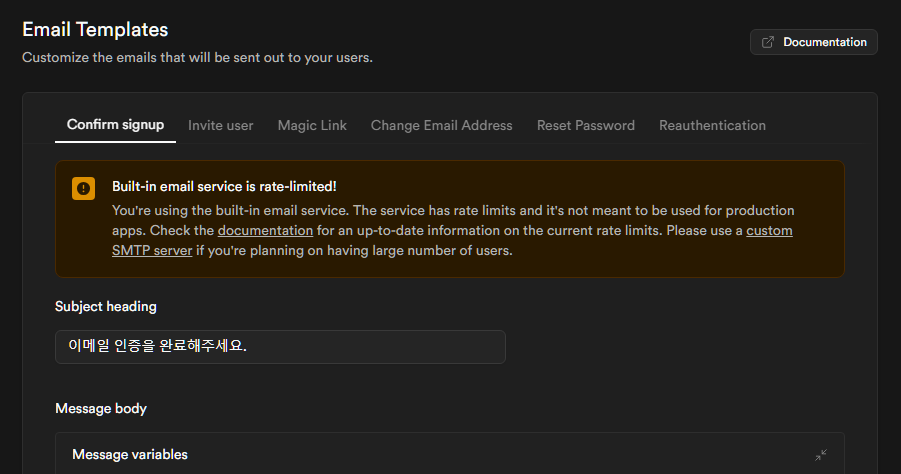
Supabase의 Email Templates 활용
- 이메일 인증 요청은 1시간에 3번 가능
- SMTP server를 설정하면 제한 없이 이메일 인증 요청 가능
SMTP server 설정하는 것은 나중에 설정할지 말지 생각해보기로 하고, 일단은 시작해보자!
회원가입
signUp.tsx
import { Button } from "@material-tailwind/react";
import { Input } from "@material-tailwind/react";
import { useMutation } from "@tanstack/react-query";
import { useState } from "react"
import { createBrowserSupabaseClient } from "utils/supabase/client";

export default function SignUp({setView}){
    const [email, setEmail] = useState("");
    const [password, setPassword] = useState("");
    const [confirmationRequired, setConfirmationRequired] = useState(false);

    const supabase = createBrowserSupabaseClient();

    const signupMutation = useMutation({
        mutationFn: async () => {
          const { data, error } = await supabase.auth.signUp({
            email,
            password,
            options: {
              emailRedirectTo: "http://localhost:3000/signup/confirm",
            },
          });

          if (data) {
            setConfirmationRequired(true);
          }

          if (error) {
            alert(error.message);
          }
        },
    });

    return (
        <div className="flex flex-col gap-4">
            <div className="pt-10 pb-6 px-10 w-full flex flex-col items-center justify-center max-w-lg border border-gray-400 bg-white gap-2">
                <img src={'/images/inflearngram.png'} className="w-60 mb-6" />
                <Input value={email} onChange={(e) => setEmail(e.target.value)} label="email" type="email" className="w-full rounded-sm" />
                <Input value={password} onChange={(e) => setPassword(e.target.value)} label="password" type="password" className="w-full rounded-sm" />
                <Button loading={signupMutation.isPending} disabled={confirmationRequired} onClick={() => signupMutation.mutate() } color='light-blue' className="w-full text-md py-1">
                    {confirmationRequired ? "메일함을 확인해주세요" : "가입하기"}
                </Button>
            </div>
            <div className="py-4 w-full text-center max-w-lg border border-gray-400 bg-white">
                이미 계정이 있으신가요? <Button className="text-light-blue-600 font-bold" onClick={() => {setView("SIGNUP")}}>로그인하기</Button>
            </div>
        </div>
    )
}
이렇게 설정을 하고, 이메일 입력후 가입하기 버튼을 클릭했더니 이메일이 오지 않았다... 메일이 안오면 로그인을 어찌하농...
스팸메일도 다 뒤졌는데 오지 않았다...
한번 더 똑같이 하고 가입하기 버튼 클릭 했더니 무슨 오류남..;;
https://www.restack.io/docs/supabase-knowledge-supabase-email-rate-limit-exceeded
Subject heading을 변경하니까 갑자기 이메일이 왔다.. 기본으로 작성 되어 있는거는 왜 안된건지는 모르겠지만 해결 완료!!
인증 클릭 시 설정해둔 URL로 잘 이동이 되었다!
2. 6-Digit OTP 방식
Confirmation URL 방식과 비슷하지만 메일로 인증번호를 받고, 인증번호를 입력하면 회원가입이 완료 되는 방식이다! UI와 Supabase 설정 해주는 것 말고는 똑같아서 코드는 따로 적지 않고 넘어가도록 하겠다!
회원가입 할 경우에 6글자 인증번호를 받는 것은 약간 귀찮아서 나는 1번 방식이 더 편한 것 같다! 젤 좋은 것은 SNS 로그인 이긴 하지만 Supabase는 이러한 SNS인증도 간편하게 로그인 되도록 잘 되어 있는 것 같다! 지금은 백엔드가 주가 아니기에 넘어가지만 나중에 꼭 구현 해보는 걸로!! Supabase 짱짱맨

개미는 뚠뚠🐜🐜 개발에 미친 새미의 개발 이야기