✅⠀WidgetKit
1. Widget Extension 생성
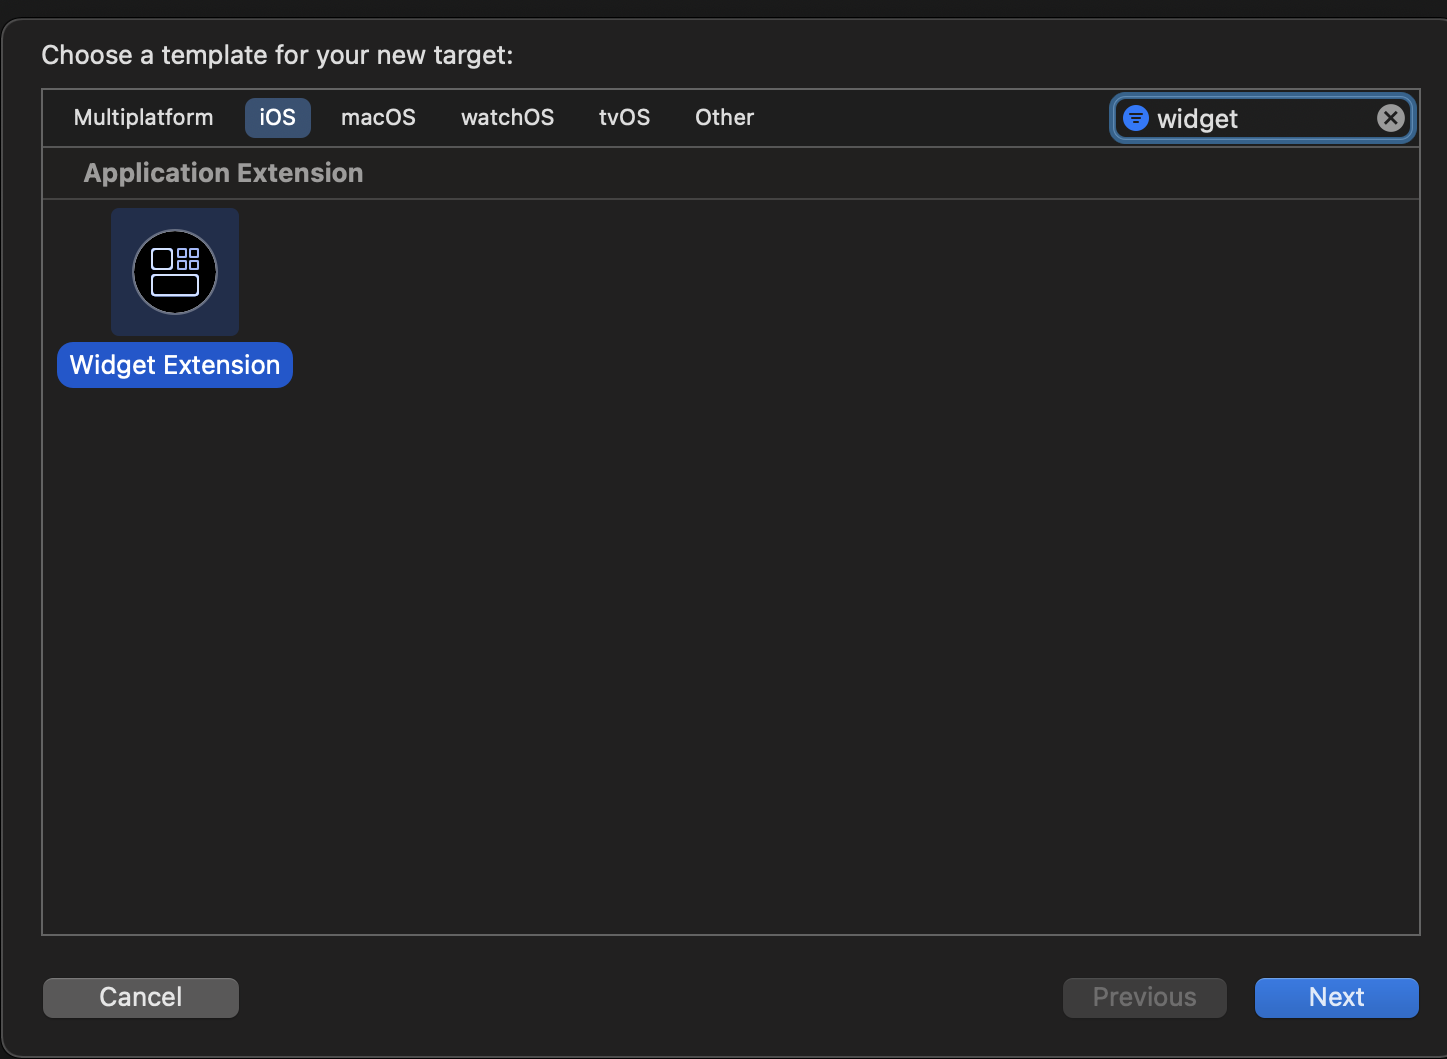
File > New > Target으로 가 Widget Extension을 찾고 클릭해줍니다.
그럼 이름을 적어주시고 Widget을 생성해주세요.
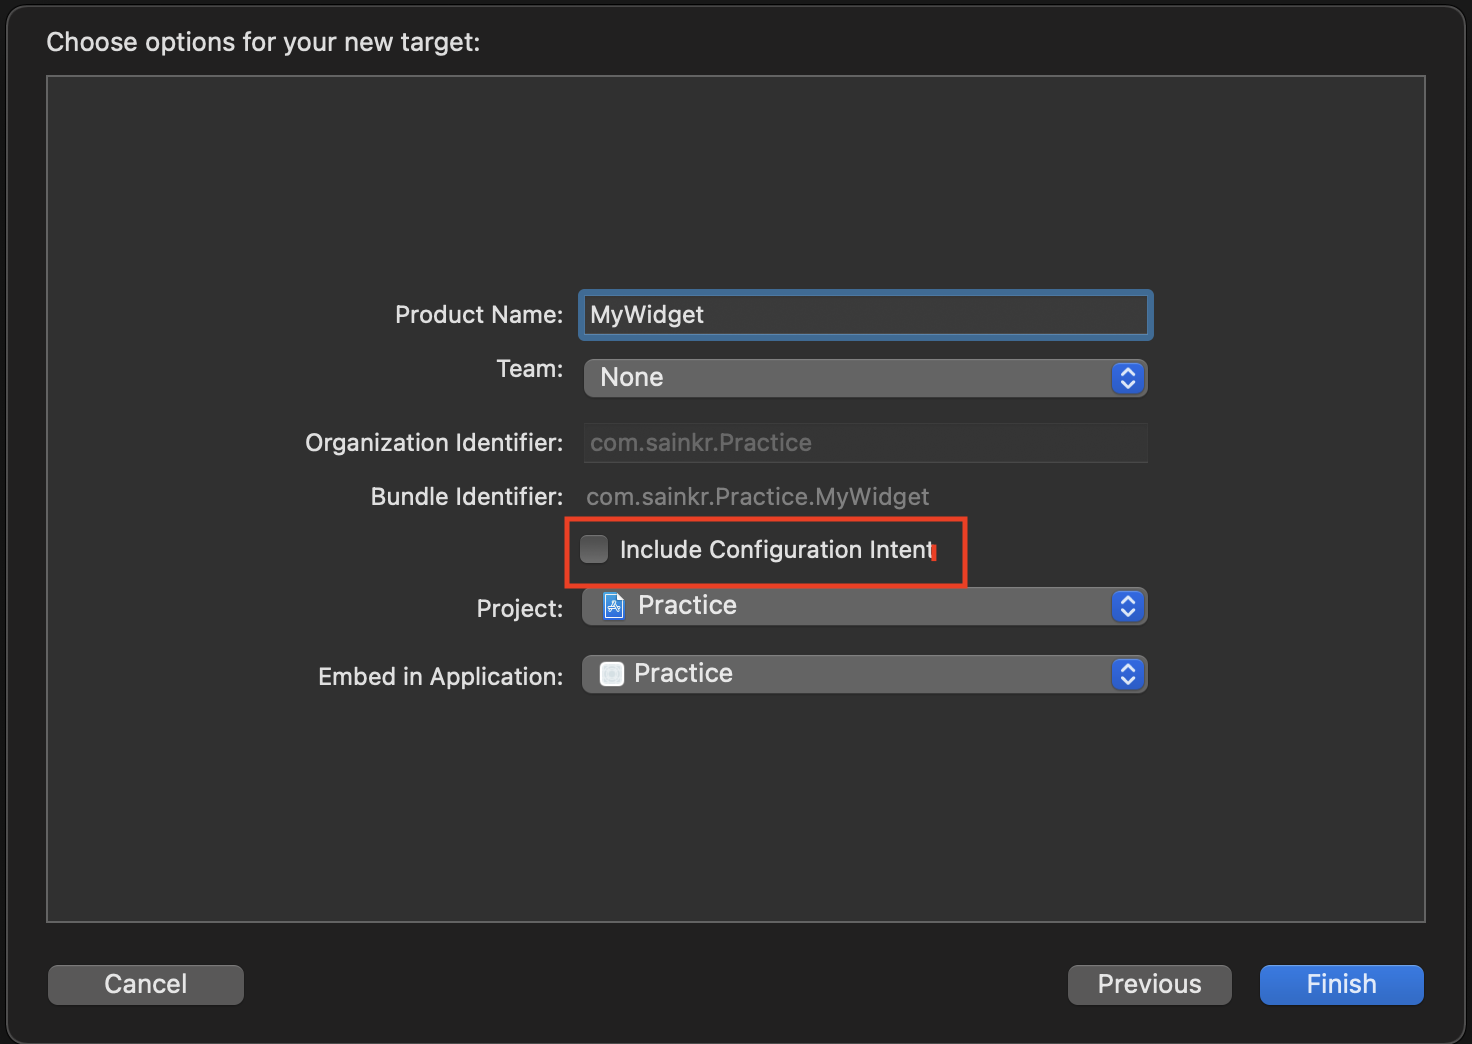
네모 친 부분을 체크하면 IntentConfiguration이 생성되고 체크하지 않으면 StaticConfiguration이 생성됩니다. 둘의 차이는 사용자가 위젯을 구성할 수 있냐 없냐 인데요.
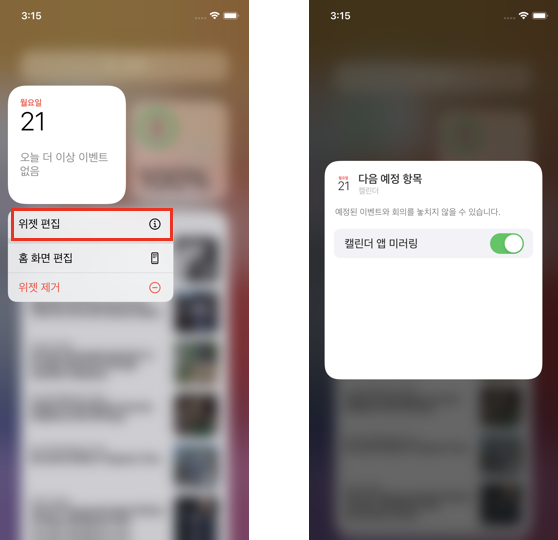
체크하면 아래와 같이 위젯 편집이 생성되고 체크안하면 생성되지 않습니다 .. !
2. Widget 살펴보기
뭐가 이렇게 많이 생겼네요 .. 이제 하나하나 뜯어봅시다.
✅⠀main
일단 다 모르겠고 😅⠀제일 접근하고 싶게 생긴 main 지점 부터 봅시다.
@main
struct MyWidget: Widget {
    let kind: String = "MyWidget"

    var body: some WidgetConfiguration {
        StaticConfiguration(kind: kind, provider: Provider()) { entry in
            MyWidgetEntryView(entry: entry)
        }
        .configurationDisplayName("My Widget")
        .description("This is an example widget.")
        .supportedFamilies([.systemSmall, .systemMedium, .systemLarge])
    }
}
kind는 고유한 문자열이고 WidgetCenter에서 타임라인을 reloading할 때 식별한다고 하네요. 애플개발자문서에선 kind를 "com.mygame.game-status"처럼 번들네임을 사용하여 고유하게 만들어주었네요 !
body에서 먼저 밑에 함수들을 살펴봅시다. 위젯을 추가할 때 이름과 설명, 사이즈를 정해줄 수 있습니다.
    var body: some WidgetConfiguration {
        StaticConfiguration(kind: kind, provider: Provider()) { entry in
            MyWidgetEntryView(entry: entry)
        }
        // 밑에 부분 먼저
        .configurationDisplayName("My Widget")
        .description("This is an example widget.")
        .supportedFamilies([.systemSmall, .systemMedium, .systemLarge])
}- onfigurationDisplayName: 위젯 이름
- description : 설명
- supportedFamilies : 위젯 사이즈 // [.systemSmall] 만 넣어주면 small 하나만 나옵니다.
이제 이 코드를 해석해야 되는데 처음보는게 굉장히 많네요. kind는 아까 해결했고 Provider, entry, MyWidgetEntryView ... 하나씩 뜯어봅시다 !
StaticConfiguration(kind: kind, provider: Provider()) { entry in
            MyWidgetEntryView(entry: entry)
}
✅⠀TimelineEntry
우선 entry가 무엇인지 살펴봅시다.
struct SimpleEntry: TimelineEntry {
    let date: Date
}
TimelineEntry란 위젯을 표시 할 날짜를 지정하고 그 외의 위젯에 표현하고 싶은 것들을 나타냅니다.
date는 필수적으로 들어가야 하고 그 외의 다른 데이터를 위젯에 나타내고 싶은 것들을 추가해주시면 됩니다.
저는 MyInfo를 추가해주었습니다.
struct SimpleEntry: TimelineEntry {
    let date: Date
    let info: MyInfo
}

struct MyInfo{
    var name: String
    var age: Int
}
✅⠀View
다음은 MyWidgetEntryView 여기는 위젯 View를 꾸며주는 부분입니다. Swift UI를 사용하여 꾸미셔야 됩니다.
Swift UI는 개발하는 정대리 영상 추천합니다.
저는 VStack(수직 뷰)안에 Text 두개를 넣어주었습니다.
struct MyWidgetEntryView : View {
var entry: Provider.Entry
var body: some View {
VStack{
Text(entry.date, style: .time)
Text(entry.info.name)
}
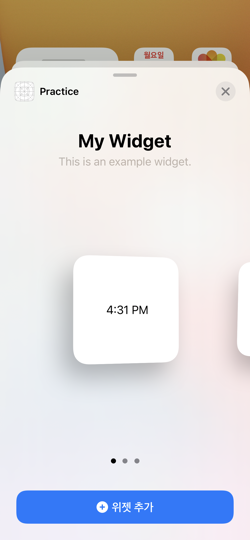
}
}그럼 이렇게 나오네요 !
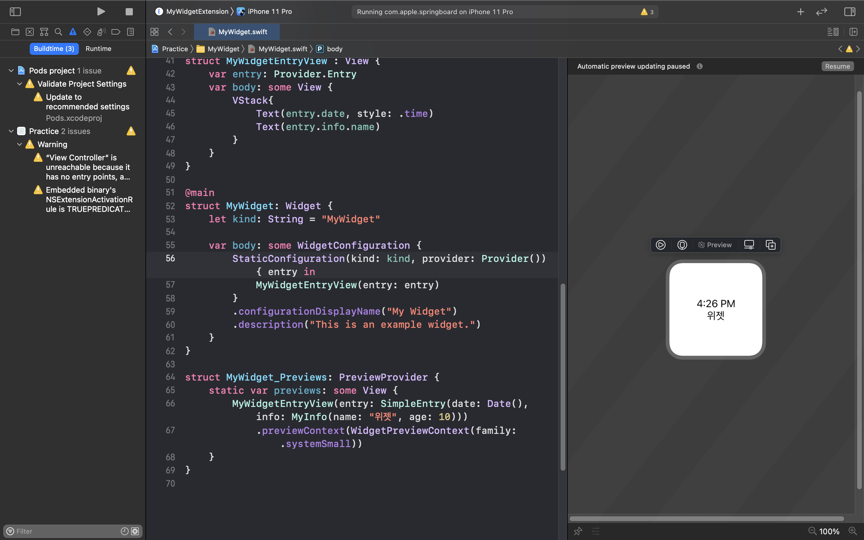
옆에 Canvas는 이 코드를 통해 나옵니다.
struct MyWidget_Previews: PreviewProvider {
    static var previews: some View {
        MyWidgetEntryView(entry: SimpleEntry(date: Date(), info: MyInfo(name: "위젯", age: 10)))
            .previewContext(WidgetPreviewContext(family: .systemSmall))
    }
}
✅⠀Provider
Provider는 위젯을 업데이트할 시기를 WidgetKit에 알려주는 역할을 합니다. 함수를 하나하나 살펴봅시다.
placeholder
func placeholder(in context: Context) -> SimpleEntry {
    SimpleEntry(date: Date(), info:  MyInfo(name: "위젯", age: 10))
}
Provides a timeline entry representing a placeholder version of the widget. 라는데 뭔지 잘 모르겠네요 ,, 아직 꼭 필요하진 않습니다.
Unlike getSnapshot(in:completion:) and getTimeline(in:completion:), which are asynchronous, placeholder(in:) is synchronous and returns a TimelineEntry immediately. Return from placeholder(in:) as quickly as possible.
비동기식인 getSnapshot과 getTimeline과 달리 placeholder는 동기식이니 즉각 반환하는 값을 입력하라네요 .
이정도만 알고 넘어갑시다.
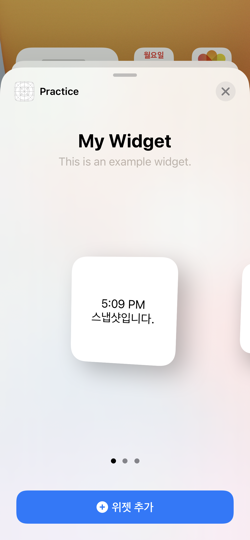
getSnapshot
func getSnapshot(in context: Context, completion: @escaping (SimpleEntry) -> ()) {
   let entry = SimpleEntry(date: Date(),info:  MyInfo(name: "스냅샷입니다.", age: 10))
   completion(entry)
}
getSnapshot은 위젯의 현재 시간과 상태를 나타내는 타임 라인 항목을 제공한다고 하네요. 보통 widget 갤러리일 때를 표현하는 것 같습니다 !
여기서 ❗️❗️ func getSnapshot(in context: Context의 파라미터인 Context를 짚고 넘어가야 됩니다.
TimelineProviderContext
typealias Context = TimelineProviderContextTimelineProviderContext는 크기 및 위젯 갤러리에 표시되는지 여부를 포함하여 위젯이 렌더링되는 방법에 대한 세부 정보가 포함 된 개체입니다.
여기에는
- isPreview : Bool
widget gallery인지 아닌지를 나타내는 Boolean 값입니다. widget gallery는 아래와 같이 위젯을 추가할 때?를 의미하는 것 같습니다.
- family: WidgetFamily
widgetSize를 나타냅니다. .systemSmall, .systemMedium, .systemLarge가 있습니다. - displaySize: CGSize
widged의 크기, 위치를 확인할 수 있습니다. - let environmentVariants: TimelineProviderContext.EnvironmentVariants
.colorScheme, .displayScale 등을 설정할 수 있다고 합니다.
context에 대해 공부한걸 이제 getSnapshot에서 활용해주면 됩니다 😭
func getSnapshot(in context: Context, completion: @escaping (SimpleEntry) -> ()) {
    let entry: SimpleEntry

    if context.isPreview{ // widget 갤러리 상태이면
        switch context.family{ // 사이즈에 따라
            case .systemSmall:
                entry = SimpleEntry(date: Date(),info:  MyInfo(name: "small", age: 10))
            case .systemMedium:
                entry = SimpleEntry(date: Date(),info:  MyInfo(name: "medium", age: 10))
            case .systemLarge:
                entry = SimpleEntry(date: Date(),info:  MyInfo(name: "large", age: 10))
        }
    }else{
        entry = SimpleEntry(date: Date(),info:  MyInfo(name: "프리뷰 아닙니다.", age: 10))
    }

    completion(entry)
}
이렇게 context를 활용하여 widget 갤러리 상태일 때를 구현해주시면 됩니다.
getTimeline
이제 마지막 getTimeline 입니다. 🤭
getTimeline은 현재 시간 및 선택적으로 위젯을 업데이트 할 미래 시간에 대한 타임 라인 항목의 배열을 제공합니다.
쉽게 풀이하자면 홈화면에 가만히 있는 앱을 언제, 어떻게 업데이트 시킬까를 구현하는 부분이 getTimeline 입니다 !
func getTimeline(in context: Context, completion: @escaping (Timeline<Entry>) -> ()) {
    var entries: [SimpleEntry] = []

    // Generate a timeline consisting of five entries an hour apart, starting from the current date.
   let currentDate = Date() // 현재 시간을 불러온다.
   for hourOffset in 0 ..< 5 {
        let entryDate = Calendar.current.date(byAdding: .hour, value: hourOffset, to: currentDate)! // 1시간씩 더한다.
        let entry = SimpleEntry(date: entryDate, info:  MyInfo(name: "위젯", age: 10)) // 한시간씩 더한 값을 갖는 entry를 생성한다.
        entries.append(entry) // entry를 추가한다.
    }

    let timeline = Timeline(entries: entries, policy: .atEnd) // entries을 갖는 Timeline을 생성한다.
    // policy
    // - atEnd : 마지막 date가 끝난후 새로고침
    // - after(date) : date가 지난 후 새로고침
    completion(timeline) // timeline을 넘겨준다.
}
코드를 보면 현재 시간을 기준으로 1시간 뒤, 2시간 뒤, 3시간 뒤, 4시간 뒤에 해당하는 entry 값으로 업데이트 해라! 를 의미합니다.
그럼 4시간이 지나면 위젯 업데이트가 종료 되나? 라고 생각하실 수 있는데 아닙니다 ! 🙅🏻♀️
4시간이 지나면 새로고침이 된다고 생각하시면 됩니다. 즉, 타임라인을 다시 새로 불러오는 것입니다.
아래 코드를 보면 healthLevel이 1을 찍으면 getTimeline(in context: Context, completion: @escaping (Timeline) -> Void)함수를 실행해 healthLevel이 0.25부터 다시 시작되겠죠 ??
직접 실행해본 결과 healthLevel이 1을 찍고 난 후 getTimeline을 실행시키는데 약 1분정도 소요되네요...
struct CharacterDetailProvider: TimelineProvider {
    func getTimeline(in context: Context, completion: @escaping (Timeline<CharacterDetailEntry>) -> Void) {
        var date = Date()
        var healthLevel = 0.25
        var entries: [CharacterDetailEntry] = []

        while healthLevel < 1 {
            // Add the current health level for a given date.
            entries.append(CharacterDetailEntry(date: date, healthLevel: healthLevel))

            // Health recovers at 25 percent per hour, with a maximum of 100 percent.
            healthLevel = min(1, healthLevel + 0.25)

            // Move the date forward by 1 hour.
            date = Calendar.current.date(byAdding: .hour, value: 1, to: date)!
        }

        // Create the timeline and call the completion handler.
        let timeline = Timeline(entries: entries, policy: .atEnd)
        completion(timeline)
    }
}
이렇게 WidgetKit을 훑어보았습니다 !! 공부하고자 적어봤는데 정리하는것도 너무 어렵네요 😂