키오스크의 다국어 시스템을 구현하기 위해 i18n 라이브러리를 이용하기로 하였다. 해당 라이브러리 사용은 처음이라 설치부터 최소한의 동작까지를 기록하고자 한다.
설치 및 기본 설정
설치
우선 라이브러리를 설치하자
$ yarn add i18next
$ yarn add react-i18next
설정 파일 생성
그 후 기본 설정 파일을 생성한다. 위치는 원하는 곳에..
import i18n from 'i18next';
import { initReactI18next } from 'react-i18next';
const resources = {
ko: {
translation: {
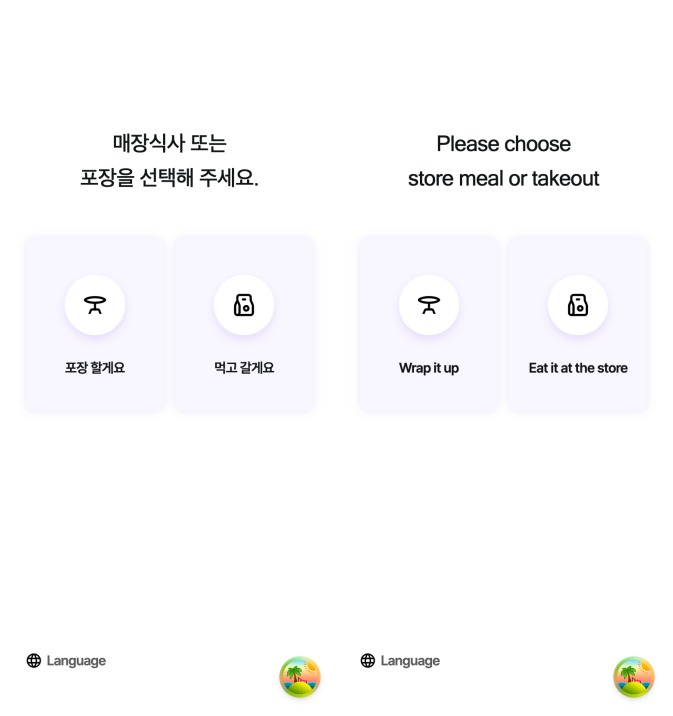
'order-type-title-1': '매장식사 또는',
'order-type-title-2': '포장을 선택해 주세요.',
'order-type-store': '먹고 갈게요',
'order-type-togo': '포장 할게요',
},
},
en: {
translation: {
'order-type-title-1': 'Please choose',
'order-type-title-2': 'store meal or takeout',
'order-type-store': 'Eat it at the store',
'order-type-togo': 'Wrap it up',
},
},
};
i18n.use(initReactI18next).init({
resources,
lng: 'en',
interpolation: {
escapeValue: false, // react already safes from xss
},
});
export default i18n;불러오기
그리고 가장 앱의 진입점이 되는 파일 리액트의 경우 index.tsx, NextJS의 경우 _app.tsx 파일에서 다음과 위에서 작성한 파일을 import 해준다.
import '@/shared/i18n'; // 위치는 각자 지정한 곳에서 가져오기~

export default function App() {
 	// ....
}
기본 사용법
사용 방법은 간단하다. useTranslation Hook을 불러온 뒤 다음 처럼 사용해주면 된다.
const { t } = useTranslation();

return (
  <h1>
    {t('order-type-title-1')} <br />
    {t('order-type-title-2')}
  </h1>
)

//... 생략
그리고 아까 작성한 i18n.ts에서 init 메서드 안에 있는 lng 속성을 변경해보면 각 언어의 맞는 텍스트가 출력 되는 것을 확인할 수 있다.
i18n.use(initReactI18next).init({
  resources,
  lng: 'en', // or 'ko'
  interpolation: {
    escapeValue: false, // react already safes from xss
  },
});
버튼을 통해 언어 바꾸기
사용자가 설정 파일을 건드려서 언어를 바꿀 수는 없으니 버튼을 통해 언어를 바꿔 보도록 하자.
이 또한 무지무지 간단하다. useTranslation Hook을 불러온 뒤 다음 처럼 사용해주면 된다.
const { t, i18n } = useTranslation();

const handleClickEnglish = () => {
  i18n.changeLanguage('en');
};

const handleClickKorean = () => {
  i18n.changeLanguage('ko');
};
하지만 바꿔줘야 하는 언어와 텍스트가 많아질 수록 하나의 i18n.ts 파일에서 관리하기는 힘들 것 같다. 파일로 분리하여 제공하는 기능도 있으니 다음에는 그 방법을 적용해 봐야겠다.

블로그 이전 => https://shdev.blog/