프로젝트를 시작할 때 디자이너가 정의한 폰트 스타일을 tailwind 설정에 반영할 필요가 있다.
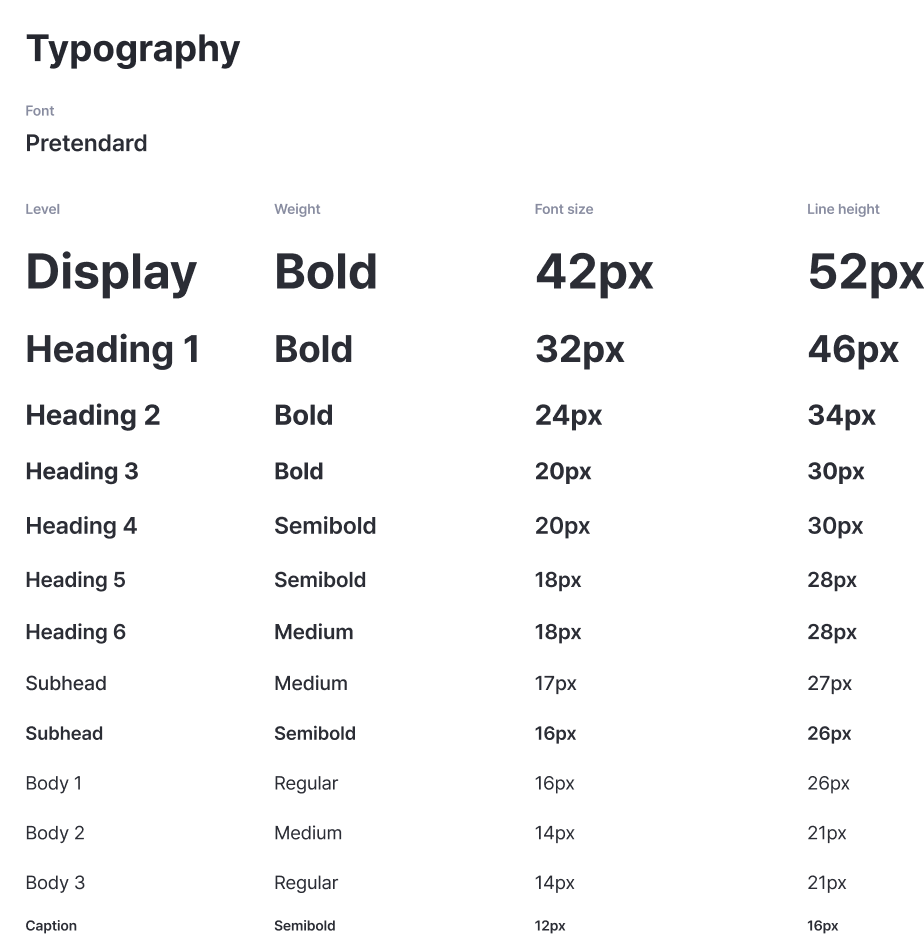
위와 같이 디자이너가 폰트 스타일을 정의를 했다고 하자.
Tailwind Custom
tailwind.config.ts
// [...]
const config = {
	// [...]
	theme: {
      extend: {
      fontSize: {
        display: [
          "42px",
          {
            fontWeight: "bold",
            lineHeight: "52px",
          },
        ],
        heading1: [
          "32px",
          {
            fontWeight: "bold",
            lineHeight: "46px",
          },
        ],
        heading2: [
          "24px",
          {
            fontWeight: "bold",
            lineHeight: "34px",
          },
        ],

        // [...]
      }
      // [...]
    }
}
위와 같이 설정하면 커스텀이 다 된것이다.
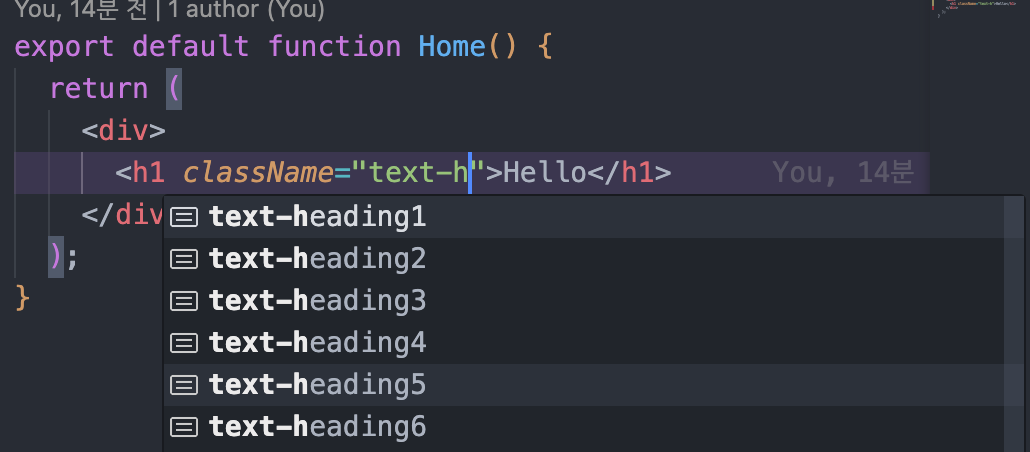
vscode에서 도움도 받을 수 있다 :)
export default function Home() {
  return (
    <div>
      <h1 className="text-display">Hello</h1>
    </div>
  );
}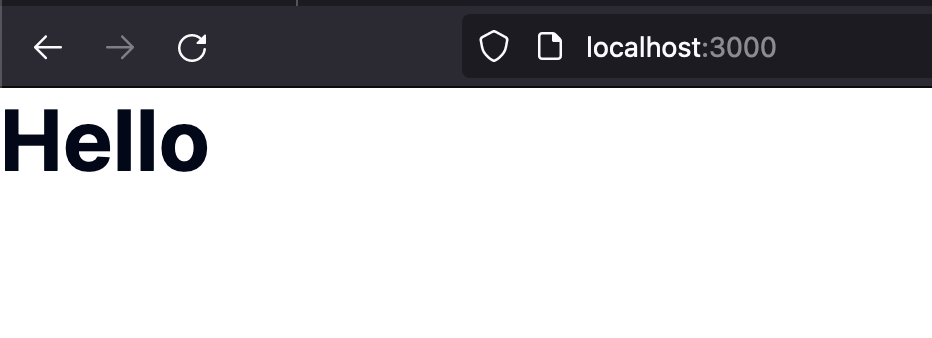
실행시켜보면 제대로 설정된 모습을 확인할 수 있다. 이제 로컬 폰트를 설정하자 Pretandard 폰트를 설치 해야한다.
Next.js Local Font 적용 with Tailwind
설치한 후에 web folder아래에 있는 PretendardVariable.woff2 파일을 프로젝트 폴더로 가져온다.

나는 위와 같이 public folder로 가져왔다.
이제 layout으로와서 설정해보자
import type { Metadata } from "next";

import localFont from "next/font/local";
import "./globals.css";

const pretendard = localFont({
  src: "../../public/fonts/PretendardVariable.woff2",
  variable: "--font-pretendard",
});

export const metadata: Metadata = {
  title: "Create Next App",
  description: "Generated by create next app",
};

export default function RootLayout({
  children,
}: Readonly<{
  children: React.ReactNode;
}>) {
  return (
    <html className={pretendard.variable} lang="en">
      <body>{children}</body>
    </html>
  );
}
localFont에서 variable에 주목하자.
html에 className에 지정하면 css variable이 할당된다.
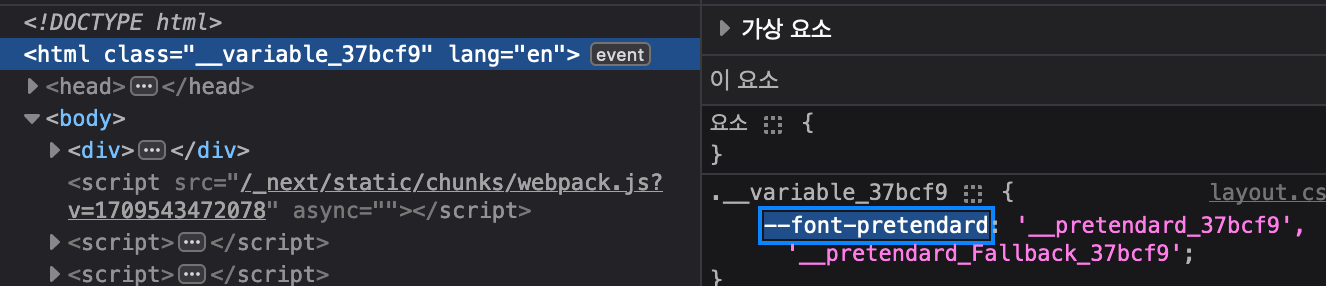
이제 이 variable을 tailwind에도 등록시켜주어야한다.
tailwind.config.ts
// [...]
const config = {
	// [...]
	theme: {
      extend: {
        fontFamily: {
          sans: ["var(--font-pretendard)", "Inter", "sans-serif"],
      },
      // [...]
    }
}
따로 이름을 지정해주어도 되지만 sans로 지정하면 기본 폰트로 사용되기 때문에 sans로 지정했다.
fontFamily: {
  pretendard: ["var(--font-pretendard)", "Inter", "sans-serif"],
}
위와 같이 지정해도 상관없다.
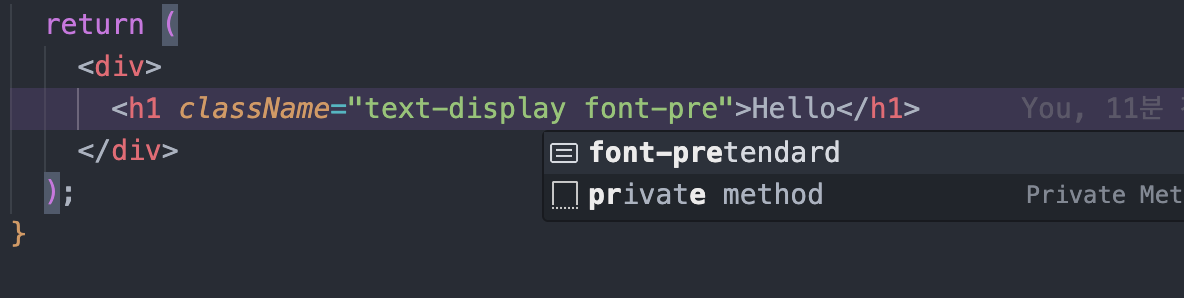
그럼 위와같이 에디터에서도 힌트를 받을 수 있게된다.
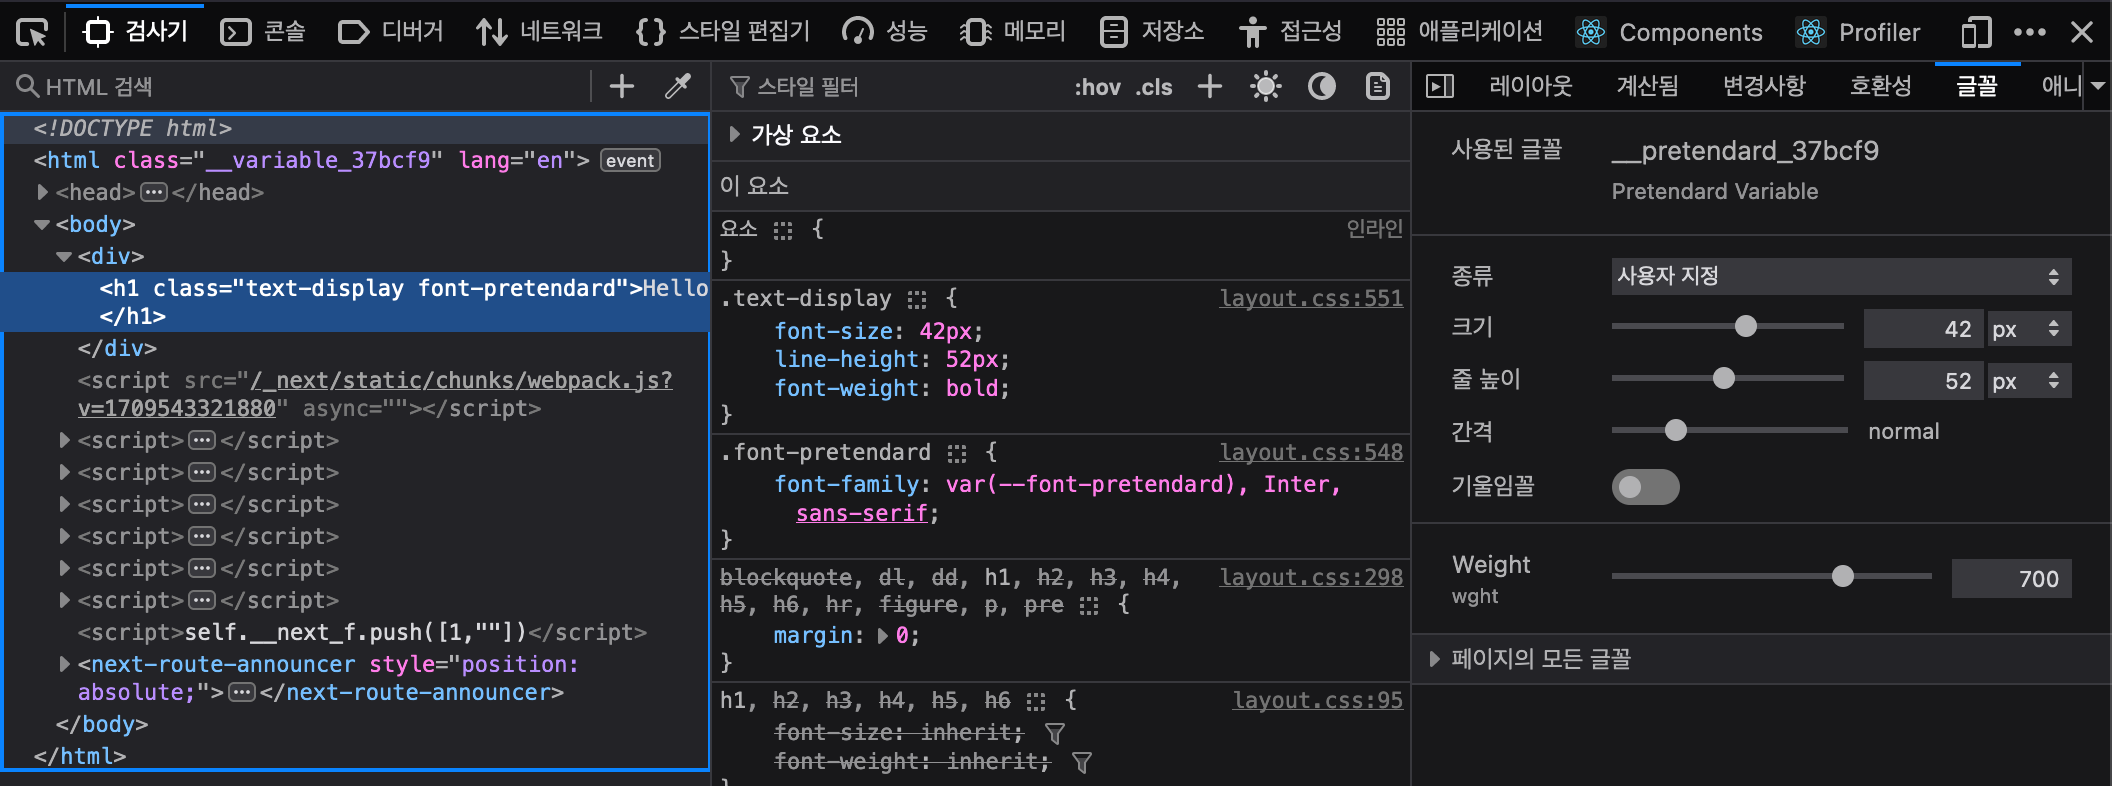
실행 시켜서 확인해보면 정상적으로 등록된걸 확인할 수 있다.
아주 심플하고 효율적으로 폰트를 등록해보았다 :)
여러 프로젝트에서 폰트 스타일을 지저분하게 관리하는 것을 목격하고 나도 정리할겸 블로그를 작성해보았다.

풀스택 개발자