학습내용 -> SPA 개발환경, 배포 서비스
require skil
palform - node.js
version managament - git
edit - vsCode
remote repository - github
cloud service - aws
node
github
git
git 설치 후 commit을 위한 user name, email 등록
ex)
git config --global user.name sangwook
git config --global user.email xx@gmail.com
설정 후 확인
cat ~/.gitconfig
vscode
aws
aws service
-> EC2(Elastic cloud compute - 시간 비례 비용 발생
-> S3(Simple Storage Service) - 파일 저장소
진행 순서
1. BE, FE 프로젝트 생성 및 PORT 지정
프로젝트 생성
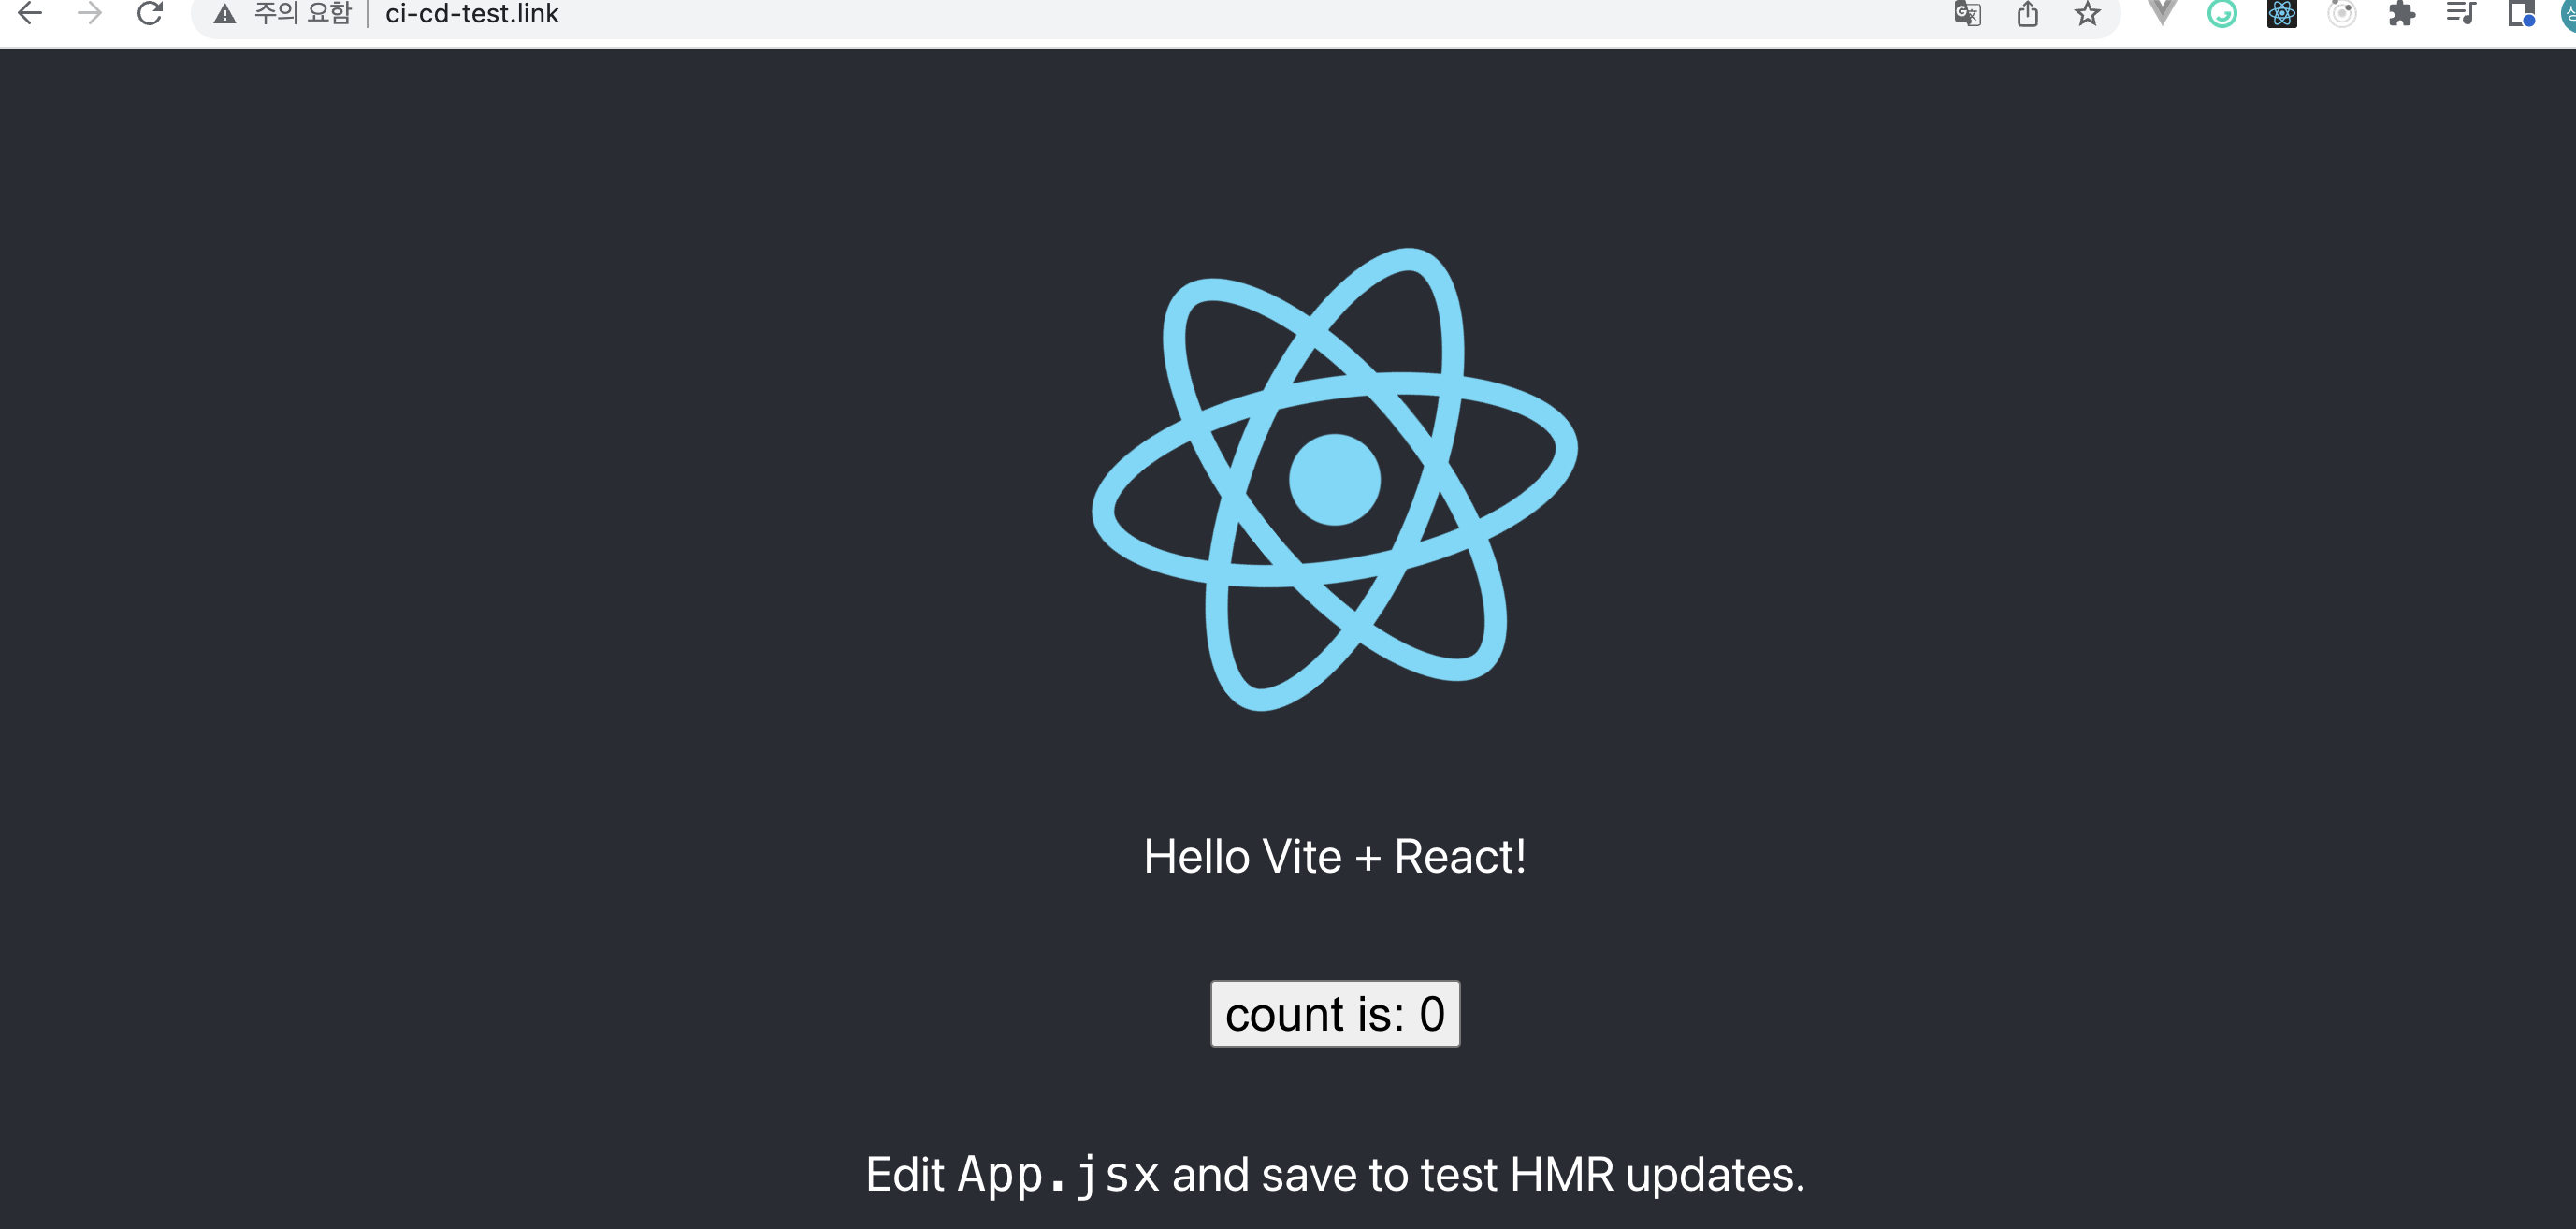
FE
npm create vite frontend -- --template react
cd frontend
npm install
BE
sudo npm install express-generator -g
express backend -e
cd backend
install
BE port 변경
path -> backend/bin/www.jswww.js
var port = normalizePort(process.env.PORT || "3000");3000 에서 원하는 port로 변경
2. BE nodemon setting - (BE code 변경시 auto server restart)
코드 변경시 자동으로 재기동
npm i nodemon -D
package json scripts에 dev nodemon mode 추가
"scripts": {
"dev": "nodemon ./bin/www",
...
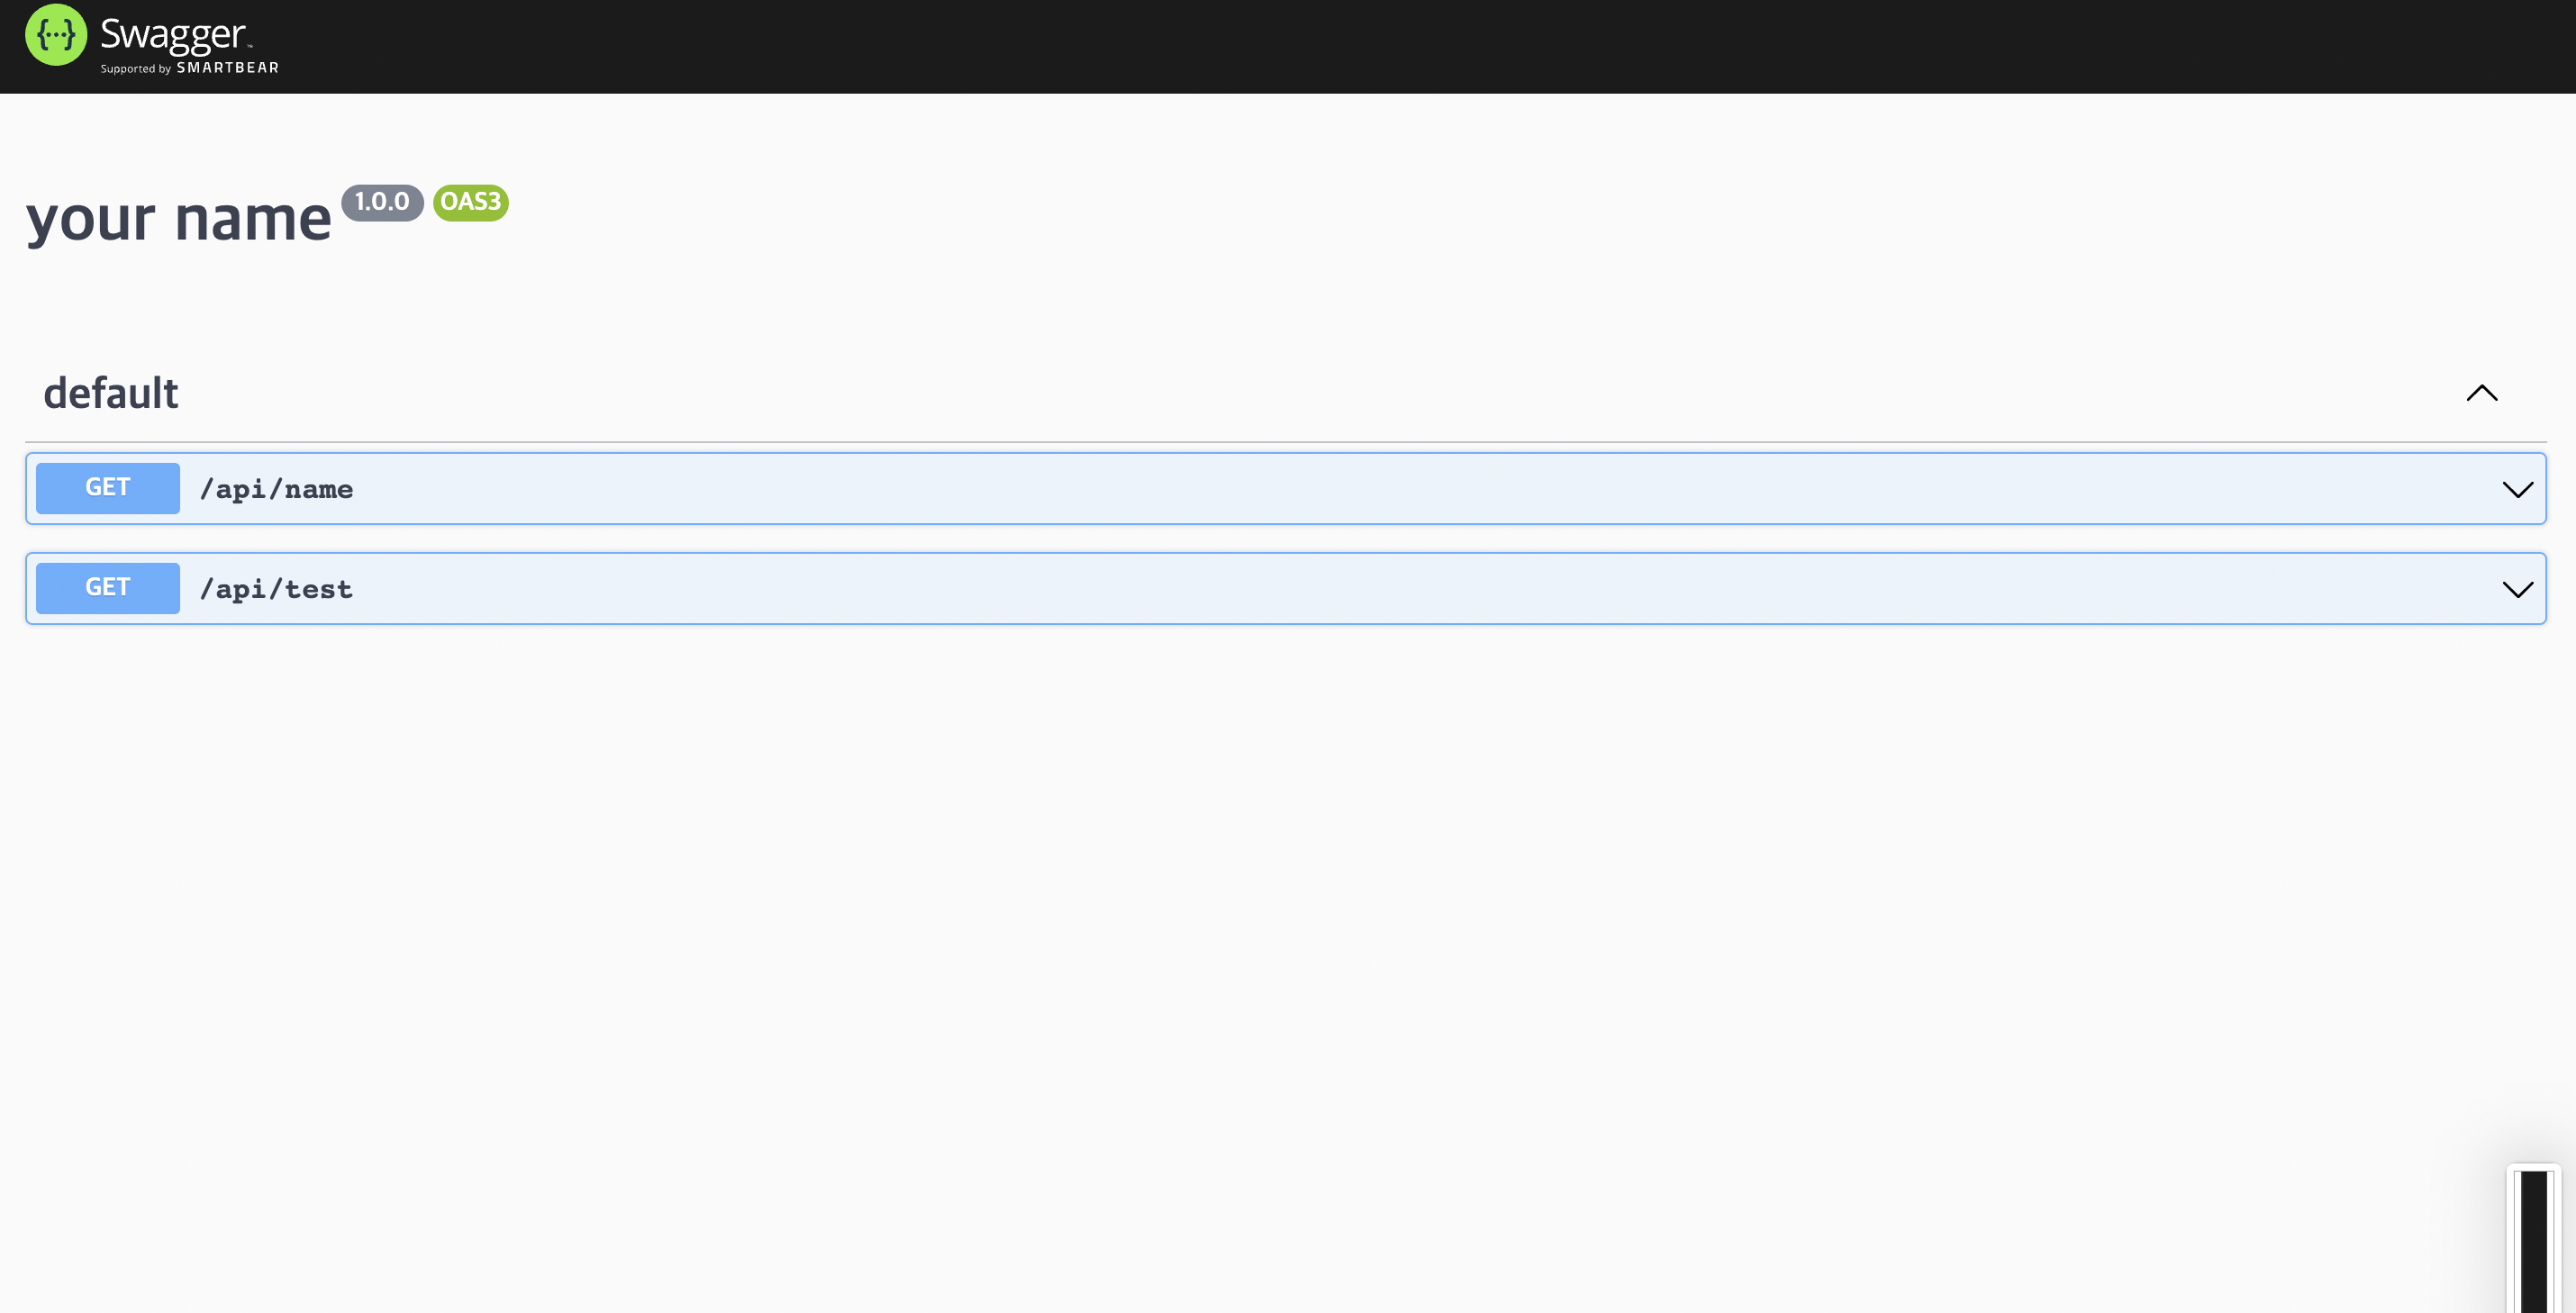
},3. Swagger 추가 - (API 문서를 자동으로 만들어줌)
프로젝트 가이드를 위한 API 문서 자동갱신 라이브러리
backend directory에 추가
npm i swagger-ui-express swagger-jsdoc -S
swagger 설정
const swaggerUi = require("swagger-ui-express");
const swaggerJsdoc = require("swagger-jsdoc");
const options = {
  definition: {
    openapi: "3.0.0", //version
    info: {
      title: "your name",
      version: "1.0.0", //최초 버전
    },
  },
  apis: ["./routes/*.js"], // files containing annotations as above
  //routes 폴더안의 .js파일을 scan한다.
};
const openapiSpec = swaggerJsdoc(options);
app.use("/api-docs", swaggerUi.serve, swaggerUi.setup(openapiSpec));
4. api sample 추가
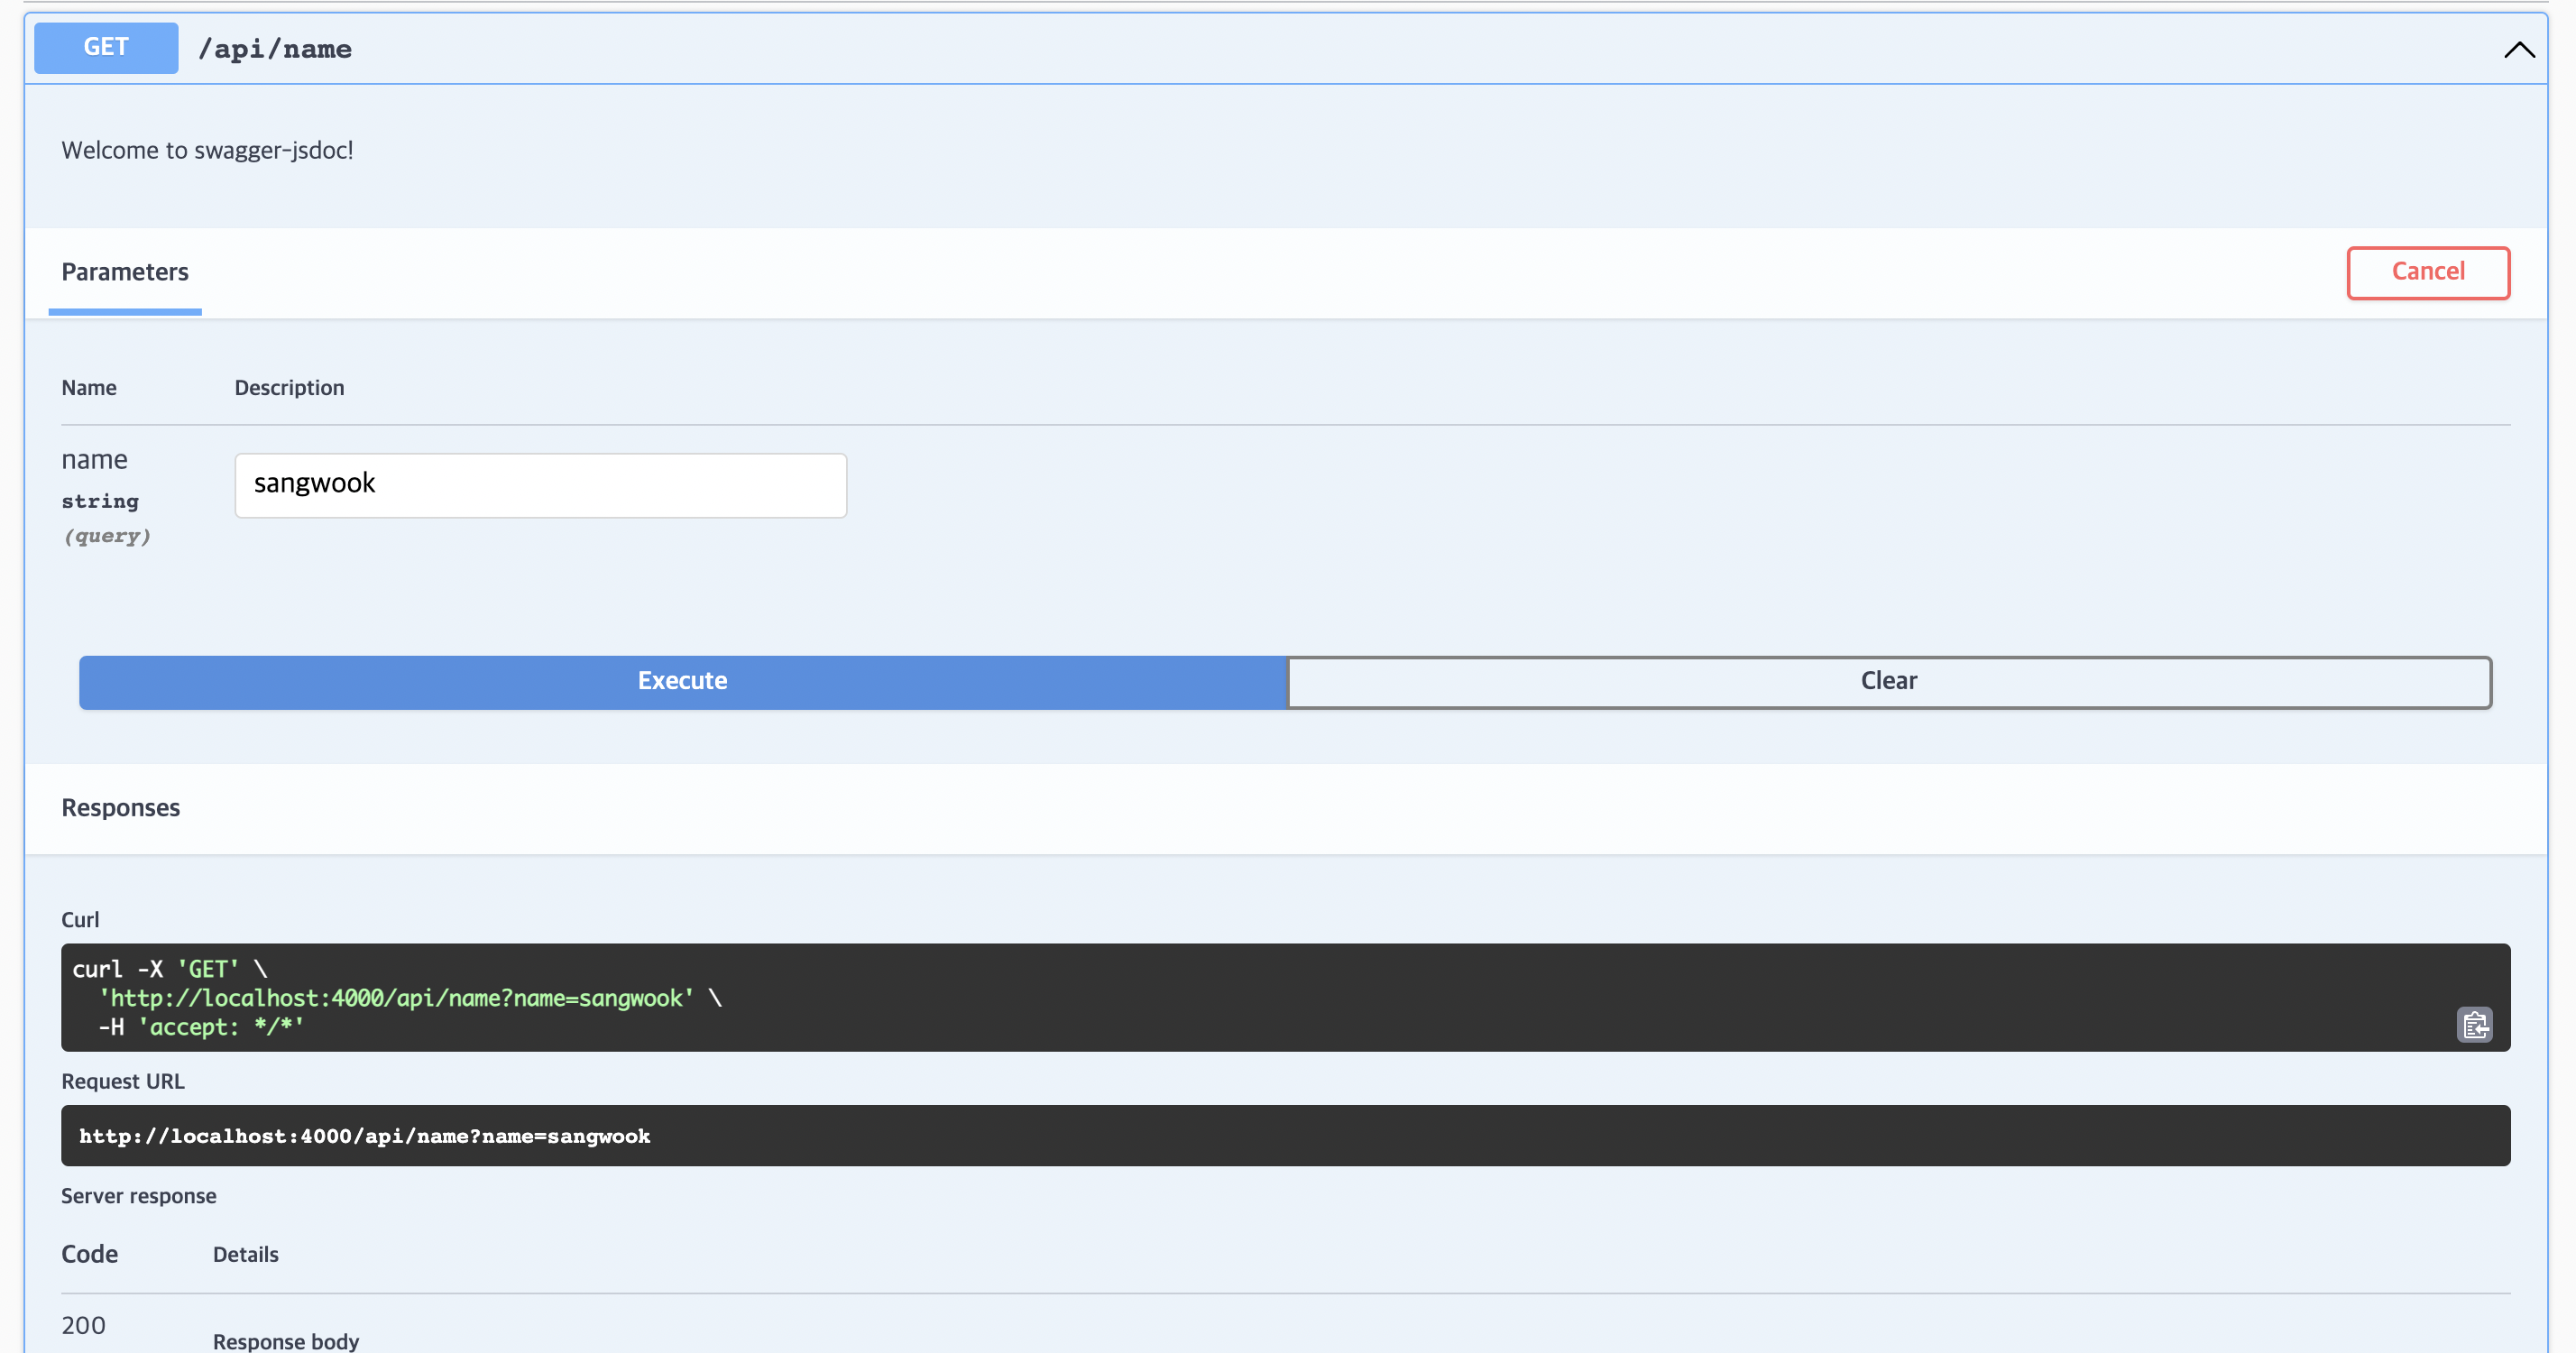
ci-cd-test/backend/routes/api.js에 test api 생성
const express = require("express");
const router = express.Router();
//yml 방식이라서 들여쓰기가 중요하다.
/**
 * @openapi
 * /api/name:
 *   get:
 *     description: Welcome to swagger-jsdoc!
 *     parameters:
 *       - name: name
 *         in: query
 *         required: false
 *         schema:
 *           type: string
 *     responses:
 *       200:
 *        descrption: Returns a mysteriois string
 */
router.get("/name", (req, res, next) => {
  const name = req.query.name || "없습니다..";
  res.json({ message: `나의 이름은 ${name}` });
});

/**
 * @openapi
 * /api/test:
 *   get:
 *     description: Welcome to swagger-jsdoc!
 *     parameters:
 *       - test: test
 *         in: query
 *         required: false
 *         schema:
 *           type: string
 *     responses:
 *       200:
 *        descrption: Returns a mysteriois string
 */
router.get("/test", (req, res, next) => {
  const test = req.query.test || "없습니다..";
  res.json({ message: `${test} ...` });
});

module.exports = router;
localhost test
5. create github project & github push
- git repository 생성
- remote repository 등록
$ git remote -v
$ git remote add origin https://github.com/sangwookp9591/ci-cd-test.git
$ git remote -v
origin https://github.com/sangwookp9591/ci-cd-test.git (fetch)
origin https://github.com/sangwookp9591/ci-cd-test.git (push)
$ git pull origin main
$ git status -> add 전
$ git add .
$ git status -> add 후
$ git commit -m "init"
$ git push origin main
6. 배포 프로세스
순서
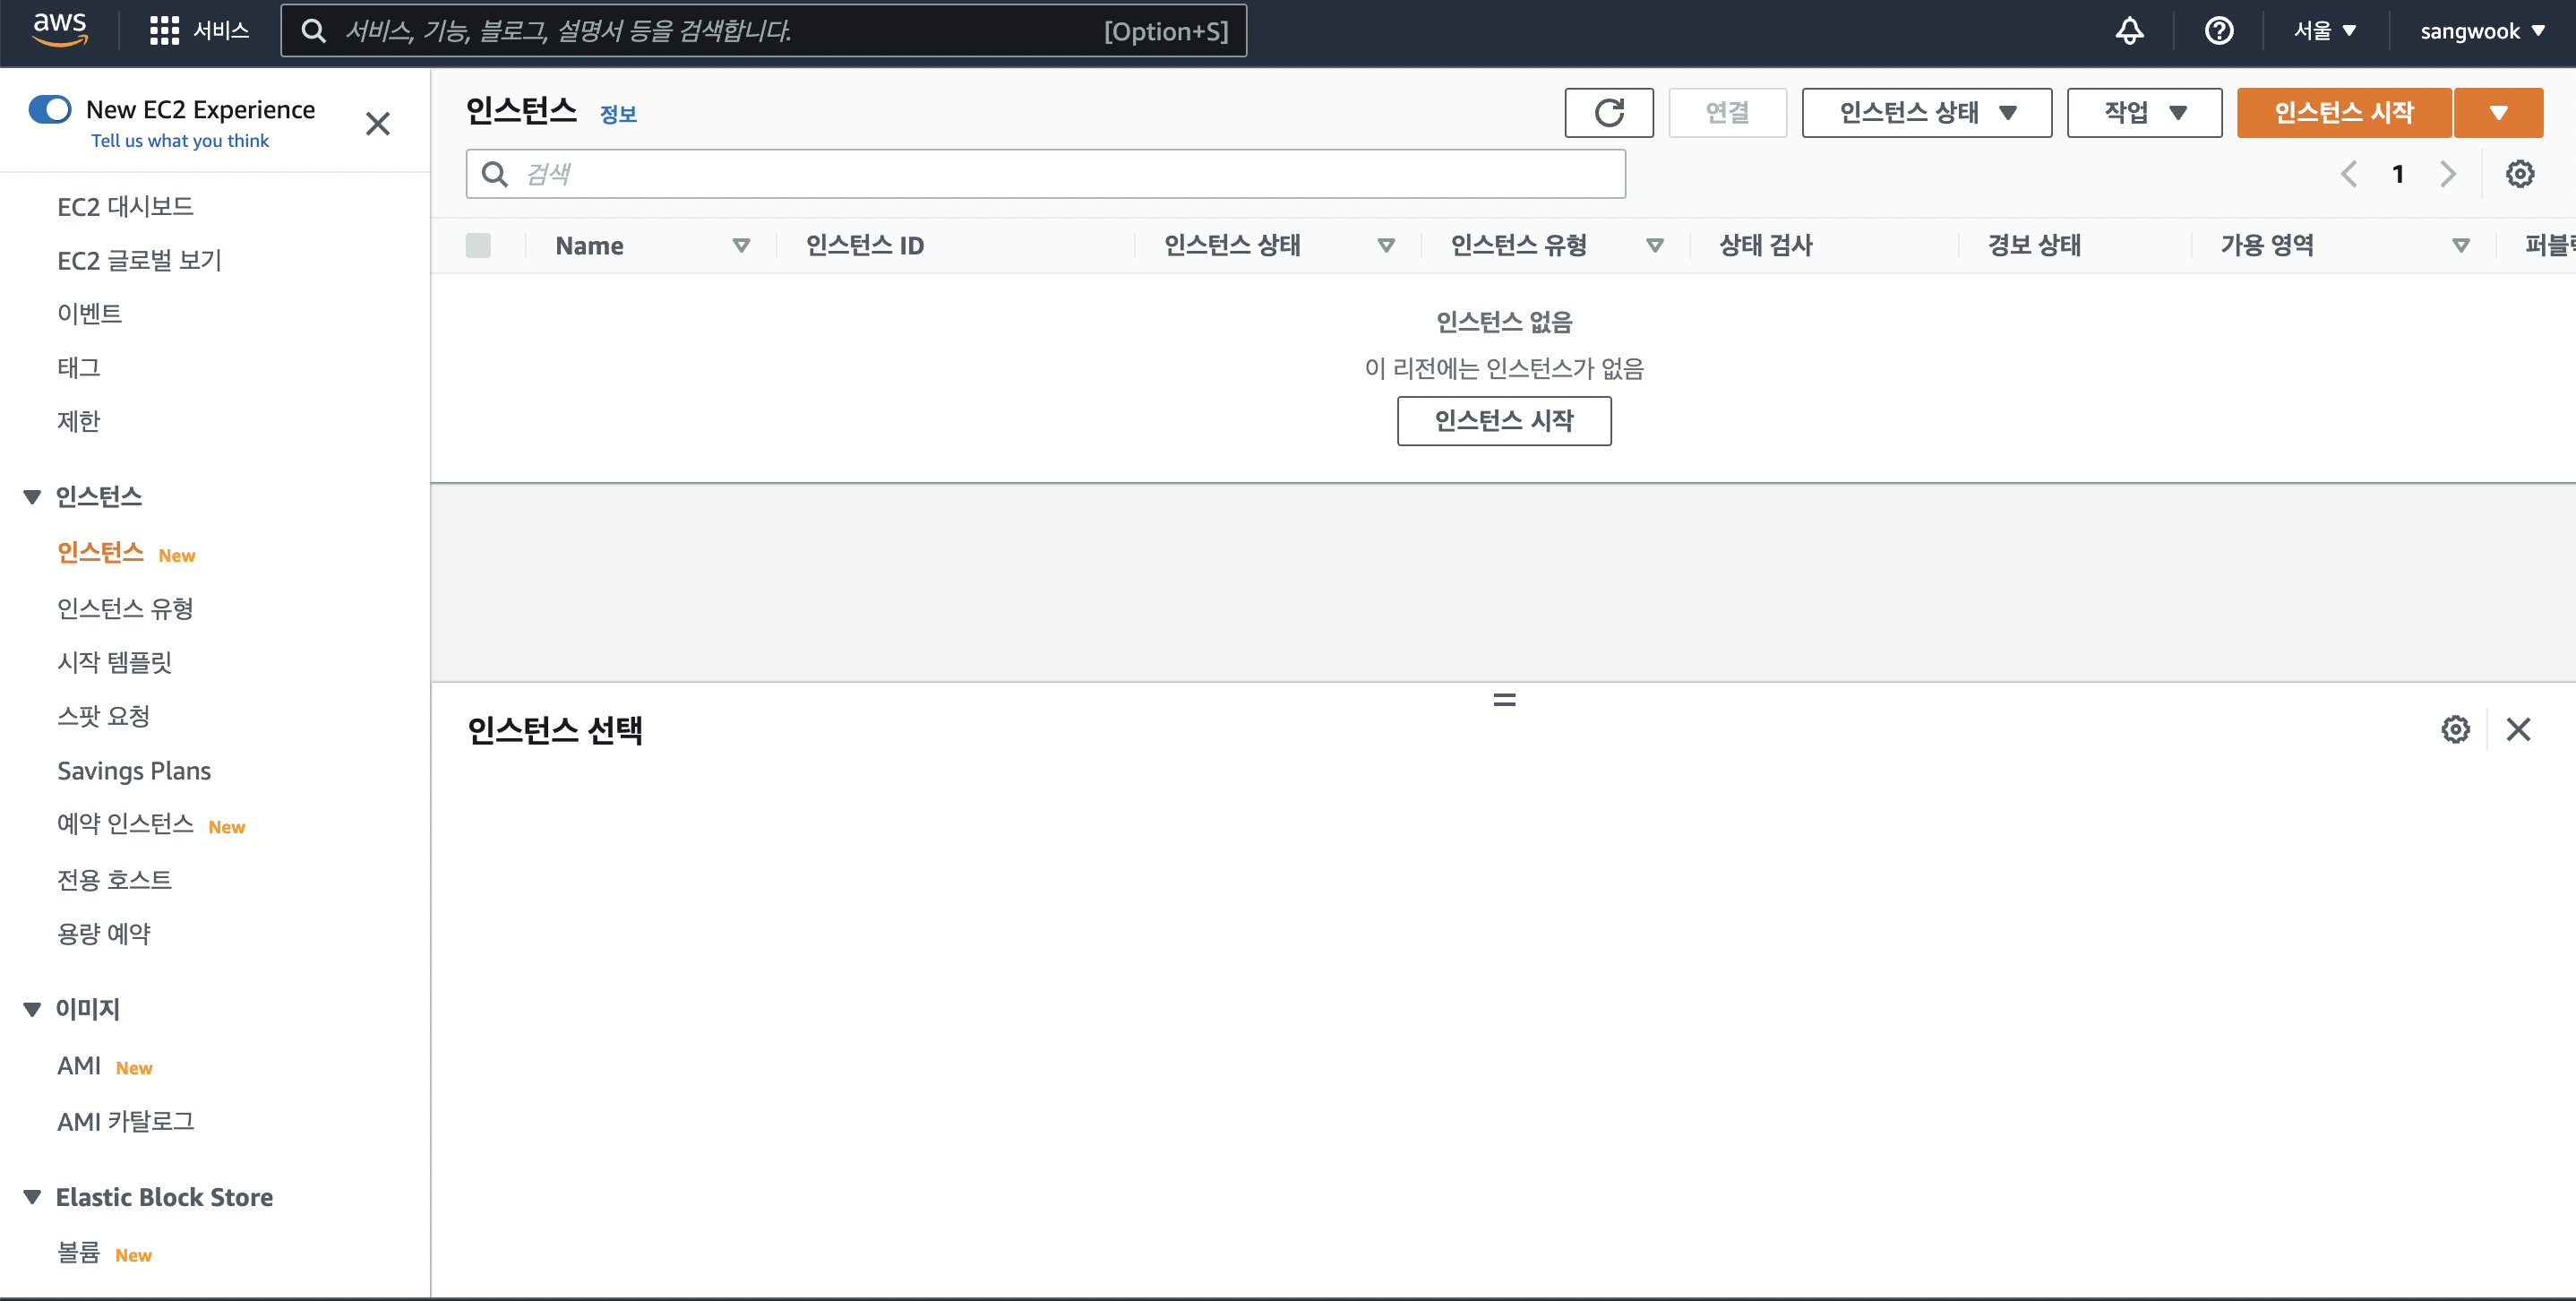
- EC2 서버 인스턴스 생성
-
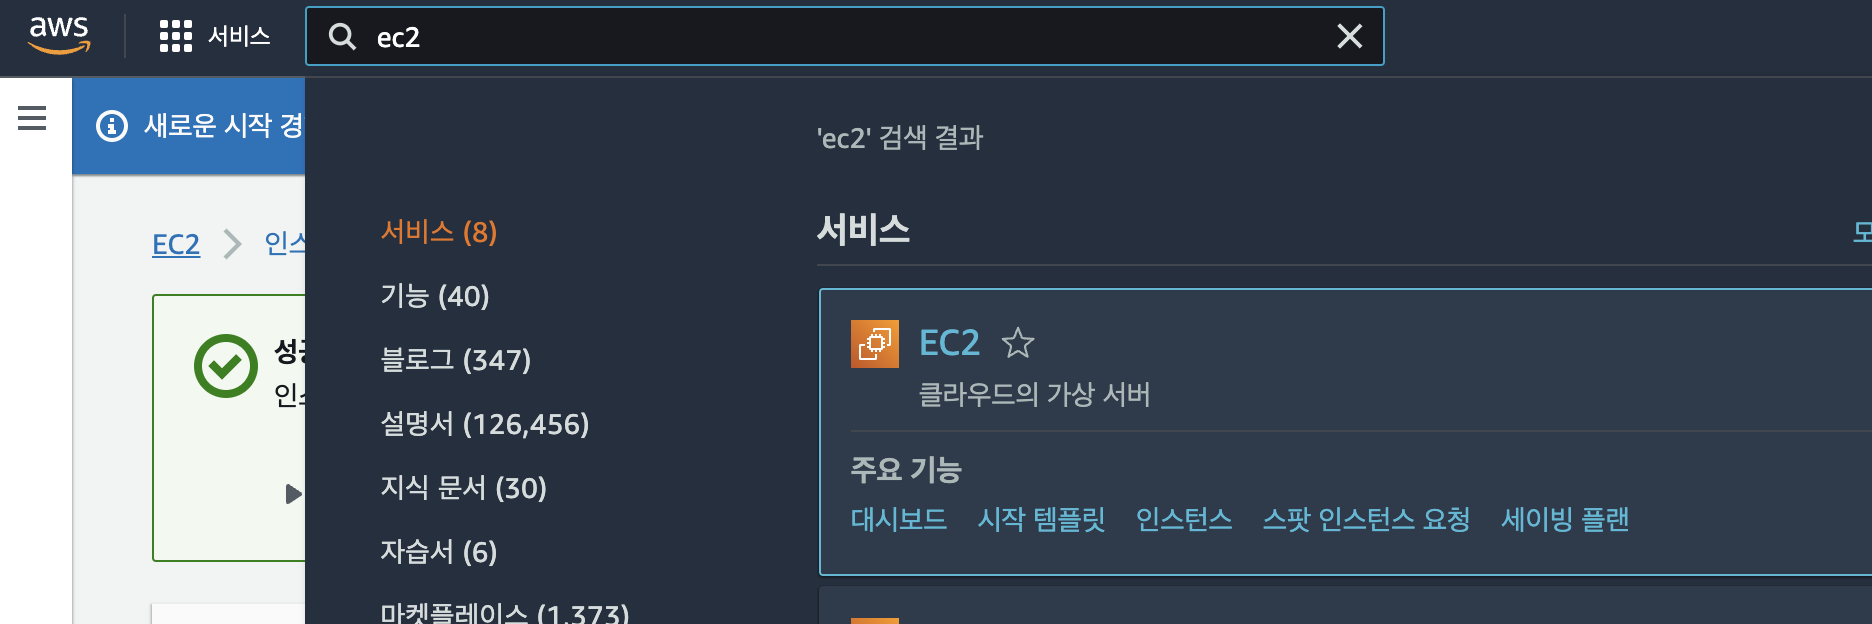
aws 로그인
-
launch instance 버튼을 클릭 -> ec2 instance를 생성
-
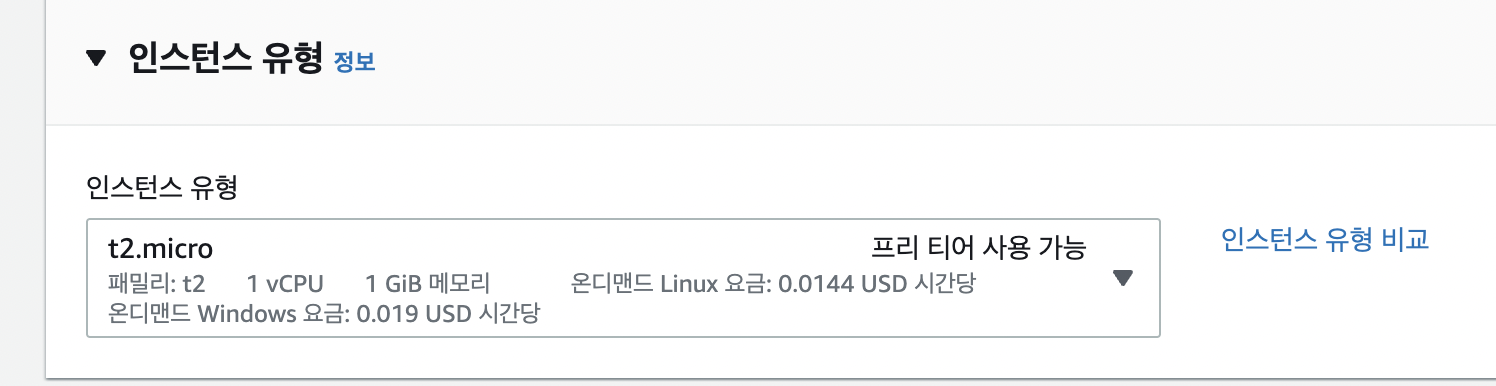
instance image -> Amazon Linux2 AMI(HVM),64-bit (x86) 선택
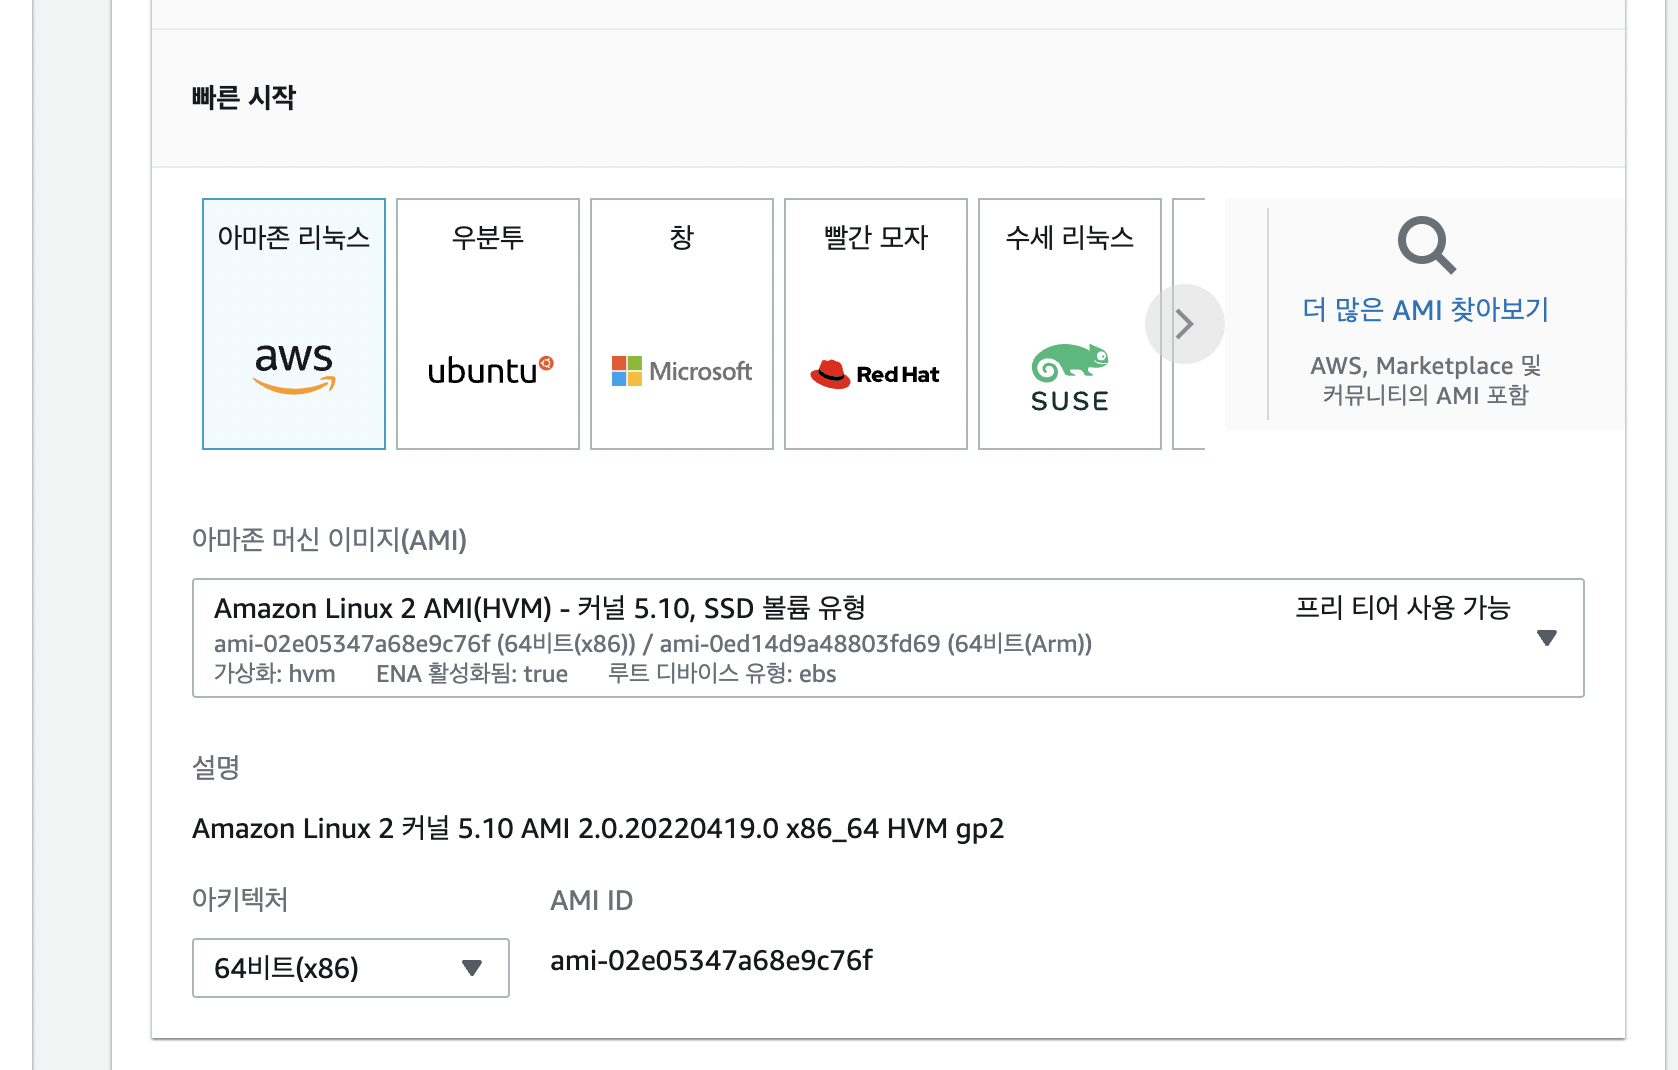
- t2.micro type 선택
- 최초 1년간 매달 750 시간 무료(월 1만원)
-
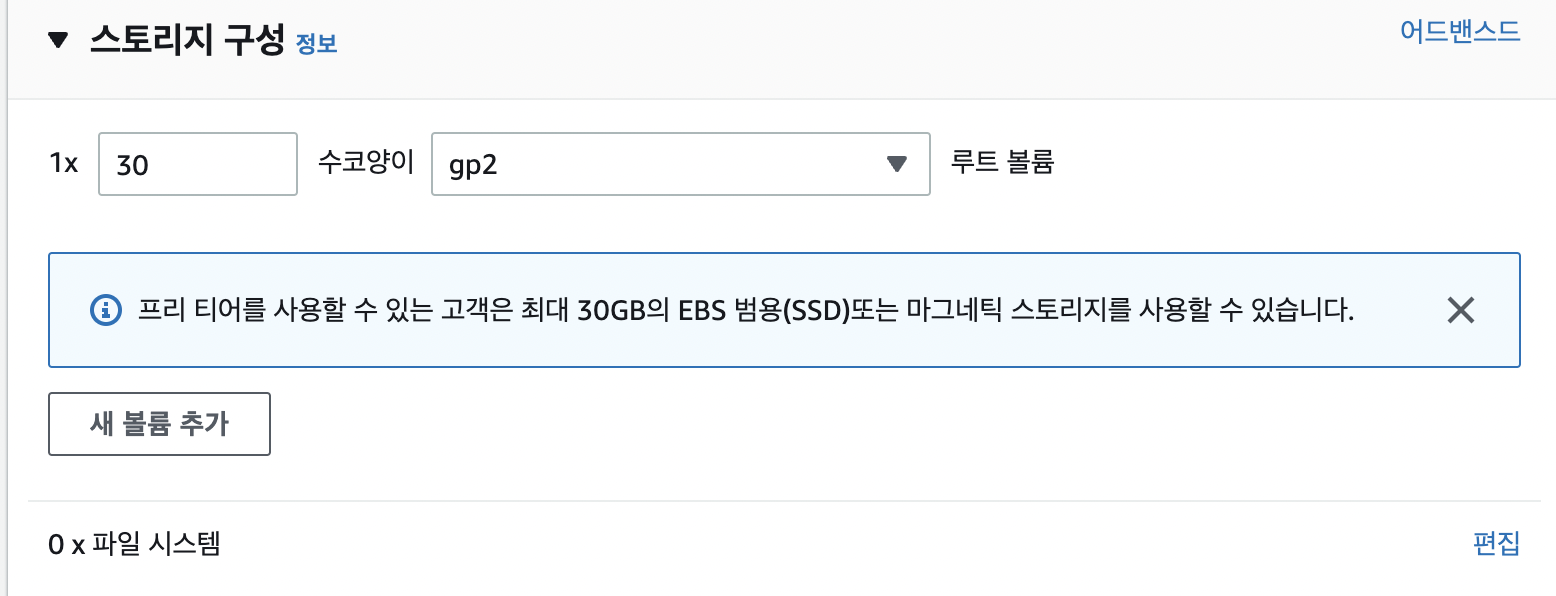
storage 추가 (30gb 까지는 무료 사용)
-
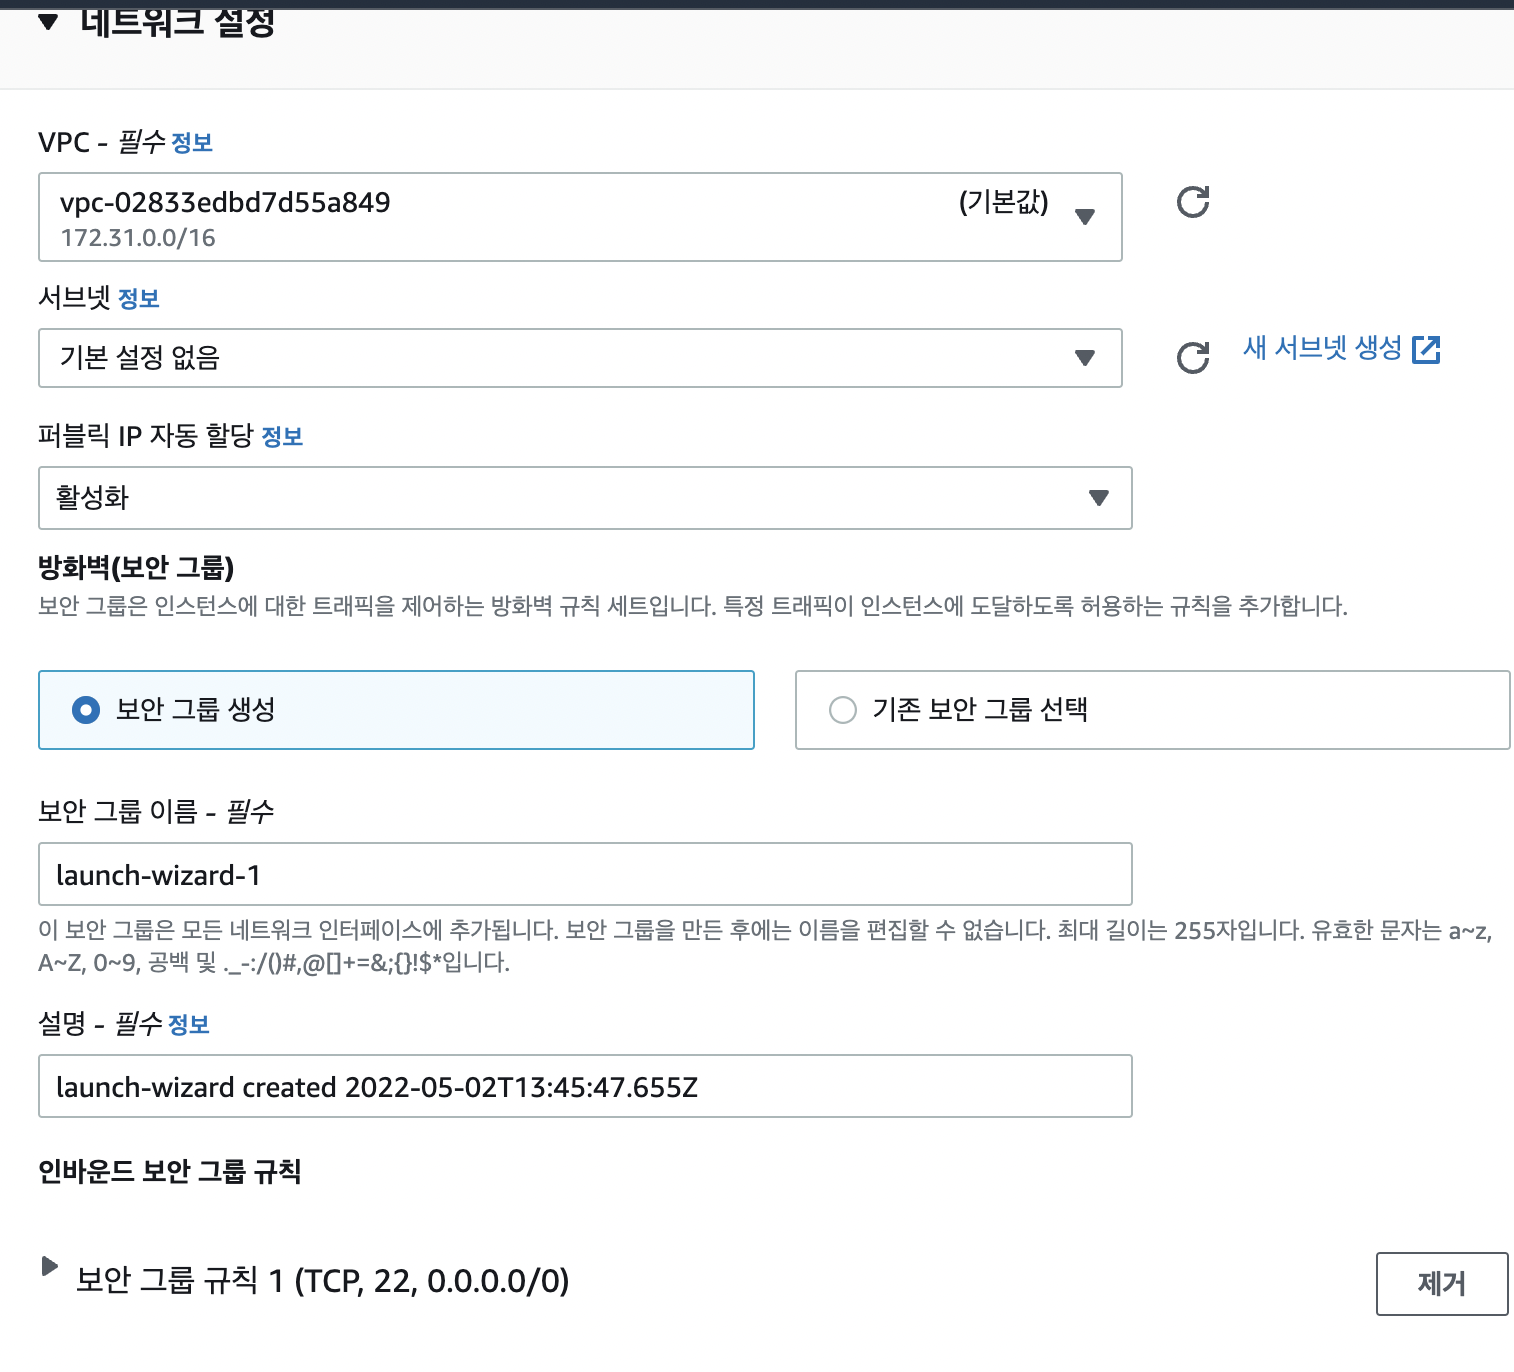
네트워크 설정
- 80, 443 port 추가 Secrurity group은 방화벽을 설정하는 메뉴이고, 추후 수정 가능
- key pair 생성
- 생성된 키는 pirvate key이고 이 키에 연결된 public key로 서버가 생성된다.
주의 - key는 한번만 다운로드 되기 때문에 백업할 필요가 있다.
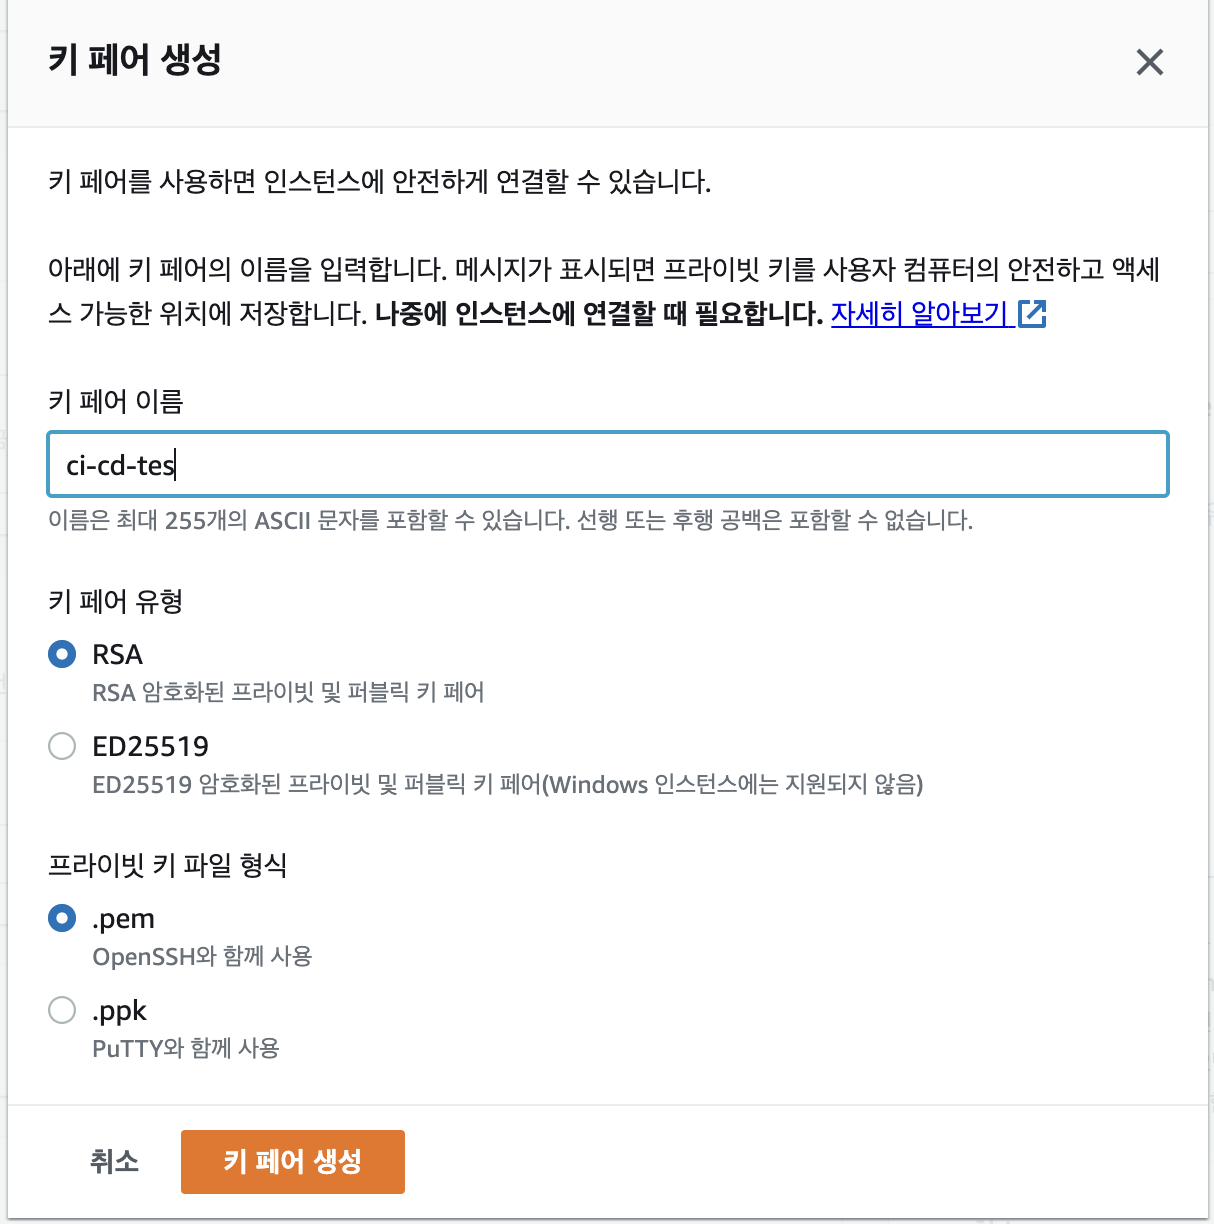
ci-cd-test.pem 이라는 파일 생성
- instance 시작
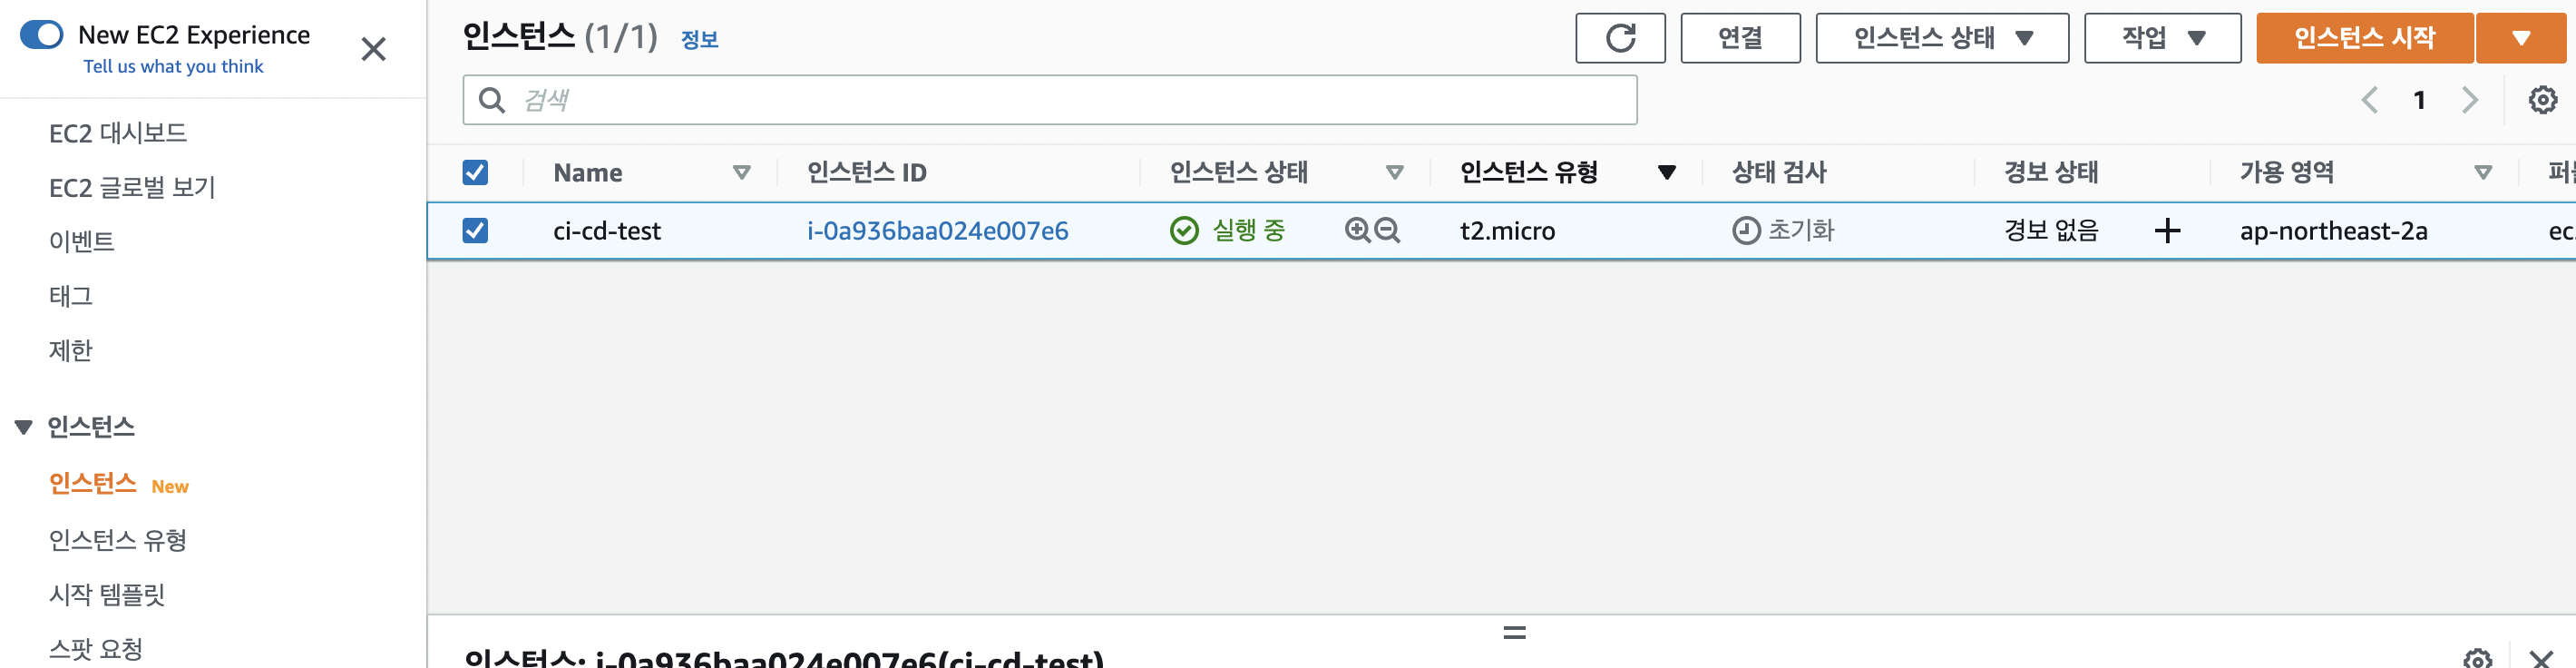
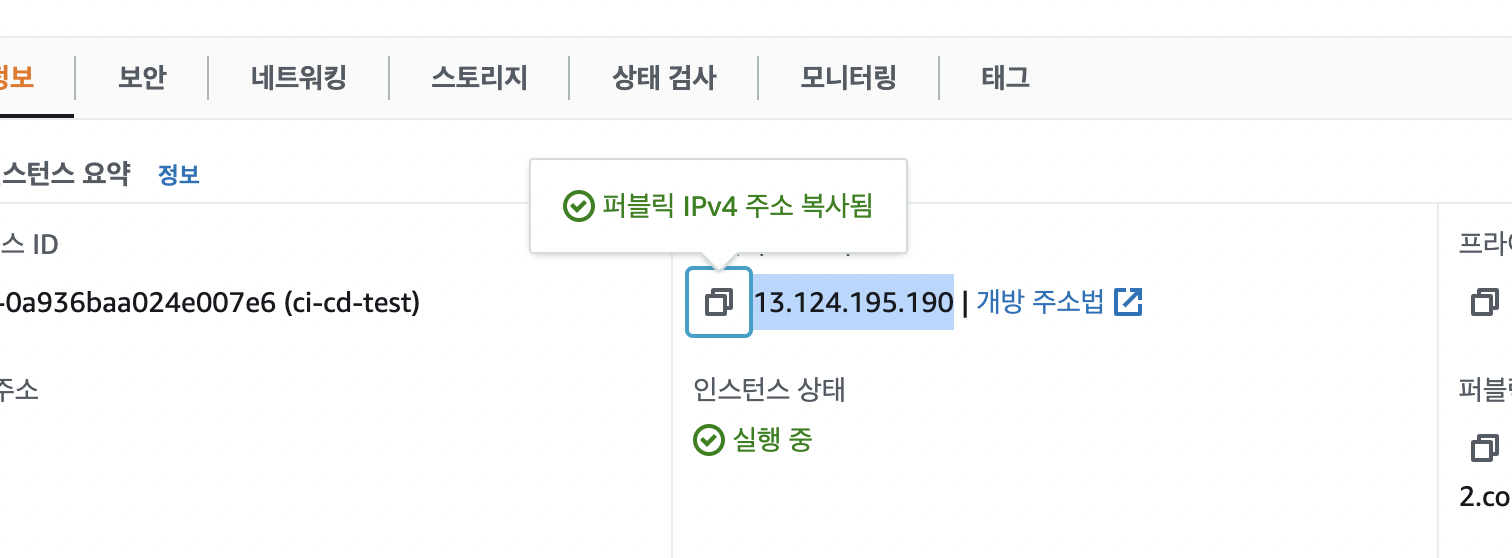
- 접속 준비하기
- ip 복사하기
$ mkdir ~/keys
$ mv ~/Downloads/ci-cd-test.pem ~/keys
//권한 설정은 윈도우는 상관 x
$ chmod 400 ~/Keys/ci-cd-test.pem
- 접속
복사한 ip 붙여넣기
$ ssh -i ~/Keys/ci-cd-test.pem ec2-user@13.124.195.190system update 실행
$ sudo yum update서버 접속 완료
[ec2-user@ip-172-31-9-24 ~]$ 서버에 git 설치
[ec2-user@ip-172-31-9-24 ~]$ sudo yum install git htop -ygit 버전 확인
[ec2-user@ip-172-31-9-24 ~]$ git --version
git version 2.32.0
htop으로 cpu , memory 확인
[ec2-user@ip-172-31-9-24 ~]$ htop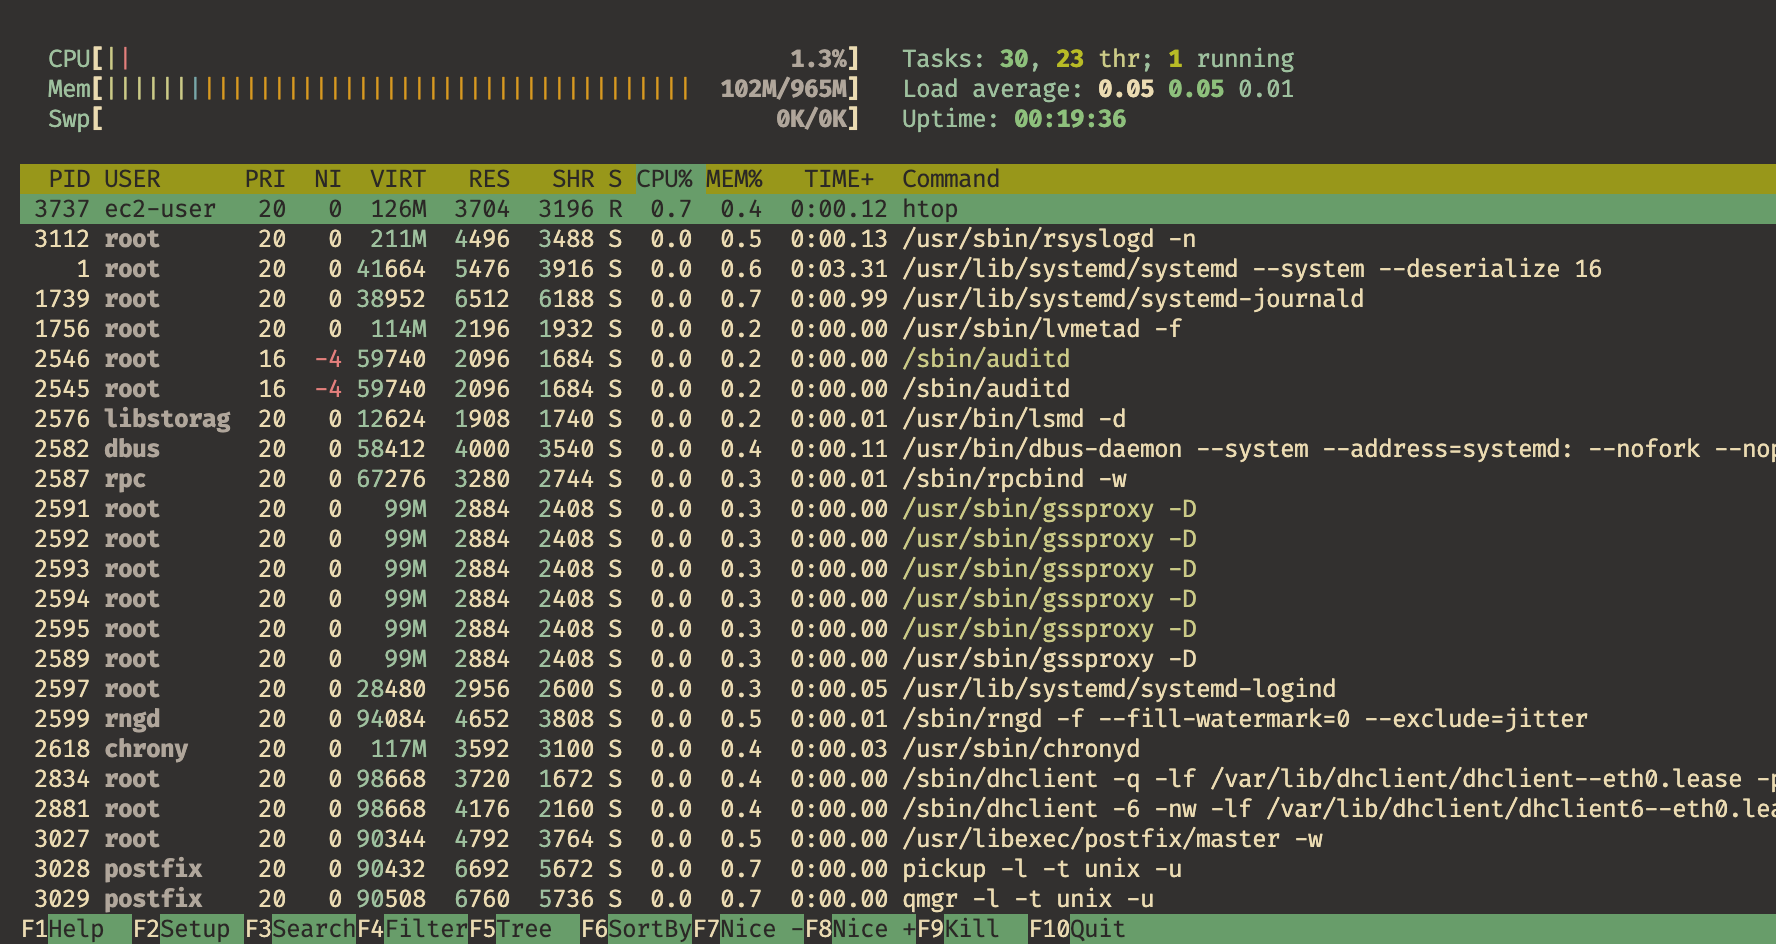
nodejs 설치
다른 운영 체제 클릭
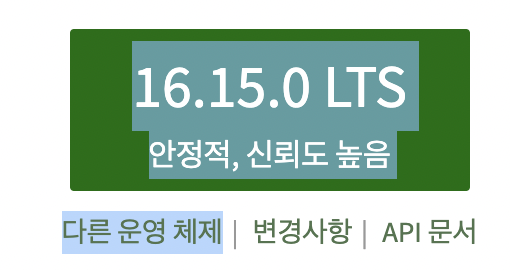
Linux Binaries(x64) 링크 주소 복사
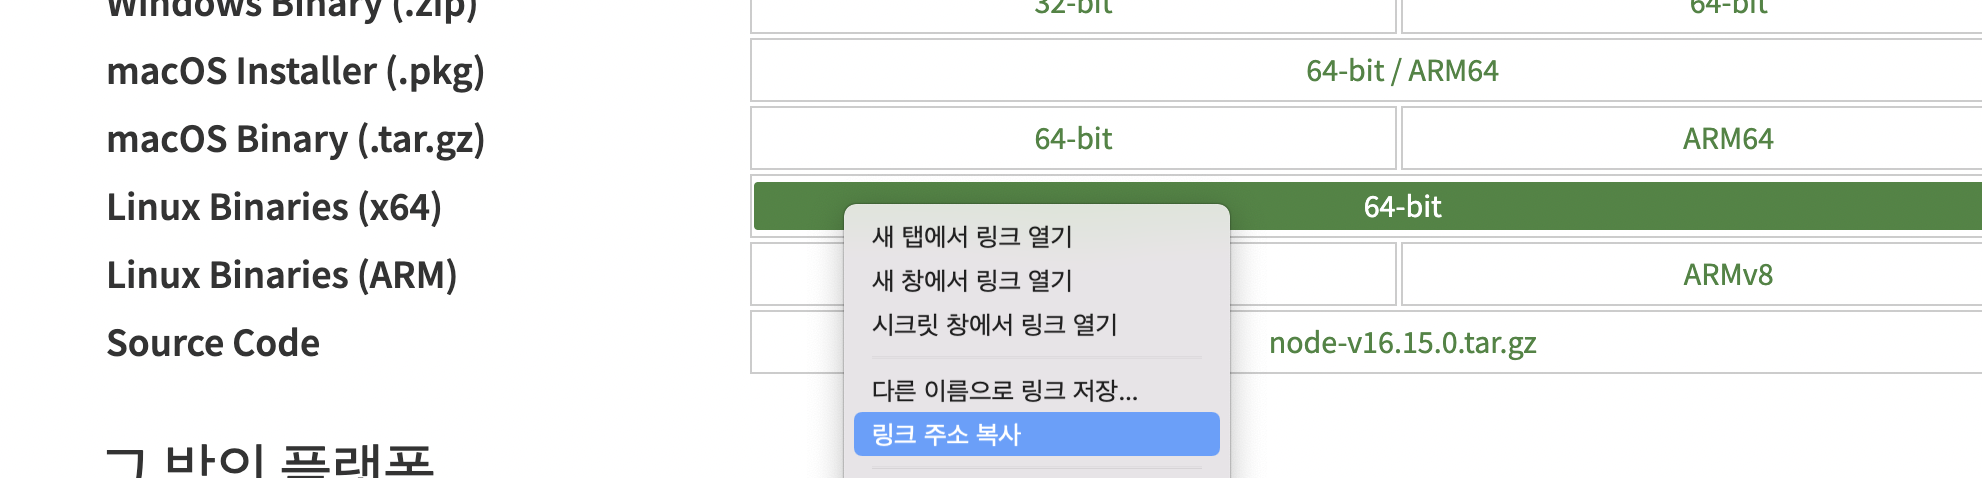
[ec2-user@ip-172-31-9-24 ~]$ mkdir ~/local
[ec2-user@ip-172-31-9-24 ~]$ cd ~/local/
[ec2-user@ip-172-31-9-24 local]$ wget https://nodejs.org/dist/v16.15.0/node-v16.15.0-linux-x64.tar.xz
[ec2-user@ip-172-31-9-24 local]$ tar xvf node-v16.15.0-linux-x64.tar.xz
[ec2-user@ip-172-31-9-24 local]$ cd node-v16.15.0-linux-x64/bin/
[ec2-user@ip-172-31-9-24 bin]$ pwd
**/home/ec2-user/local/node-v16.15.0-linux-x64/bin**//파일 경로 복사!
[ec2-user@ip-172-31-9-24 bin]$ vi ~/.bash_profile
.bash_profile
# .bash_profile

# Get the aliases and functions
if [ -f ~/.bashrc ]; then
        . ~/.bashrc
fi

# User specific environment and startup programs

PATH=$PATH:$HOME/.local/bin:$HOME/bin
PATH=$PATH:/home/ec2-user/local/node-v16.15.0-linux-x64/bin

export PATH
~
~
~
j로 path까지 이동 yy로 복사후 p로 바로 아래 붙여넣기
j후 l로 path:까지 진입후 d -> shift +4 -> 복사한 파일 경로 붙여넣기 -> esc -> :wq
node 버전 확인
[ec2-user@ip-172-31-9-24 bin]$ node
-bash: node: command not found
[ec2-user@ip-172-31-9-24 bin]$ source ~/.bash_profile
[ec2-user@ip-172-31-9-24 bin]$ node -v
v16.15.0- nginx 설치와 node.js 연결
nginx 웹서버를 설치하고, reverse proxy 설정을 통해서 node.js 4000번 backend port로 연결
[ec2-user@ip-172-31-9-24 bin]$ sudo amazon-linux-extras install nginx1
[ec2-user@ip-172-31-9-24 bin]$ sudo vi /etc/nginx/nginx.conf
nginx.conf 의 server 쪽을 보면
    server {
        listen       80;
        listen       [::]:80;
        server_name  _;
        root         /usr/share/nginx/html;

        # Load configuration files for the default server block.
        include /etc/nginx/default.d/*.conf;

        error_page 404 /404.html;
        location = /404.html {
        }

        error_page 500 502 503 504 /50x.html;
        location = /50x.html {
        }
이렇게 구성되어있는데 include 와 error-page 사이에 4000번 port location을 추가한다.
location / {
sendfile off;
proxy_pass http://127.0.0.1:4000;
proxy_redirect default;
proxy_http_version 1.1;
proxy_set_header Host $host;
proxy_set_header X-Real-IP $remote_addr;
proxy_set_header X-Forwarded-For $proxy_add_x_forwarded_for;
proxy_set_header X-Forwarded-Proto $scheme;
proxy_cache_bypass $http_upgrade;
proxy_max_temp_file_size 0;
}
수정을 마치고, nginx 설정을 테스트하고, ok 일 경우 서버를 시작한다. 오류가 있을 경우 메시지를 따라서 수정하면 된다. 서버를 재시작할 때 nginx 서비스도 자동으로 시작도록 설정한다.
[ec2-user@ip-172-31-9-24 bin]$ sudo nginx -t
nginx: the configuration file /etc/nginx/nginx.conf syntax is ok
nginx: configuration file /etc/nginx/nginx.conf test is successful

[ec2-user@ip-172-31-9-24 bin]$ sudo systemctl start nginx
[ec2-user@ip-172-31-9-24 bin]$ sudo systemctl enable nginx //서버를 재시작해도 nginx가 자동으로 재시작
Created symlink from /etc/systemd/system/multi-user.target.wants/nginx.service to /usr/lib/systemd/system/nginx.service.
[ec2-user@ip-172-31-9-24 bin]$ curl localhost //port를 안붙이면 80이랑 같음.- 프로젝트 빌드와 실행
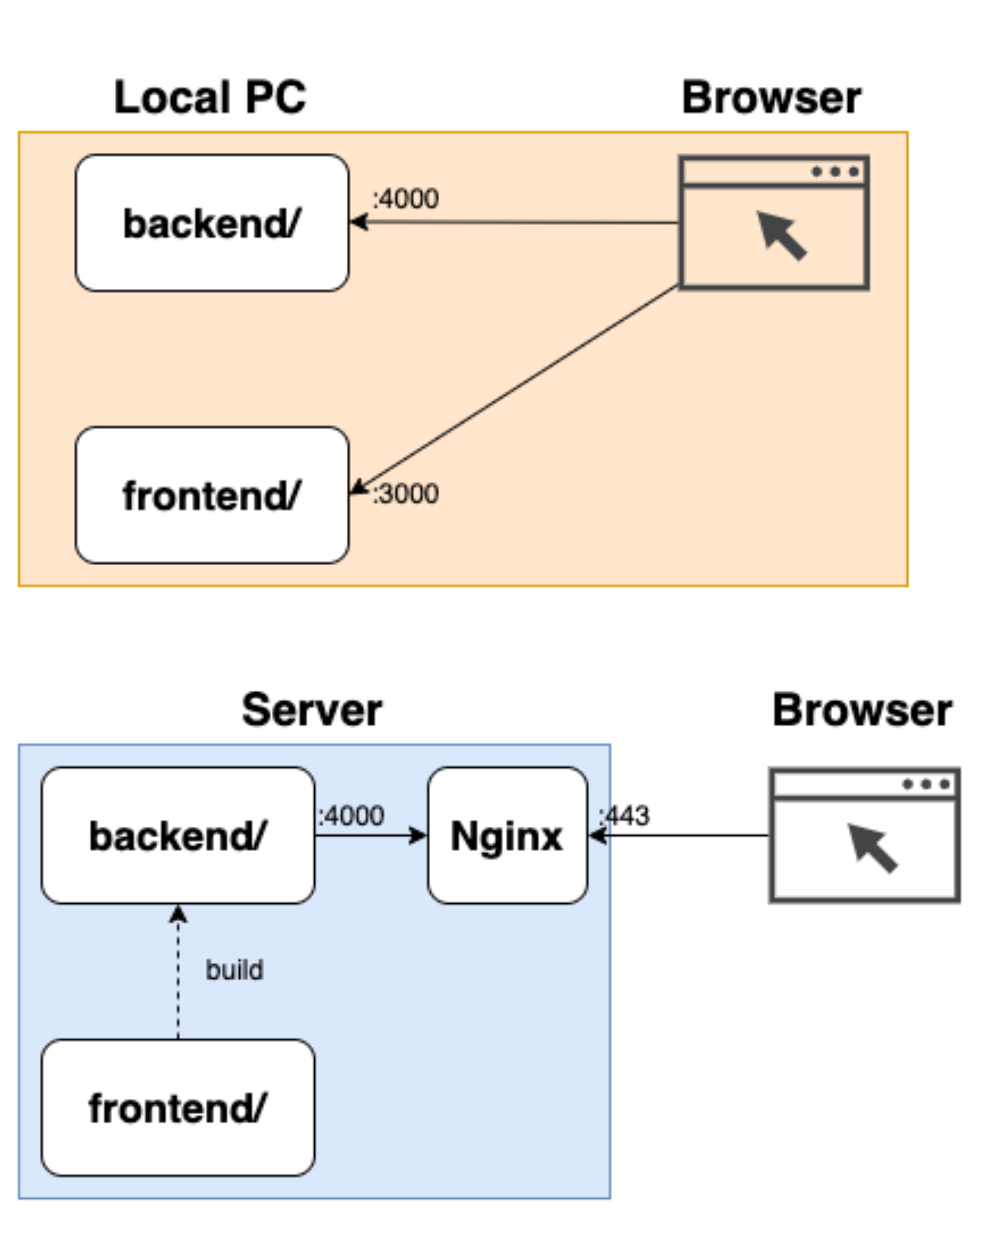
로컬 컴퓨터와는 달리 서버에서는 API 서버만 프로세스를 띄우고, React는 빌드한 결과물을 backend/public 경로로 복사해서 실행한다. node.js 서버를 띄우기 위해서 pm2 (https://pm2.keymetrics.io/) 명령을 추가한다.
[ec2-user@ip-172-31-9-24 bin]$ npm install -g pm2
[ec2-user@ip-172-31-9-24 bin]$ mkdir ~/git
[ec2-user@ip-172-31-9-24 bin]$ cd ~/git
[ec2-user@ip-172-31-9-24 git]$ git clone https://github.com/sangwookp9591/ci-cd-test.git
[ec2-user@ip-172-31-9-24 git]$ cd ci-cd-test/frontend
[ec2-user@ip-172-31-9-24 ci-cd-test]$ npm i
[ec2-user@ip-172-31-9-24 frontend]$ npm run build

--빌드된 결과물
vite v2.9.6 building for production...
✓ 34 modules transformed.
dist/assets/favicon.17e50649.svg   1.49 KiB
dist/assets/logo.ecc203fb.svg      2.61 KiB
dist/index.html                    0.46 KiB
dist/assets/index.62f502b0.css     0.75 KiB / gzip: 0.48 KiB
dist/assets/index.ff634a51.js      140.35 KiB / gzip: 45.09 KiB

[ec2-user@ip-172-31-9-24 frontend]$ cp -rf dist/* ../backend/public
[ec2-user@ip-172-31-9-24 frontend]$ cd ../backend/
[ec2-user@ip-172-31-9-24 backend]$ npm i
[ec2-user@ip-172-31-9-24 backend]$ pm2 start bin/www --name web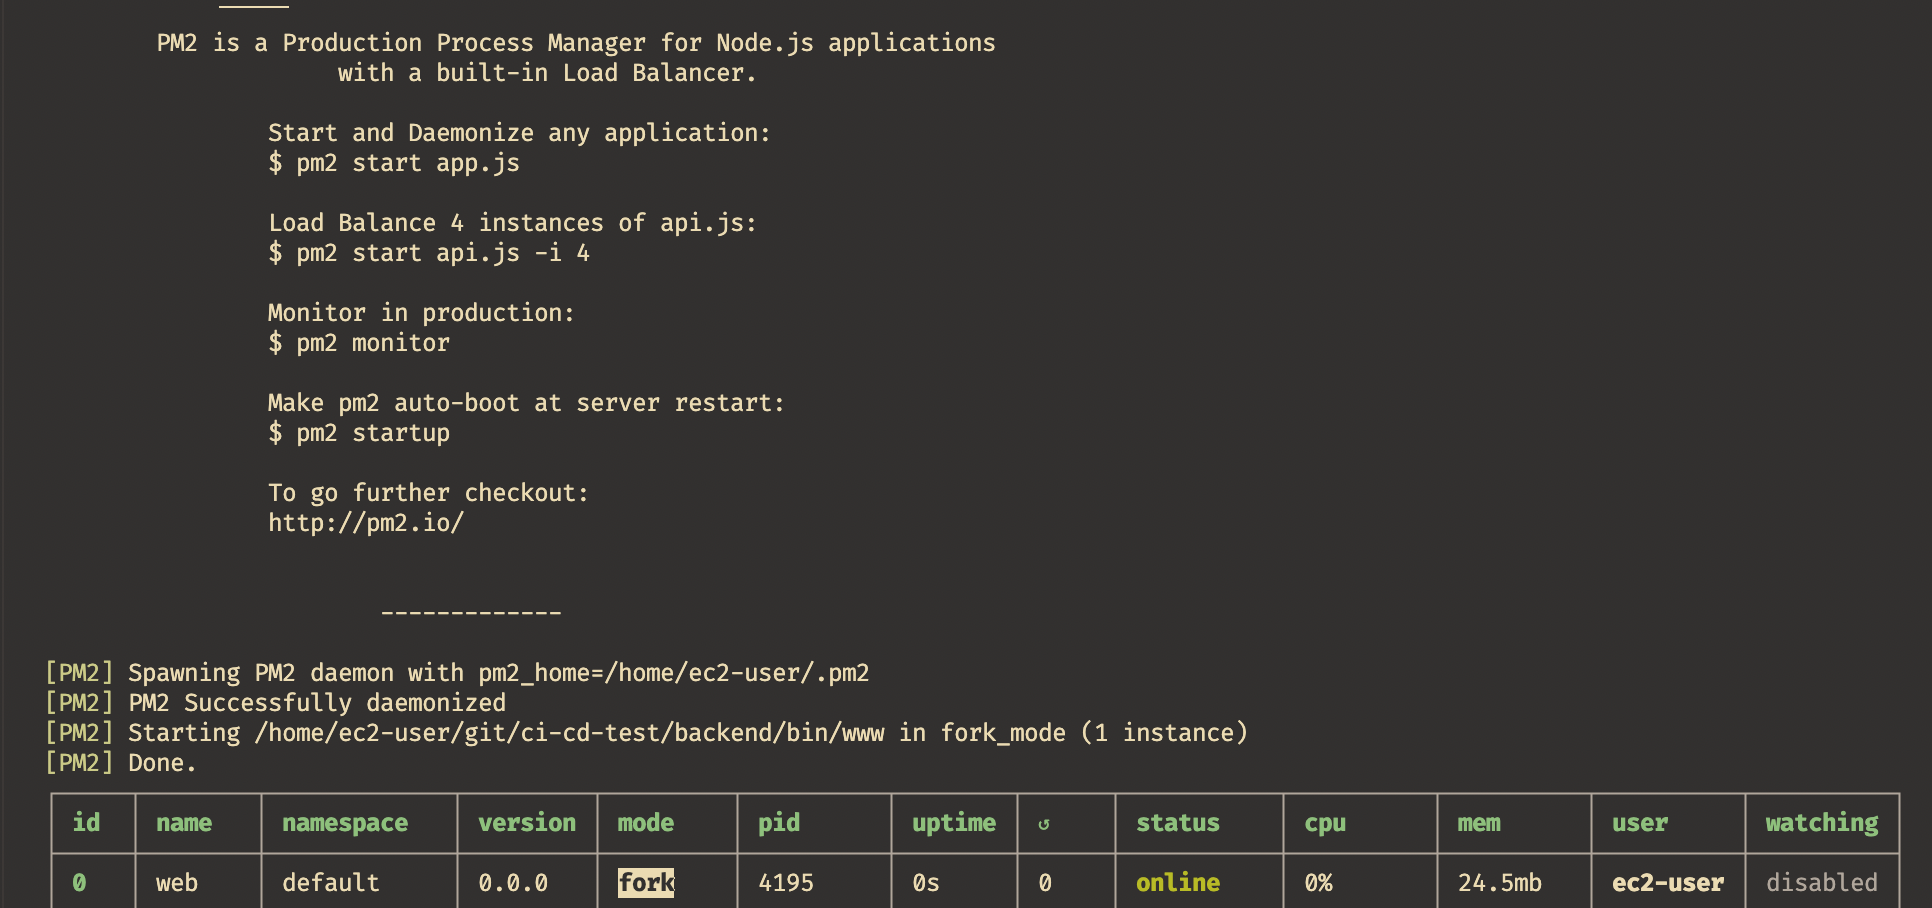
[ec2-user@ip-172-31-9-24 backend]$ pm2 list
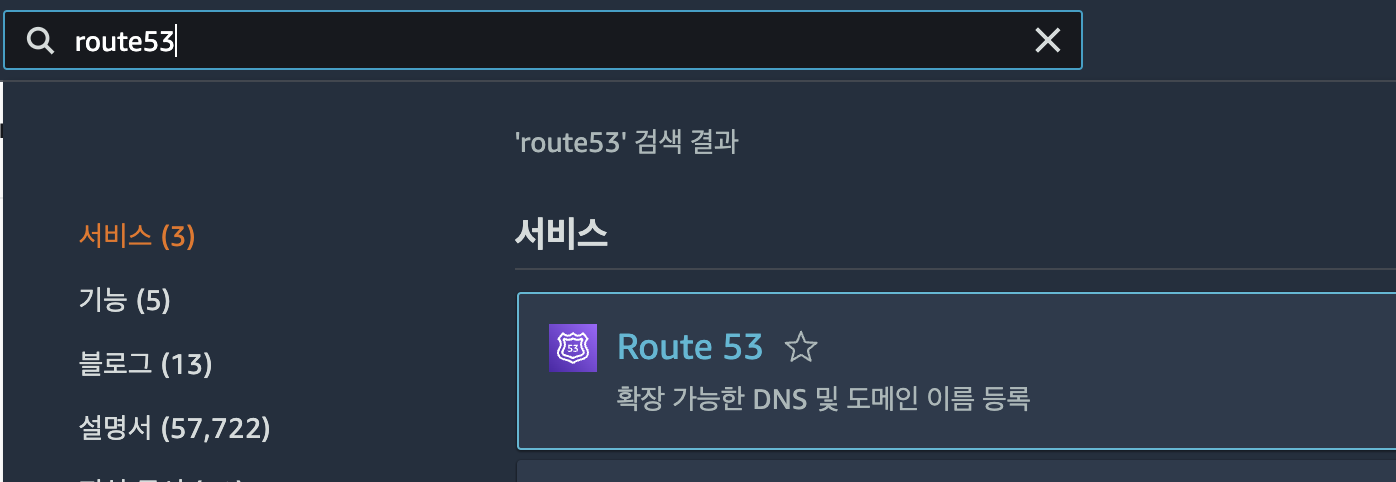
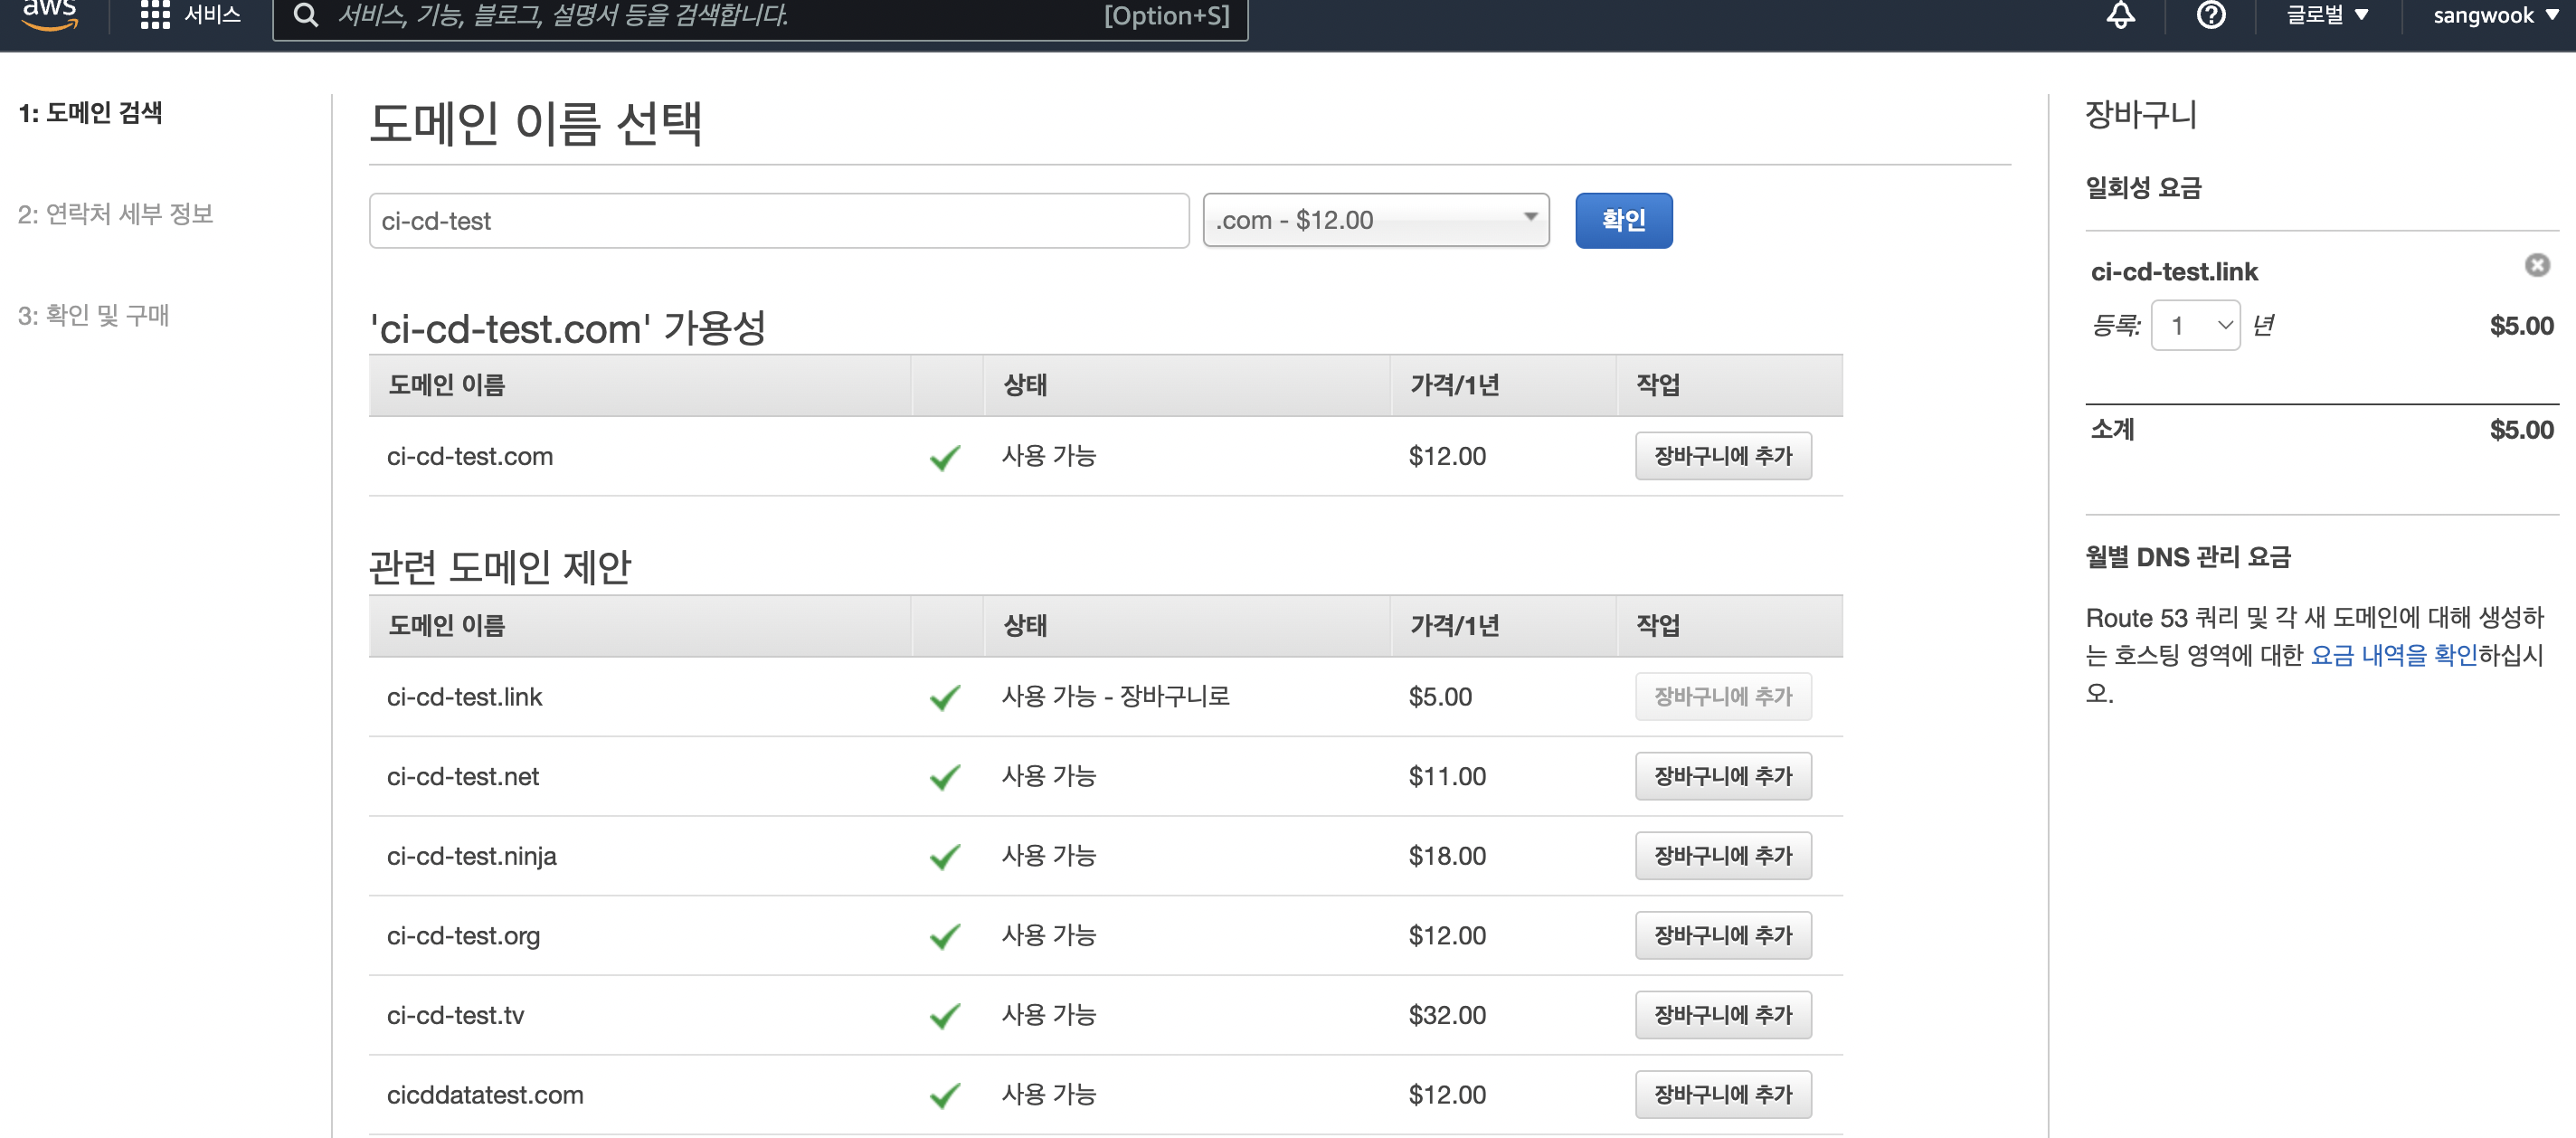
7. 도메인 등록
Route 53 도메인 추가
AWS를 이용하면 도메인 구매와 관리를 쉽게 할 수 있다. Route 53 서비스에 접속해서 필요한 도메인을 검색한 뒤에 장바구니에 넣고 구매를 진행한다. .net, .com은 1년에 $12 정도면 구입할 수 있다. 갱신은 매년 자동으로 진행되며, 설정에서 자동 연장을 그만 둘 수도 있다.
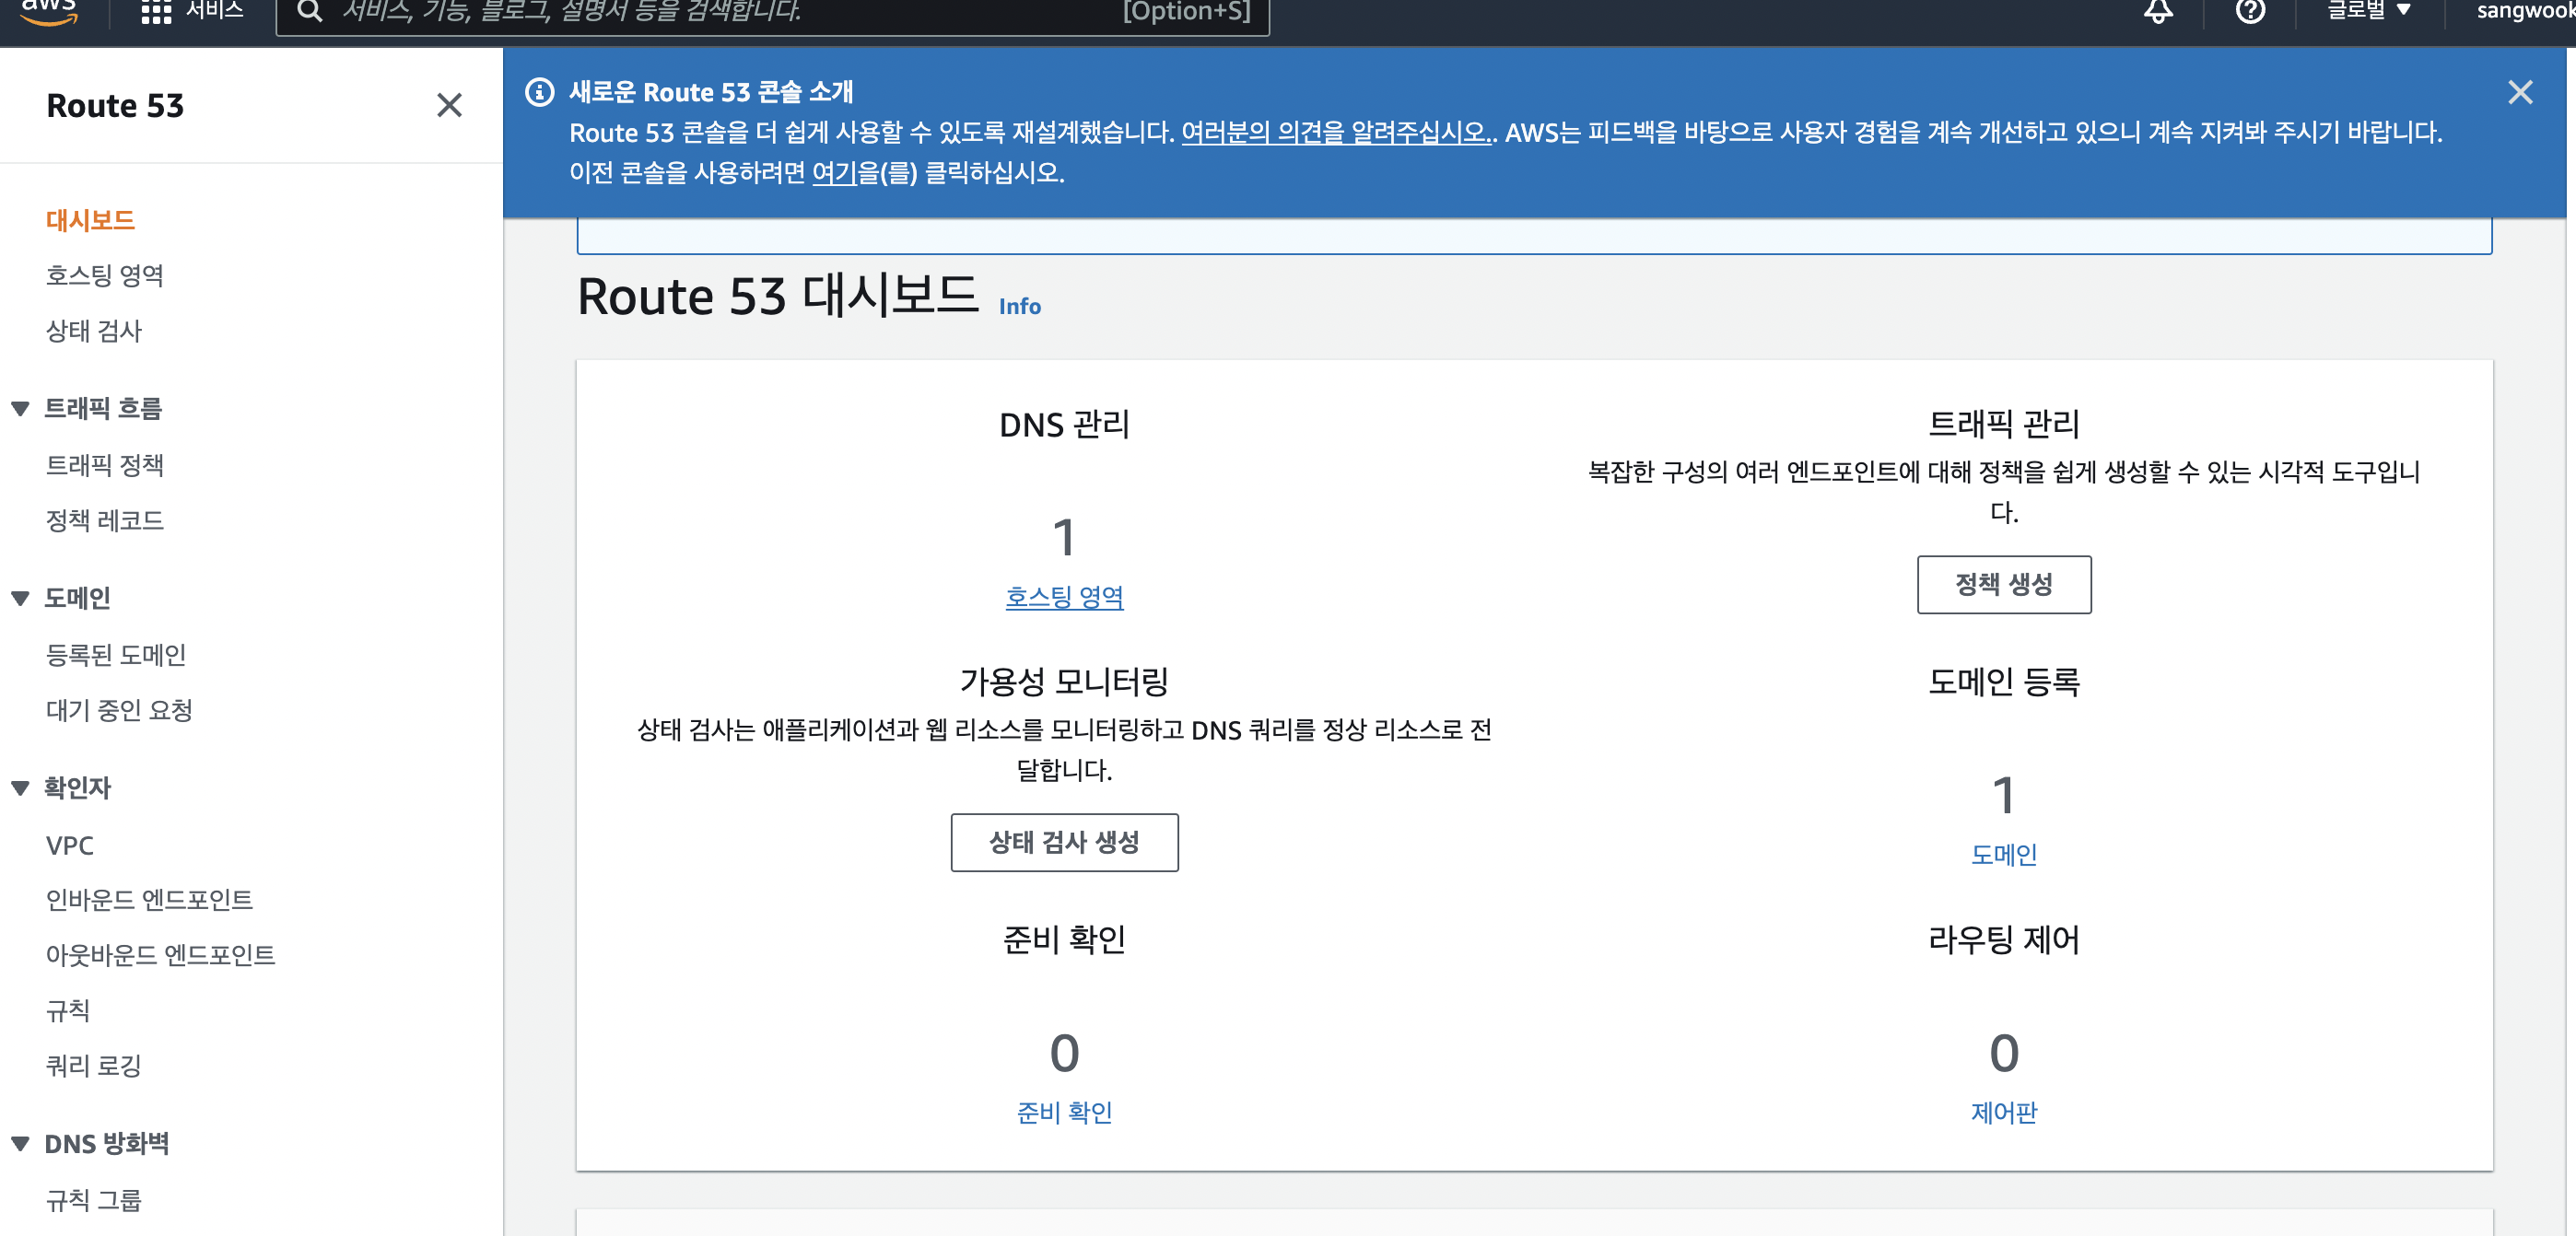
Route 53과 Hosted zones 의 도메인 페이지에 들어가 Create records 버튼을 클릭한다. 등록한 도메인과 EC2 인스턴스의 IP를 매핑한다.
도메인이 정상적으로 등록이 되면 Route 53 대시보드에서 호스트 영역을 클릭
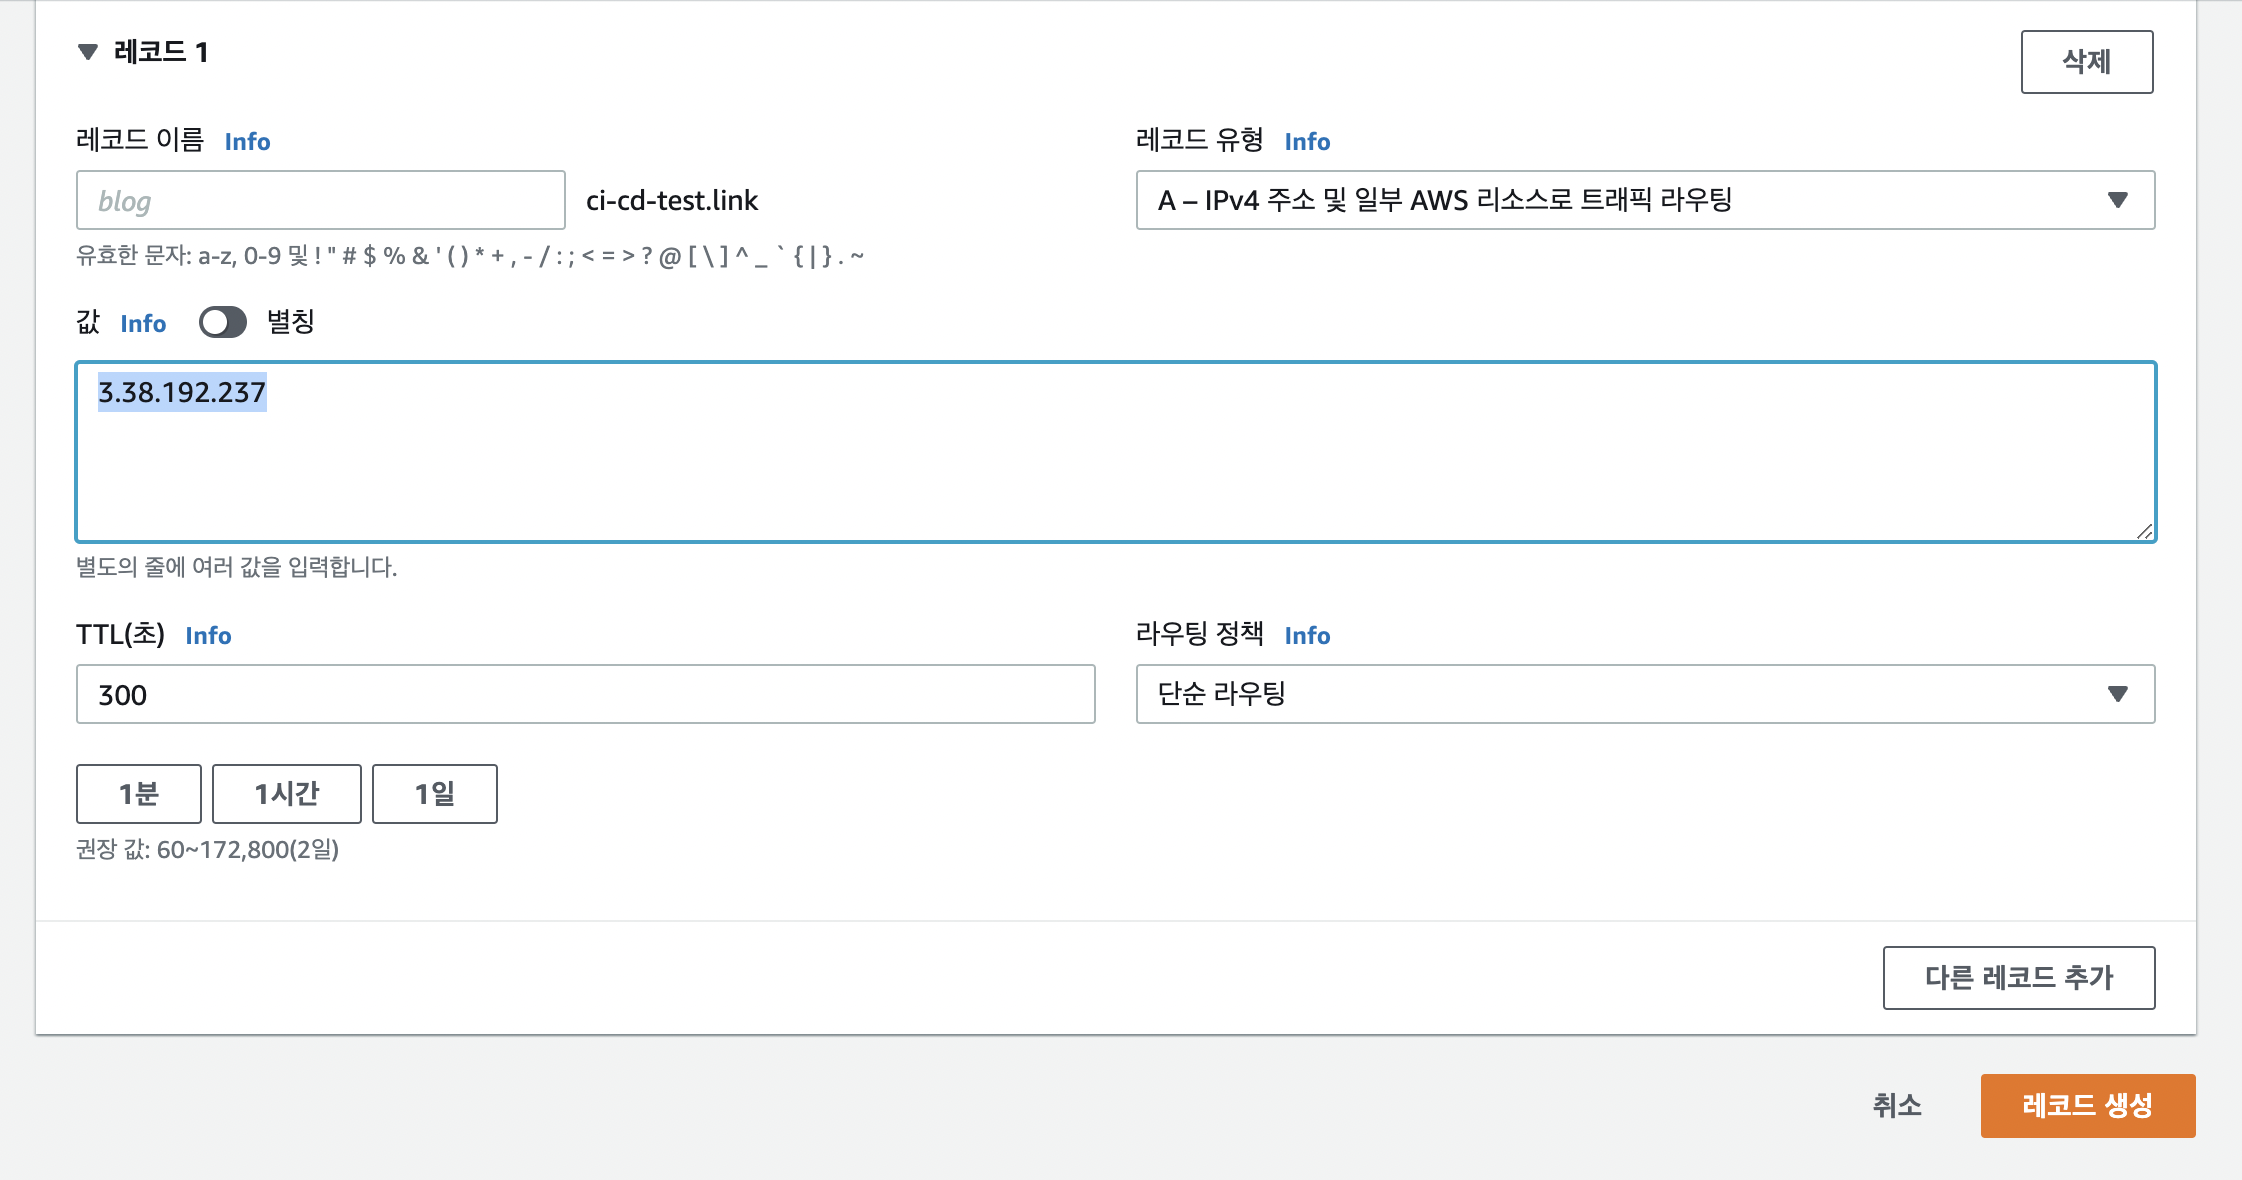
호스트영역 세부내용에서 레코드 생성 클릭
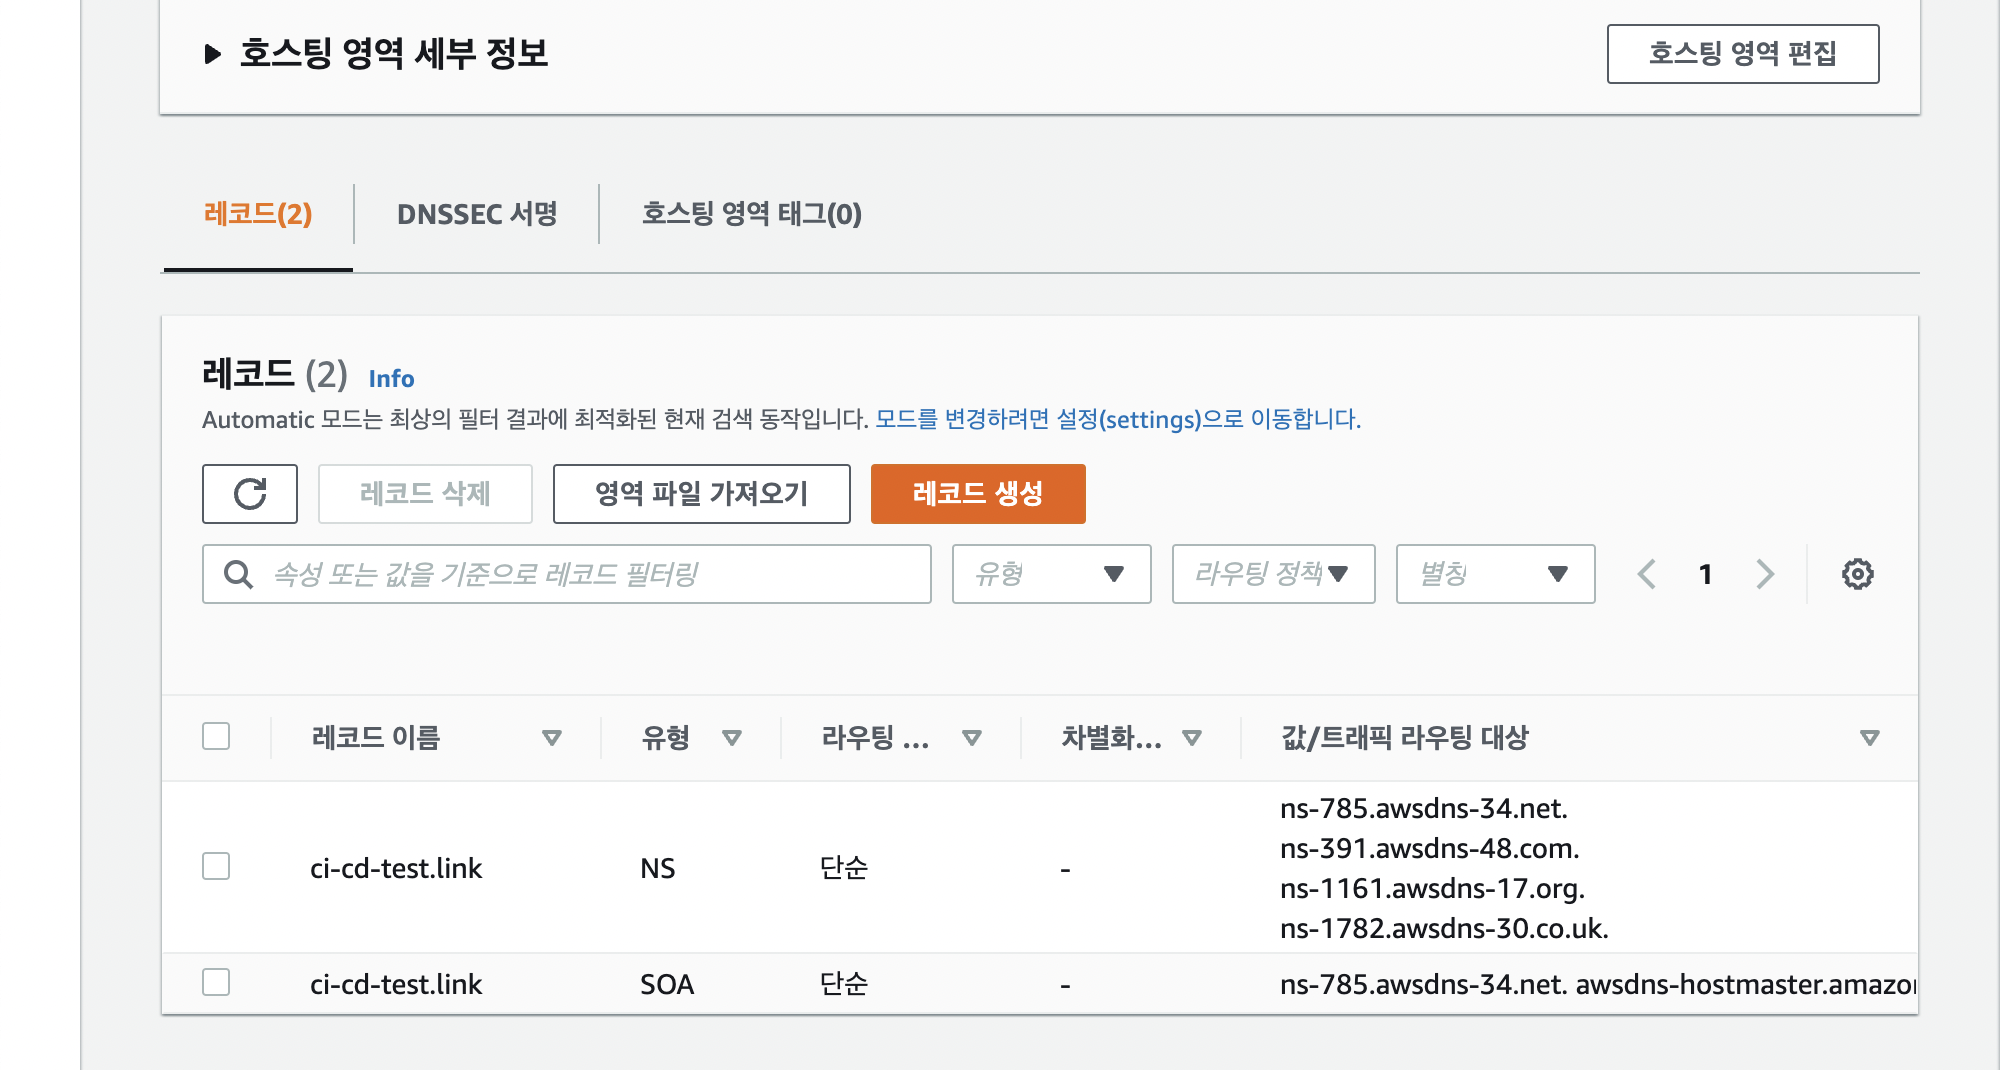
값에 instance에 등록된 ip를 등록 후 레코드 생성
nginx restart
[ec2-user@ip-172-31-10-145 backend]$ sudo nginx -t
[ec2-user@ip-172-31-10-145 backend]$ sudo systemctl restart nginx
[ec2-user@ip-172-31-10-145 backend]$ curl localhost
curl localhost를 하면 이전보다 짧아진 react의 index.js의 모습을 확인 할 수 있다.
실제 발급받은 도메인으로 접속을 해보면 정상적으로 배포되었음을 확인 할 수 있다.
8. 도메인에 인증서 발급
- nginx설정을 통해 nginx.conf파일의 server_name을 도메인으로 변경
- conf 파일 편집
sudo vi /etc/nginx/nginx.conf- server_name 변경
 server {
        listen       80;
        listen       [::]:80;
        server_name  ci-cd-test.link _;
...- 변경 확인
[ec2-user@ip-172-31-10-145 backend]$ sudo nginx -t
nginx: the configuration file /etc/nginx/nginx.conf syntax is ok
nginx: configuration file /etc/nginx/nginx.conf test is successful- 서버 재시작
[ec2-user@ip-172-31-10-145 backend]$ sudo systemctl restart nginx9. HTTPS를 위한 인증서 설정
- 도메인 설정 후 HTTPS 설정 가능.
- 인증서 설정은 무료로 인증서 등록을 위해 LetsEncrypt에서 등록가능.
- 이전 작업은 ec2-user 계정으로 작업을 해서 sudo를 사용했지만,
EC2 인스터스의 root로 접근을 하기 위해서는 sudo su - 명령을 사용해야함.- 인증서 설정 작업을 위한 라이브러리 설치
[ec2-user@ip-172-31-10-145 backend]$ sudo su -
[root@ip-172-31-10-145 ~]# yum -y install yum-utils
[root@ip-172-31-10-145 ~]# yum-config-manager --enable rhui-REGION-rhel-server-extras rhui-REGION-rhel-server-optional
[root@ip-172-31-10-145 ~]# yum install https://dl.fedoraproject.org/pub/epel/epel-release-latest-7.noarch.rpm
[root@ip-172-31-10-145 ~]# yum install certbot python2-certbot-nginx
certbot이 인증서를 발급하는 bot
[root@ip-172-31-10-145 ~]# certbot --nginx
Saving debug log to /var/log/letsencrypt/letsencrypt.log
Plugins selected: Authenticator nginx, Installer nginx
Enter email address (used for urgent renewal and security notices)
 (Enter 'c' to cancel): sangwookp9591@gmail.com

- - - - - - - - - - - - - - - - - - - - - - - - - - - - - - - - - - - - - - - -
Please read the Terms of Service at
https://letsencrypt.org/documents/LE-SA-v1.2-November-15-2017.pdf. You must
agree in order to register with the ACME server. Do you agree?
- - - - - - - - - - - - - - - - - - - - - - - - - - - - - - - - - - - - - - - -
(Y)es/(N)o: y

- - - - - - - - - - - - - - - - - - - - - - - - - - - - - - - - - - - - - - - -
Would you be willing, once your first certificate is successfully issued, to
share your email address with the Electronic Frontier Foundation, a founding
partner of the Let's Encrypt project and the non-profit organization that
develops Certbot? We'd like to send you email about our work encrypting the web,
EFF news, campaigns, and ways to support digital freedom.
- - - - - - - - - - - - - - - - - - - - - - - - - - - - - - - - - - - - - - - -
(Y)es/(N)o: y
Account registered.

Which names would you like to activate HTTPS for?
- - - - - - - - - - - - - - - - - - - - - - - - - - - - - - - - - - - - - - - -
1: ci-cd-test.link
- - - - - - - - - - - - - - - - - - - - - - - - - - - - - - - - - - - - - - - -
Select the appropriate numbers separated by commas and/or spaces, or leave input
blank to select all options shown (Enter 'c' to cancel):
Requesting a certificate for ci-cd-test.link
Performing the following challenges:
http-01 challenge for ci-cd-test.link
Waiting for verification...
Cleaning up challenges
Deploying Certificate to VirtualHost /etc/nginx/nginx.conf
Redirecting all traffic on port 80 to ssl in /etc/nginx/nginx.conf

- - - - - - - - - - - - - - - - - - - - - - - - - - - - - - - - - - - - - - - -
Congratulations! You have successfully enabled https://ci-cd-test.link
- - - - - - - - - - - - - - - - - - - - - - - - - - - - - - - - - - - - - - - -
Subscribe to the EFF mailing list (email: sangwookp9591@gmail.com).

IMPORTANT NOTES:
 - Congratulations! Your certificate and chain have been saved at:
   /etc/letsencrypt/live/ci-cd-test.link/fullchain.pem
   Your key file has been saved at:
   /etc/letsencrypt/live/ci-cd-test.link/privkey.pem
   Your certificate will expire on 2022-08-01. To obtain a new or
   tweaked version of this certificate in the future, simply run
   certbot again with the "certonly" option. To non-interactively
   renew *all* of your certificates, run "certbot renew"
 - If you like Certbot, please consider supporting our work by:

   Donating to ISRG / Let's Encrypt:   https://letsencrypt.org/donate
   Donating to EFF:                    https://eff.org/donate-le
이렇게 결과가 나온다면 정상 완료된 것이다. 그럼 /etc/nginx/nginx.conf에 인증서를 연결하는 부분이 자동 추가된다.
conf 파일을 확인하고, nginx를 재시작한다.
[root@ip-172-31-10-145 ~]# nginx -t
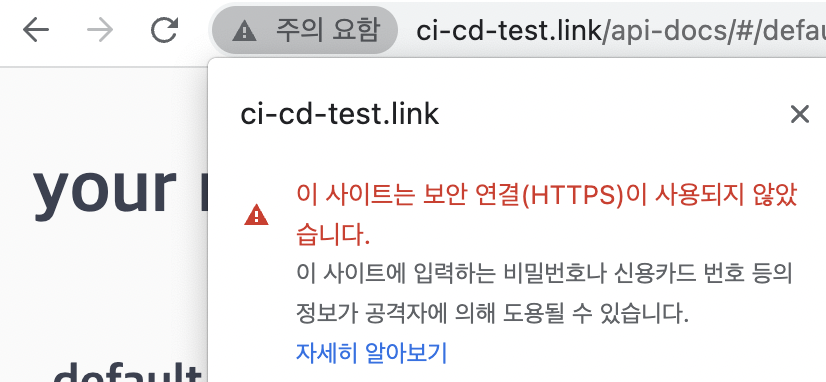
[root@ip-172-31-10-145 ~]# systemctl restart nginx이전에는 https 등록이 되지 않았기 때문에 보안에 대한 경고문이 발생한다.
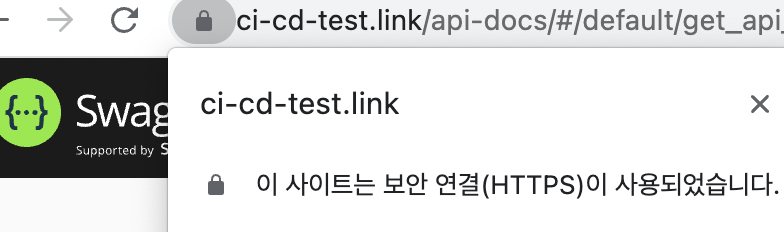
현재 HTTPS를 등록한 후에는 정상적으로 보안 연결이 적용된 것을 볼 수 있다.
하지만 인증서 유효기간이 90일이기 때문에 매번 갱신의 번거로움이 발생해서
크론탭을 이용해 자동 업데이트 스케줄을 등록해준다.
- 0시 12시기준 certbot을 자동 갱신
echo "0 0,12 * * * root python -c 'import random; import time; time.sleep(random.random() * 3600)' && certbot renew" | sudo tee -a /etc/crontab > /dev/null- 적용된 크론탭 목록 확인
[root@ip-172-31-10-145 ~]# cat /etc/crontab
> SHELL=/bin/bash
PATH=/sbin:/bin:/usr/sbin:/usr/bin
MAILTO=root

# For details see man 4 crontabs

# Example of job definition:
# .---------------- minute (0 - 59)
# |  .------------- hour (0 - 23)
# |  |  .---------- day of month (1 - 31)
# |  |  |  .------- month (1 - 12) OR jan,feb,mar,apr ...
# |  |  |  |  .---- day of week (0 - 6) (Sunday=0 or 7) OR sun,mon,tue,wed,thu,fri,sat
# |  |  |  |  |
# *  *  *  *  * user-name  command to be executed

0 0,12 * * * root python -c 'import random; import time; time.sleep(random.random() * 3600)' && certbot renew- root에서 할 설정이 끝낫기 때문에 logout (ctrl+d)
10. CI/CD 구성하기 with GitHub Actions
CI(Continuous Integration)
- 영역별로 구분하여 개발시, 인터페이스 충돌을 미리 발견하기 위해 매일, 매시간 저자오를 자동으로 빌드
CD(Continous Delivery)
-
repository의 code의 변경이 발생하면 개발 서버 또는 운영 서버에 자동으로 배포
GitHub Actions 시작하기
1. deploy-main.yml 설정
- project repository root에 .github/workflows direcotry 생성 후 deploy-main.yml 추가
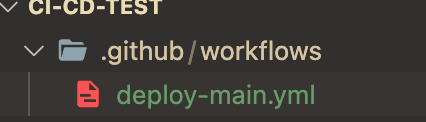
- deploy-main.yml
name: remote ssh command for deploy
on:
push:
branches: [main]
jobs:
build:
name: Build
runs-on: ubuntu-latest
steps:
- name: executing remote ssh commands using key
uses: appleboy/ssh-action@master
with:
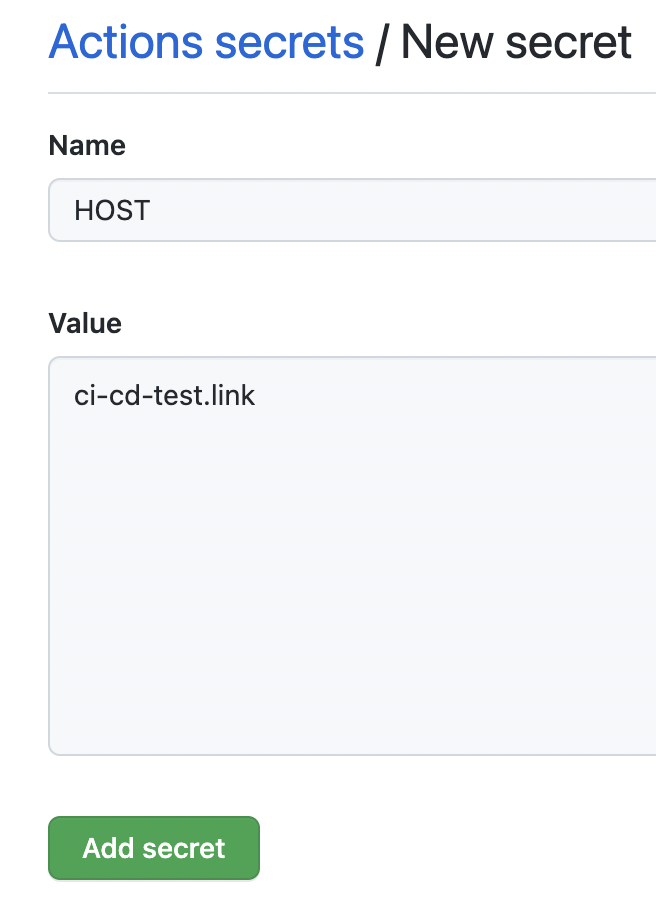
host: ${{ secrets.HOST }}
username: ${{ secrets.USERNAME }}
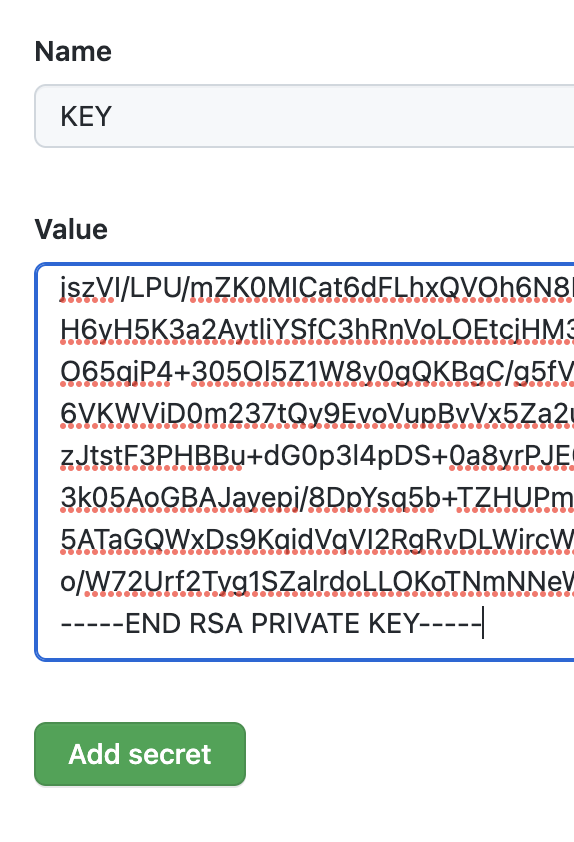
key: ${{ secrets.KEY }}
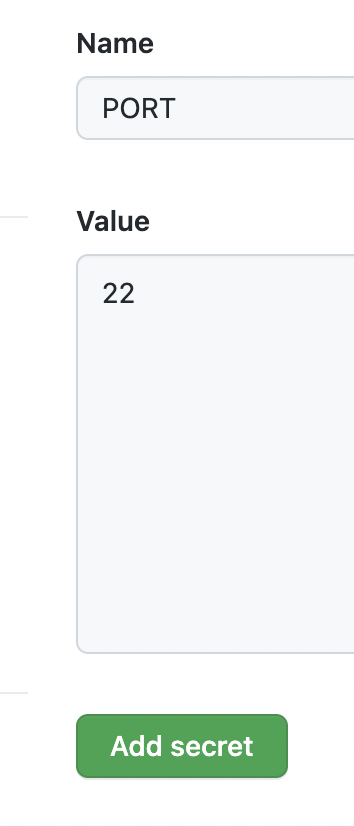
port: ${{ secrets.PORT }}
script: |
./deploy.shpush event가 일어날대 해당 job을 실행하는 것 -> docker가 실행됨.
appleboy/ssh-action@master -> github market place에서 ssh-action를 사용
ssh 접속이 완료되면 접속한 home directory의 deploy.sh 파일 실행
해당 학습은 인프런 React + API Sever 프로젝트 개발과 배포를 참조하였음.
2. Gi
-
settings 접속
https://github.com/xxxx/xxxx/settings -
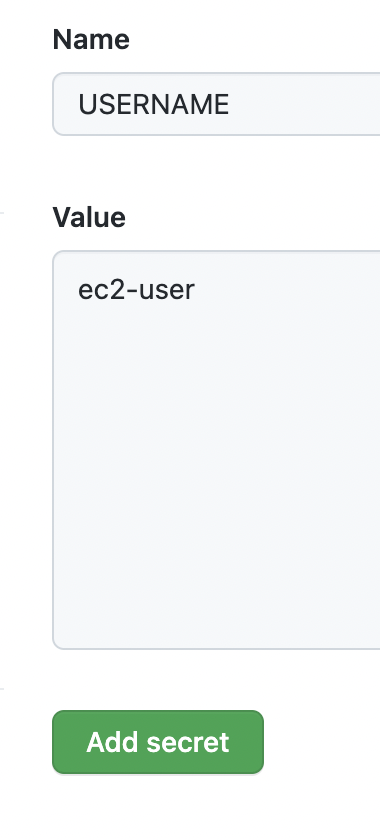
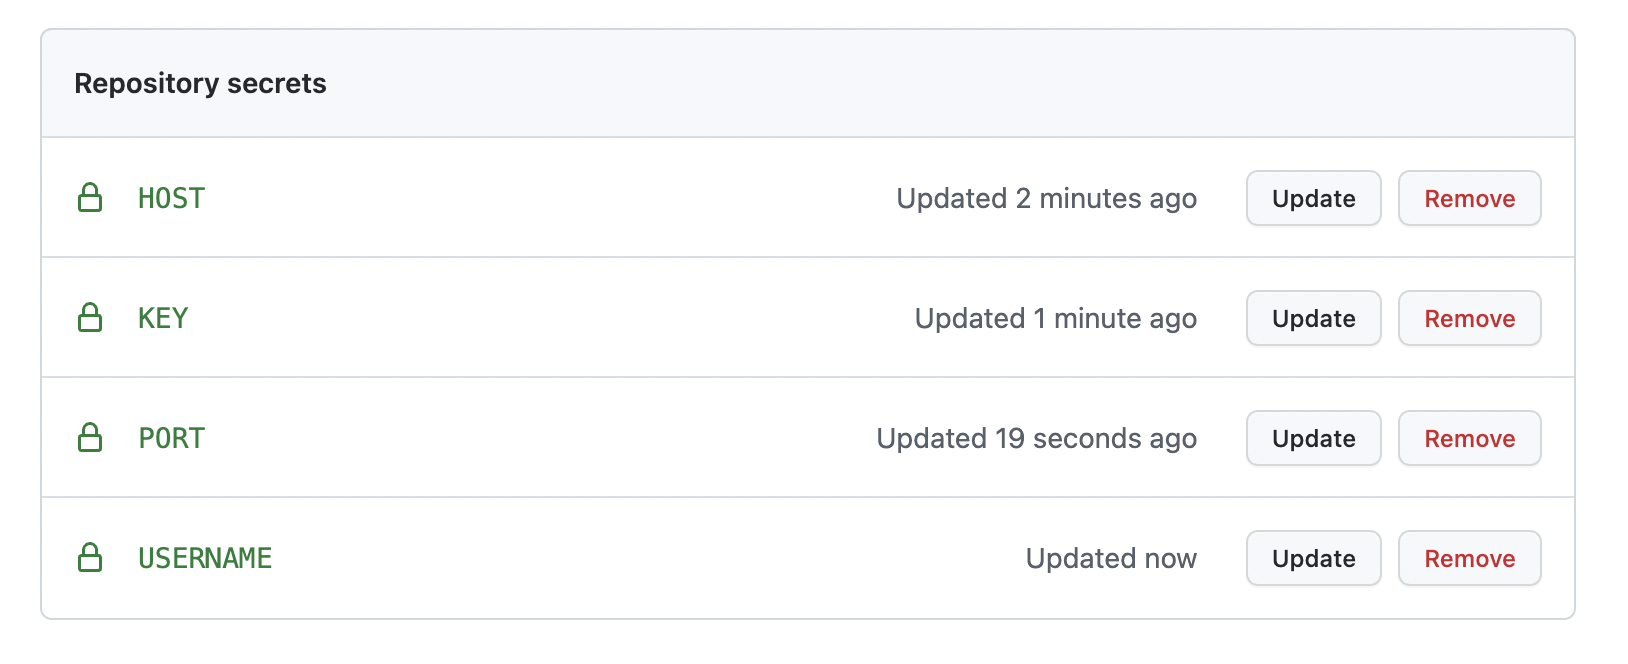
secrets > actions > new repository secret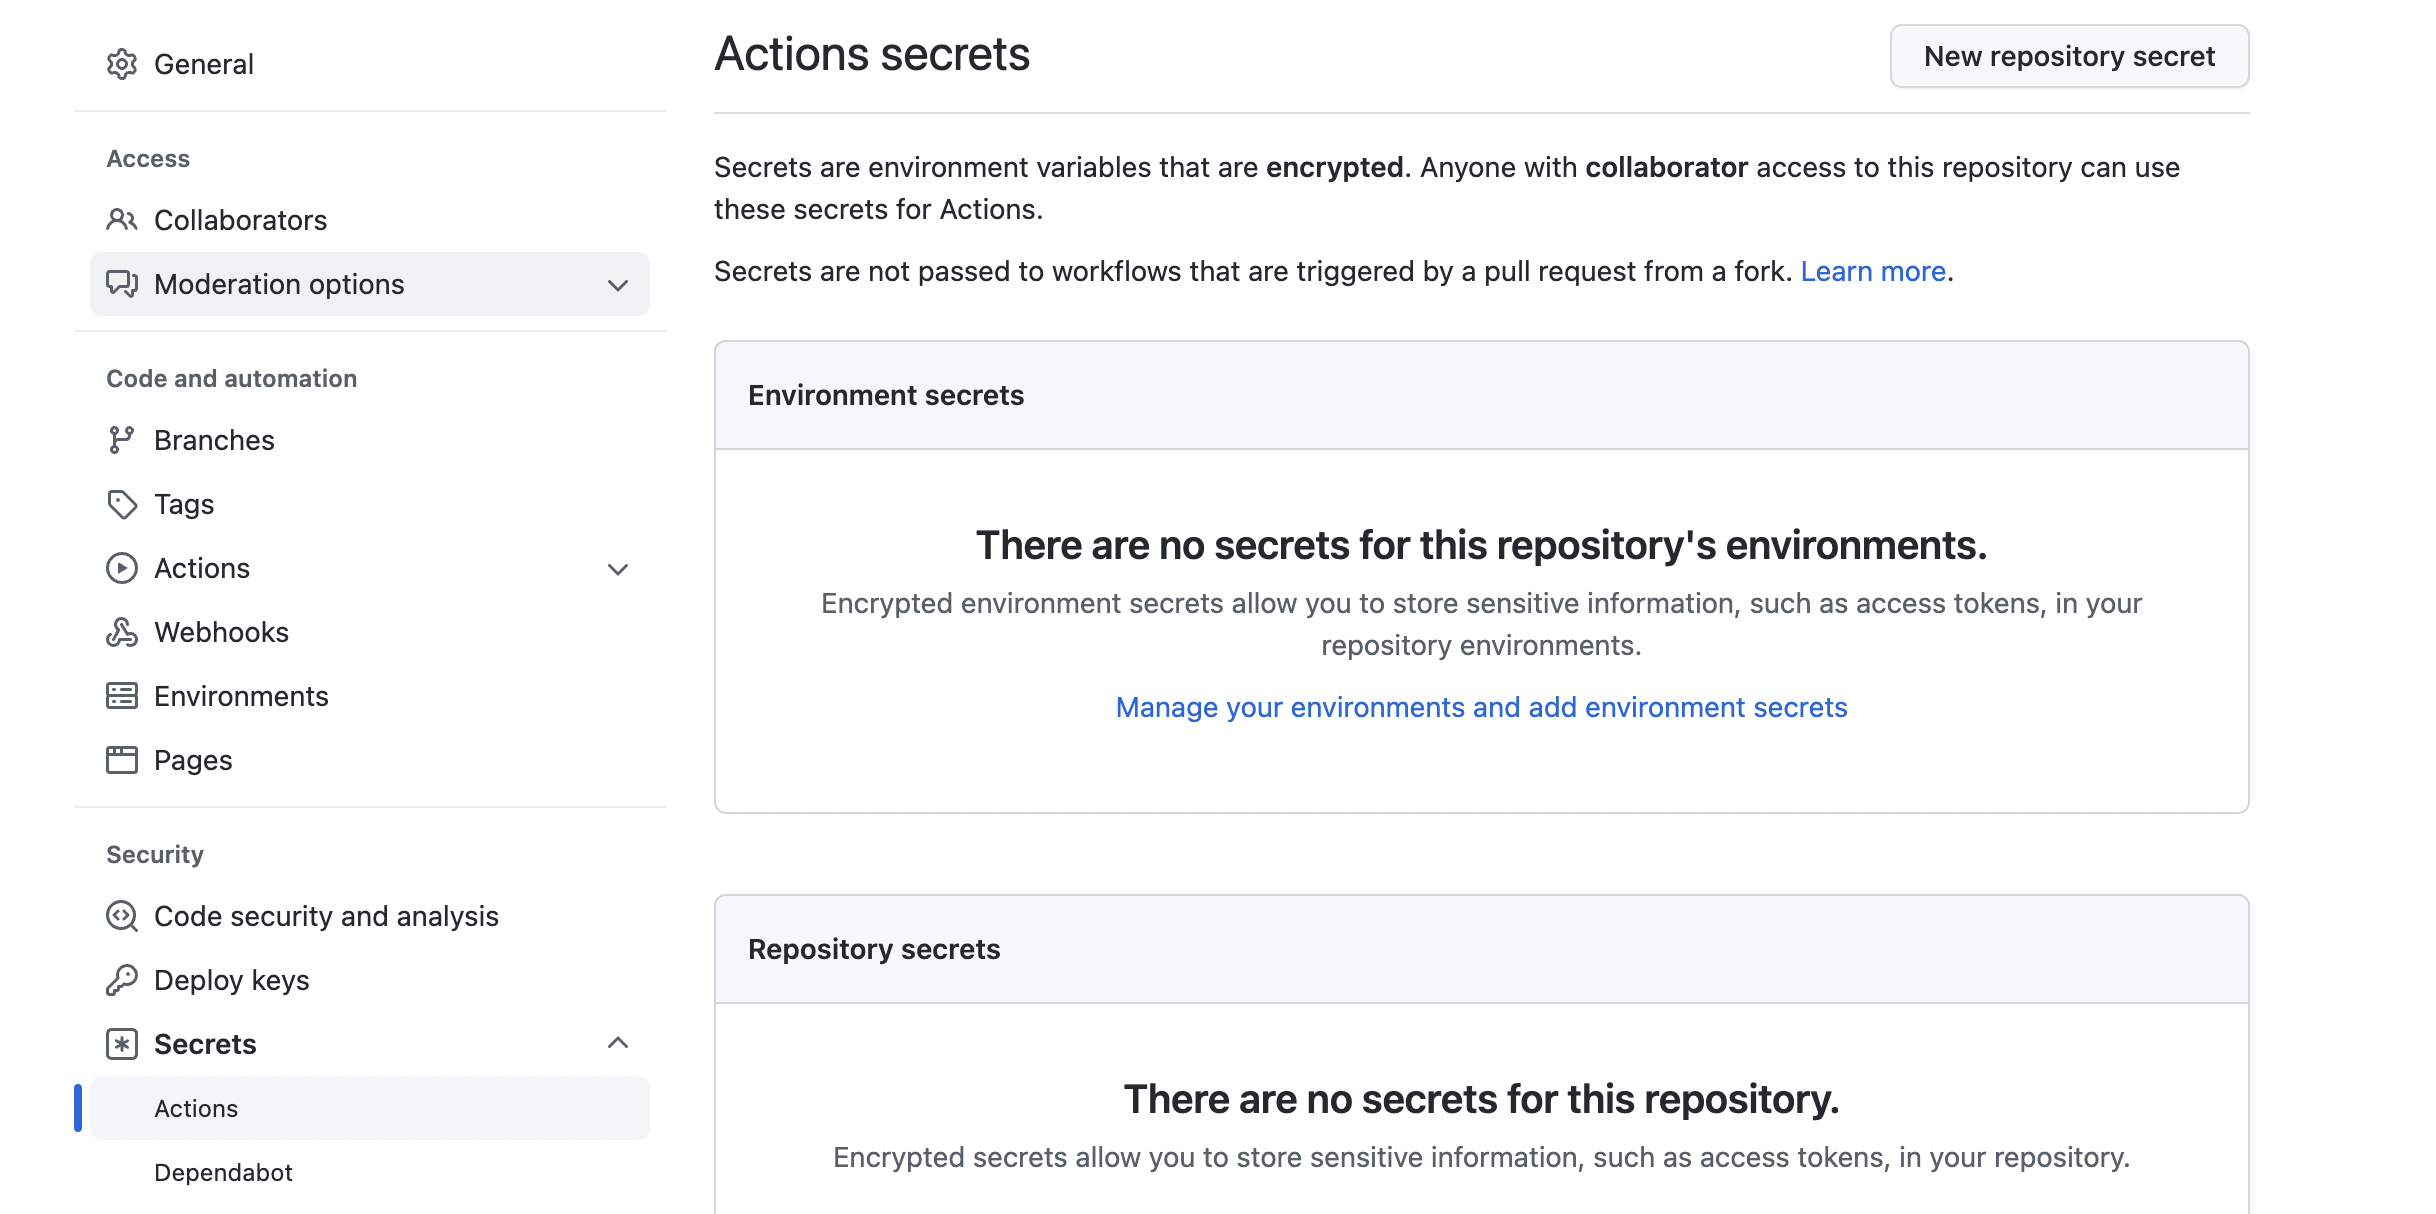
-
HOST, KEY, PORT , USERNAME 생성
- EC2 서버에 접속하여 deploy,sh 파일 새성 서버에 접속하지 않고 GitHub Acgtions 설정으로 저장소의 main branch가 변경될 때마다 서버에 최신 버전을 받아서 자동으로 빌드하고 재시작하는 스크립트
$ ssh -i ~/keys/ci-cd-test.pem ec2-user@ci-cd-test.link
[ec2-user@ip-172-31-10-145 ~]$ sudo yum update
[ec2-user@ip-172-31-10-145 ~]$ vi ~/deploy.sh- 붙여넣기
#!/bin/bash
source ~/.bash_profile

cd ~/git/ci-cd-test/
git pull origin main
cd frontend/
npm i
npm run build
cp -rf dist/* ../backend/public

cd ../backend/
npm i
pm2 stop web
pm2 start bin/www --name web --update-env
sleep 2
pm2 list
- 환경변수 실행
#!/bin/bash
source ~/.bash_profile
- 소스 다운로드 -> node install -> build -> build soucrce backend/public에 copy
cd ~/git/ci-cd-test/
git pull origin main
cd frontend/
npm i
npm run build
- node install -> stop web -> update -> 2초 sleep -> project 정상 확인
cd ../backend/
npm i
pm2 stop web
pm2 start bin/www --name web --update-env
sleep 2
pm2 list
- 파일에 실행 권한을 부여 및 실행가능한 파일임을 확인
[ec2-user@ip-172-31-10-145 ~]$ chmod +x ~/deploy.sh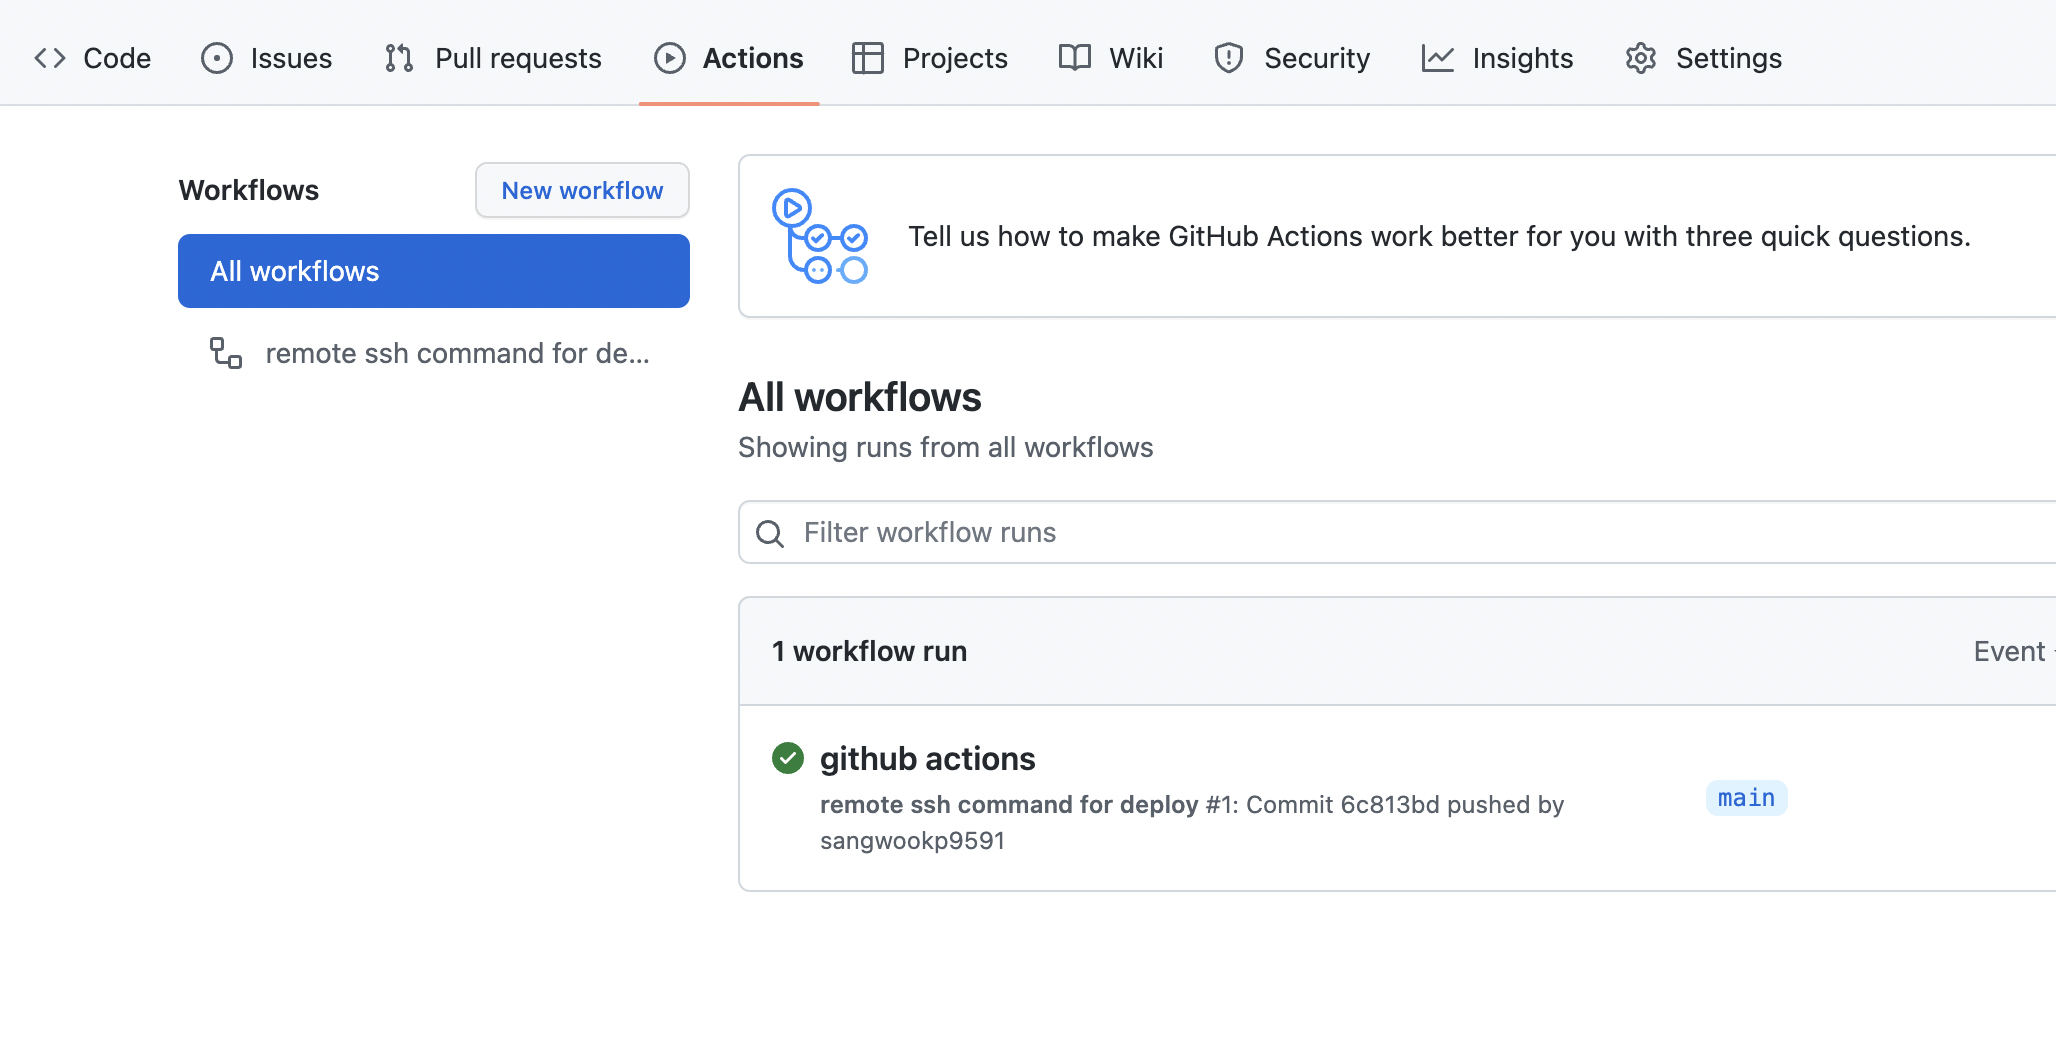
[ec2-user@ip-172-31-10-145 ~]$ ls -altr- ./github/workflows/deploy-main.yml 파일을 push하여 변경 확인
- build 중이면 노란색 동그라미가 보인다

- action tab에서 성공 여부를 확인해보자
11. CORS 설정
- CORS(cross origin resource sharing)
- 도메인을 origin이라고 표현함. 도메인이 달라질 경우 보안 때문에 생겨 난 정보를 주고 받는 규칙
- 도메인 변경시 발생하는 isssue이고 프론트엔드는 3000번 포트를 사용하고, 백엔드는 4000번 포트를 사용하기 때문에 API를 호출할 때 http://localhost:4000/api/name 주소를 사용한다.
만약 /api/hello URI와 같이, 도메인을 사용한다면 발생하지 않는다. - frontend에서 http://localhost:4000/api/name 호출해보자
그럼 다음과 같은 error가 발생할 것이다.

express.js에서 cors를 설정하는 것은 비교적 어렵지 않다. 다음과 같이 backend에 라이브러리를 추가한다.
cd ~/git/backfront/backend
npm i -S cors
그리고, backend/app.js 파일에서 var app = express(); 아래 다음 코드를 추가한다.
var app = express();

var cors = require("cors");
app.use(cors());
이렇게 하고 다시 push후 서버를 보면 error가 난다. 그 이유는 fetch에서 localhost:4000를 호출하고 있기 때문이다. 개발 환경에서는 3000,4000 port를 사용하지만 서버는 다르다 front 빌드 결과를 backend public 폴더에 복사하고 같은 도메인으로 nginx를 통해서 서비스한다. 즉 localhost:4000이 없어져야한다.
환경변수를 이용해서 주소를 할당해보자
- frontend/.env.local 파일 생성
VITE_API_SERVER=http://localhost:4000
- frontend/src/App.jsx 수정
fetch(import.meta.env.VITE_API_SERVER + '/api/hello')
 .then(response => response.json())
 .then(data => greet.innerHTML = JSON.stringify(data))
- 수정 파일 commit > push > 확인

undefined가 생기는 문제를 해결하기 위해 sever에서의 작업이 필요함
[ec2-user@ip-172-31-10-145 ~]$ cd ~/git/ci-cd-test/frontend/
[ec2-user@ip-172-31-10-145 frontend]$ vi .env- 빈 VITE_API_SERVER= 넣기
VITE_API_SERVER= - 서버 변경사항 재빌드
~/deploy.sh- 재시작 방법
[ec2-user@ip-172-31-10-145 frontend]$ pm2 list
┌────┬────────────────────┬──────────┬──────┬───────────┬──────────┬──────────┐
│ id │ name               │ mode     │ ↺    │ status    │ cpu      │ memory   │
├────┼────────────────────┼──────────┼──────┼───────────┼──────────┼──────────┤
│ 0  │ web                │ fork     │ 0    │ online    │ 0%       │ 67.1mb   │
└────┴────────────────────┴──────────┴──────┴───────────┴──────────┴──────────┘
[ec2-user@ip-172-31-10-145 frontend]$ pm2 restart web
또는
[ec2-user@ip-172-31-10-145 frontend]$ pm2 restart 0