테스트를 실행하고 나서 테스트 결과를 확인해보니 fail이 발생하였는데, 매번 재현되는 현상이 아닌 경우, 테스트가 실행되고 fail이 발생하는 시점에 찍힌 스크린샷이 필요해서 알아보게 되었습니다.
수행 절차
- 스크린샷을 찍을 웹 드라이버 세팅
- 테스트 결과가 fail인 경우, 스크린샷 저장
위 수행 절차는 테스트가 수행될 때, 공통으로 사용되는 fixture를 모아두는 파일인 conftest.py 에 작성되어야 합니다.
1. 스크린샷을 찍을 웹 드라이버 세팅
pytest.fixture로 테스트 중 사용할 웹 드라이버를 세팅합니다.
실행하는 웹 드라이버가 headless 모드여야 원하는 크기에 맞는 스크린샷을 제대로 저장할 수 있습니다.
conftest.py
from selenium import webdriver as selenium_webdriver
from selenium.webdriver.chrome.options import Options
from selenium.webdriver.chrome.service import Service
from webdriver_manager.chrome import ChromeDriverManager
import pytest


@pytest.fixture(scope='session')
def selenium_driver():
    chrome_options = Options()
    chrome_options.add_argument('--headless')
    chrome_options.add_argument('--no-sandbox')
    chrome_options.add_argument('--disable-dev-shm-usage')
    chrome_options.add_argument("--window-size=1920,1080")

    driver = selenium_webdriver.Chrome(service=Service(ChromeDriverManager().install()), options=chrome_options)
    yield driver
    driver.quit()
2. 테스트 결과가 fail인 경우, 스크린샷 저장
우선 샘플 테스트 파일을 준비합니다.
제가 작성한 샘플 테스트 파일은 총 3개의 함수(매개변수화되어 총 5개의 테스트)로 구성되어 있습니다.
(1) test_google 함수
(2) test_naver 함수 - PC/모바일
(3) test_daum 함수 - PC/모바일
tests/test_sample.py
import pytest


def test_google(selenium_driver):
    selenium_driver.get("https://www.google.com")
    assert True


@pytest.mark.parametrize('naver_url', ['https://www.naver.com', 'https://m.naver.com'])
def test_naver(selenium_driver, naver_url):
    selenium_driver.get(naver_url)
    assert False


@pytest.mark.parametrize('daum_url', ['https://www.daum.net', 'https://m.daum.net'])
def test_daum(selenium_driver, daum_url):
    selenium_driver.get(daum_url)
    assert False
위 함수 중 assert False로 fail 처리될 네이버, 다음 - PC/모바일 메인의 스크린샷이 'screenshots' 폴더에 저장될 것입니다.
이제 테스트 결과를 바탕으로 리포트를 만드는 hook 함수인 pytest_runtest_makereport 에서 테스트 결과가 fail인 경우에만 스크린샷을 저장하도록 구현합니다.
conftest.py
@pytest.hookimpl(tryfirst=True, hookwrapper=True)
def pytest_runtest_makereport(item, call):
    outcome = yield
    report = outcome.get_result()

    if report.when == "call":
        xfail = hasattr(report, "wasxfail")
        if (report.skipped and xfail) or (report.failed and not xfail):
            # 여기가 fail인 경우
            driver = item.funcargs['selenium_driver']
            save_screenshot(driver=driver, nodeid=report.nodeid)
아직 이 부분은 깊게 이해하지는 못했지만,
item.funcargs를 통해 pytest에 정의된 fixture를 사용할 수 있으며,
report.nodeid를 통해 각각의 테스트를 string 형태(테스트파일명::테스트함수명[매개변수])로 불러올 수 있습니다.
위 샘플 테스트를 수행할 시 report.nodeid를 출력한 결과는 아래와 같습니다.
tests/test_sample.py::test_google
tests/test_sample.py::test_naver[https://www.naver.com]
tests/test_sample.py::test_naver[https://m.naver.com]
tests/test_sample.py::test_daum[https://www.daum.net]
tests/test_sample.py::test_daum[https://m.daum.net]
아래는 스크린샷 저장하는 부분인 save_screenshot 함수 입니다.
save_screenshot 함수에게 전달되는 인자는 스크린샷을 찍을 웹 드라이버와 스크린샷 파일명으로 어떤 테스트가 실패했는지 구분할 수 있게 사용할 report.nodeid 입니다.
def save_screenshot(driver, nodeid):
    test_case_name = re.sub(pattern=r'::|\[', repl='_', string=re.sub(pattern=r'/', repl='__', string=re.sub(pattern=r'https?://|\]', repl='', string=nodeid)))
    image_file_name = f'{test_case_name}_{datetime.today().strftime("%Y%m%d_%H%M%S")}.png'
    driver.save_screenshot(filename='screenshot/' + image_file_name)
report.nodeid 에서 문자열을 아래 방식으로 치환하여 test_case_name 변수에 저장합니다.
- 매개변수 URL의
https://>> 제거 - 매개변수화된 문자열 뒤에 들어가는
]>> 제거 - 테스트파일명의 디렉터리 구분자
/>>__로 치환 - 테스트파일명과 테스트함수명 사이 구분자
::>>_로 치환 - 매개변수화된 문자열 앞에 들어가는
[>>_로 치환
그리고 이미지 파일명에 날짜_시간을 넣은 후, Selenium WebDriver API를 이용하여 스크린샷을 저장합니다.
실행 결과
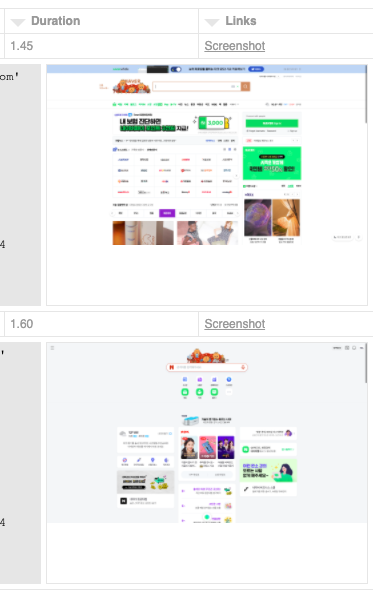
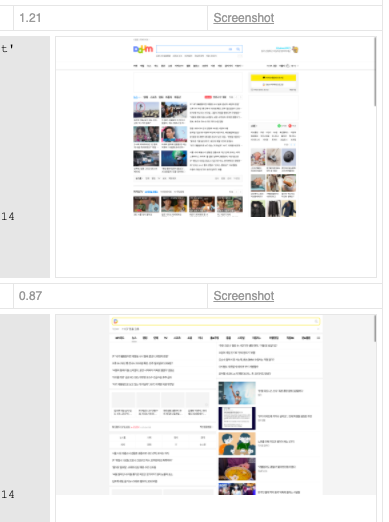
fail 처리된 4개의 테스트(네이버, 다음 PC/모바일 메인)의 스크린샷이 'screenshots' 폴더에 저장된 걸 확인할 수 있었습니다.

HTML 리포트로 출력하는 경우
pytest-html 플러그인을 사용하여 테스트 결과를 HTML 리포트로 출력하는 경우, Failed TC의 스크린샷을 어떻게 보여줘야하는지에 대해 알아봅니다.
위 글을 보니 테스트 결과가 fail인 경우, 스크린샷 저장할 때와 동일하게 hook 함수인 pytest_runtest_makereport 에서 pytest_html.extras.image('이미지파일명')을 통해 이미지를 HTML 리포트에 출력되도록 할 수 있는 것 같아 보입니다.
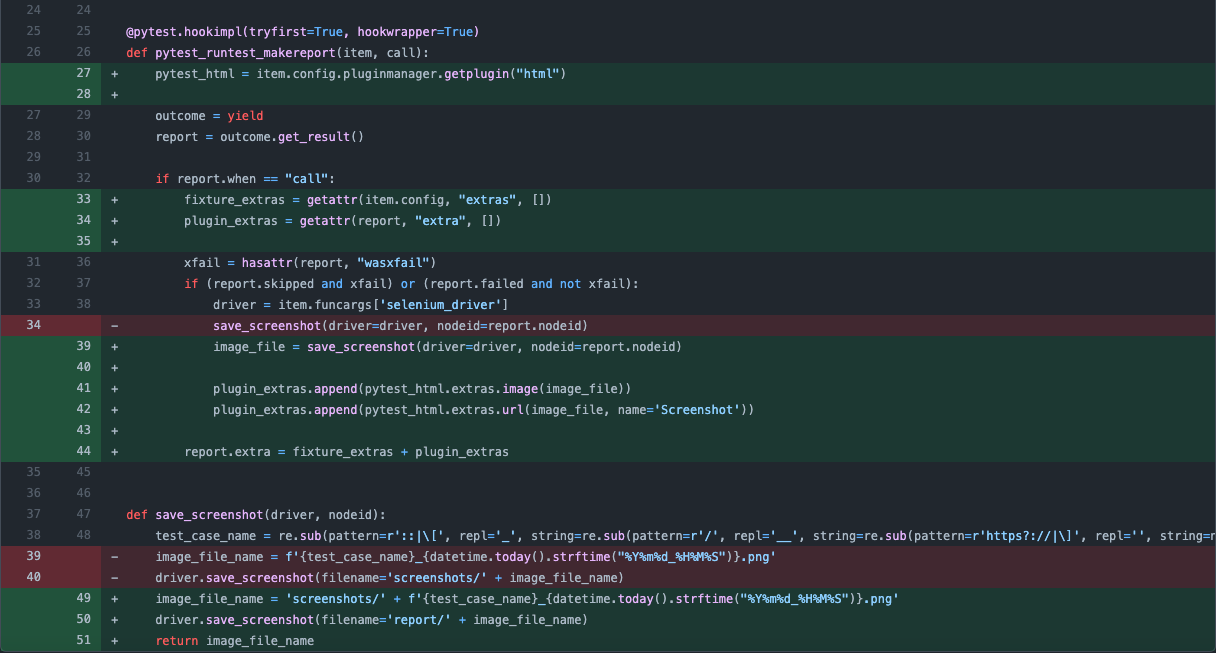
그래서 위에 구현한 pytest_runtest_makereport 함수에서 pytest-html 플러그인에 맞게 몇 줄 추가해보았습니다.

save_screenshot 함수에서는 HTML 리포트 위치에서 이미지 파일을 찾을 수 있어야하기 때문에, 기존에 프로젝트 root 하위에 있던 screenshots 디렉터리를 HTML 리포트 위치인 report 디렉터리 하위로 변경하였습니다.
그리고 'screenshots/이미지파일명'을 반환하도록 하였습니다.
pytest_runtest_makereport 함수에서는 pytest_html 플러그인을 불러온 후, 테스트 결과가 fail인 경우 저장한 스크린샷을 pytest_html.extras.image('screenshots/이미지파일명')을 통해 HTML 리포트에서 미리보기 형태로 보여주고, pytest_html.extras.url('screenshots/이미지파일명', name='Screenshot')을 통해 Links 열의 'Screenshot' 클릭 시 새 창으로 이미지 파일을 볼 수 있도록 하였습니다.
문제 해결
그런데, 테스트를 실행하였더니 한 가지 문제가 발생했습니다.

제 의도와는 다르게 data:image/png;base64,가 이미지 경로 앞에 붙어서 이미지 파일을 인식할 수 없어 엑박 표시로 노출되는 것이었습니다.
https://pytest-html.readthedocs.io/en/latest/user_guide.html#extra-content
위 글을 보니 --self-contained-html 옵션과 함께 실행 시, 이미지가 제대로 노출되지 않을 수 있다는 내용이 있었습니다.
Note: When using --self-contained-html, images added as files or links may not work as expected, see section Creating a self-contained report for more info.
External Libraries > site-packages > pytest_html 플러그인의 plugin.py 코드(github 에서는 result.py)를 확인해보니, _make_media_html_div 함수에 아래와 같은 부분이 있었습니다.
elif self.self_contained:
	src = f"data:{extra.get('mime_type')};base64,{content}"
	html_div = raw(base_extra_string.format(src))
이미지 파일명 앞에 "data:{extra.get('mime_type')};base64가 붙도록 되어있었는데요.. 그래서 div 태그 내 img 태그에 이미지 파일명만 표시되도록 src -> content 로 플러그인 코드를 수정하였습니다.
elif self.self_contained:
    # src = f"data:{extra.get('mime_type')};base64,{content}"
    html_div = raw(base_extra_string.format(content))
(아직도 pytest-html 플러그인에서 왜 그렇게 짜여있는지 잘 모르겠네요..)
screenshot = driver.get_screenshot_as_base64()
plugin_extras.append(pytest_html.extras.image(screenshot))
스크린샷의 base64 인코딩 버전으로 변환한 후 이미지 임베드를 하면 위와 같이 플러그인 코드를 수정할 필요가 없었네요.
참고 : https://stackoverflow.com/questions/70761764/pytest-html-not-displaying-image
실행 결과
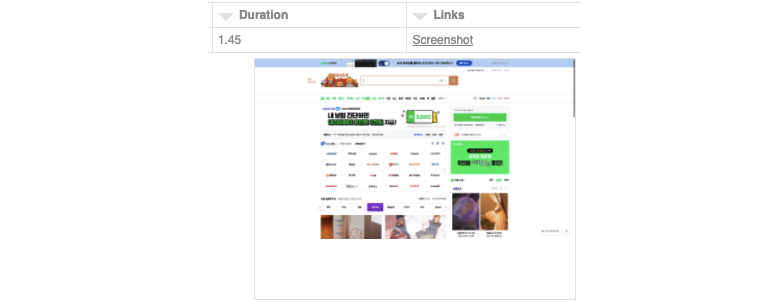
이후 재실행하였더니 HTML 리포트에 실패한 테스트케이스의 스크린샷이 정상 노출되었습니다.


TestRail로 전송하는 경우(미해결)
pytest-testrail 플러그인을 사용하여 테스트 결과를 TestRail로 전송하는 경우, 테스트 결과의 코멘트에 스크린샷을 어떻게 첨부할 수 있는지에 대해 알아봅니다.
이 경우에는 윗 내용의 테스트 결과가 fail인 경우, 스크린샷 저장할 때, 저장한 스크린샷을 TestRail로 전송하는 과정만 추가되면 됩니다.(라고 단순하게 생각했으나 아니었다는..)
conftest.py
@pytest.hookimpl(tryfirst=True, hookwrapper=True)
def pytest_runtest_makereport(item, call):
    outcome = yield
    report = outcome.get_result()

    if report.when == "call":
        xfail = hasattr(report, "wasxfail")
        if (report.skipped and xfail) or (report.failed and not xfail):
            driver = item.funcargs['selenium_driver']
            image_file = save_screenshot(driver=driver, nodeid=report.nodeid)
            # 저장한 스크린샷 TestRail로 전송하는 과정 추가
우선, TestRail API 상에서 테스트 결과에 attachment를 첨부하는 POST 요청은 아래와 같습니다.
result = client.send_post(
	'add_attachment_to_result/'+result_id,
	'screenshot.png'
)
참고 : https://www.gurock.com/testrail/docs/api/reference/attachments#addattachmenttoresult
result_id는 TestRail API 상에서 테스트 결과를 추가하는 add_result POST 요청의 응답값으로부터 가져와야 합니다.
result = client.send_post(
	'add_result/'+test_id,
    {
    	"status_id": 5,
	"comment": "코멘트 내용",
	"elapsed": "소요시간",
	"defects": "연결할 defect 번호",
	"version": "버전",
    }
)

# conftest.py > pytest_runtest_makereport 함수에서 진행
result_id = result['id']
result = client.send_post(
	'add_attachment_to_result/'+result_id,
	'screenshot.png'
)
위와 같은 형태로 이제 pytest-testrail 플러그인이 실행되면서 테스트 결과가 add_result POST 요청으로 보내지고, 그 응답값으로부터 result_id를 가져와서 테스트 결과가 fail인 경우, 로컬에 저장된 스크린샷을 TestRail로 전송해야 합니다.
여기서 첫 번째 난관에 봉착합니다.
conftest.py에서 pytest-testrail 플러그인으로부터 어떻게 result_id를 가져오느냐
pytest-testrail 플러그인의 conftest.py 코드(github)를 보니, name="pytest-testrail-instance"를 이용하면 불러올 수 있을 거 같아 보입니다.
def pytest_configure(config):
    if config.getoption('--testrail'):
        config.pluginmanager.register(
            PyTestRailPlugin(
            ~~~
            ),
            # Name of plugin instance (allow to be used by other plugins)
            name="pytest-testrail-instance"
        )
다시 생각해보니, 두 번째 난관이 있었습니다.
pytest-testrail 플러그인에 TestRail API
add_resultPOST 요청을 할 줄 알았으나,add_results_for_casesPOST 요청을 사용한다.
아래는 pytest-testrail 플러그인의 코드를 분석한 내용 입니다.
pytest-testrail 플러그인의 plugin.py 코드(github)를 보면, pytest_runtest_makereport 함수(hook함수)에서 테스트 결과를 추가할 시 self.add_result 함수를 호출합니다.
@pytest.hookimpl(tryfirst=True, hookwrapper=True)
    def pytest_runtest_makereport(self, item, call):
        """ Collect result and associated testcases (TestRail) of an execution """
        outcome = yield
        rep = outcome.get_result()
        defectids = None
        if 'callspec' in dir(item):
            test_parametrize = item.callspec.params
        else:
            test_parametrize = None
        comment = rep.longrepr
        if item.get_closest_marker(TESTRAIL_DEFECTS_PREFIX):
            defectids = item.get_closest_marker(TESTRAIL_DEFECTS_PREFIX).kwargs.get('defect_ids')
        if item.get_closest_marker(TESTRAIL_PREFIX):
            testcaseids = item.get_closest_marker(TESTRAIL_PREFIX).kwargs.get('ids')
            if rep.when == 'call' and testcaseids:
                if defectids:
                    self.add_result(
                        clean_test_ids(testcaseids),
                        get_test_outcome(outcome.get_result().outcome),
                        comment=comment,
                        duration=rep.duration,
                        defects=str(clean_test_defects(defectids)).replace('[', '').replace(']', '').replace("'", ''),
                        test_parametrize=test_parametrize
                    )
                else:  # 이 부분
                    self.add_result(
                        clean_test_ids(testcaseids),
                        get_test_outcome(outcome.get_result().outcome),
                        comment=comment,
                        duration=rep.duration,
                        test_parametrize=test_parametrize
                    )
self.add_result 함수는 아래와 같습니다.
def add_result(self, test_ids, status, comment='', defects=None, duration=0, test_parametrize=None):
        """
        Add a new result to results dict to be submitted at the end.
        :param list test_parametrize: Add test parametrize to test result
        :param defects: Add defects to test result
        :param list test_ids: list of test_ids.
        :param int status: status code of test (pass or fail).
        :param comment: None or a failure representation.
        :param duration: Time it took to run just the test.
        """
        for test_id in test_ids:
            data = {
                'case_id': test_id,
                'status_id': status,
                'comment': comment,
                'duration': duration,
                'defects': defects,
                'test_parametrize': test_parametrize
            }
            self.results.append(data)
data 딕셔너리에 TestRail에 전송할 정보를 담아 self.results 리스트에 넣어줍니다.
그리고 테스트 세션이 종료될 시, pytest_sessionfinish 함수(hook 함수)에서 self.add_results 함수를 호출하여 self.results 리스트를 바탕으로 data에 내용을 담아 TestRail로 전송합니다.
pytest_sessionfinish 함수
    def pytest_sessionfinish(self, session, exitstatus):
        """ Publish results in TestRail """
        print('[{}] Start publishing'.format(TESTRAIL_PREFIX))
        if self.results:
            tests_list = [str(result['case_id']) for result in self.results]
            print('[{}] Testcases to publish: {}'.format(TESTRAIL_PREFIX, ', '.join(tests_list)))

            if self.testrun_id:
                self.add_results(self.testrun_id)
            elif self.testplan_id:
                testruns = self.get_available_testruns(self.testplan_id)
                print('[{}] Testruns to update: {}'.format(TESTRAIL_PREFIX, ', '.join([str(elt) for elt in testruns])))
                for testrun_id in testruns:
                    self.add_results(testrun_id)
            else:
                print('[{}] No data published'.format(TESTRAIL_PREFIX))

            if self.close_on_complete and self.testrun_id:
                self.close_test_run(self.testrun_id)
            elif self.close_on_complete and self.testplan_id:
                self.close_test_plan(self.testplan_id)
        print('[{}] End publishing'.format(TESTRAIL_PREFIX))
self.add_results 함수
def add_results(self, testrun_id):
        """
        Add results one by one to improve errors handling.
        :param testrun_id: Id of the testrun to feed
        """
        # 앞 부분 생략
        response = self.client.send_post(
            ADD_RESULTS_URL.format(testrun_id),
            data,
            cert_check=self.cert_check
        )
        error = self.client.get_error(response)
        if error:
            print('[{}] Info: Testcases not published for following reason: "{}"'.format(TESTRAIL_PREFIX, error))
제가 생각한 건 테스트 결과 하나하나에 대해 add_result POST 요청을 할 줄 알았으나, 리스트에 테스트 결과 정보를 담아두고, add_results_for_cases POST 요청을 1회 하네요.. 고로 그 응답값으로부터 실패한 테스트의 result_id를 모아서 스크린샷을 전송하는 작업을 pytest-testrail 플러그인 내부에서 해줘야할 것으로 보여집니다. 생각했던 것보다 복잡해져서.. 나중에 구현해볼 생각입니다;
(해당 기능 관련하여 enhancement로 생성된 이슈 티켓도 있으나 아직까지 직접 만들어서 pr 요청한 분은 없는 것으로 보여집니다..
https://github.com/allankp/pytest-testrail/issues/137)

