이 글은 Java와 IntelliJ 설정이 끝난 상태를 전제로 작성되었습니다.
목표
IntelliJ로 Spring boot 프로젝트를 생성하고 DB연동, Swagger 등을 사용하는 API 서버 구축을 목표로 합니다.
개발환경
- OS : Window 10
- Java Version : 11.0.13
- Intellij Version : IntelliJ IDEA 2021.3.2 (Ultimate Edition)
Project 생성
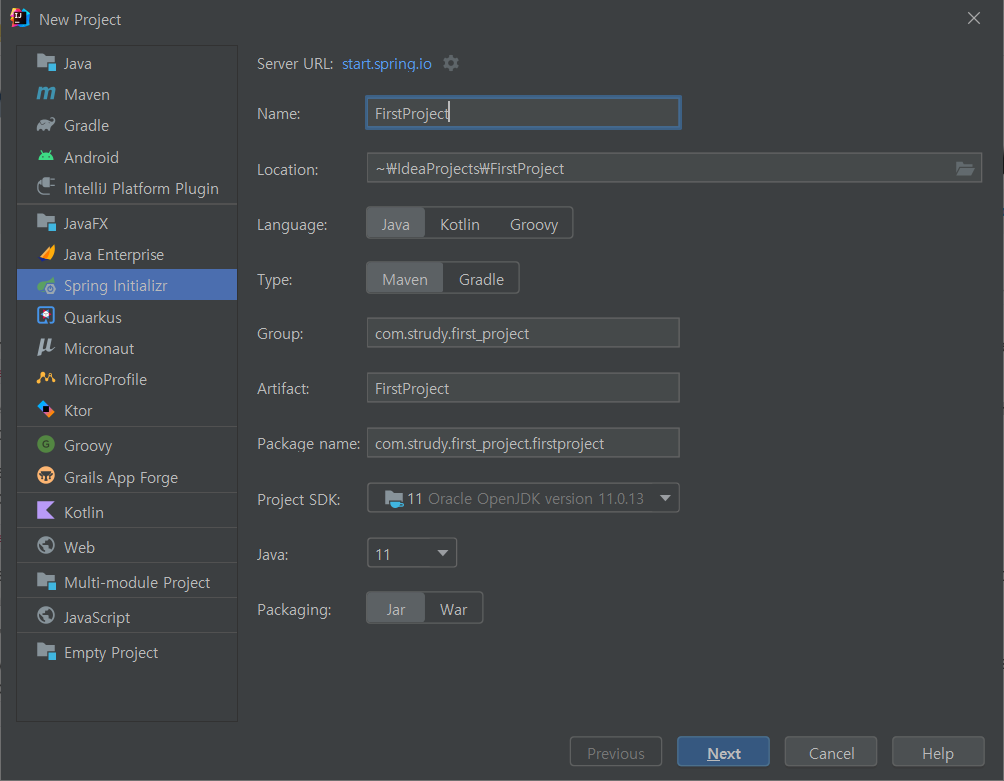
1. New Project 선택
2. Spring Initializr 선택 후 아래 내용 입력 후 Next
-
Name : Project 명
-
Location : 프로젝트 저장 위치.
-
Language : 개발 언어.
-
Type : 프로젝트 관리도구를 선택.
-
Group : 전체 프로젝트에서 고유하게 식별해주는 값.
uniquely identifies your project across all projects. A group ID should follow Java's package name rules. This means it starts with a reversed domain name you control.
For example,
org.apache.maven, org.apache.commonsMaven does not enforce this rule. There are many legacy projects that do not follow this convention and instead use single word group IDs. However, it will be difficult to get a new single word group ID approved for inclusion in the Maven Central repository
You can create as many subgroups as you want. A good way to determine the granularity of the groupId is to use the project structure. That is, if the current project is a multiple module project, it should append a new identifier to the parent's groupId.
For example,
org.apache.maven, org.apache.maven.plugins, org.apache.maven.reporting -
Artifact : Version 정보를 제외한 jar 파일 명.
ArtifactId is the name of the jar without version. If you created it, then you can choose whatever name you want with lowercase letters and no strange symbols. If it's a third party jar, you have to take the name of the jar as it's distributed.
eg. maven, commons-math출처 : https://maven.apache.org/guides/mini/guide-naming-conventions.html
-
Project SDK : 소프트웨어 개발 도구(Software Development Kit)로 여기에서는 기존에 설치한 Java의 jdk를 뜻합니다.
-
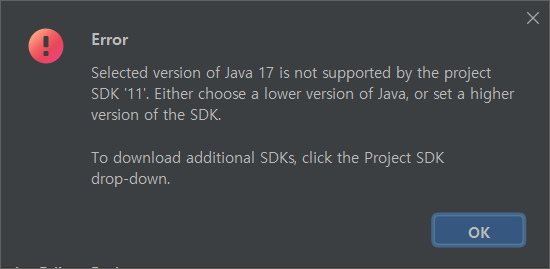
Java : 프로젝트에서 사용할 Java 버전을 뜻합니다. 여기서 Project SDK의 버전 보다 높게 선택을 하면 아래 에러가 발생됩니다.
3. Dependencies 설정
- Spring 기능들을 추가/삭제 할 수 있는 기능으로 필요한 항목들을 선택합니다.
- 이 중 기본적인 몇가지만 선택 후 추후 추가하도록 하겠습니다.
Developer Tools
Spring Boot DevTools
Lombok
Spring Configuration ProcessorWeb
Spring Web
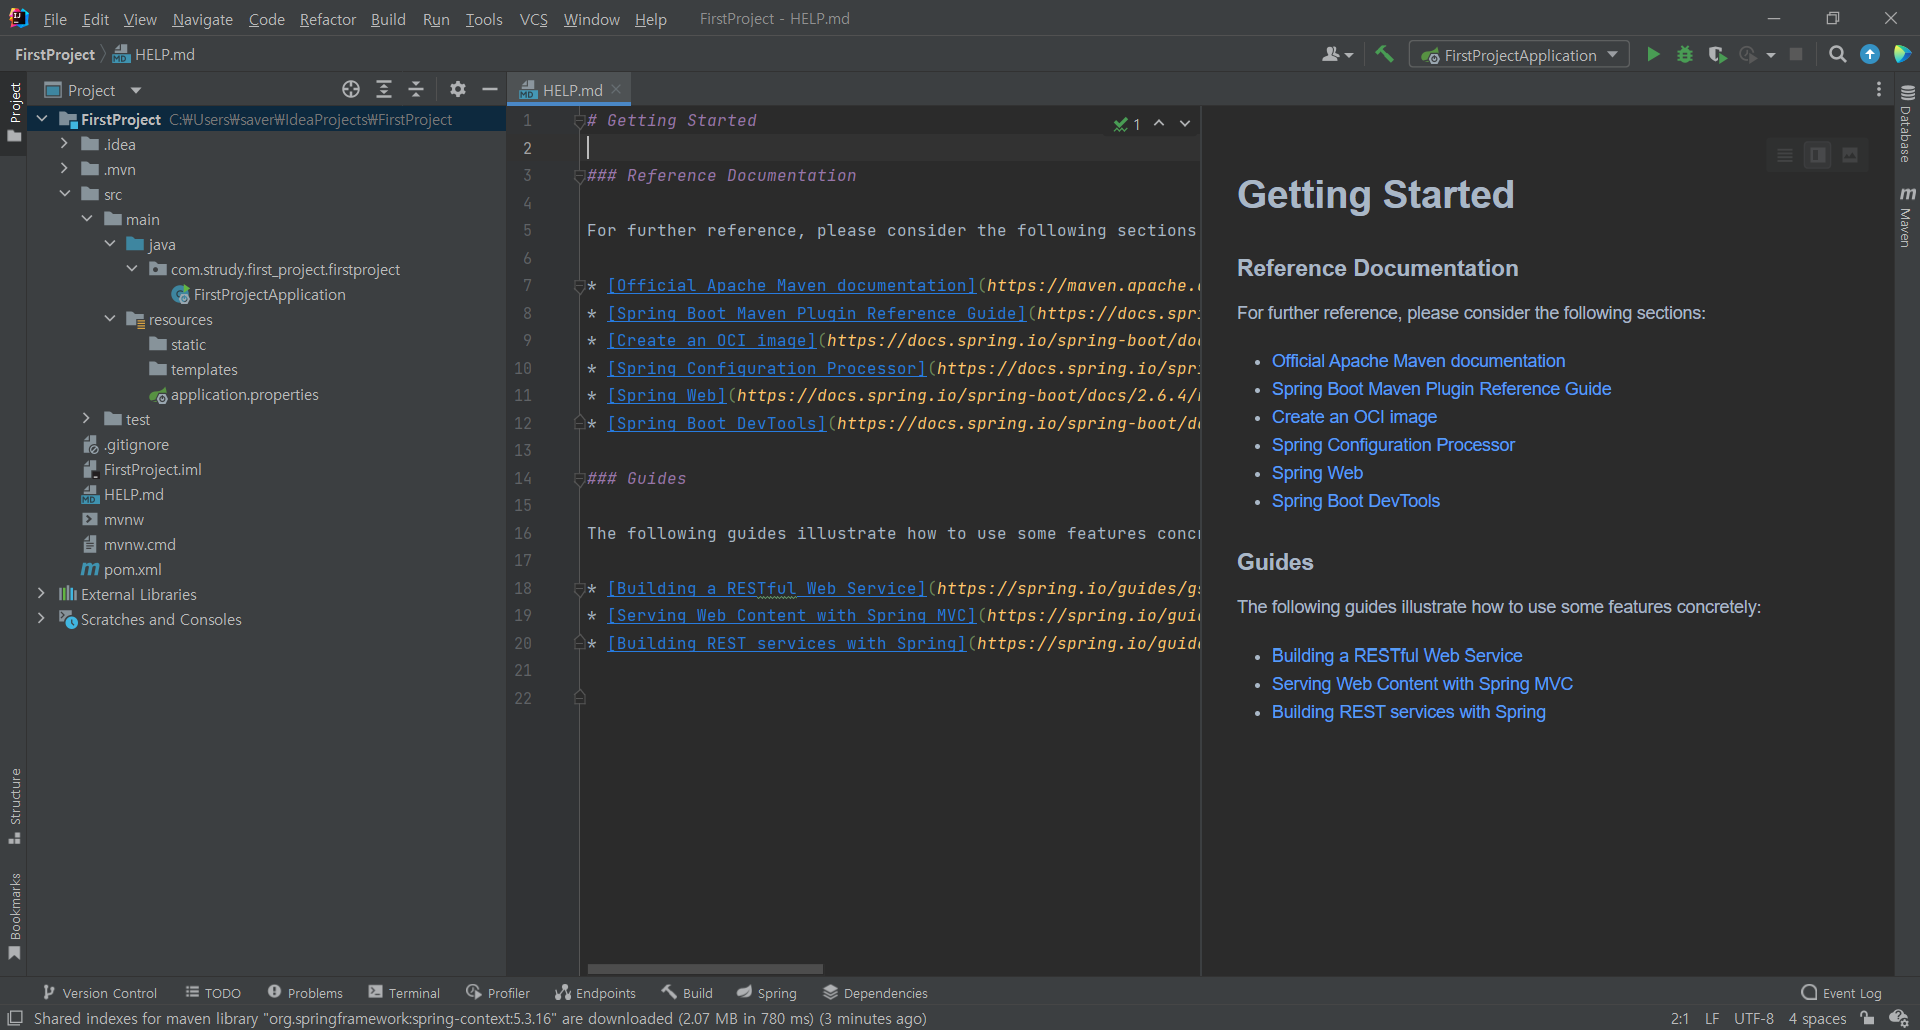
4. 프로젝트 초기화면
- Depenencies를 설정하고 진행하면 관련 소스를 다운로드 하고 다음과 같은 구조의 프로젝트가 생성됩니다.
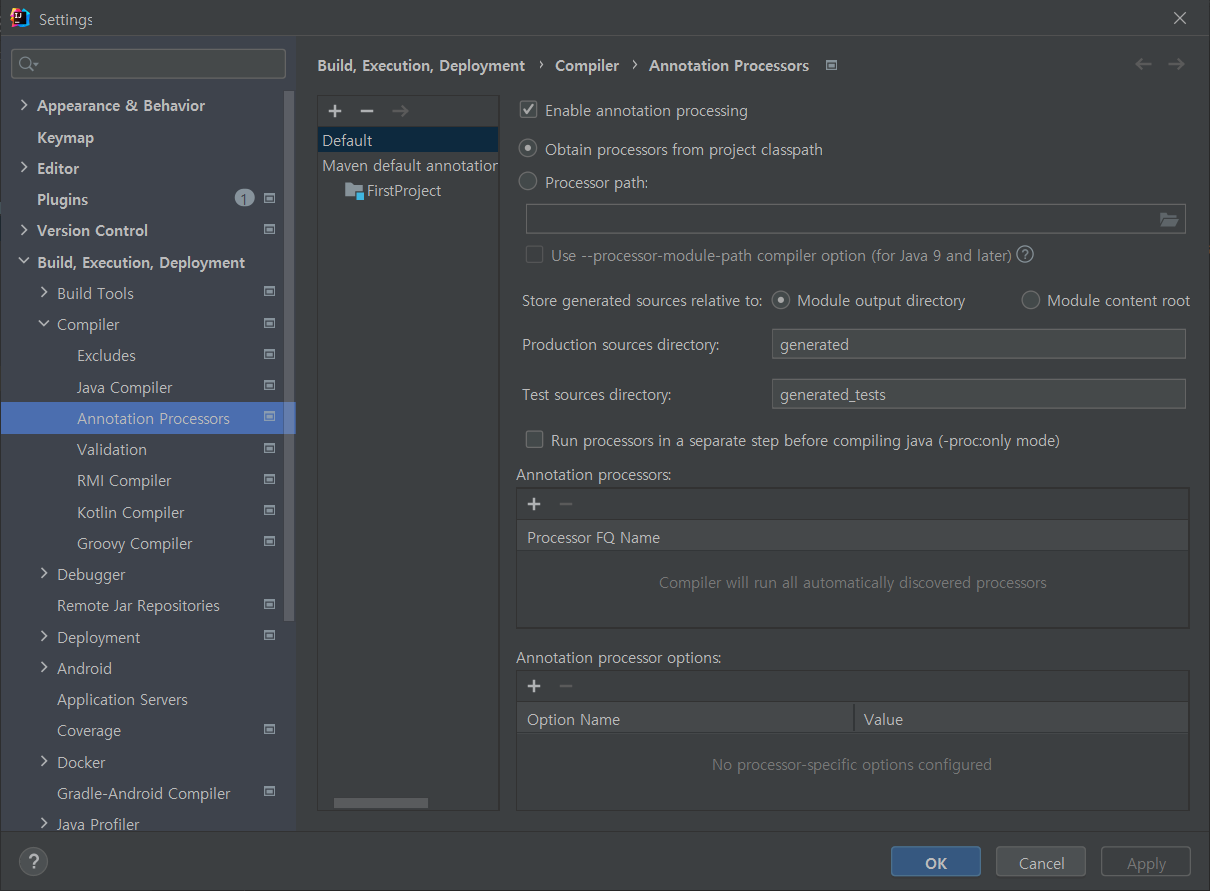
5. Lombok 설정
- 위에서 추가한 Lombok을 사용하려면 IntelliJ에서 추가 설정이 필요합니다.
- Settings -> Build, Execution, Deployment -> Compiler -> Annotation Processors -> Enable annotation processing 체크
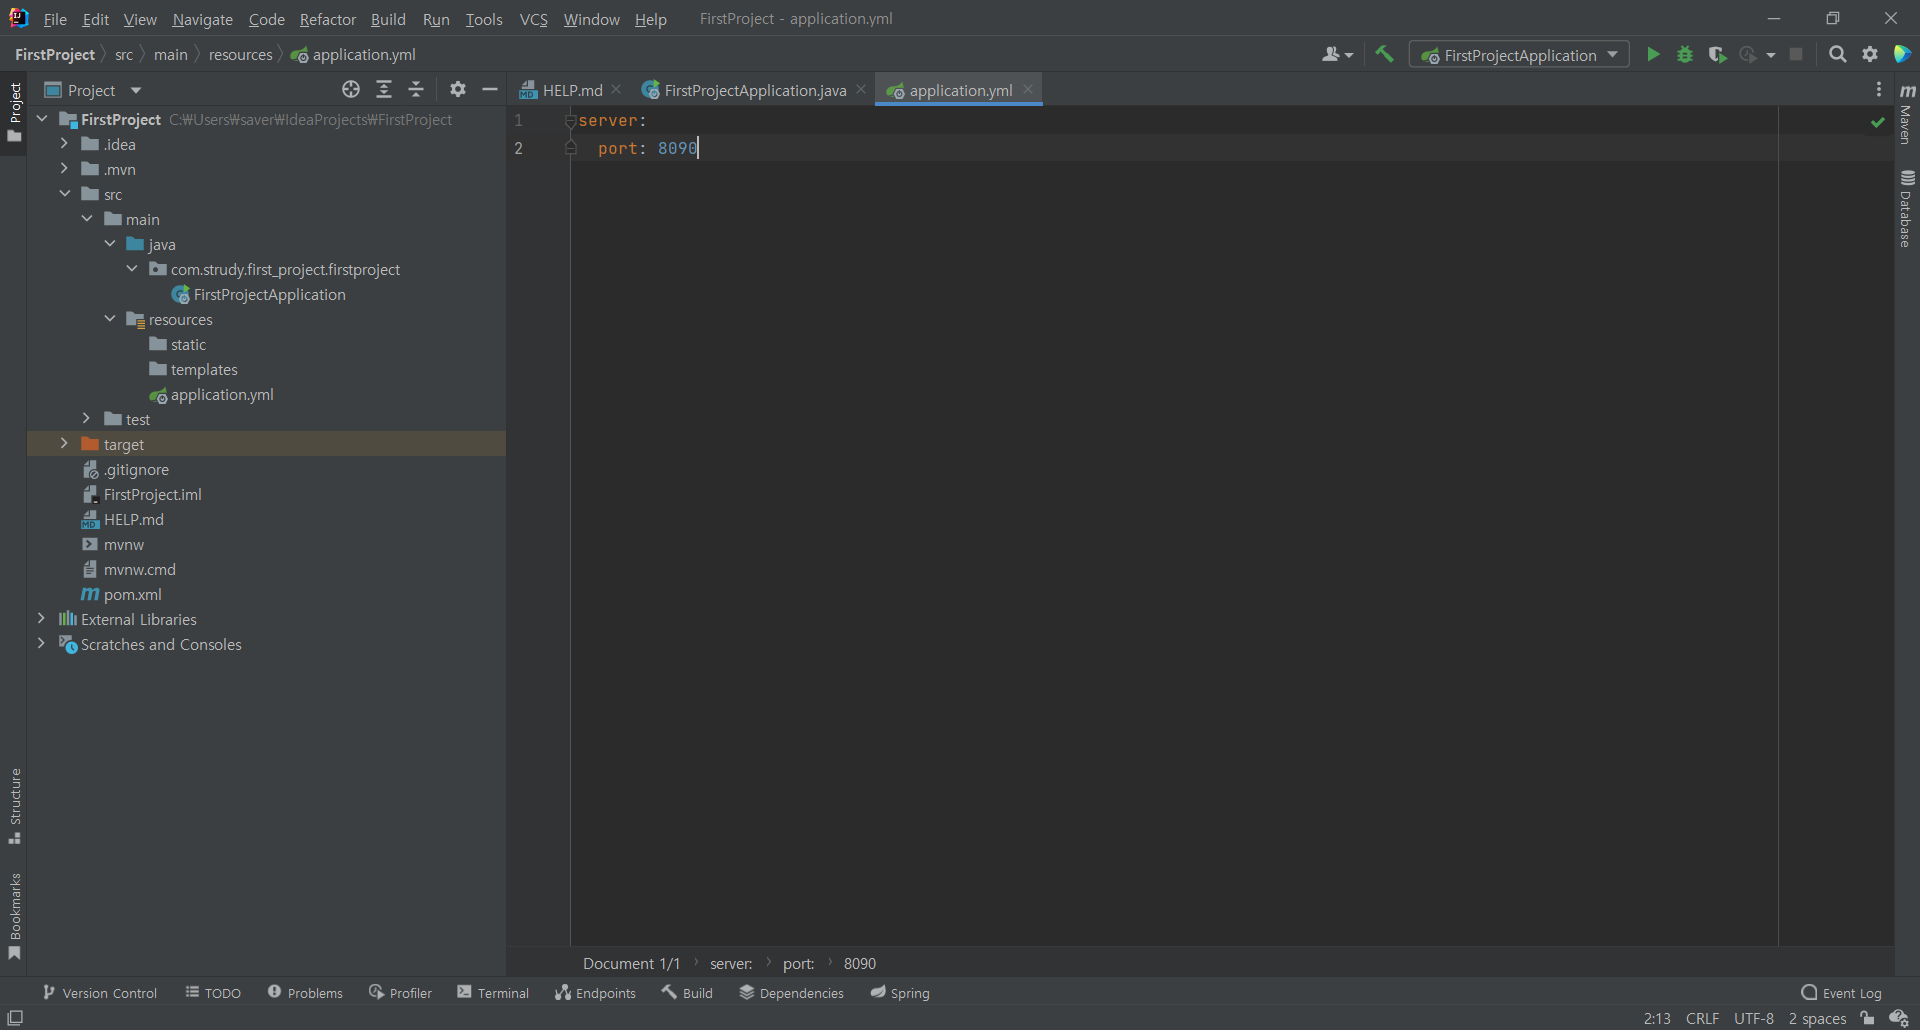
6. server port 변경
- application.properties -> application.yml로 변경(단축키 Shift + F6)
- server port를 변경하기 위해 application.yml에 포트를 추가합니다.(8090 포트를 사용중이면 다른 port를 사용하셔도 무방합니다)
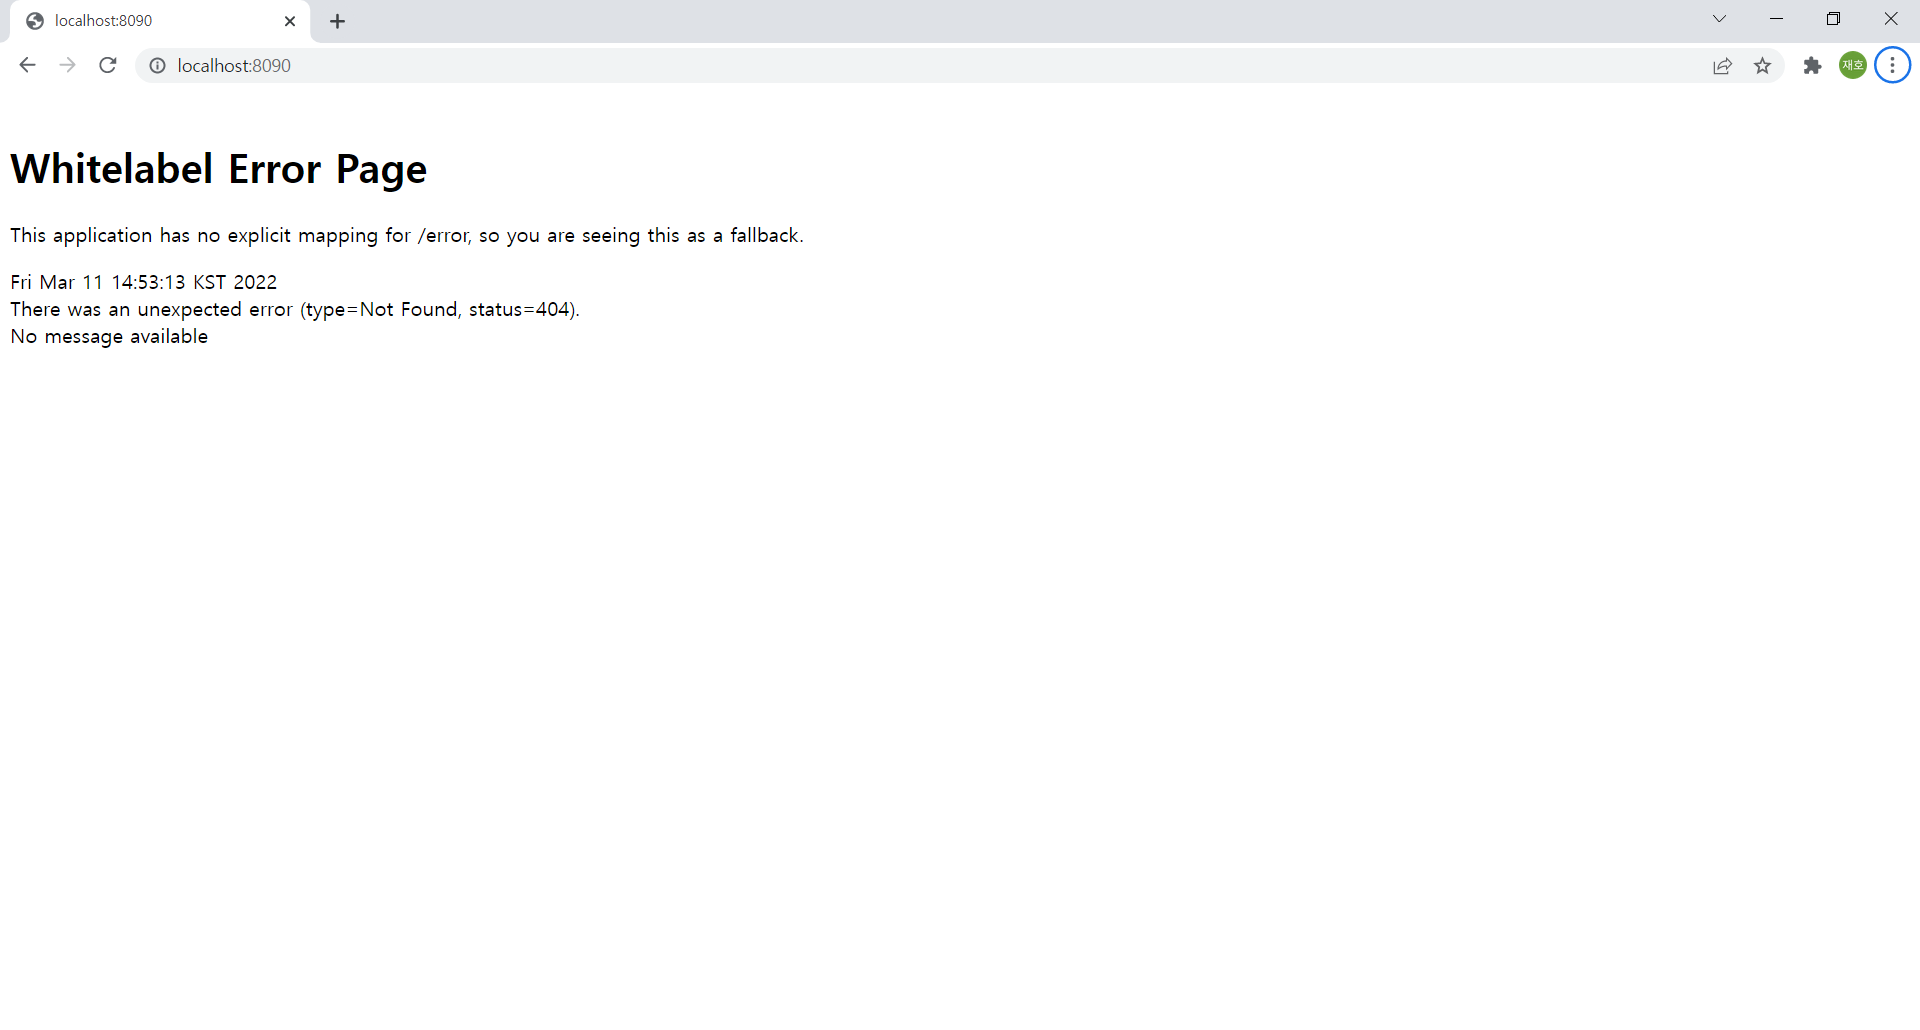
7. 프로그램 실행
- FirstProjectApplication 실행
- 정상적으로 프로그램이 실행되었다면 아래와 같은 화면이 나오게 됩니다.
기본적인 프로젝트 세팅이 끝났기 때문에, 다음 글에서는 프로젝트 구조 생성 및 Controller를 생성하여 get, post 호출을 진행해 보겠습니다.
전체 소스는 Gitlab 에서 확인할 수 있습니다.
