장고로 쇼핑몰 만들기 (상품 리스트, 상품 등록)
models
class Product(models.Model):
    name = models.CharField(max_length=256, verbose_name='상품명')
    price = models.IntegerField(verbose_name='상품가격')
    description = models.TextField(verbose_name='상품설명')
    stock = models.IntegerField(verbose_name='재고')
    register_date = models.DateTimeField(auto_now_add=True, verbose_name='등록날짜')

    def __str__(self):
        return self.name

    class Meta:
        db_table = 'products_product'
        verbose_name = '상품'
verbose_name_plural = '상품'- 모델은 저번에 생성한 것 그대로다.
views
from django.shortcuts import render
from django.views.generic import ListView
from django.views.generic.edit import FormView
from .models import Product
from .forms import RegisterForm
# Create your views here.

class ProductList(ListView):
    model = Product
    template_name = 'product.html'
    context_object_name = 'product_list'

class ProductCreate(FormView):
    template_name = 'register_product.html'
    form_class = RegisterForm
    success_url = '/product/'

class ProductDetail(DetailView):
    template_name = 'product_detail.html'
    queryset = Product.objects.all()   # 모든 제품에서 하나씩 꺼내서 쓸 것이기에 queryset을 쓴다.
    context_object_name = 'product'
- 뷰도 ListView랑 FormView를 상속받아와서 딱히 할 게 없다.
context_object_name은 템플릿에 쓸 값의 이름을 설정한다.
template

- summernote를 활용해서 텍스트 필드에 다양한 요소를 넣을 수 있게 됐다.
- summernote는 jquery기반으로 만들어진다.
<link
  href="https://cdnjs.cloudflare.com/ajax/libs/summernote/0.8.12/summernote-bs4.css"
  rel="stylesheet"
/>
<script src="https://cdnjs.cloudflare.com/ajax/libs/summernote/0.8.12/summernote-bs4.js"></script>
<script>
  $(document).ready(function () {
    $("#id_description").summernote({
      height: 300,
    });
  });
</script>- <summernote 코드>
- id값에 textarea id를 입력하면 된다.
urls
from fcuser.views import index, RegisterView, LoginView
from product.views import ProductList,ProductCreate, ProductDetail

urlpatterns = [
    path('admin/', admin.site.urls),
    path('', index),
    path('register/', RegisterView.as_view()),   # .as_view()를 꼭 붙일 것
    path('login/', LoginView.as_view()),
    path('product/', ProductList.as_view()),
    path('product/<int:pk>/', ProductDetail.as_view()),
    path('product/create/', ProductCreate.as_view()),
]
path('product/<int:pk>/', ProductDetail.as_view())URL에 product/숫자가 붙으면 해당페이지로 간다.- 숫자형이 pk변수에 할당돼서 ProductCreate에 전달된다.
template
{% extends "base.html" %} {% load humanize %} {% block contents %}
<div class="row mt-5">
<div class="col-12">
<div class="card" style="width: 100%">
<div class="card-body">
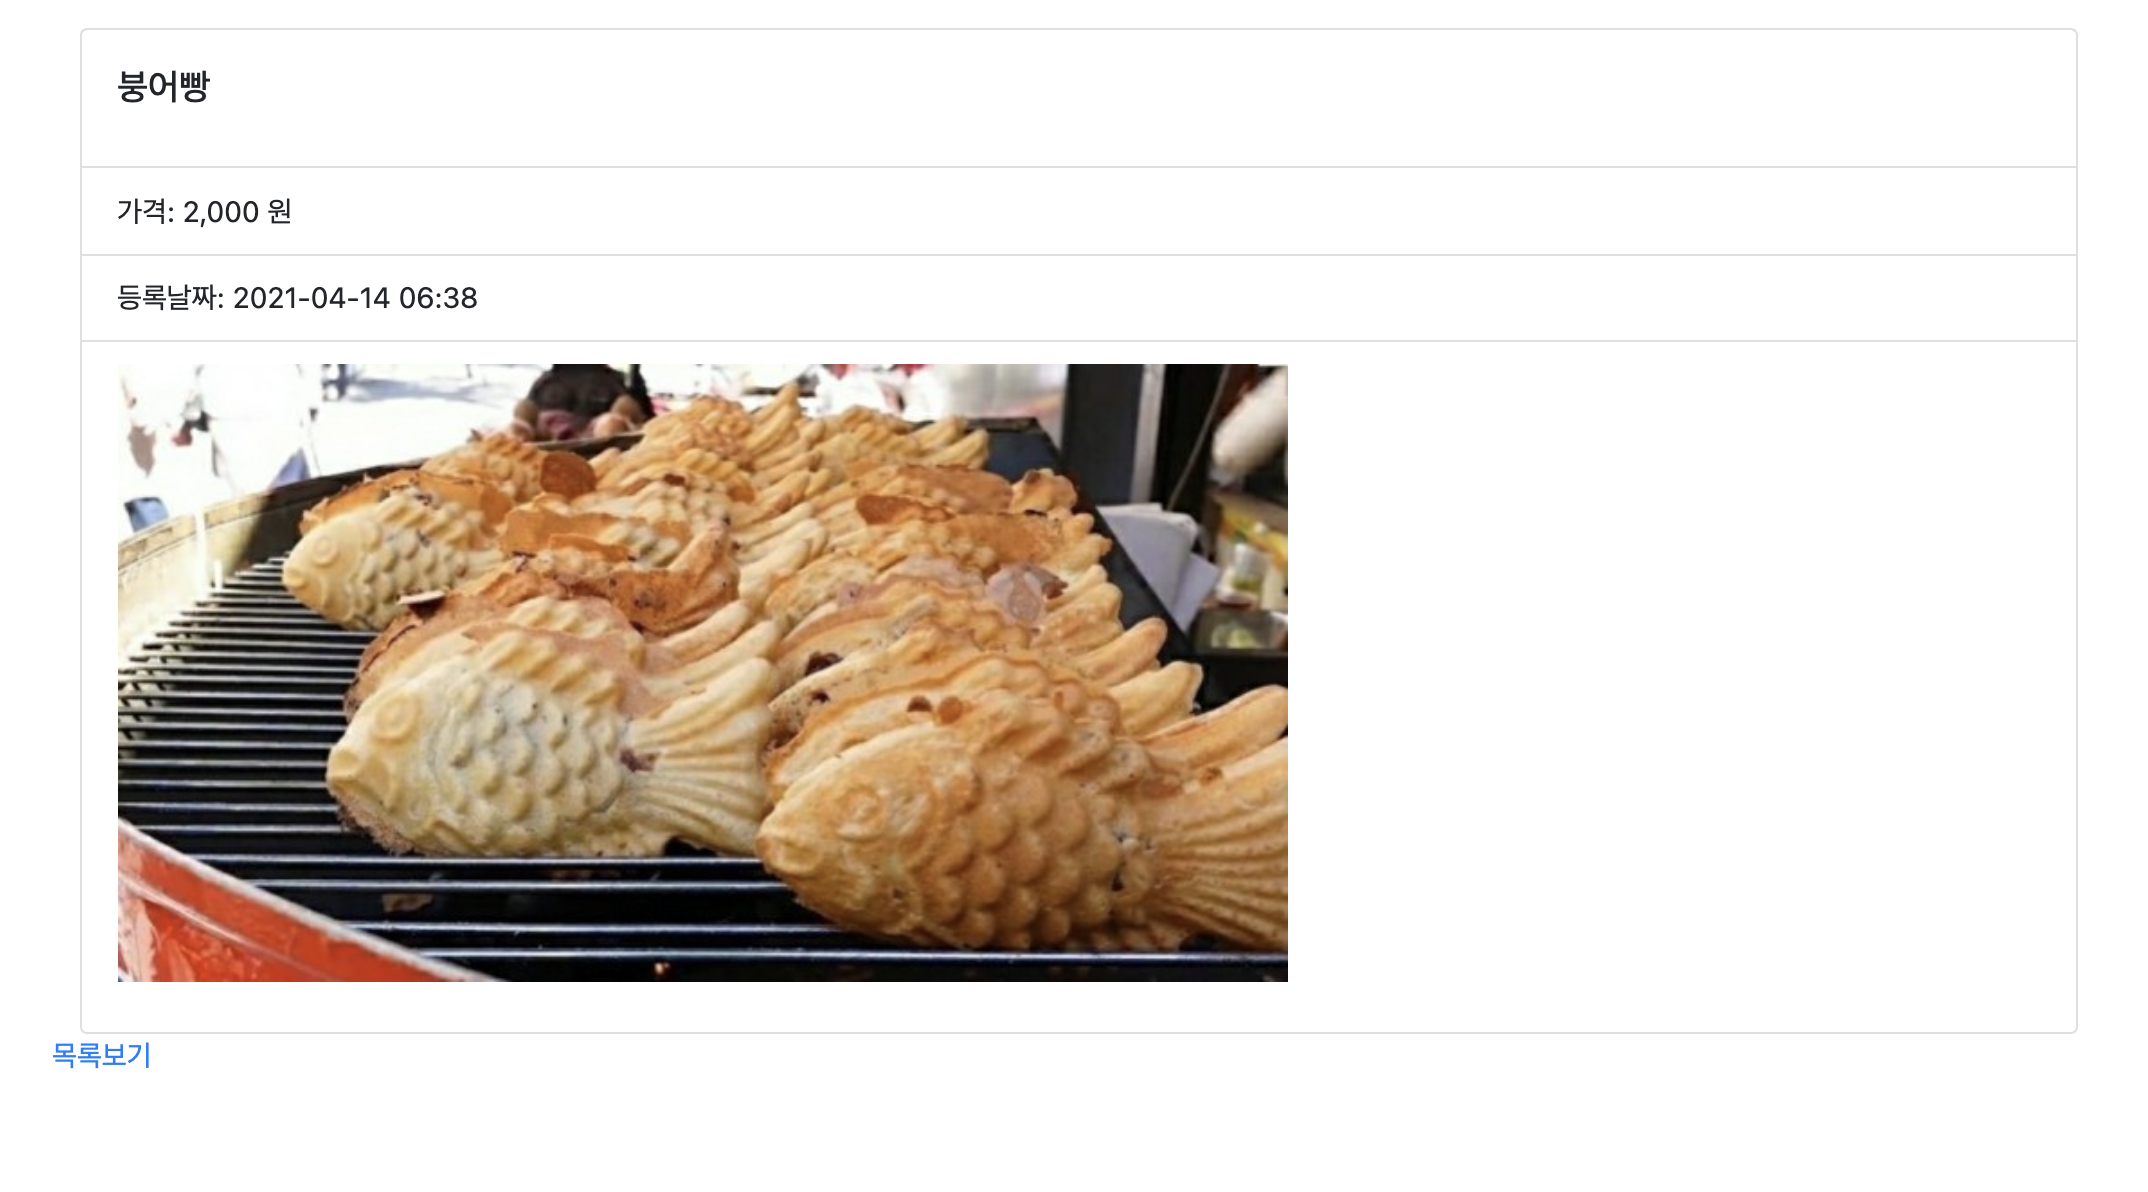
<h5 class="card-title">{{ product.name }}</h5>
</div>
<ul class="list-group list-group-flush">
<li class="list-group-item">가격: {{ product.price|intcomma }} 원</li>
<li class="list-group-item">
등록날짜: {{product.register_date|date:'Y-m-d H:i' }}
</li>
<li class="list-group-item">{{ product.description|safe }}</li>
</ul>
</div>
</div>
<div class="row">
<div class="col-12">
<a href="/product/">목록보기</a>
</div>
</div>
</div>
{% endblock %}
<li class="list-group-item">{{ product.description|safe }}</li>|safe 필터가 description의 이미지태그의 텍스트를 이미지로 변환시켜준다.- 여기서 product는 아까 view에서
context_object_name = 'product'설정한 값이다.
배움의 기록