
주의
해당 글은 이전에 작성한 복잡한 코드를 정리하는 글이기 때문에
코드의 생략이 많습니다.
그렇기 때문에 전체적인 흐름만 봐주시면 감사하겠습니다.
본론
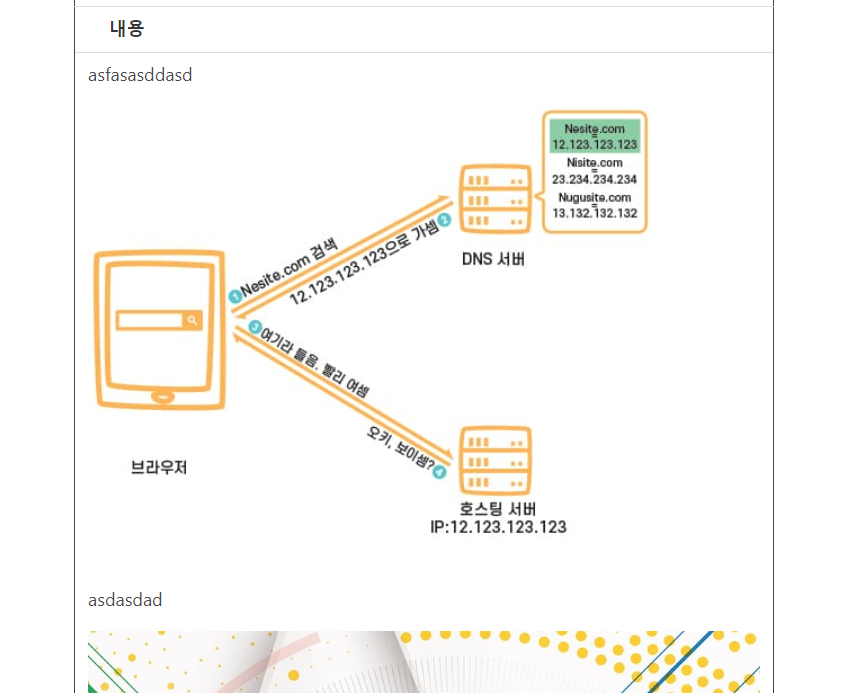
글자로만 되어있는 글을 DB에 저장하는 것은 문제가 되지 않습니다.
그런데 다음과 같이 글의 내용에 이미지가 포함된다면 문제가 발생합니다.
DB에 이 내용을 전부 저장할 수도 있지만 권장되지 않는 방법입니다.
해당 글에서는 이미지와 글을 분리해서 저장하고 합쳐서 보여주는 기능을 만들도록 하겠습니다.
해당 글은 해당 기술을 사용하고 있습니다.
Java JPA Spring Boot Jsoup
텍스트 에디터: Summernote
MySQL
Javascript, ajax
summernote를 이용해서 글을 쓰는 기능은 단순한 기능이기 때문에 생략하고
이미지를 저장하는 과정만 집중해서 살펴보겠습니다.
기능 분할하기
지금 만들고자 하는 기능은 "글과 이미지를 함께 저장하기"이지만
해당 기능은 다음과 같은 세부 기능으로 나눌 수 있습니다.
- 글 쓰기 시작
- 텍스트 쓰기
- 이미지 (임시)업로드하기
3-1. 이미지를임시 저장폴더에 저장하기
3-2. 임시 저장한 파일을<img>태그를 통해 보여주기- 텍스트 쓰기
- 글 저장하기
5-1.임시 저장폴더에 저장된 이미지를실제 저장폴더로 이동하기
5-2. 글을 DB에 저장
왜 임시 저장을 할까?
만약 사용자가 글과 이미지를 입력하는 도중에 글을 저장하지 않고 화면을 나간다면
쓸모 없는 이미지 파일이 임시 저장 폴더에 이미지들이 남게될 것입니다.
해당 이미지 파일들을 사용자가 없는 시간에 스프링 스케줄러를 통해 지워준다면
쓸모 없는 이미지가 용량을 차지하지 않을 것입니다.
(해당 글에서는 스케줄러를 다루지 않습니다.)
임시 저장 폴더와 실제 저장 폴더는 다음 설정과 같이 나눠놨습니다.
contentImgLocation=C:/temp/content # 실제 저장 장소
temporaryLocation=C:/temp/temporary # 이미지 임시 저장 장소
resourceHandlerUrl=/images/ # 이미지 파일 접근 uri
이미지 (임시)업로드하기
프론트 엔드
<script>
$(document).ready(function() {
	$('#summernote').summernote({
		height: 500,
		  focus: true,
		  lang: "ko-KR",
		  placeholder: '내용',
          disableResizeEditor: true,
          toolbar: [
            ['fontname', ['fontname']],
            ['fontsize', ['fontsize']],
            ['style', ['bold', 'italic', 'underline','strikethrough', 'clear']],
            ['color', ['forecolor','color']],
            ['table', ['table']],
            ['para', ['ul', 'ol', 'paragraph']],
            ['height', ['height']],
            ['insert',['picture','link','video']],
            ['view', ['fullscreen', 'help']]
          ],
        fontNames: ['Arial', 'Arial Black', 'Comic Sans MS', 'Courier New','맑은 고딕','궁서','굴림체','굴림','돋움체','바탕체'],
        fontSizes: ['8','9','10','11','12','14','16','18','20','22','24','28','30','36','50','72'],
        callbacks: {
            // 이미지 업로드시에 호출됩니다.
            onImageUpload: function(files, editor, welEditable) {
              for (var i = files.length - 1; i >= 0; i--) {
                sendFile(files[i], this);
              }
            },
          },
        })
      })

	  // 이미지를 임시저장합니다.
      function sendFile(file, el) {
        var form_data = new FormData();
        form_data.append('img', file);
        $.ajax({
          data: form_data,
          type: "POST",
          url: '/api/image',
          cache: false,
          contentType: false,
          enctype: 'multipart/form-data',
          processData: false,
          success: function(tempImg) {
              $('#summernote').summernote('insertImage', tempImg.savedPath, tempImg.originalName);
            },
        })
      }
</script>
Summernote에서는 이미지를 업로드할 때 호출되는 onImageUpload메소드를 제공하고 있습니다.
이것을 이용해서 사용자가 이미지를 업로드할 때 이미지를 임시저장할 수 있습니다.
그리고 임시저장된 이미지를 글 내용에 삽입해줍니다.
백엔드
앞서 본 Javascript 코드를 통해 /api/image로 업로드해야할 이미지가 들어왔습니다.
해당 이미지를 임시저장하는 기능은 다음과 같습니다.
	/**
	 * 글(Content) 등록 이전에 이미지를 추가했을 시 서버에 이미지 파일을 임시저장한다.
	 * 해당 컨트롤러는 임시저장을 위한 컨트롤러이다.
	 */
	@ResponseBody
    @PostMapping("/api/image")
    public ResponseEntity<DisplayedImageDTO> saveTempImg(MultipartFile img) {
        if(img == null || img.isEmpty()) {
            return new ResponseEntity<>(null, HttpStatus.BAD_REQUEST);
        }
        DisplayedImageDTO imgDTO = null;
        try {
            imgDTO = tempImageService.saveTemporaryImage(img);
        } catch (IOException e) {
            return new ResponseEntity<>(null, HttpStatus.BAD_REQUEST);
        }
        return new ResponseEntity<>(imgDTO, HttpStatus.OK);
    }
@Service
@RequiredArgsConstructor
public class TemporaryImageService {
@Value("${temporaryLocation}")
private String temporaryLocation;
private final String resourceHandlerURL = "/images/"; // 외부에서 이미지로 접근하는 경로
private final FileService fileService;
/** 이미지 임시저장 폴더에 저장 */
public DisplayedImageDTO saveTemporaryImage(MultipartFile ImgFile) throws IOException {
String oriImgName = ImgFile.getOriginalFilename();
String imgName = "";
String imgUrl = "";
if (StringUtils.isEmpty(oriImgName)) {
throw new IllegalArgumentException();
}
BufferedImage bufferedImage = ImageIO.read(ImgFile.getInputStream());
imgName = fileService.uploadFile(temporaryLocation, oriImgName, ImgFile.getBytes());
imgUrl = "/images/temporary/" + imgName;
return DisplayedImageDTO.builder()
.originalName(oriImgName)
.savedPath(imgUrl)
.build();
}
...
}fileService.uploadFile의 코드는 단순히 uuid로 이미지 이름을 만들고 저장합니다.
그리고 저장된 uuid 이미지 이름을 반환합니다.
단순한 코드이기 때문에 생략했습니다.
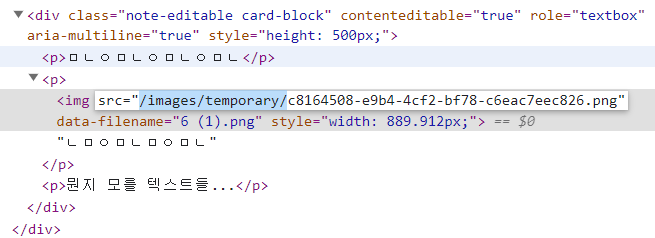
해당 기능을 통해서 다음과 같이 글을 쓸 때 이미지파일을 업로드할 수 있습니다.
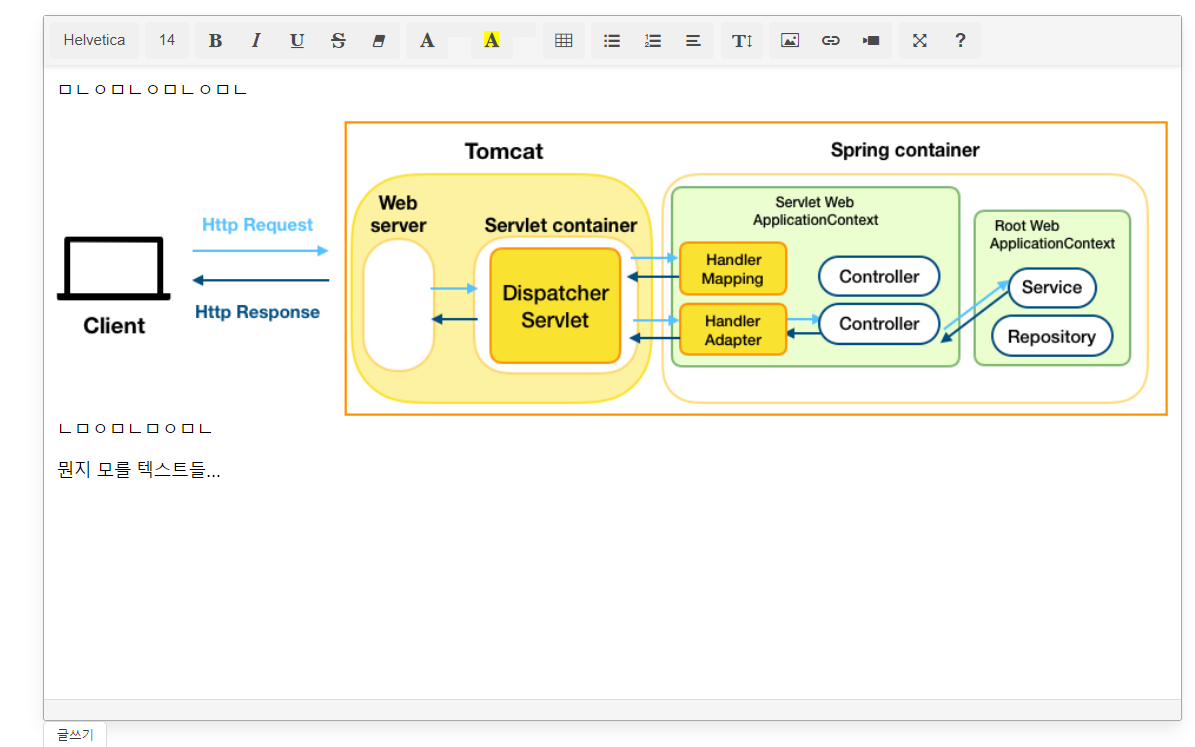
개발자 모드로 들어가서 <img>태그에 있는 내용을 확인해보면 임시저장 폴더에 저장된 이미지를 보여주고 있는 것임을 확인할 수 있습니다.
글 저장하기
이제 글을 실제로 저장해보겠습니다.
프론트엔드
<form actio="/content" method="POST">
	<div class="note-editable card-block" contenteditable="true" role="textbox" aria-multiline="true" style="height: 500px;">
  	  <p>sadasdasdasdsad</p>
      <img src="images/temporary/c8164590-e9b4-c4f2-..826.png" data-filename="이미지.png" ...>
      <p>sadsadsad</p>
      ...
  </div>
</form>
프론트 엔드는 처리할 것이 없습니다. summernote의 글을 지정된 곳으로 POST요청을 보내면
<div>태그 내에 html 요소들이 컨트롤러로 전송됩니다.
백엔드
프론트로부터 받은 데이터는 다음과 같습니다.
<p>sadasdasdasdsad</p>
<img src="images/temporary/c8164590-e9b4-c4f2-..826.png" data-filename="이미지.png" ...>
<p>sadsadsad</p>
백엔드에서 다음과 같은 일을 처리해주면 됩니다.
임시 저장폴더에 이미지를실제 저장폴더로 이동 과정
1-1 프론트에게 받은<img>태그 내부 정보 추출
1-2임시 저장폴더에서실제 저장폴더로 이동
1-3<img>태그 내에 저장한- DB에 저장
화면에 보여지는 Image 정보에 대한 DTO입니다.
@Data
@Builder
public class DisplayedImageDTO {
	private String originalName; // 원본 이름
	private String savedPath; // 저장된 파일 Path
}
프론트에게 받은 <img>태그 내부 정보 추출
자바 HTML 파서인 Jsoup을 사용해서 통해 프론트로 받은 <img>태그 내의 정보를 추출할 수 있습니다.
	/** 이미지 요소의 내용을 추출 */
	public List<DisplayedImageDTO> extractImageElement(String contentBody) {
		Document doc = Jsoup.parse(contentBody);
		Elements elements =  doc.getElementsByTag("img");

		List<DisplayedImageDTO> tempImgs = new ArrayList<>();
		int width, height;
		for (Element element : elements) {
			tempImgs.add(DisplayedImageDTO.builder()
					.savedPath(element.attr("src")) // src에 내용 뽑아내기
					.originalName(element.attr("data-filename")) // 원본 이름 뽑아내기
					.build());
		}

		return tempImgs;
	}
임시 저장 폴더에서 실제 저장 폴더로 이동
앞서 추출한 정보를 바탕으로 임시 저장폴더에 있는 이미지파일을 실제 저장 폴더로 이동시킬 수 있습니다.
다시 설정파일을 보면 temp는 공통 파일이고,
실제 저장 폴더는 content.
임시 저장폴더는 temporary로 되어있습니다.
contentImgLocation=C:/temp/content # 실제 저장 장소
temporaryLocation=C:/temp/temporary # 이미지 임시 저장 장소
현재 이미지 src는 images/temporary/uuid이름.png 이렇게 구성되어 있습니다.
images는 프론트엔드에서 파일에 접근하기 위한 uri이고,
temporary는 임시저장 폴더를 가리키고 있습니다.
지금 해야할 일은 백엔드에서 처리하기 때문에 앞에 붙은 images를 제거하고
temoporary 폴더에 파일을 content 폴더로 이동시켜야 합니다.
다음 코드는 위의 동작을 실행하는 코드입니다.
	/** 임시저장 파일을 실제 저장폴더로 이동 */
	public DisplayedImageDTO moveTempFileToSavedFolder(DisplayedImageDTO tempImg, String movedFolderName) throws IOException {
		String tempPath = FileService.resourcePathToSavedPath(tempImg.getSavedPath());
		String targetPath = tempPath.replaceFirst("temporary", movedFolderName);
		fileService.moveFile(tempPath, targetPath); // content폴더로 이동합니다.

		return DisplayedImageDTO.builder()
				.originalName(tempImg.getOriginalName())
				.savedPath(FileService.savedPathToResourcePath(targetPath))
				.build();
}<img>태그에 src 변경
이미지는 이제 content폴더로 이동되었기 때문에
저장될 <img>태그의 src 또한 변경해주어야 합니다.
<img src="images/temporary/c8164590-e9b4-c4f2-..826.png" ...> 임시저장 이미지


이렇게 변해야 한다.
<img src="images/content/c8164590-e9b4-c4f2-..826.png" ...> 실제 저장된 이미지
이것 또한 자바 HTML 파서인 Jsoup을 사용해서 쉽게 변환할 수 있습니다.
	/** 이미지 src를 해당 위치로 변경 */
	public String changeImageSorce(String contentBody) {
		String movedFolderName = "content";
		Element doc = Jsoup.parseBodyFragment(contentBody).body();
		Elements elements =  doc.getElementsByTag("img");

		String tempSrc, savedSrc;
		for (Element element : elements) {
			tempSrc = element.attr("src");
			savedSrc = tempSrc.replaceFirst("temporary", movedFolderName);
			element.attr("src", savedSrc);
		}

		return doc.select("body").html();
	}
DB에 저장
앞선 과정들을 모두 마치면 다음과 같은
다음 데이터가 백엔드로 전달됩니다.
<!-- 이전 데이터 -->
<p>sadasdasdasdsad</p>
<img src="images/temporary/c8164590-e9b4-c4f2-..826.png" data-filename="이미지.png" ...>
<p>sadsadsad</p>
<!-- DB에 저장될 이후 데이터 -->
<p>sadasdasdasdsad</p>
<img src="images/content/c8164590-e9b4-c4f2-..826.png" data-filename="이미지.png" ...>
<p>sadsadsad</p>실제 DB에는 다음과 같은 데이터가 저장됩니다.
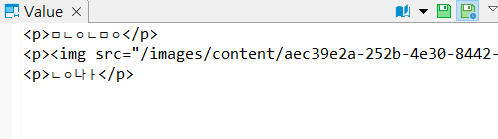
확인하기
이제 저장한 글을 프론트로 확인하면 다음과 같이 확인할 수 있습니다.
글과 이미지가 함께 저장되어 화면에 표시됩니다.

혹시 summernote에 파일 코드좀 볼수 있을까요??