리눅스 명령어/리다이렉션/사용자/히스토리 (교육 24일차)
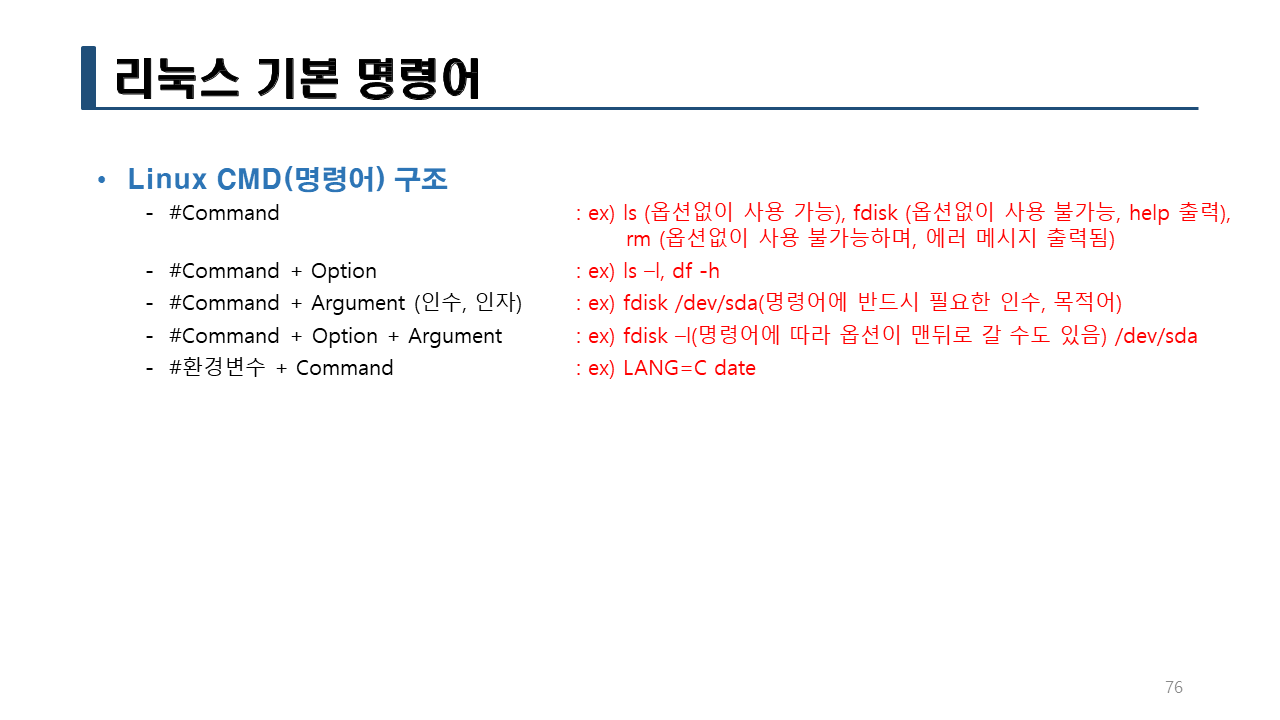

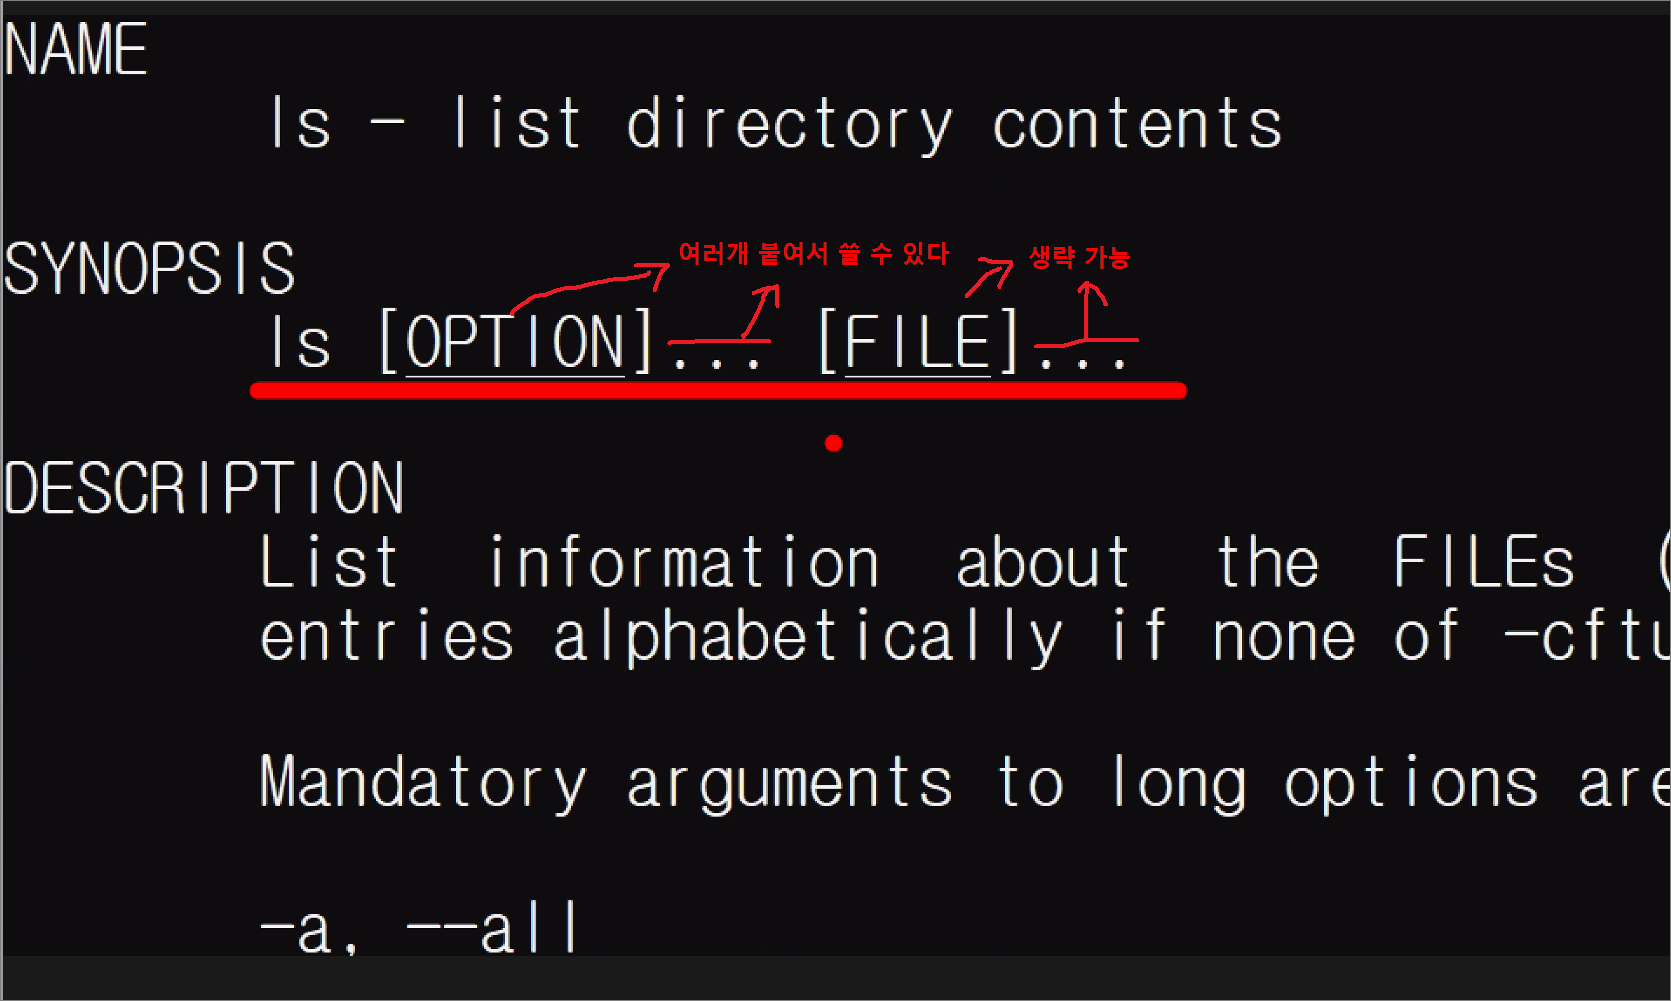
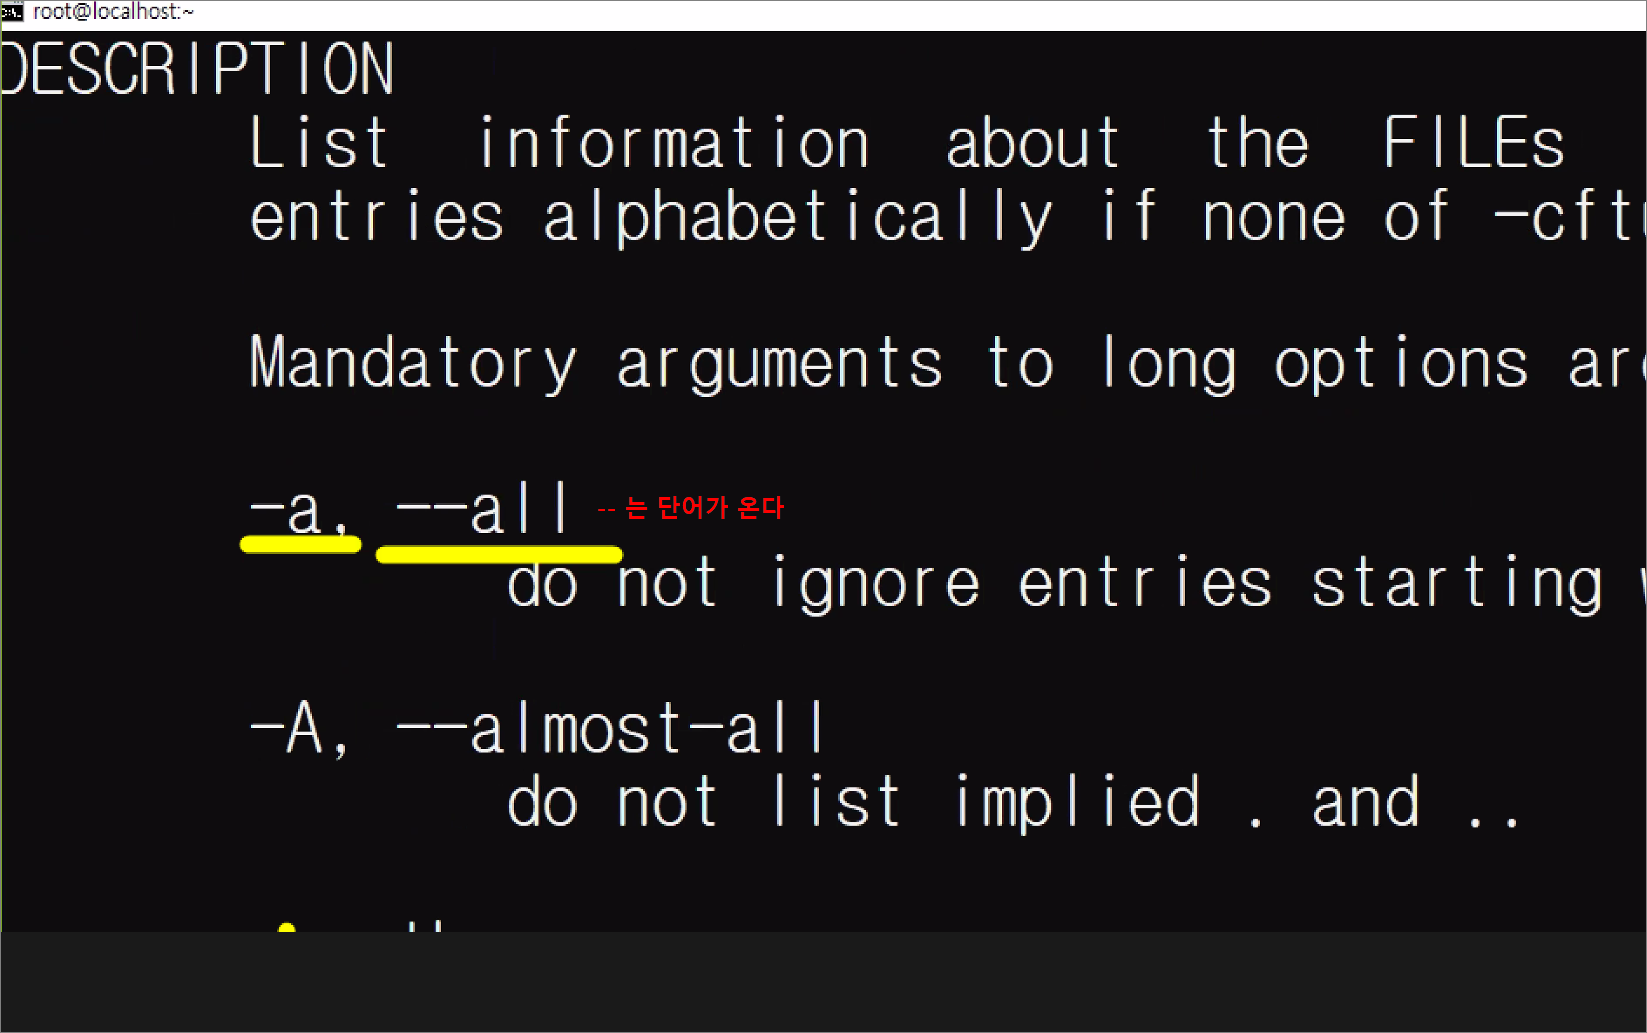
#man ls
#ls -a
#ls -l
#ls -a -l
#ls -al
#ls -l -a
#ls -la
#ls -i
#ls hello4.c hello1.sh hello2.py
#ls -l hello4.c hello1.sh hello2.py
#ls -i hello4.c hello1.sh hello2.py
#ls -li hello4.c hello1.sh hello2.py
#ls -il hello4.c hello1.sh hello2.py
#ls hello4.c hello1.sh hello2.py -li
#ls hello4.c hello1.sh hello2.py -il
#ls -l hello4.c hello1.sh hello2.py -i
#ls -i hello4.c hello1.sh hello2.py -l
-> ls의 경우 옵션의 위치가 자유롭게 적용가능하다.
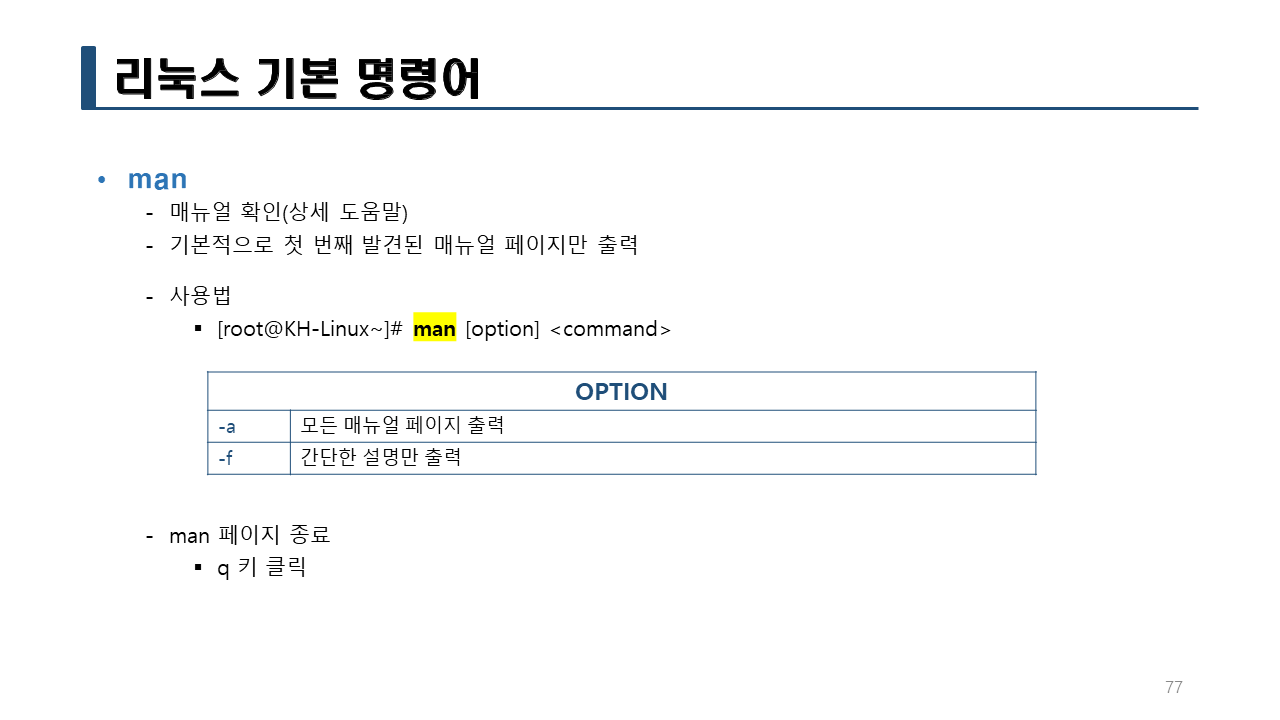
#man man
[root@localhost ~]# man man
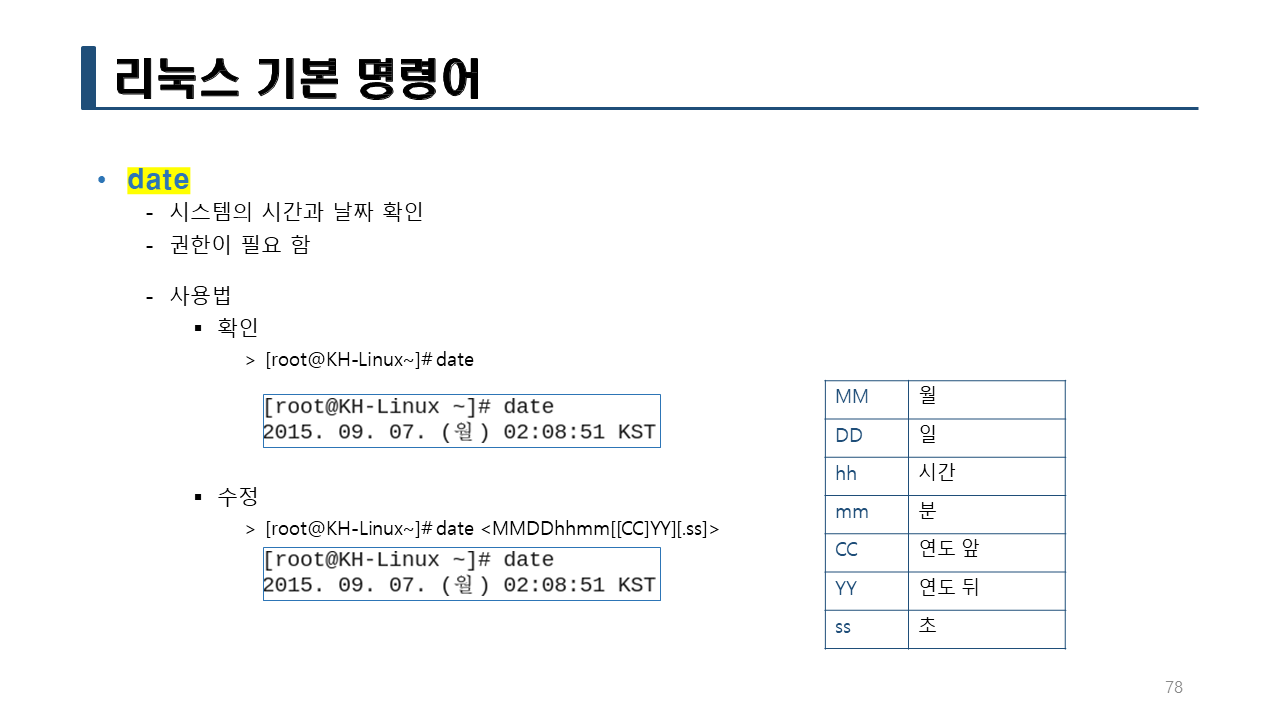
[root@localhost ~]# date
2022. 12. 23. (금) 07:27:52 KST
[root@localhost ~]# man date
[root@localhost ~]# date +%Y
2022
[root@localhost ~]# date +%m
12
[root@localhost ~]# date +%d
23
[root@localhost ~]# date +%Y%m%d
20221223
[root@localhost ~]# date +%Y-%m-%d
2022-12-23
[root@localhost ~]#
[root@localhost ~]# date
2022. 12. 23. (금) 07:33:18 KST
[root@localhost ~]#
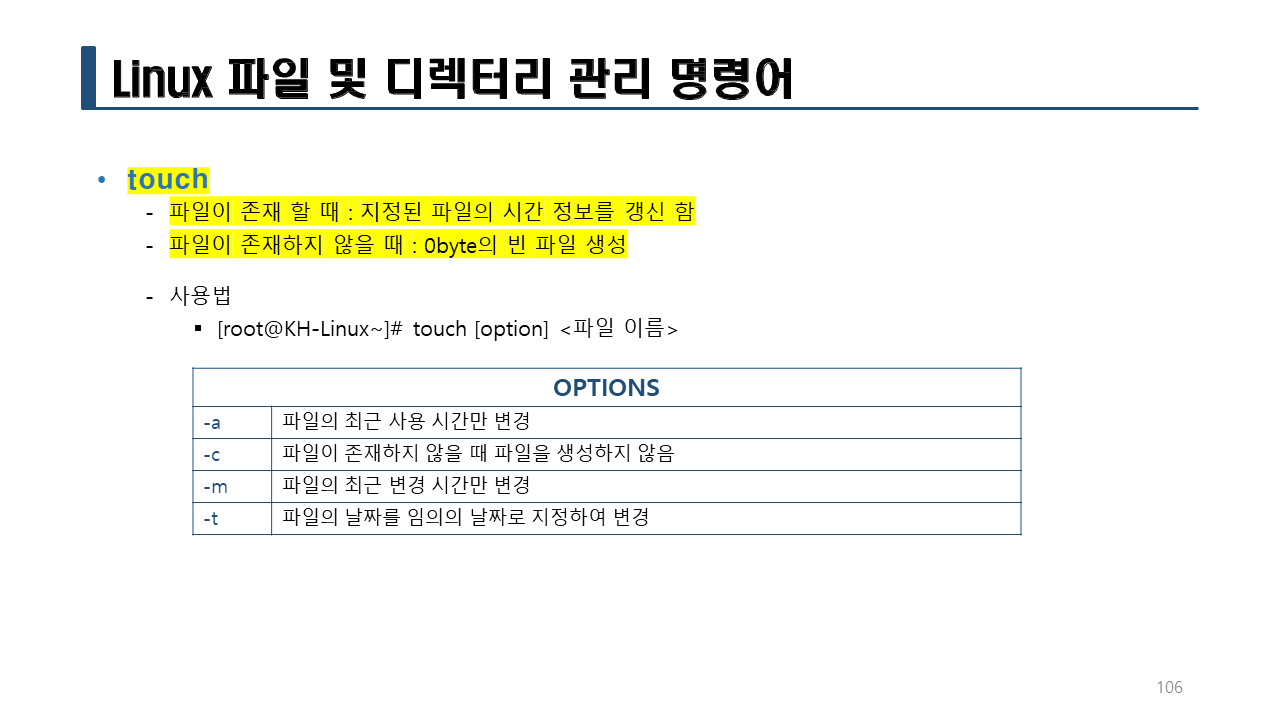
[root@localhost ~]# touch 1.txt
[root@localhost ~]# ls -l 1.txt
-rw-r--r--. 1 root root 0 12월 23 07:33 1.txt

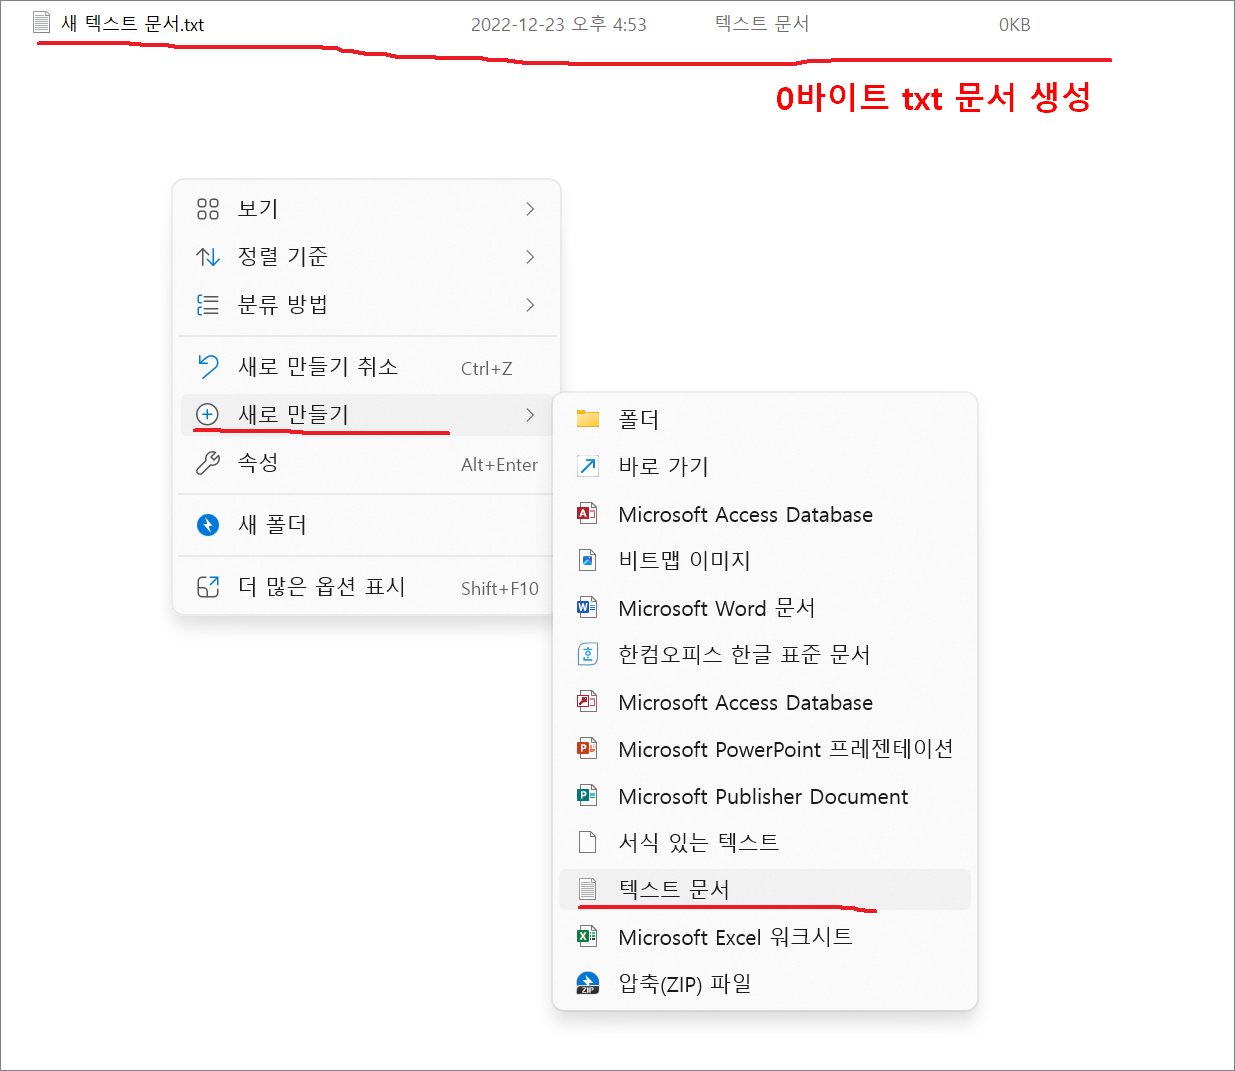
-> 원도우의 새로 만들기 > 텍스트 문서와 동일한 기능임.
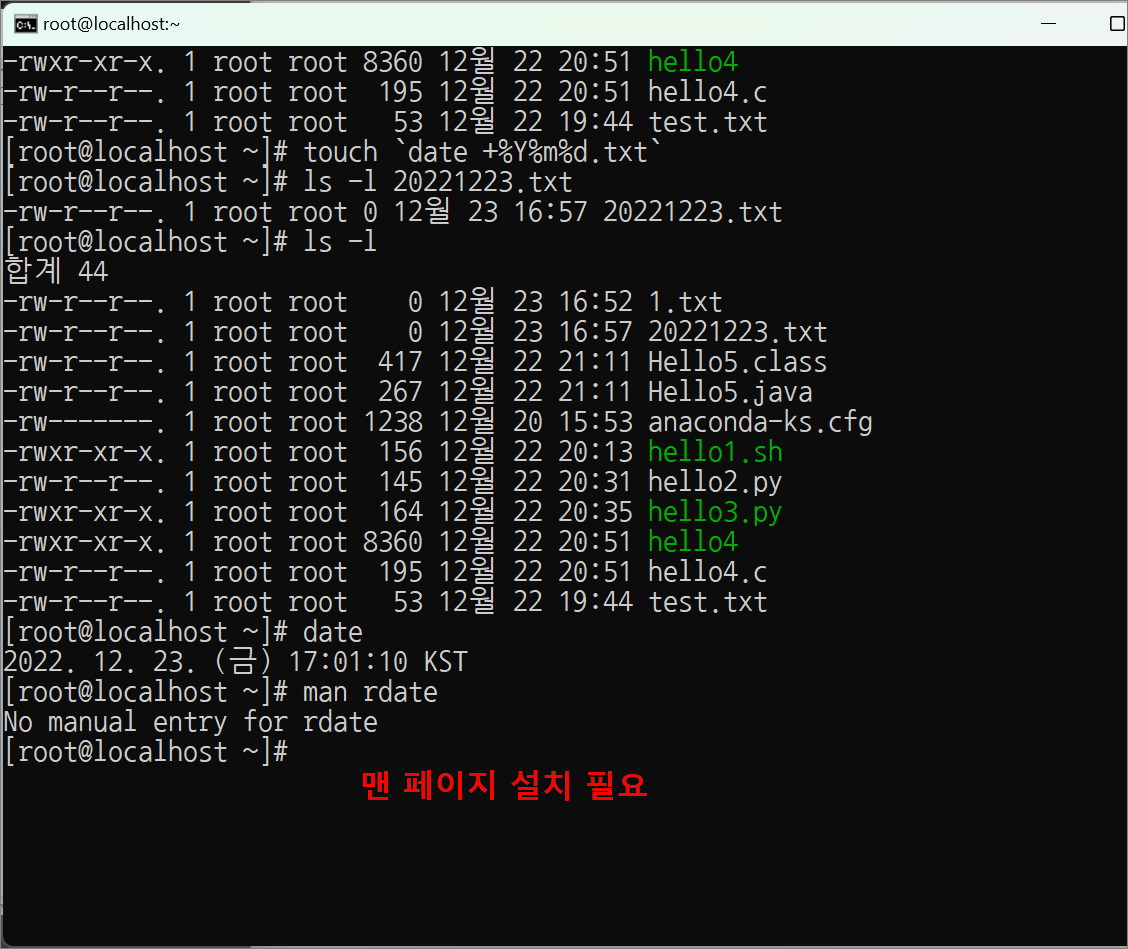
실습> man page 설치하기
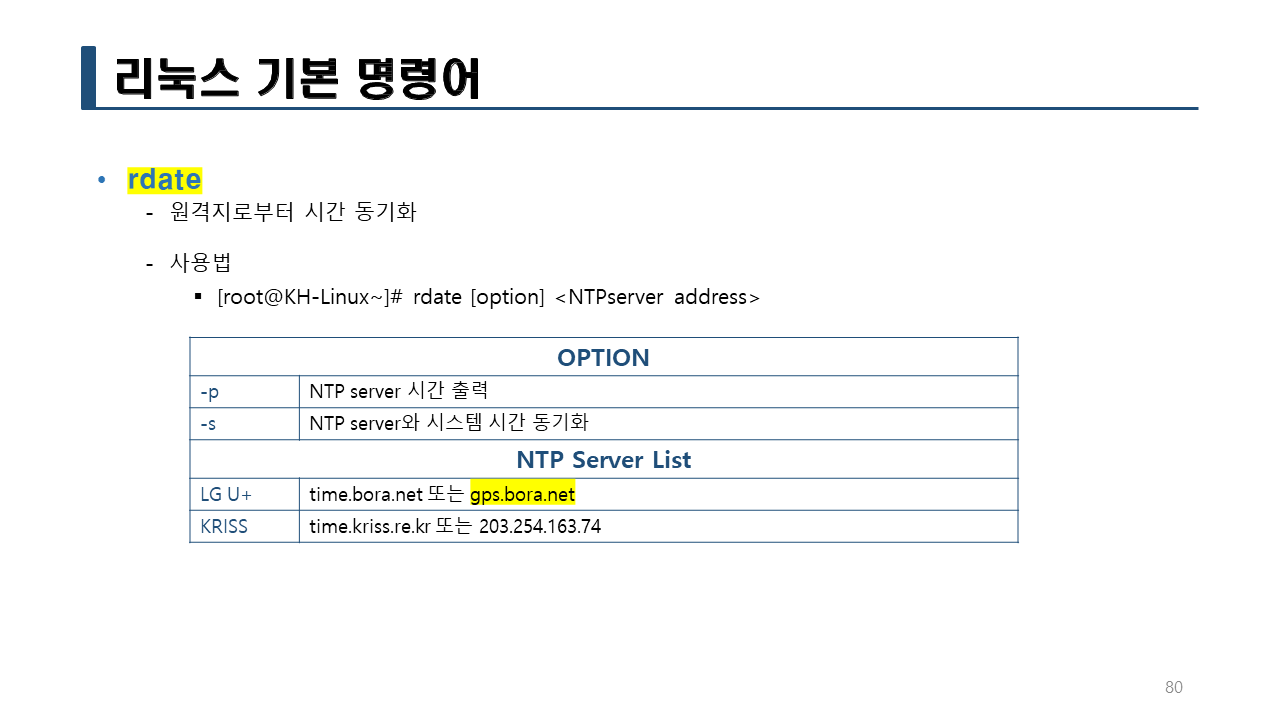
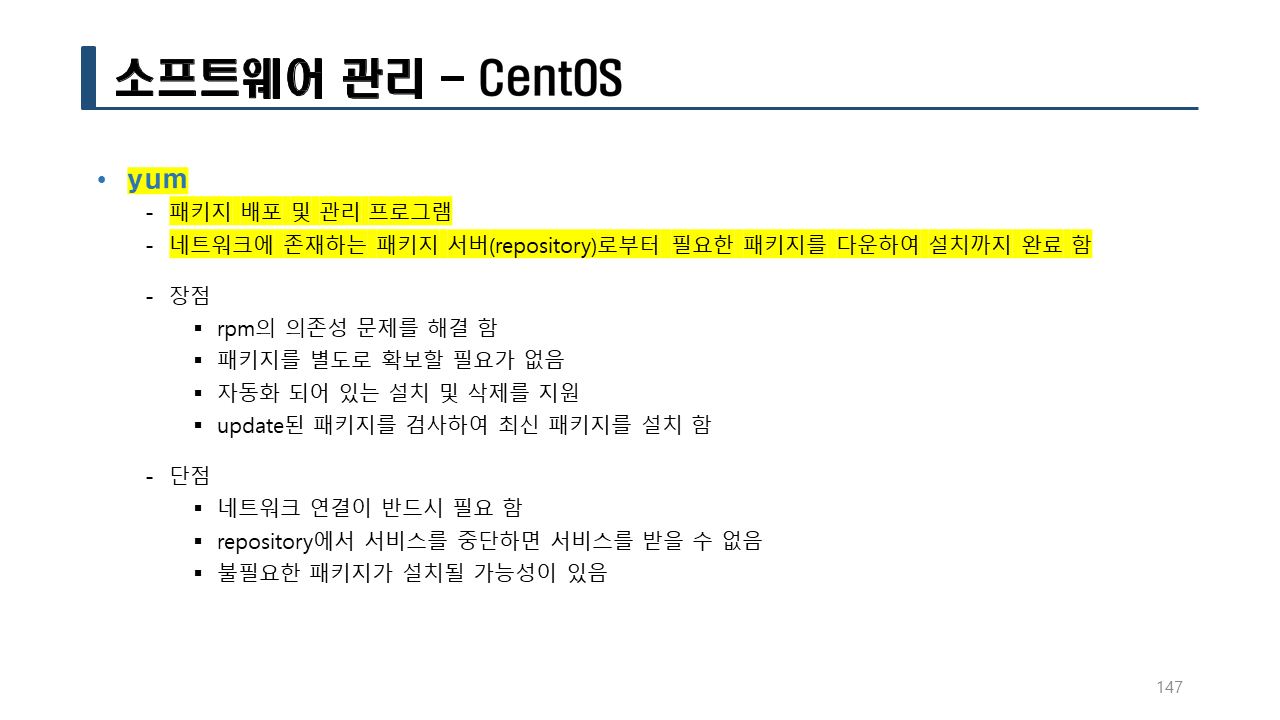
#yum -y install man-pages rdate
#date
2022. 12. 23. (금) 07:50:48 KST
#rdate -s time.bora.net
-> LG U+ NPT서버로 부터 시간 동기화
#date
2022. 12. 23. (금) 17:08:26 KST
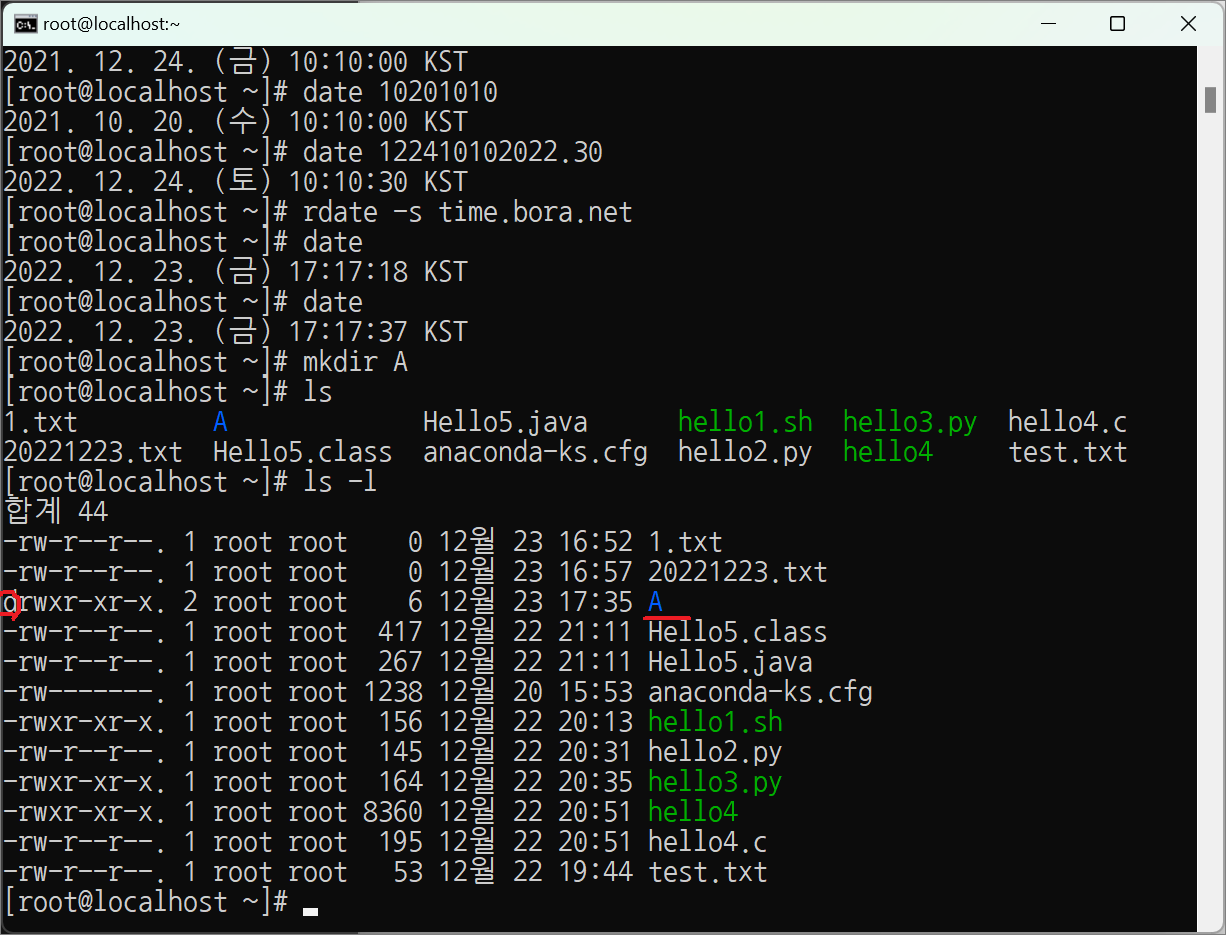
실습> date 로 시간 변경하기
– date : 월일시분(~분까지 필수)년도.초
#date
2022. 12. 23. (금) 17:10:23 KST
#date 12241010
2022. 12. 24. (토) 10:10:00 KST
#date 122410102022
2022. 12. 24. (토) 10:10:00 KST
#date 122410102021
2021. 12. 24. (금) 10:10:00 KST
#date 10201010
2021. 10. 20. (수) 10:10:00 KST
#date 122410102022.30
2022. 12. 24. (토) 10:10:30 KST
#rdate -s time.bora.net
#date
2022. 12. 23. (금) 17:16:56 KST
💥 (중요) 💥
분을 생략하면 에러가 발생된다.
#date 122410
date: invalid date `122410'
#date
2022. 12. 23. (금) 17:18:11 KST
년도는 생략할 수 있다. (년도 생략은 현재 설정되어 있는 년도로 설정된다.)
#date 12241020.30
2022. 12. 24. (토) 10:20:30 KST
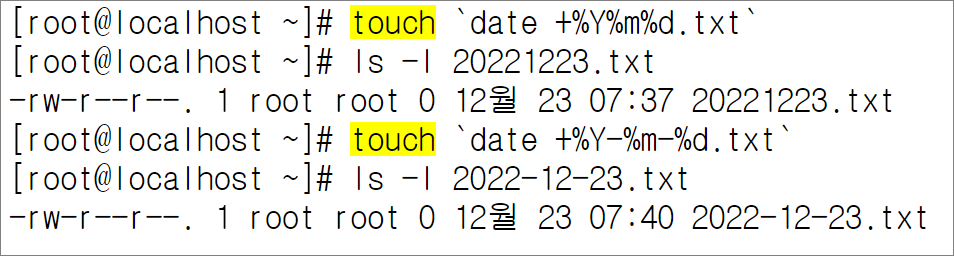
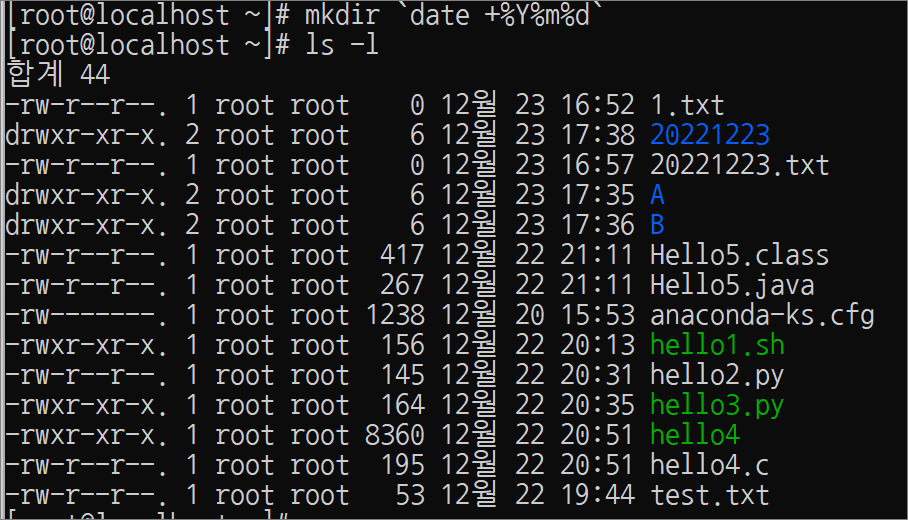
오늘 날짜의 디렉터리를 생성하는 명령어
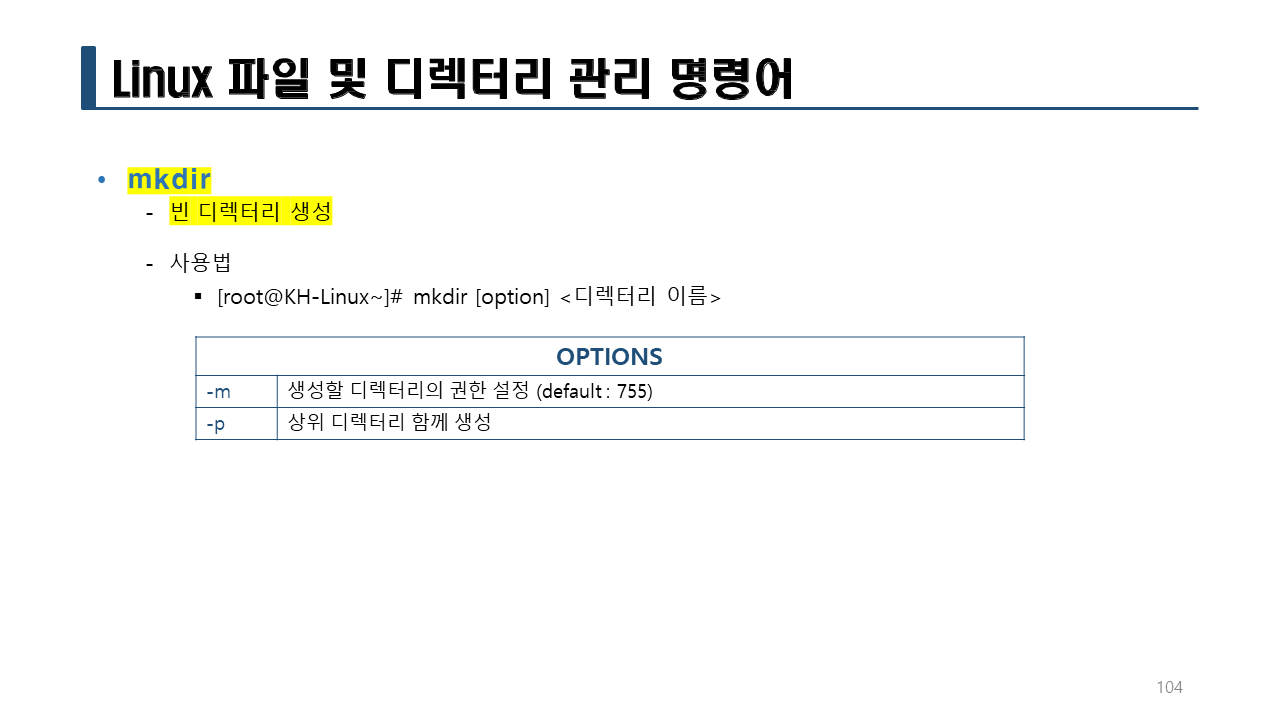
#mkdir ‵date +%Y%m%d‵
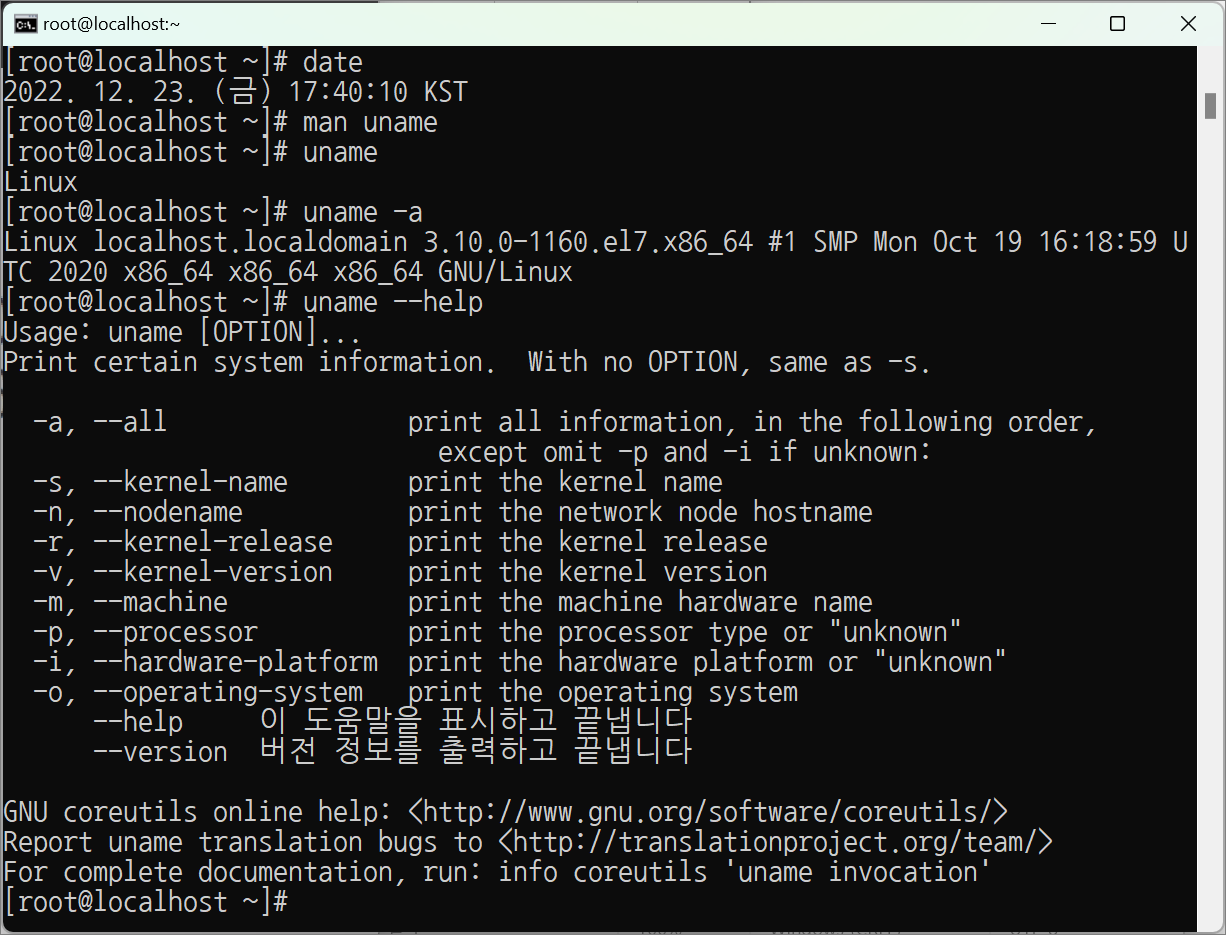

x86: 32bit
x86_64: 64bit
📌 화면 지우기 📌
clear: 화면 지우기
Ctrl + l(엘): 단축키 화면 지우기
[root@localhost ~]# clear
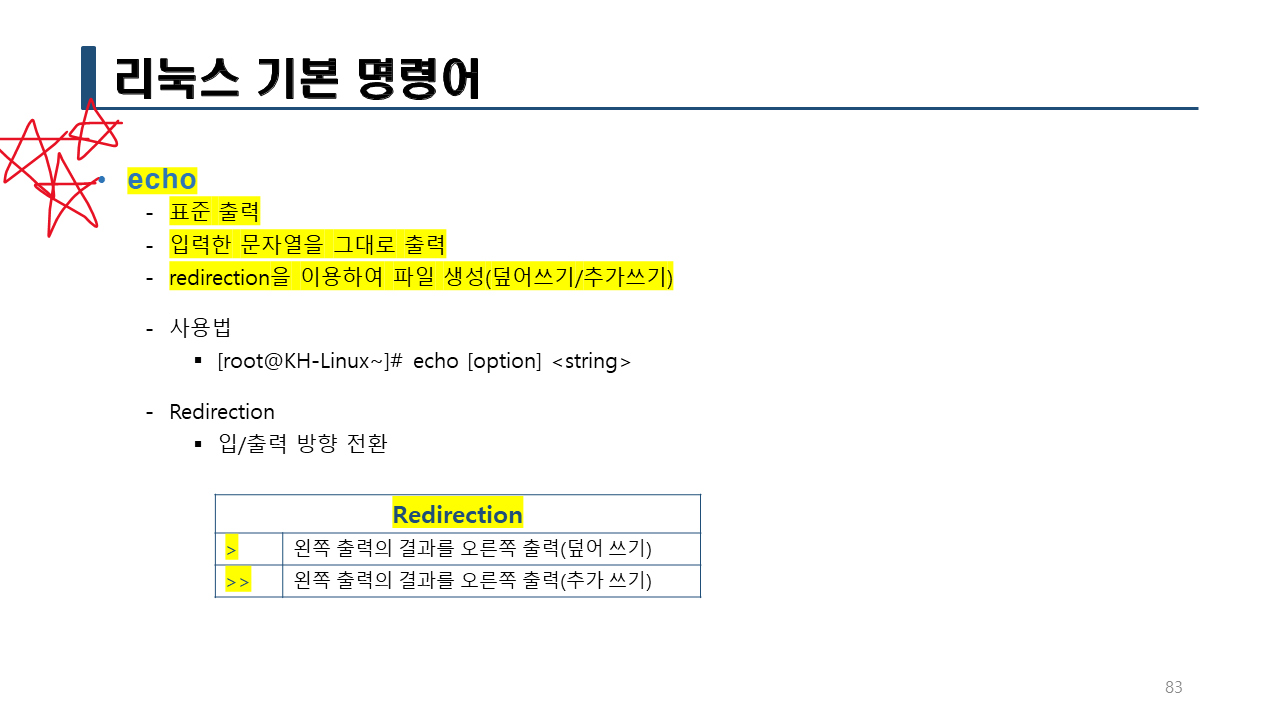
[root@localhost ~]# echo Hello
Hello
[root@localhost ~]# echo Hello Linux
Hello Linux
[root@localhost ~]# echo Hello Linux!
Hello Linux!
[root@localhost ~]# gfhhkjk
bash: gfhhkjk: command not found
[root@localhost ~]# ls -l /dev/null
crw-rw-rw-. 1 root root 1, 3 12월 22 19:06 /dev/null
[root@localhost ~]# echo Hello Linux! 1> /dev/null
[root@localhost ~]# echo Hello Linux! 2> /dev/null
Hello Linux!
[root@localhost ~]# abc
bash: abc: command not found
[root@localhost ~]# abc 1> /dev/null
bash: abc: command not found
[root@localhost ~]# abc 2> /dev/null
📌 > 리다이렉션 📌
💥 리다이렉션이란?
입력과 출력의 방향을 재지정할때 사용한다.
리다이렉션(입출력 재지정)이란 일반적인 키보드 입력, 화면 출력을 사용하지 않고 사용자 마음대로 입력, 출력을 재지정 하겠다는 말이다.
본래 표준입력은 기본적으로 키보드에서 직접 받아오고, 표준 출력은 기본적으로 따로 디스크에 저장하지 않고 화면에 출력된다.
이러한 기본적인 하드웨어적인 입출력 동작을 변경한다는 것이다.
대표적으로 키보드에서 입력을 받지않고 파일내용을 입력으로 받거나, 내용을 화면에 출력하지않고 파일에 저장하는 것이 있다.
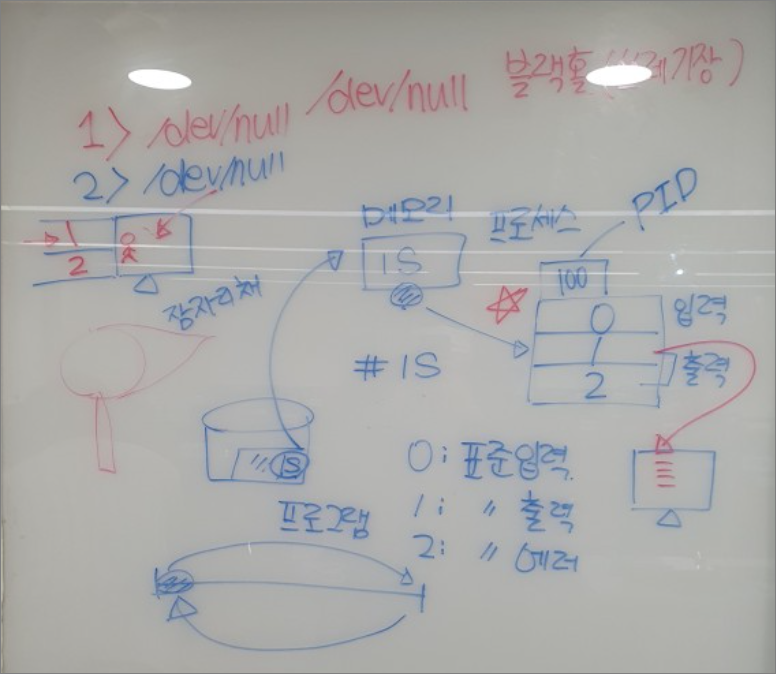
숫자 or x > 파일 (/dev/null)
-> x는 1과 동일
#ls 1> /dev/null
#ls > /dev/null
-> 無 출력
#ls 2> /dev/null
-> 출력됨

/dev/null 는 블랙홀 이라고 이해한다. (잠자리채로 잡아 블랙홀로 버린다.)
이 경로에 보내지는 모든 파일과 데이터들은 블랙홀에 빨려들어가서 無가 된다.
즉, /dev/null로 결과를 보낸다는 것은,
데이터를 죄다 말끔히 없애버려서 깔끔하게 화면에 표시하지 않는다는 것을 말한다.
따라서 특정 명령어를 실행한 후에 출력이 필요 없는 경우엔 > /dev/null 로 리다이렉션을 하면 된다.
실습> 리다이렉션 분석하기
>, 1>, 2> 가 /dev/null로 방향이 변경되는 것을 확인한다.
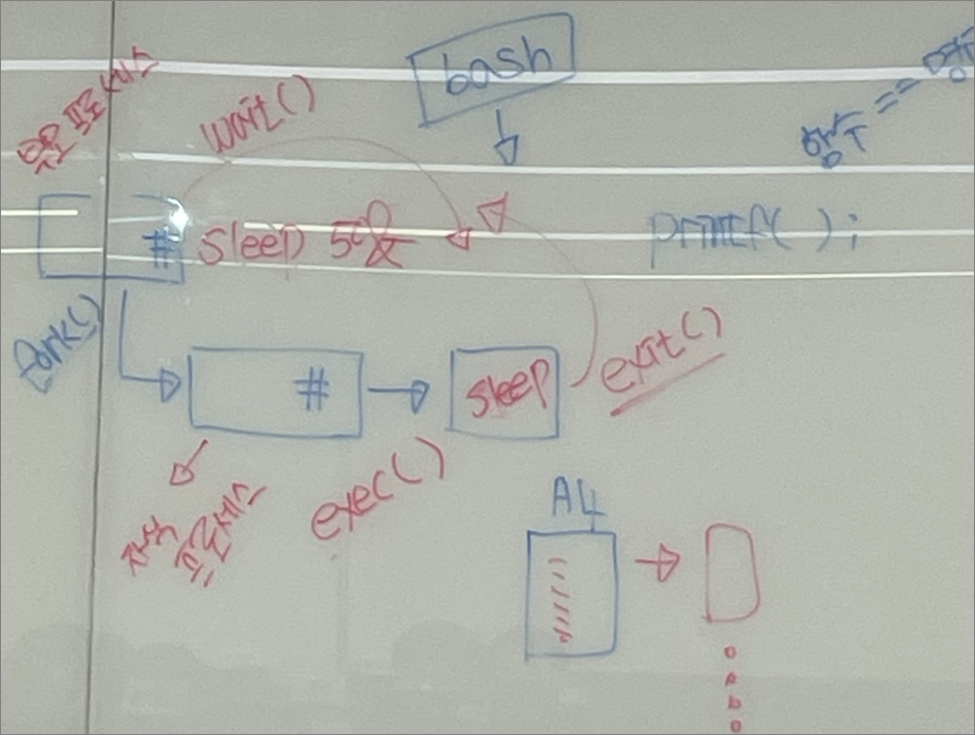
[root@localhost ~]# sleep 1000 &
[1] 1319
[root@localhost ~]# sleep 2000 > /dev/null &
[2] 1320
[root@localhost ~]# sleep 3000 1> /dev/null &
[3] 1321
[root@localhost ~]# sleep 4000 2> /dev/null &
[4] 1322
[root@localhost ~]# tty
/dev/pts/0
[root@localhost ~]# ls -l /proc/1319/fd
합계 0
lrwx------. 1 root root 64 12월 25 22:48 0 -> /dev/pts/0
lrwx------. 1 root root 64 12월 25 22:48 1 -> /dev/pts/0
lrwx------. 1 root root 64 12월 25 22:48 2 -> /dev/pts/0
[root@localhost ~]# ls -l /proc/1320/fd
합계 0
lrwx------. 1 root root 64 12월 25 22:48 0 -> /dev/pts/0
l-wx------. 1 root root 64 12월 25 22:48 1 -> /dev/null
lrwx------. 1 root root 64 12월 25 22:48 2 -> /dev/pts/0
[root@localhost ~]# ls -l /proc/1321/fd
합계 0
lrwx------. 1 root root 64 12월 25 22:49 0 -> /dev/pts/0
l-wx------. 1 root root 64 12월 25 22:49 1 -> /dev/null
lrwx------. 1 root root 64 12월 25 22:49 2 -> /dev/pts/0
[root@localhost ~]# ls -l /proc/1322/fd
합계 0
lrwx------. 1 root root 64 12월 25 22:49 0 -> /dev/pts/0
lrwx------. 1 root root 64 12월 25 22:49 1 -> /dev/pts/0
l-wx------. 1 root root 64 12월 25 22:49 2 -> /dev/null
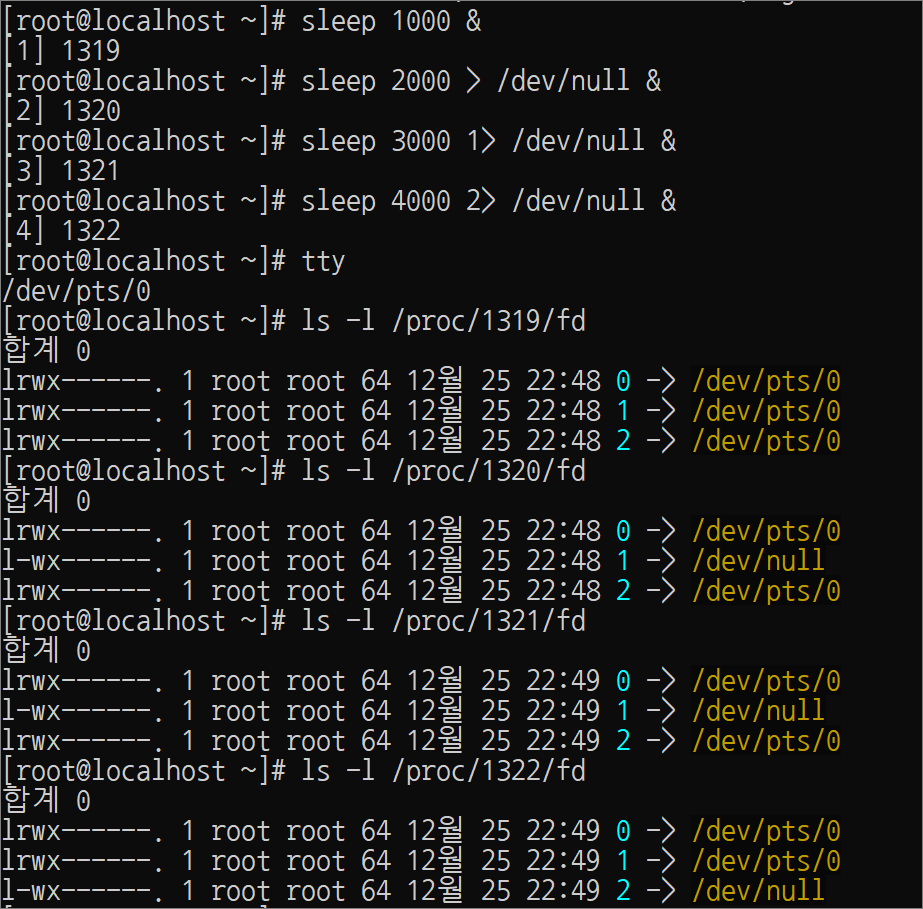
👀 /proc/ : 메모리에 실행되는 프로세스 번호 출력
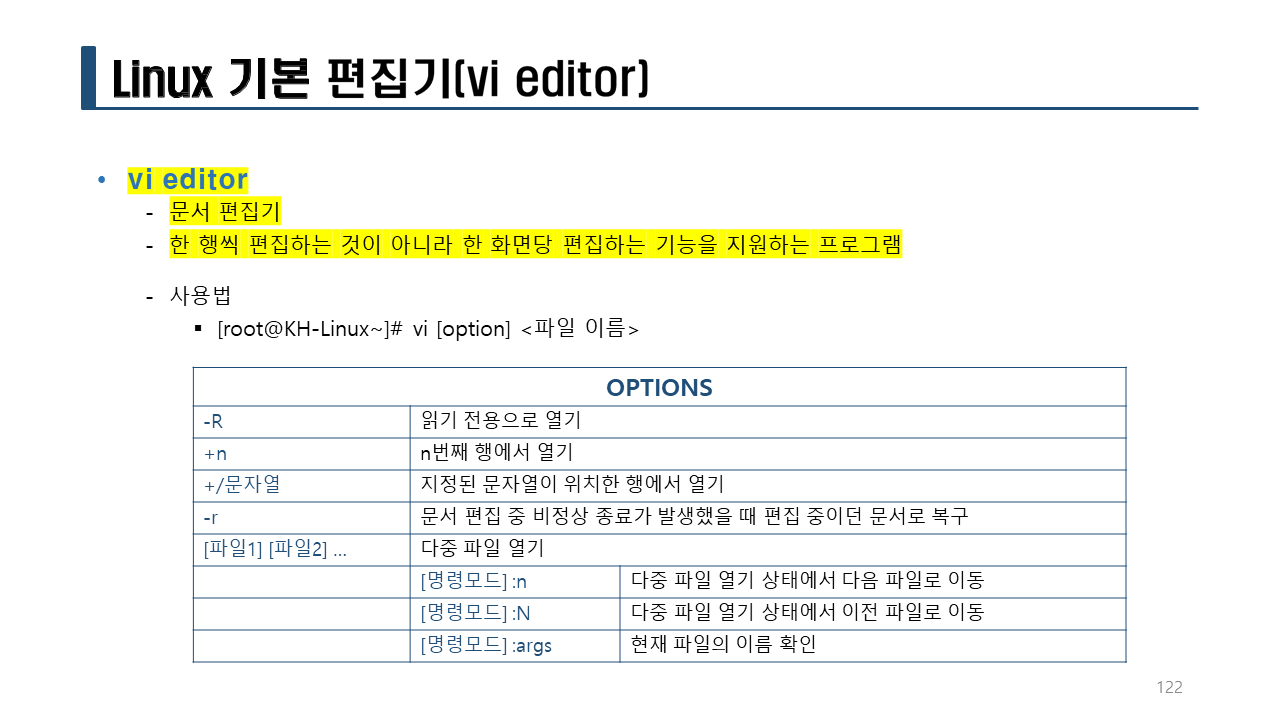
#vi printStdout.c
#include <stdio.h>
int main()
{
printf("Hello World!\n");
fprintf(stdout, "Hello C!\n");
return 0;
}
[root@localhost ~]# gcc printStdout.c -o printStdout
-> gcc 컴파일러로 printStdout.c이라는 소스파일 printStdout이라는 실행파일로 만든다.
[root@localhost ~]# ./printStdout
Hello World!
Hello C!
[root@localhost ~]# ./printStdout > /dev/null
👀 fprintf 👀
printf 의 경우 인자로 지정한 내용을 콘솔 화면(정확히 말하면 stdout) 에 출력하는 반면에 fprintf 함수는 지정한 스트림에 출력하게 된다.
fprintf(stdout, "Hello, World! \n");
printf("Hello, World! \n");
은 정확히 동일한 작업을 하게 된다.
#vi printStderr.c
#include <stdio.h>
int main()
{
fprintf(stderr, "Hello C!\n");
return 0;
}
[root@localhost ~]# gcc printStderr.c -o printStderr
[root@localhost ~]# ./printStderr
Hello C!
[root@localhost ~]# ./printStderr > /dev/null
Hello C!
[root@localhost ~]# ./printStderr 2> /dev/null
[root@localhost ~]#
💥💥💥!!! 중요 !!!💥💥💥
standard output: 1
standard error: 2
정상 출력은 1로 보낸다.
에러 출력은 2로 보낸다.
실습> 출력 리다이렉션 사용하기
[root@localhost ~]# echo Hello
Hello
[root@localhost ~]# echo Hello > hello.txt
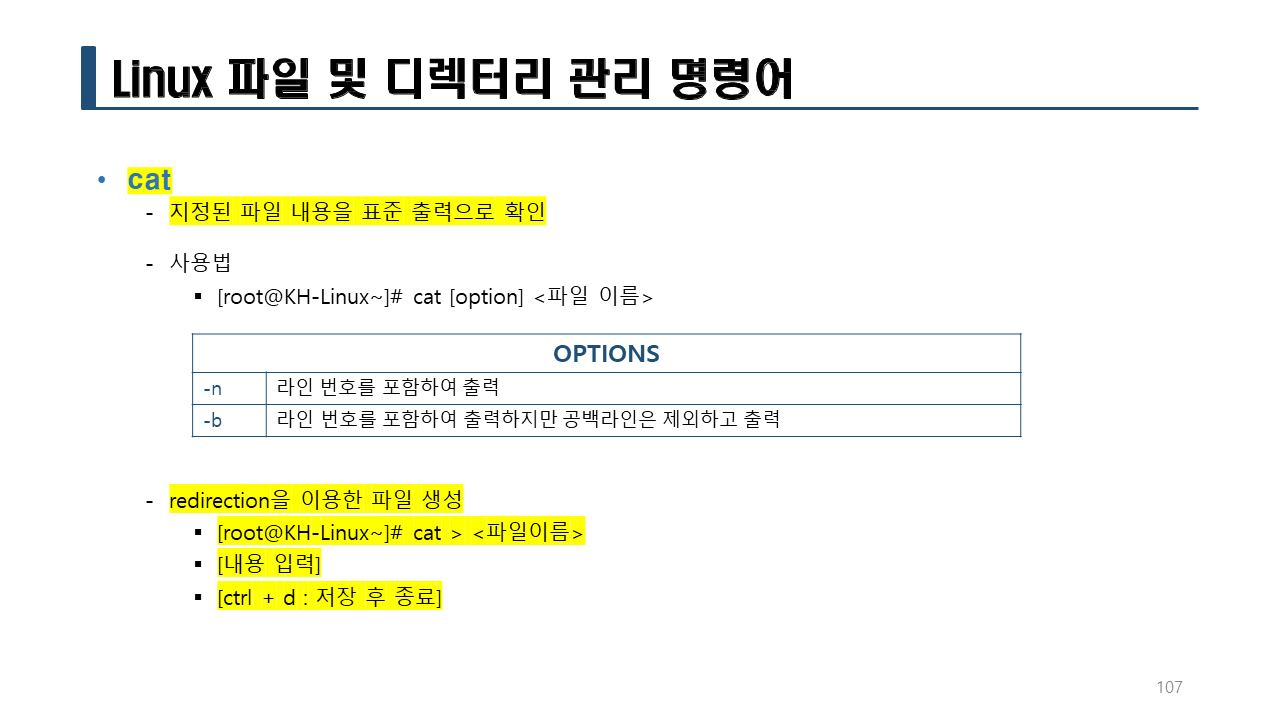
[root@localhost ~]# cat hello.txt
Hello
[root@localhost ~]# echo 오늘은 즐거운 금요일입니다. > hello.txt
[root@localhost ~]# cat hello.txt
오늘은 즐거운 금요일입니다.
[root@localhost ~]# echo 내일은 토요일입니다.
내일은 토요일입니다.
[root@localhost ~]# echo 내일은 토요일입니다. >> hello.txt
[root@localhost ~]# cat hello.txt
오늘은 즐거운 금요일입니다.
내일은 토요일입니다.
[root@localhost ~]# history
[root@localhost ~]# history 5
[root@localhost ~]# history 10
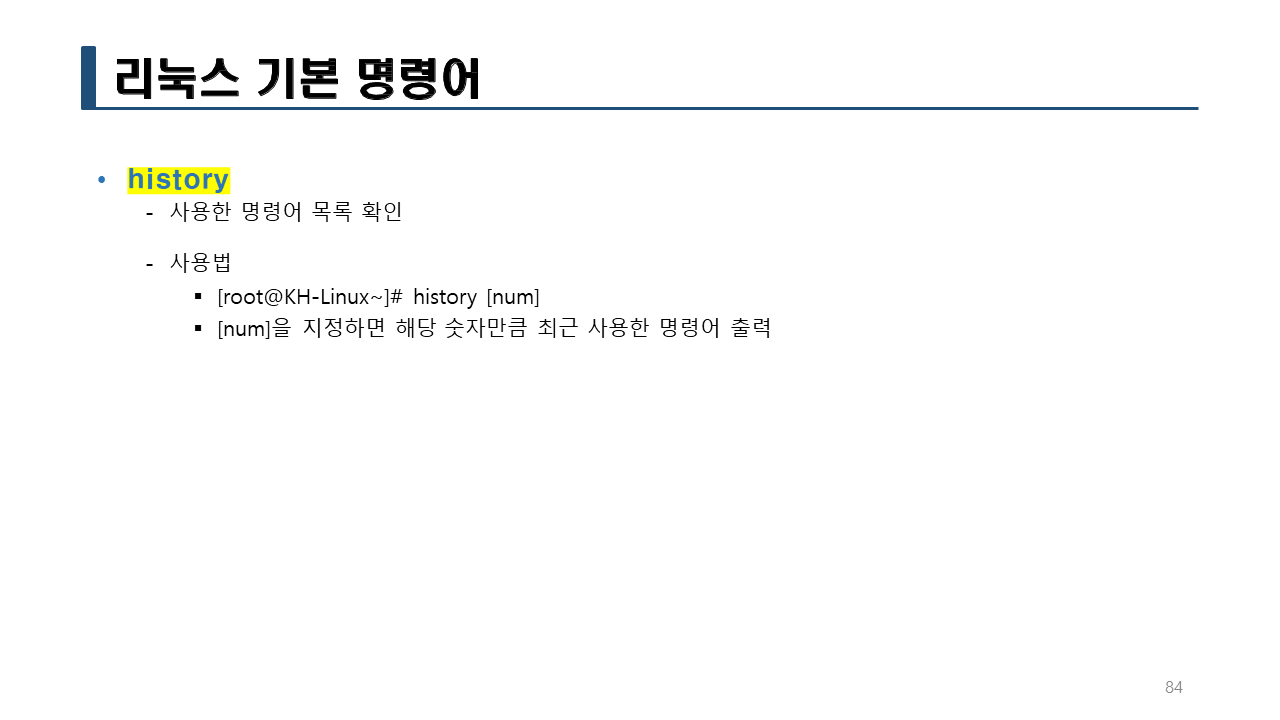
Shell에서의 history 기능
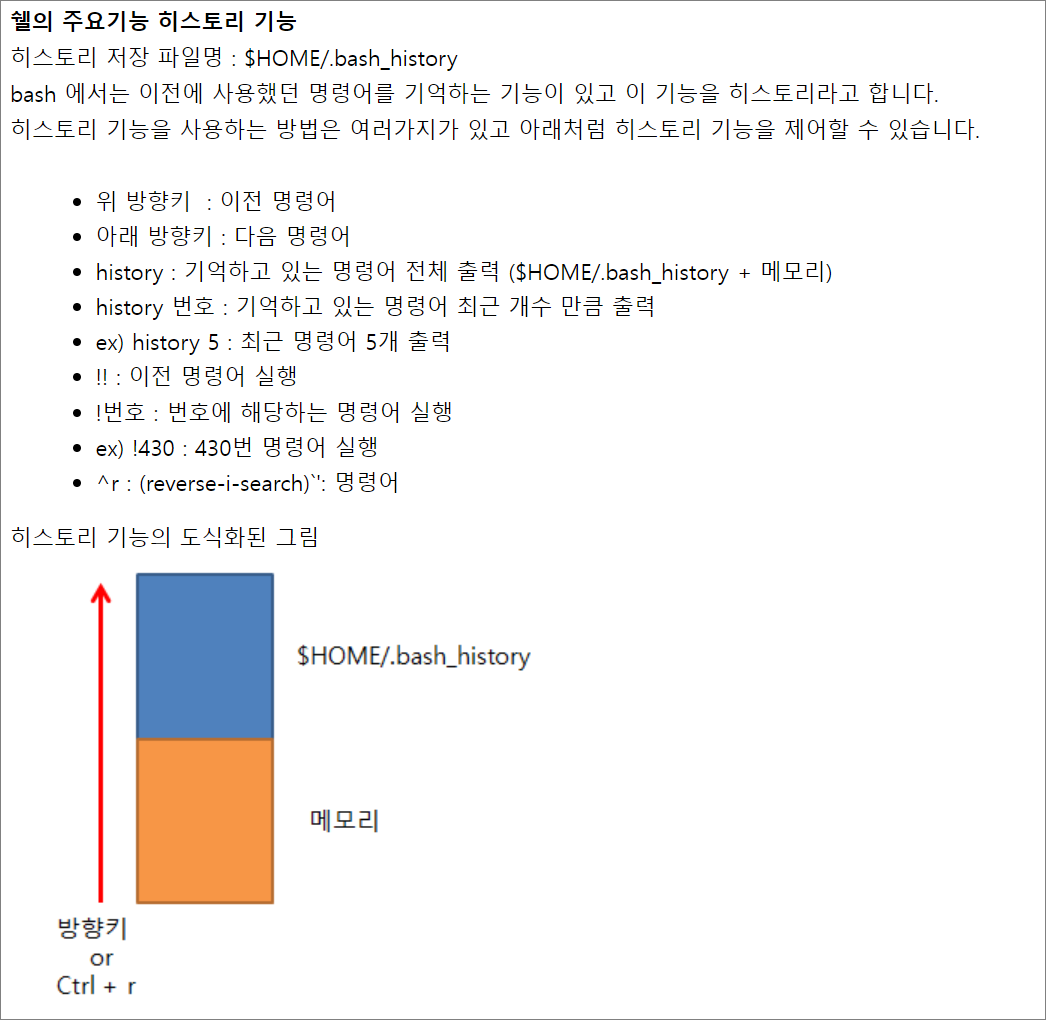
– 히스토리는 기본적으로 1000줄까지 기억함.
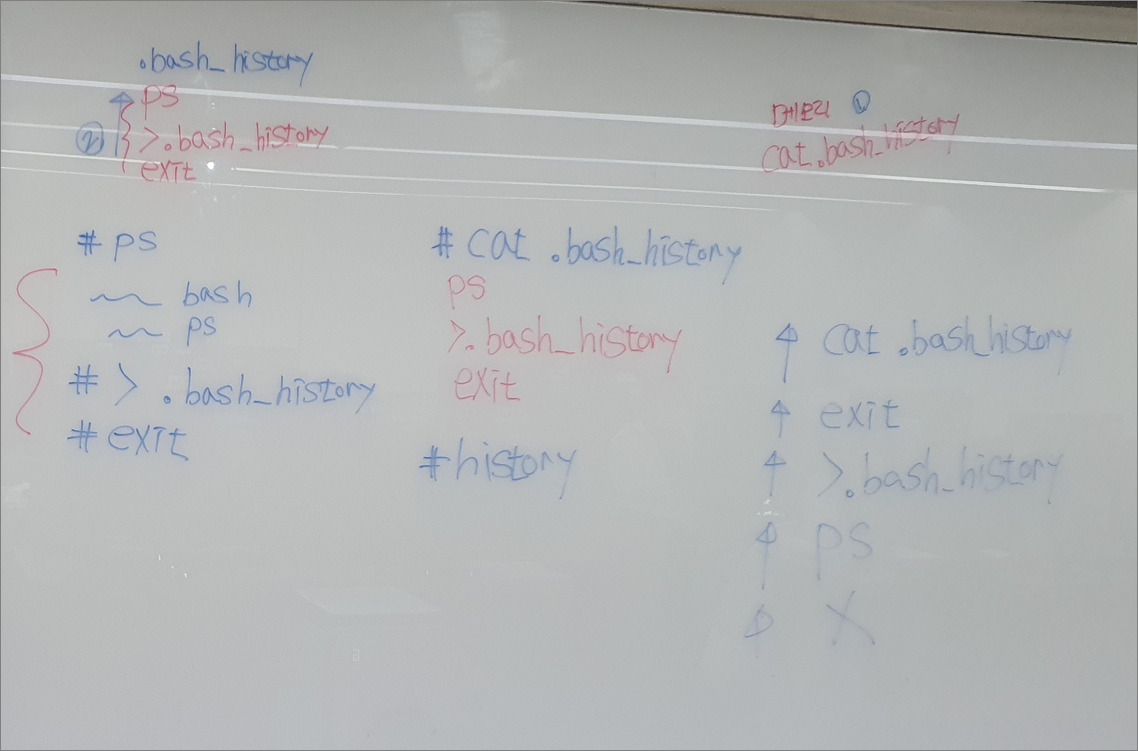
– .bash_history : 로그아웃될 때 명령어 실행한 히스토리가 저장된다.
– > .bash_history : 출력 히스토리를 완전히 지운다. 0 바이트
실습> history 기능 알아보기
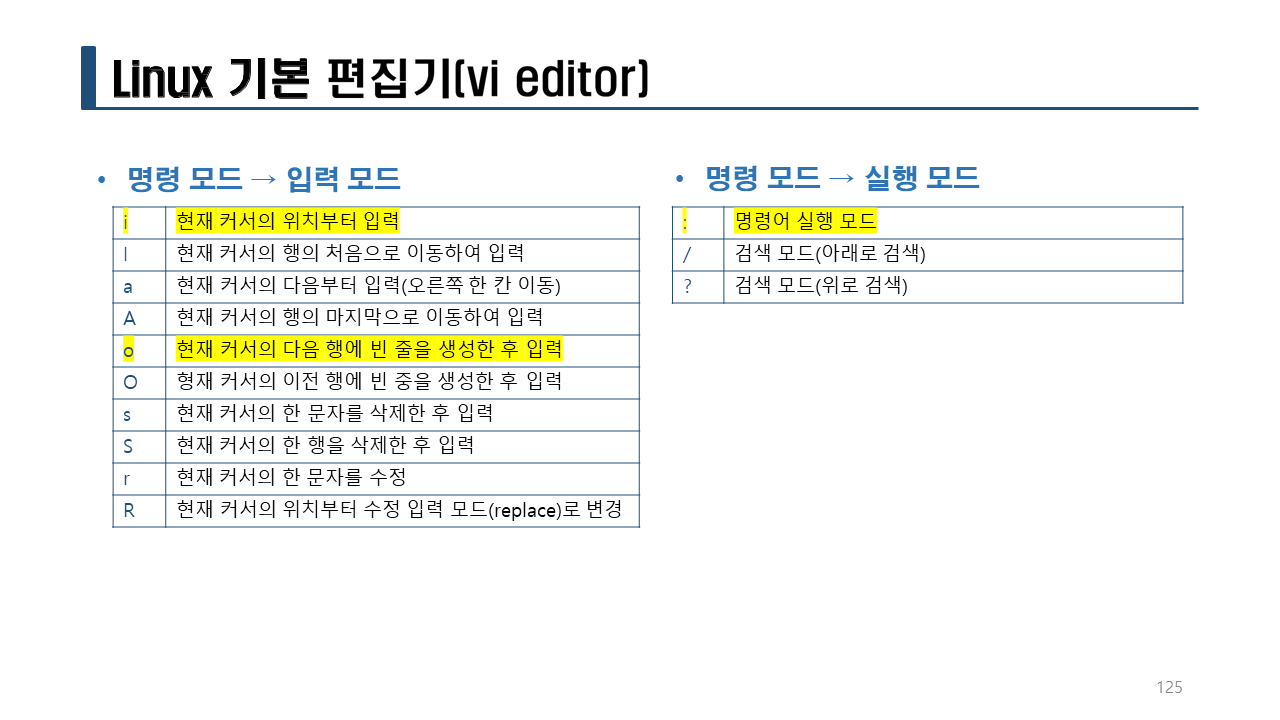
[root@localhost ~]# vi .bash_profile
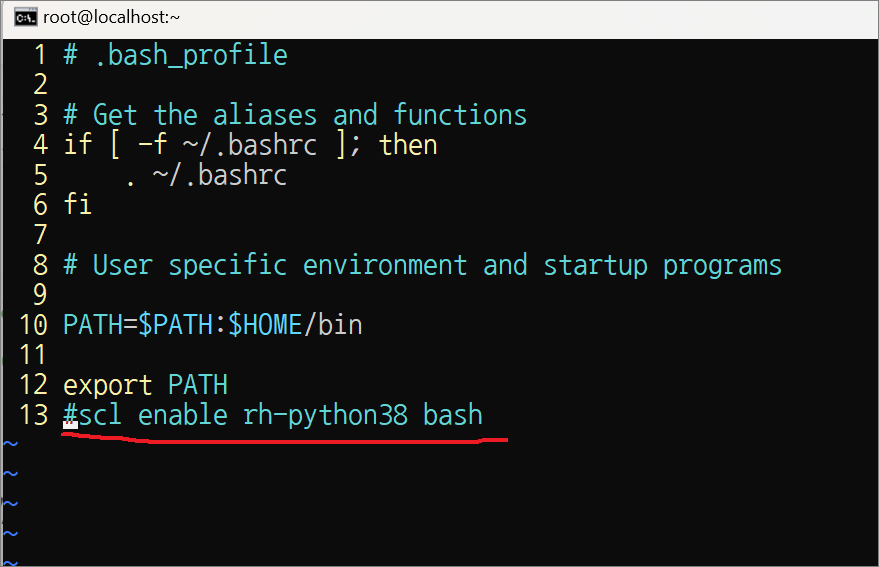
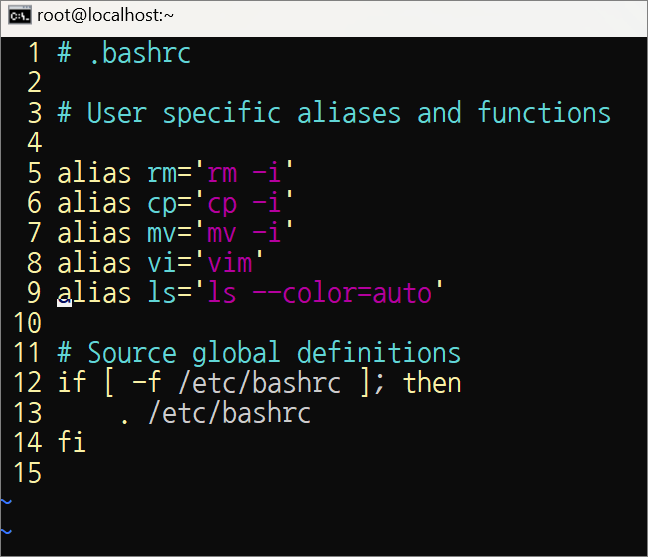
-> .bashrc : 로그인할때 실행되는 파일
-> 파이썬 bash가 부팅때 2번 실행되므로 주석처리로 꺼둔다. 명령어 히스토리를 파악하기 위해서...
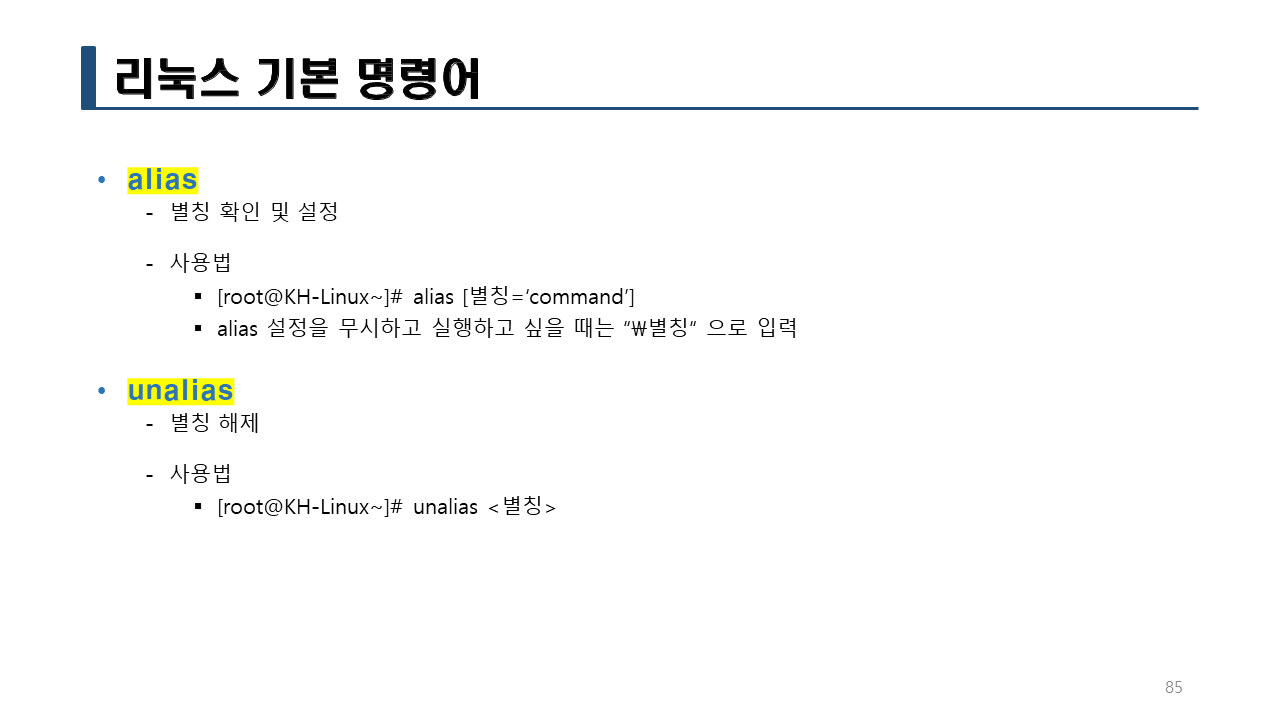
👉 alias 이름 = '실제 명령어'
-> 1. 메모리에서 실행한다.
-> 2. 하드디스크에 있는 파일을 실행함
[root@localhost ~]# exit
[root@localhost ~]# exit
-> 재부팅한다.
C:\Users\user2>ssh root@200.200.200.3
root@200.200.200.3's password:
Last login: Fri Dec 23 18:02:08 2022 from 200.200.200.1
[root@localhost ~]# ps
PID TTY TIME CMD
10578 pts/1 00:00:00 bash
10595 pts/1 00:00:00 ps
-> ps로 현재 실행중인 프로세스 목록과 상태를 보여준다.
[root@localhost ~]# > .bash_history
-> 출력 history를 0바이트로 완전히 지운다.
[root@localhost ~]# exit
-> 재부팅
C:\Users\user2>ssh root@200.200.200.3
root@200.200.200.3's password:
Last login: Fri Dec 23 20:33:41 2022 from 200.200.200.1
[root@localhost ~]# cat .bash_history
ps
> .bash_history
exit
-> bash_history에는 최근 실행한 명령어가 저장되어 있음을 확인할 수 있다.
실습> 사용자 생성
useradd: 사용자를 생성하는 명령어
userdel: 사용자를 삭제하는 명령어
passwd: 비밀번호를 설정하는 명령어
#useradd user1
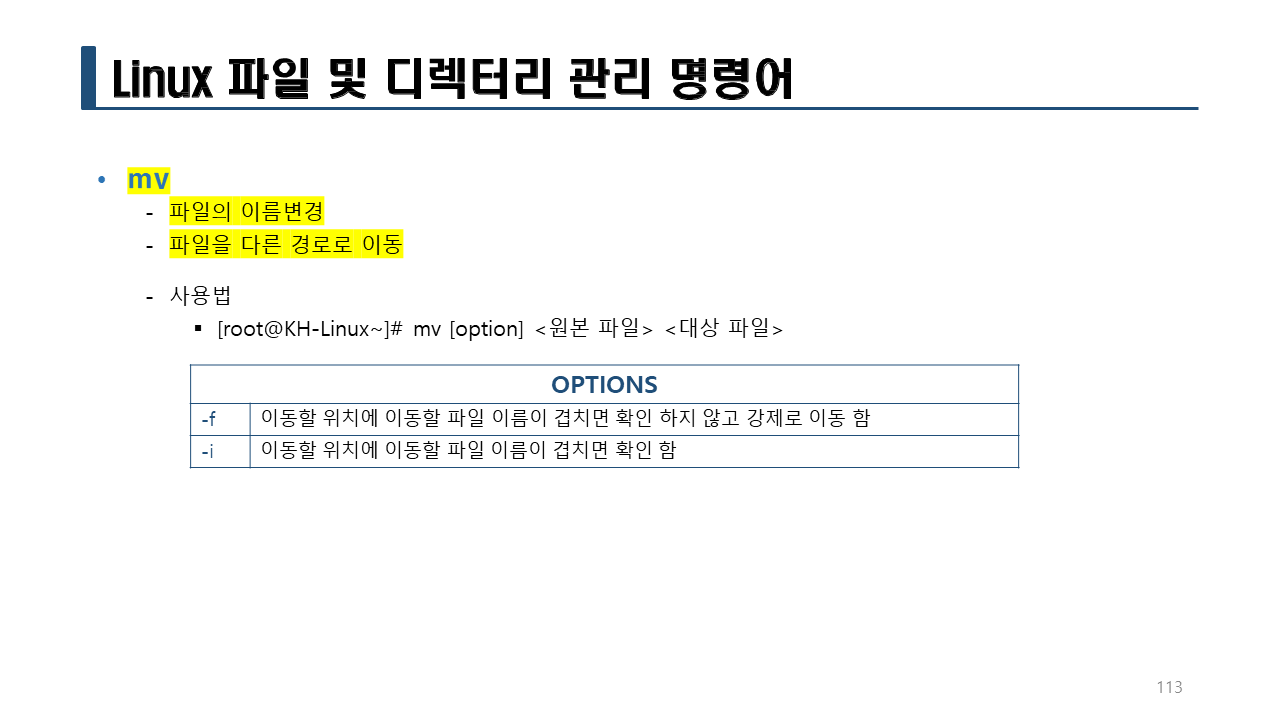
#userdel -r user1
#useradd user1
#echo 1 | passwd --stdin user1

실습> history
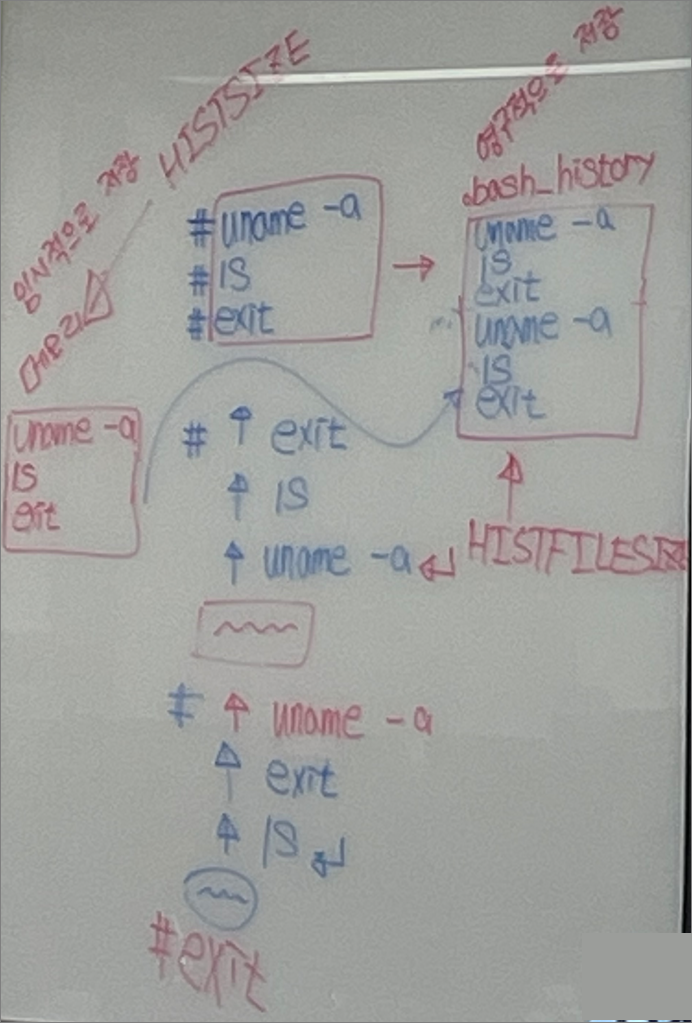
bash(Bone Again SHell) 에는 이전 명령어를 기억하는 기능이 존재한다.
이를 히스토리라고 한다.
로그인 후 명령어를 사용하면 메모리에 저장되고 로그아웃 하면 메모리에 있던 내용이 파일에 저장된다.
환경변수 HISTFILE 에 저장된 값에 저장된다.
기본값은 $HOME/.bash_history 이고 변수이므로 값은 얼마든지 변경이 가능하다.
명령어를 찾는 순서 :
방향키를 위로 올리면 먼저 메모리에 있는 명령어를 찾고 다 찾은 후 $HOME/.bash_history에서 찾는다.
해킹을 당하면 히스토리가 변조되므로 관심있게 알아야 한다.
– 환경변수 HISTFILE 을 /dev/null로 변경한다.
#HISTFILE=/dev/null
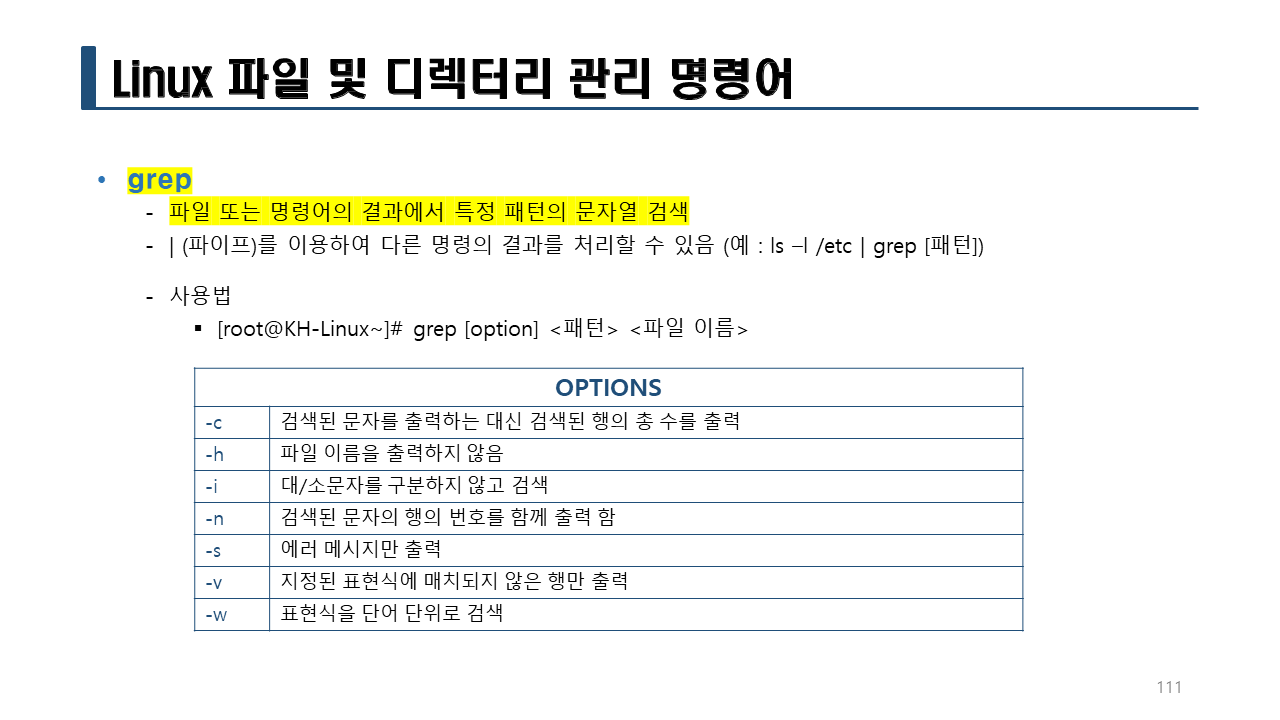
#set | grep HISTFILE=
HISTFILE=/dev/null
– $HOME/.bash_history 를 디렉터리로 만든다.
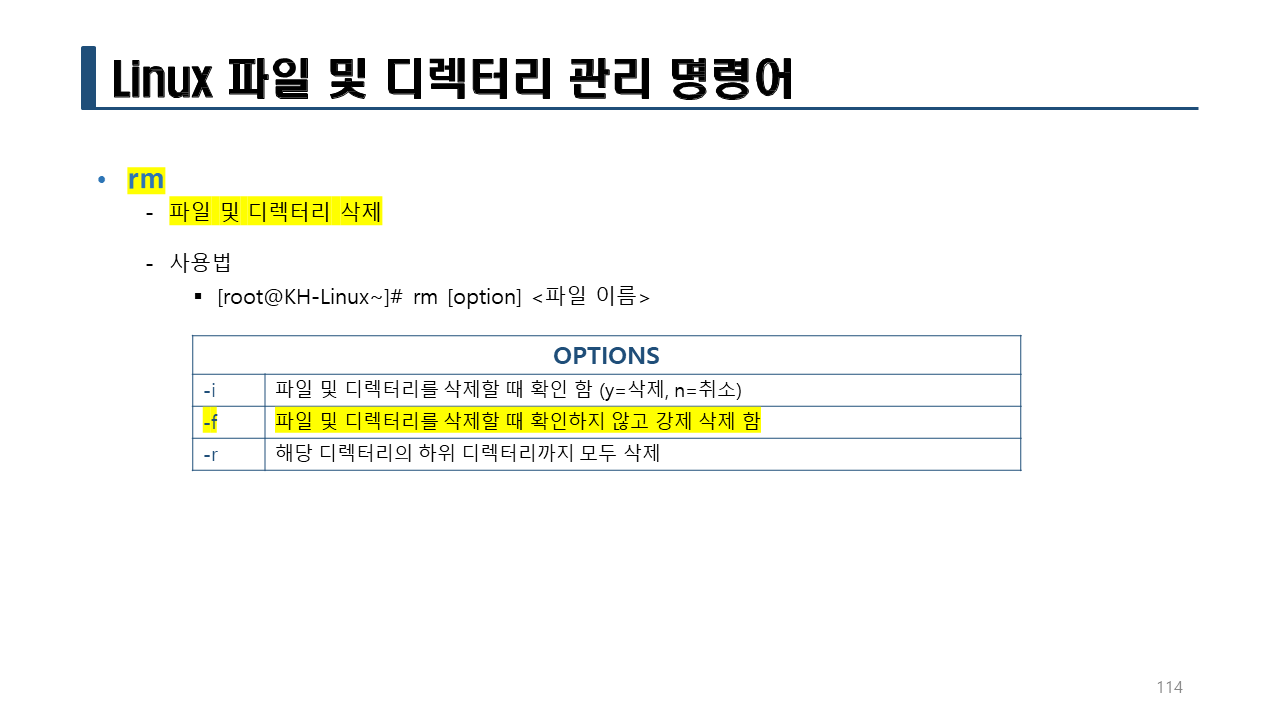
#rm -f .bash_history
#mkdir .bash_history
#ls -ld .bash_history
drwxr-xr-x. 2 root root 6 10월 14 19:51 .bash_history
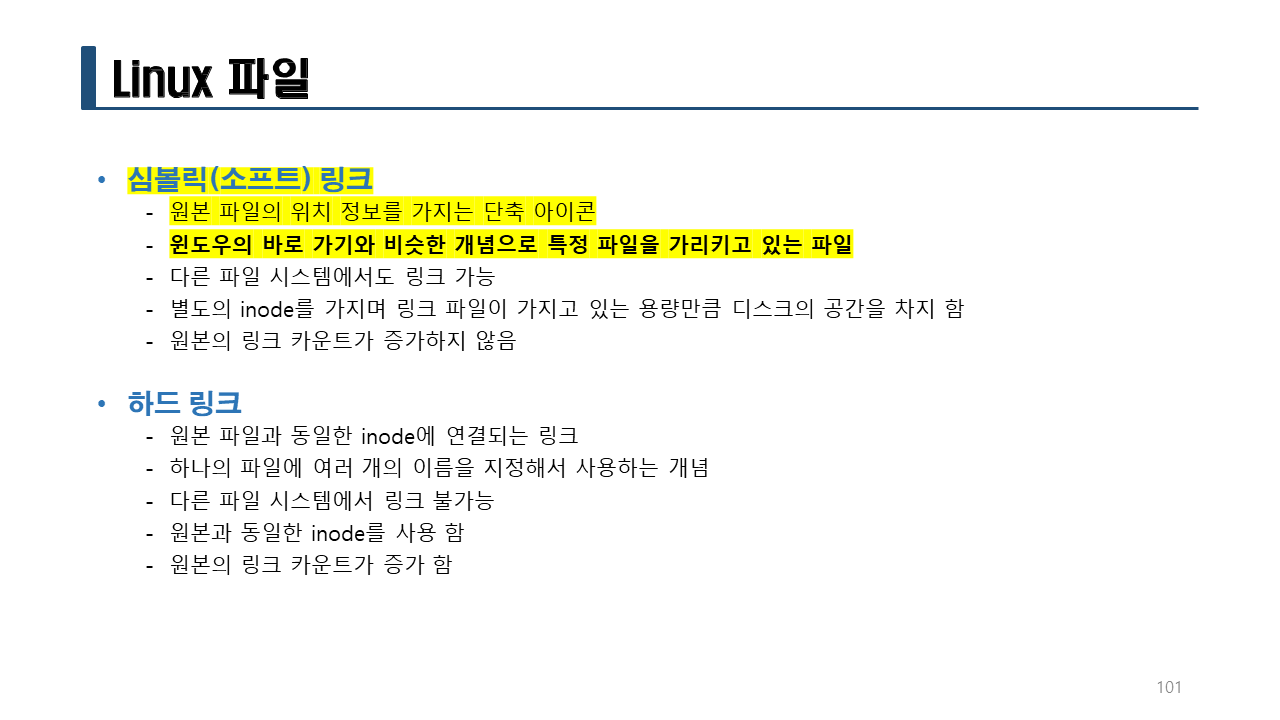
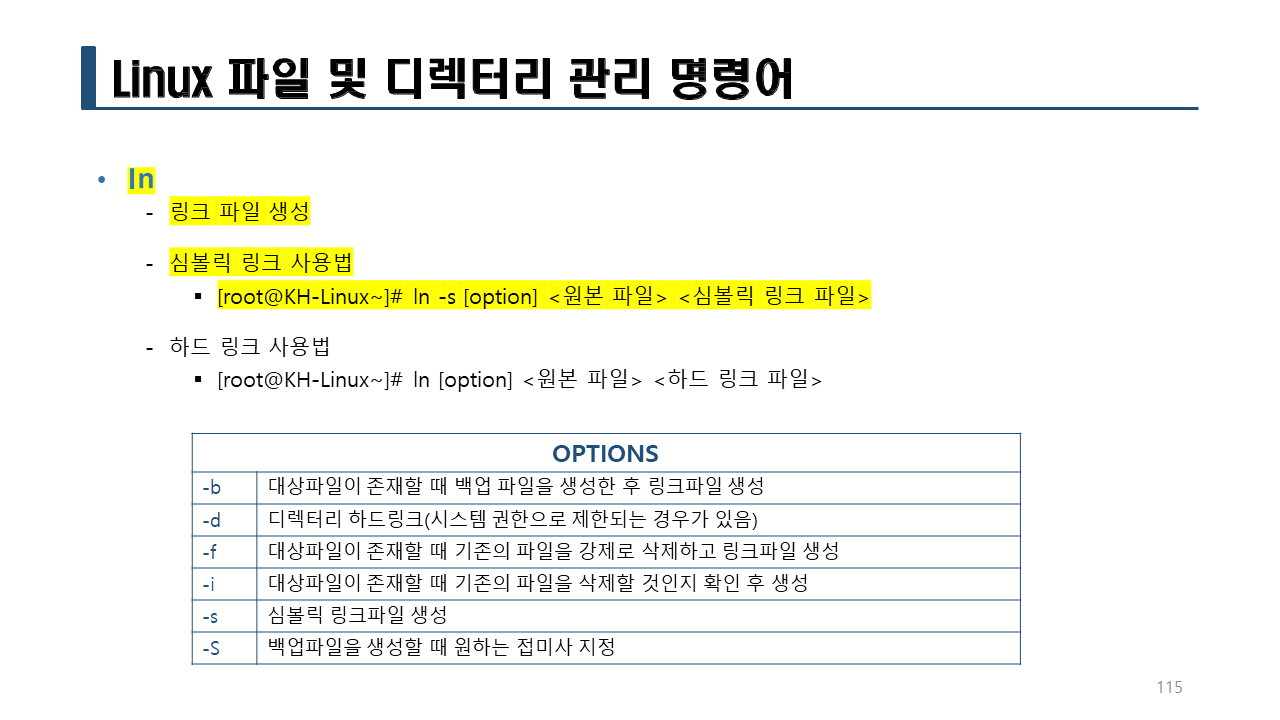
– $HOME/.bash_history 를 /dev/null로 심볼릭 링크로 만든다.
#ln -sf /dev/null .bash_history
#ls -l .bash_history
lrwxrwxrwx. 1 root root 9 10월 14 19:52 .bash_history -> /dev/null
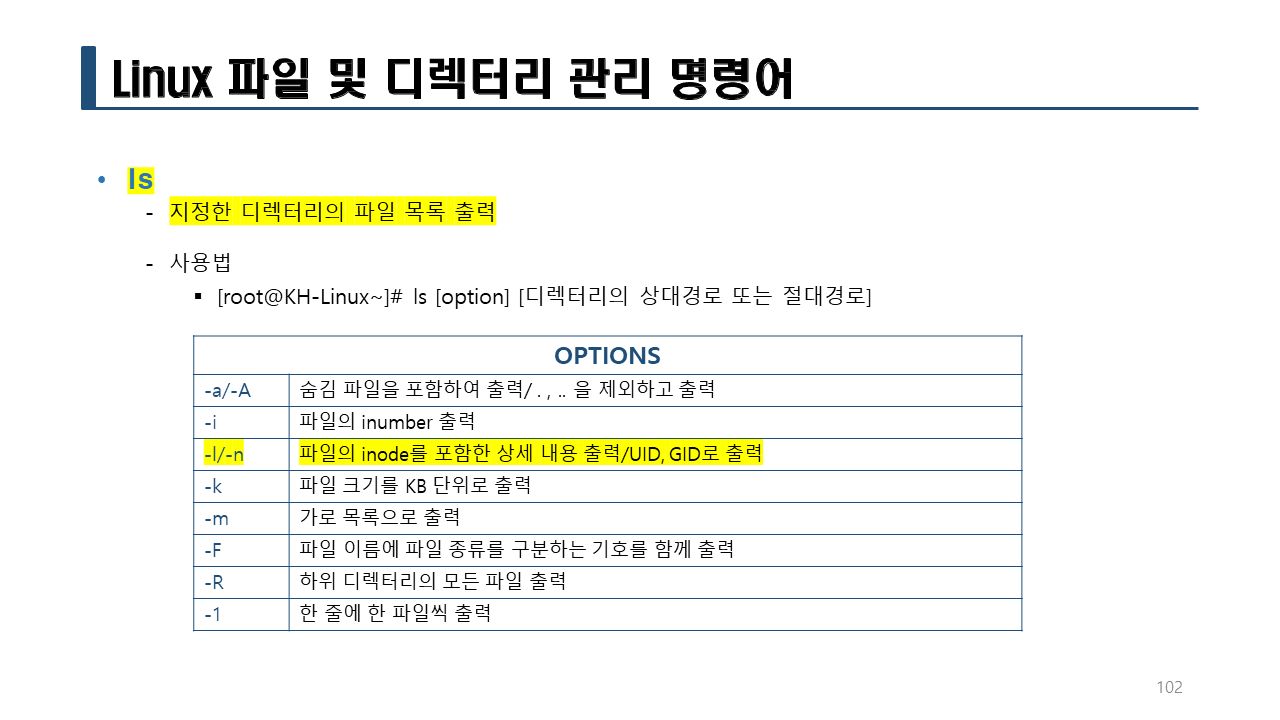
history 명령어는 이전에 사용했던 명령어를 기억하고 있고 이를 다시 출력하는 명령어
#history
이전 명령어 10개까지 출력한다.
#history 10
히스토리가 저장된 파일
기본값: $HOME/.bash_history
기본값을 다른 값으로 변경할 수 있다.
히스토리에 관련된 환경변수
#set | grep HIST
HISTCONTROL=ignoredups
HISTFILE=/root/.bash_history
HISTFILESIZE=1000
HISTSIZE=1000
HISTCONTROL=ignoredups
ignoredups : 중복된 명령어는 무시한다. (여러 번 입력 시 하나만 기록)
HISTCONTROL=erasedups
erasedups : 중복 로그를 제거하고 가장 최근의 로그를 기록한다.
HISTCONTROL=ignorespace
명령어를 실행시 처음 스페이스가 포함되면 로그에 기록하지 않는다.
HISTFILE=/root/.bash_history
로그아웃 후 명령어가 저장될 파일을 기록한다.
HISTFILESIZE=1000
환경변수 HISTFILE에 저장된 파일의 명령어 개수가 저장된다.
명령어 1,000개를 말하므로 /root/.bash_history는 1,000줄이 된다.
HISTSIZE=1000
로그인 후 명령어를 실행하면 그 명령어가 메모리에 저장되는데 이 메모리의 사이즈를 말한다.
실습> 히스토리 변수 조작을 막는 방법
이 실습을 진행하기 위해서는 아래와 같은 내용을 알고 있어야 한다.
bash에서 history의 역할
/etc/profile 의 역할
히스토리에 대한 내용
/dev/null 에 대한 내용
readonly 에 대한 내용
실습 진행은 일반 유저와 관리자 모두 가능하다.
#echo $HISTSIZE
1000
#HISTSIZE=0 <-- 메모리에 명령어를 저장하지 않는다는 의미이다.
#<-- 방향키 위로 올리면 안올라간다.
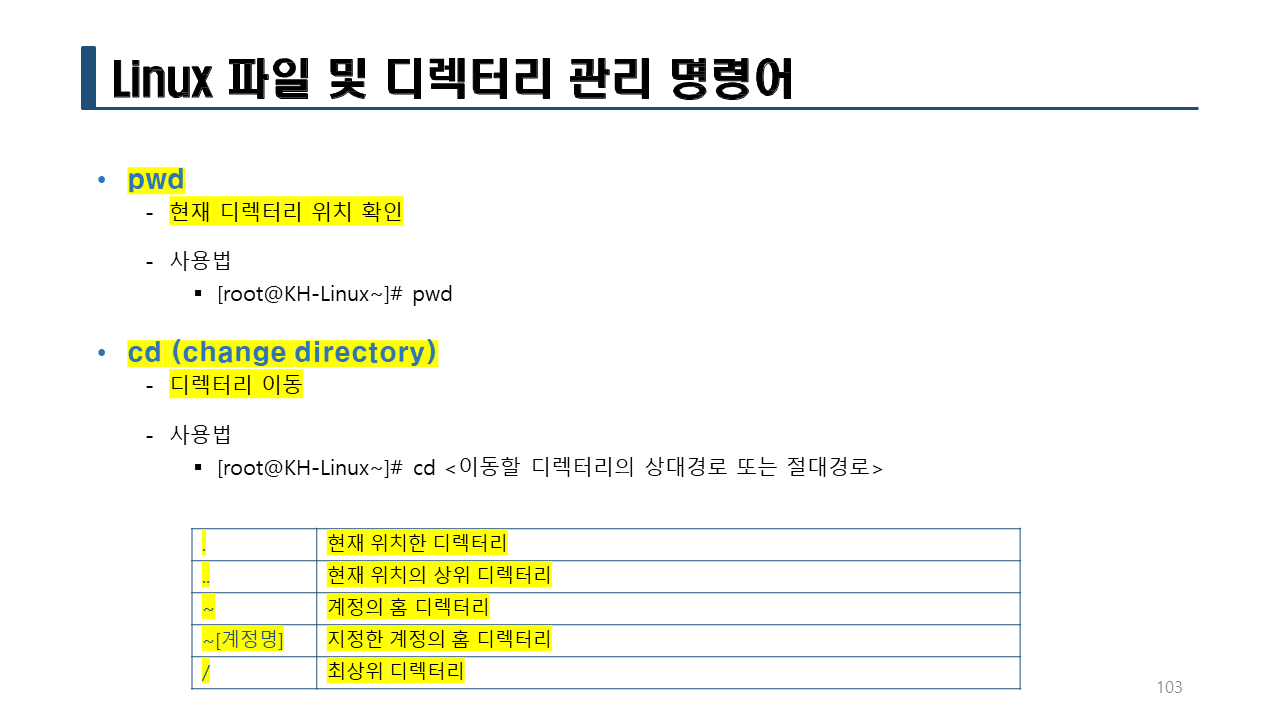
#pwd
#ls
#> .bash_history
#ll .bash_history
-rw-------. 1 root root 0 4월 13 14:48 .bash_history
#echo $HISTFILE
/root/.bash_history
#HISTFILE=/dev/null
#set | grep HIST
HISTCONTROL=ignoredups
HISTFILE=/dev/null
HISTFILESIZE=1000
HISTSIZE=0
#exit
다시 로그인해서 이전 로그인시 명령어를 확인한다.
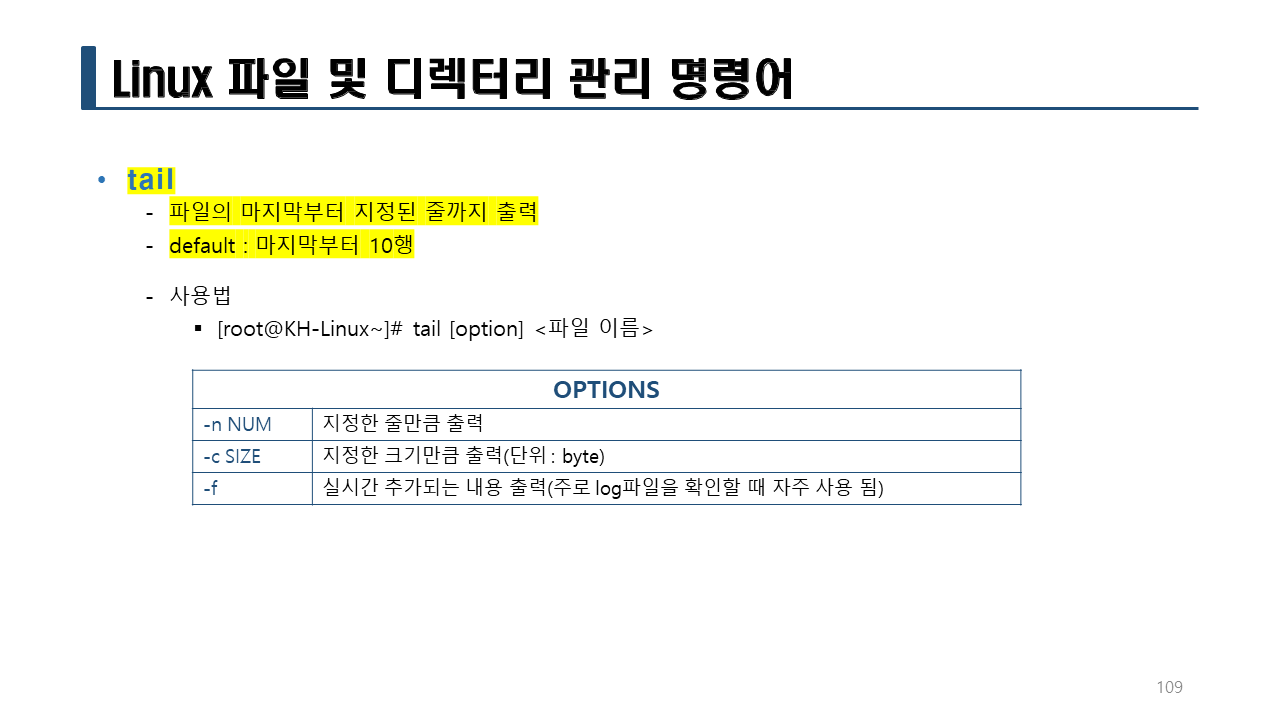
#tail .bash_history
<-- 결론 : 변조가 되었으므로 명령어가 기록이 안된다.
#ll .bash_history
-rw-------. 1 root root 0 4월 13 14:48 .bash_history
👉 [해킹 히스토리 삭제 방지 1]
환경변수 조작을 막는 방법은 읽기 전용으로 변수를 변경하면 된다.
형식 : readonly 환경변수
/etc/profile : 시스템에 모든 사용자가 로그인을 하면 실행되는 스크립트 파일로 이 파일 안에 넣어야 한다.
#vi /etc/profile
:
:(생략)
HISTFILESIZE=50000
HISTSIZE=50000
readonly HISTFILE
readonly HISTFILESIZE
readonly HISTSIZE
user1 사용자로 로그인한다.
C:\Users\user2>ssh user1@200.200.200.3
user1@200.200.200.3's password:
[user1@localhost ~]$
$ set | grep HIST
HISTCONTROL=ignoredups
HISTFILE=/home/user1/.bash_history
HISTFILESIZE=50000
HISTSIZE=50000
HISTSIZE 변수를 삭제해보면 readonly 이므로 삭제가 안된다.
$ unset HISTSIZE
-bash: unset: HISTSIZE: cannot unset: readonly variable
HISTSIZE 변수를 0으로 변경하면 readonly 이므로 값 변경이 안된다.
$ HISTSIZE=0
-bash: HISTSIZE: readonly variable
HISTFILE 변수를 /dev/null로 변경하면 readonly 이므로 값 변경이 안된다.
$ HISTFILE=/dev/null
-bash: HISTFILE: readonly variable
💥 이 방법의 문제점은 .bash_history 파일을 삭제하는 것이다.
$ ls -a
. .. .bash_history .bash_logout .bash_profile .bashrc
$ rm -f .bash_history
$ ls -a
. .. .bash_logout .bash_profile .bashrc
$ exit
👉 [해킹 히스토리 삭제 방지 2]
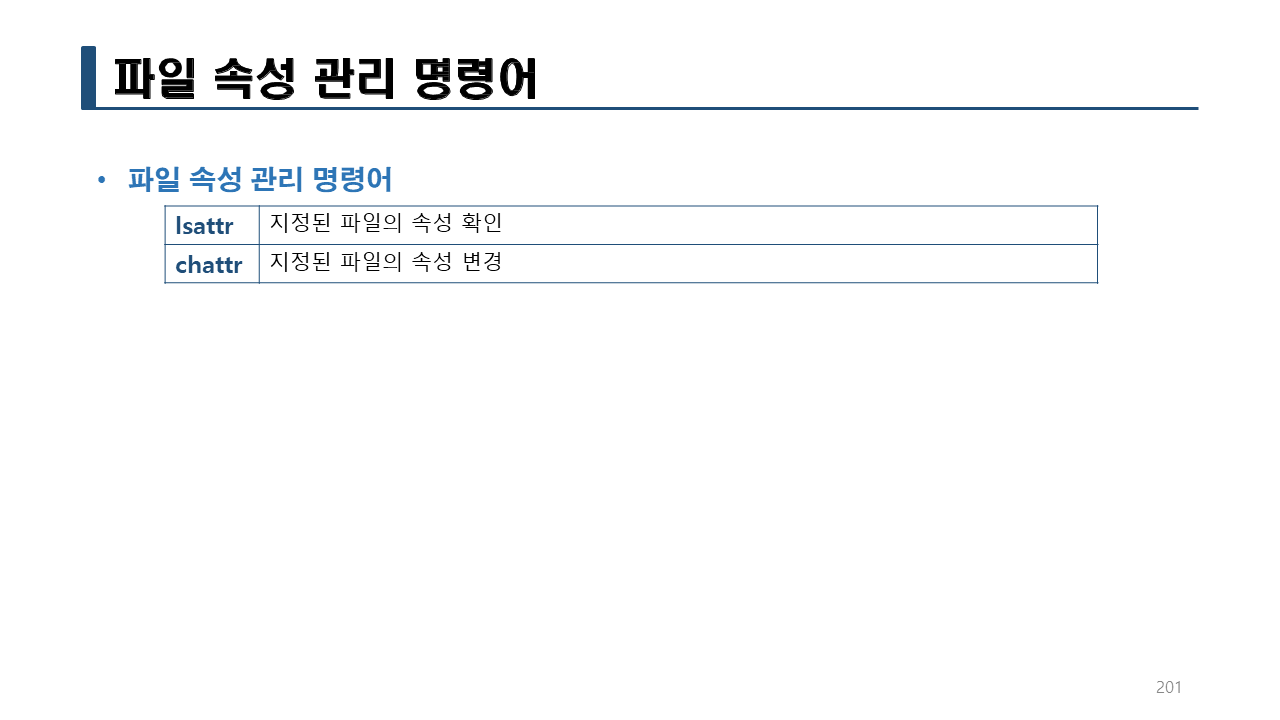
파일 삭제를 막기 위해서는 파일에 속성을 변경하면 된다.
-a : 파일의 내용을 추가하는 것은 가능하지만 파일 삭제는 못한다.
#rm -f ~user1/.bash_history
#install -m 644 -o user1 -g user1 /dev/null ~user1/.bash_history
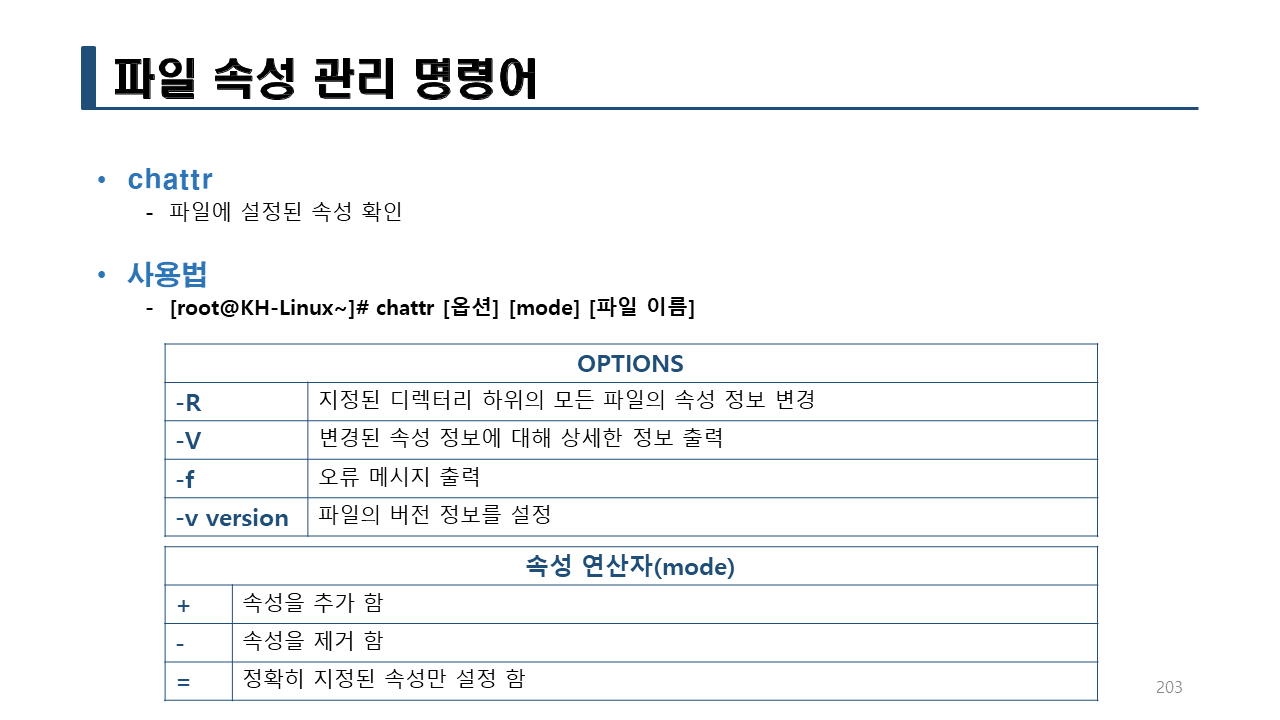
#chattr +a ~user1/.bash_history
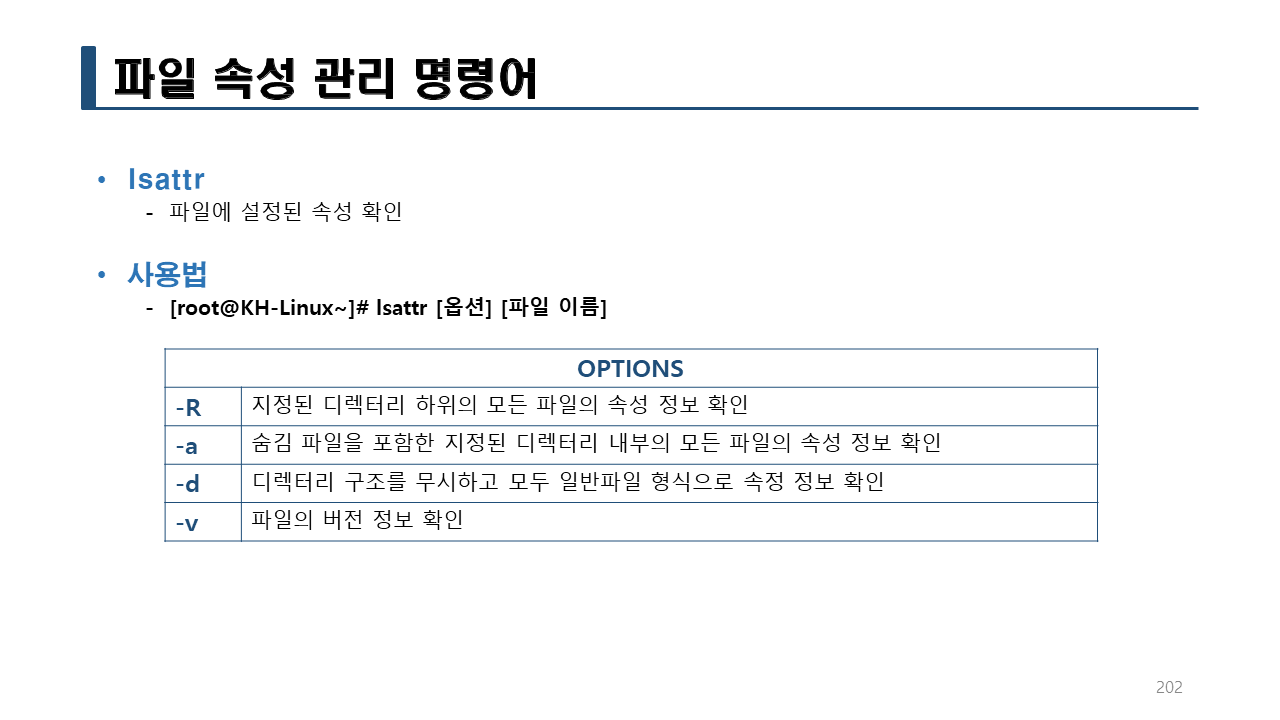
#lsattr ~user1/.bash_history
-----a---------- /home/user1/.bash_history
$ rm -f .bash_history
rm: cannot remove `.bash_history': 명령을 허용하지 않음
$ ln -sf /dev/null .bash_history
ln: cannot remove `.bash_history': 명령을 허용하지 않음
$ chattr -a .bash_history
chattr: 명령을 허용하지 않음 while setting flags on .bash_history
