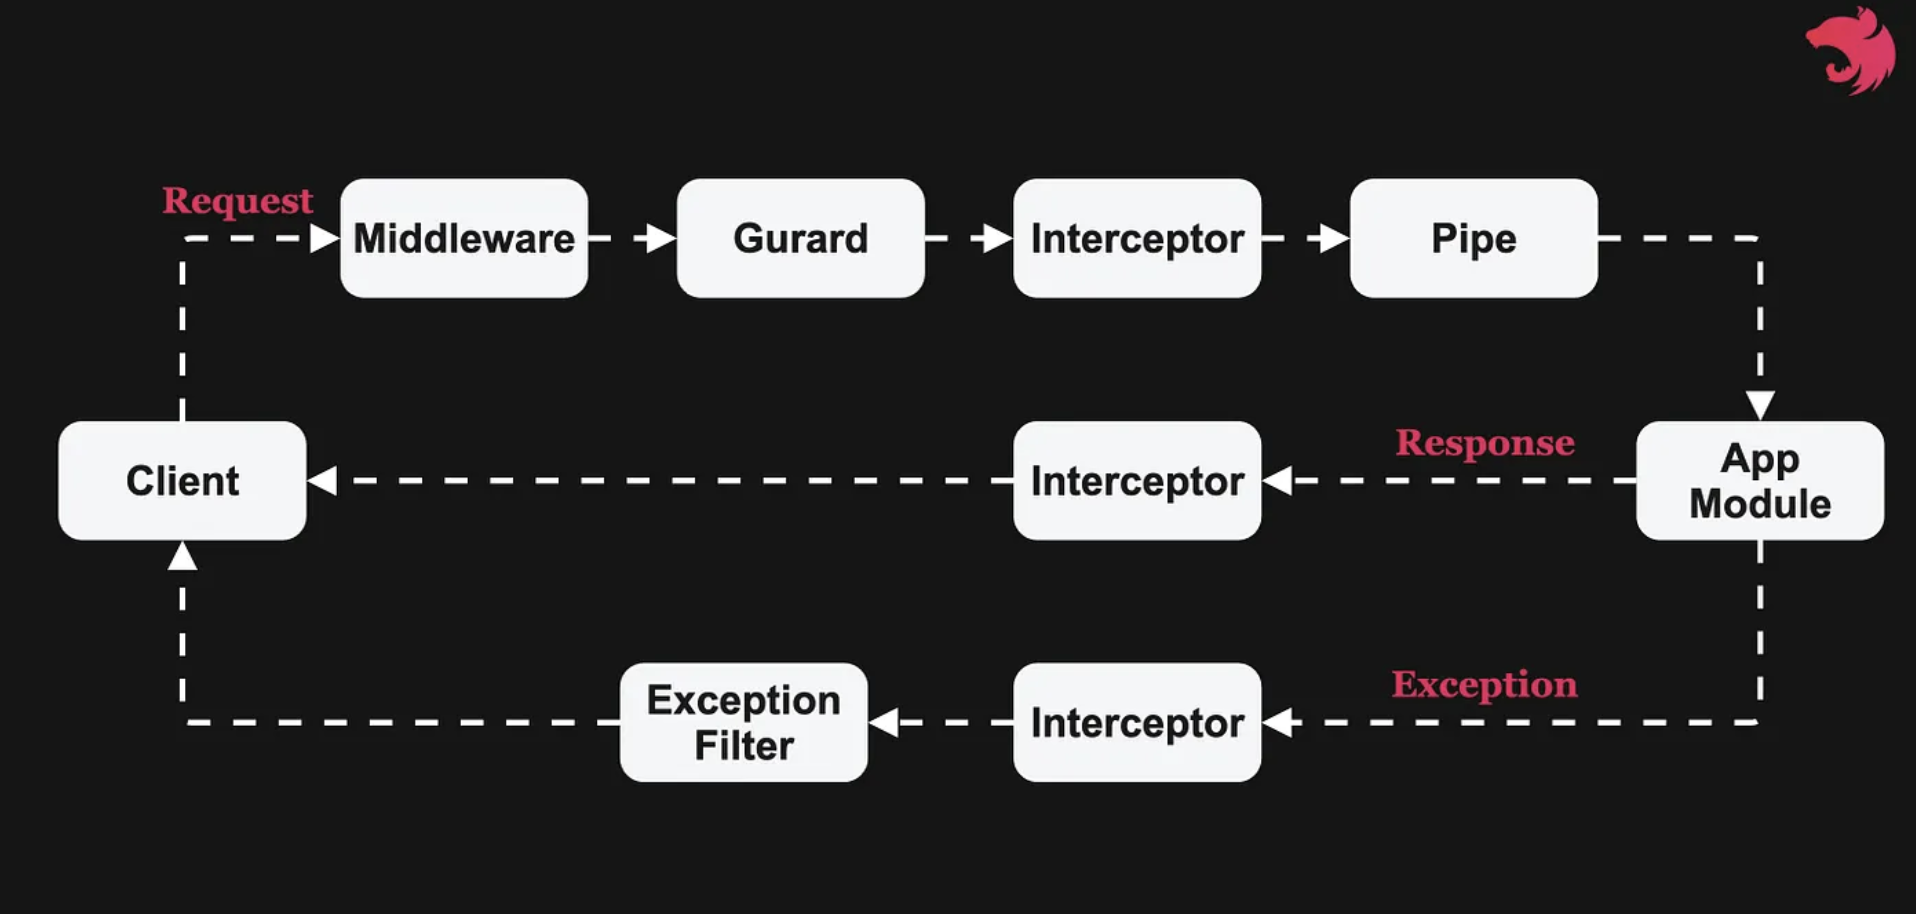
NestJS로 프로젝트를 진행하면서, 클라이언트에 반환하는 API 응답 형식을 통일해야 할 필요성을 느꼈다.
가장 처음에는 컨트롤러에서 직접 다음과 같이 응답 객체를 만들어 반환하려 했다.
컨트롤러에서 직접 응답 객체 생성
@Controller('system')
export class SystemController {
    constructor(private readonly systemService: SystemService) { }

    @Get('status')
    status() {
        const systemStatusData = this.systemService.getStatus();

        // 컨트롤러가 너무 많은 책임을 갖게 된다.
        return {
            statusCode: 200,
            message: '시스템 상태 조회 성공',
            data: systemStatusData,
        };
    }
}
문제점
- 반복 (Repetition): 모든 API 메서드마다
statusCode,message,data구조를 반복해서 작성해야 한다. - 책임의 모호함 (SoC 위반): 컨트롤러의 핵심 책임은 라우팅과 요청 검증, 그리고 서비스 호출이다. 응답 형식을 '포장'하는 책임까지 맡는 것은 관심사의 분리(Separation of Concerns) 원칙에 위배된다.
- 유지보수 어려움: 만약
statusCode를code로 바꾸는 등, 공통 응답 형식을 변경해야 한다면 프로젝트 내의 모든 컨트롤러 파일을 수정해야 한다.
Static 유틸리티 클래스
가장 간단하게는 ApiResponse 같은 유틸리티 클래스를 만들어 static 메서드를 호출하는 방식이 있다.
// src/common/utils/api-response.util.ts
export class ApiResponse {
  public static success<T>(message: string, data: T) {
    return {
      statusCode: 200,
      message,
      data,
    };
  }
}

// SystemController.ts
@Get('status')
status() {
    const data = this.systemService.getStatus();
    // 여전히 컨트롤러에서 'ApiResponse.success'를 수동으로 호출해야 한다.
    return ApiResponse.success('시스템 상태 조회 성공', data);
}
여전히 모든 컨트롤러 메서드에서 ApiResponse.success(...)를 직접 호출하고 return 해줘야 한다는 점이 번거롭다.
🌟 Interceptor와 Custom Decorator 활용
NestJS는 이러한 '횡단 관심사(Cross-Cutting Concern)'를 처리하기 위해 인터셉터(Interceptor) 라는 기능을 제공한다.
컨트롤러가 순수한 데이터만 반환하면, 인터셉터가 응답을 보내기 직전에 이를 가로채서 우리가 원하는 공통 응답 형식으로 자동으로 래핑해주는 방식이다.
1. Custom Decorator 생성 (@ResponseMessage)
컨트롤러마다 다른 message를 설정할 수 있도록 커스텀 데코레이터(@ResponseMessage)를 만든다.
// src/common/decorators/response-message.decorator.ts

import { SetMetadata } from '@nestjs/common';

export const RESPONSE_MESSAGE_KEY = 'responseMessage';
export const ResponseMessage = (message: string) =>
  SetMetadata(RESPONSE_MESSAGE_KEY, message);
2. Success Interceptor 생성
모든 성공 응답을 가로채서 래핑하는 인터셉터를 구현한다.
// src/common/interceptors/success.interceptor.ts

import {
  Injectable,
  NestInterceptor,
  ExecutionContext,
  CallHandler,
} from '@nestjs/common';
import { Observable } from 'rxjs';
import { map } from 'rxjs/operators';
import { Reflector } from '@nestjs/core';
import { RESPONSE_MESSAGE_KEY } from '../decorators/response-message.decorator';

// 공통 응답 형식을 Interface로 정의
export interface IApiResponse<T> {
  statusCode: number;
  message: string;
  data: T;
}

@Injectable()
export class SuccessInterceptor<T>
  implements NestInterceptor<T, IApiResponse<T>>
{
  constructor(private reflector: Reflector) {}

  intercept(
    context: ExecutionContext,
    next: CallHandler,
  ): Observable<IApiResponse<T>> {

    // @ResponseMessage() 데코레이터에서 설정한 메시지를 가져온다.
    // Reflector를 사용해 메타데이터를 조회한다.
    const message =
      this.reflector.get<string>(
        RESPONSE_MESSAGE_KEY,
        context.getHandler(),
      ) ?? 'OK'; // 메시지가 없으면 'OK'를 기본값으로

    // next.handle()은 컨트롤러의 핸들러(메서드)가 반환한 값(Observable)이다.
    // pipe(map(...))을 통해 반환된 '데이터'를 가공한다.
    return next.handle().pipe(
      map((data) => ({
        statusCode: 200,
        message: message,
        data: data, // 컨트롤러가 반환한 순수 데이터
      })),
    );
  }
}
3. 인터셉터 전역 등록
이 인터셉터가 모든 요청에 적용되도록 main.ts에 등록한다.
// src/main.ts

import { NestFactory, Reflector } from '@nestjs/core';
import { AppModule } from './app.module';
import { SuccessInterceptor } from './common/interceptors/success.interceptor';

async function bootstrap() {
  const app = await NestFactory.create(AppModule);

  // SuccessInterceptor가 Reflector를 사용하므로 new로 생성하며 의존성을 주입해준다.
  app.useGlobalInterceptors(new SuccessInterceptor(new Reflector()));

  await app.listen(3000);
}
bootstrap();
4. 최종 적용된 컨트롤러 코드 (Skinny Controller)
이제 SystemController는 비즈니스 로직(Service)을 호출하고 순수 데이터만 반환하는 '가벼운 컨트롤러(Skinny Controller)' 의 역할을 수행한다.
// src/system/system.controller.ts

import { Controller, Post, Get } from '@nestjs/common';
import { SystemService } from './system.service';
// 커스텀 데코레이터 import
import { ResponseMessage } from '../common/decorators/response-message.decorator';

@Controller('system')
export class SystemController {
    constructor(private readonly systemService: SystemService) { }

    // 응답 메시지만 데코레이터로 설정
    @ResponseMessage('System boot initiated successfully')
    @Post('boot')
    async boot() {
        // 순수한 데이터 혹은 로직 결과만 반환!
        return this.systemService.boot();
    }
}
5. Fat Service
서비스는 HTTP에 대해 아무것도 모른 채 순수하게 비즈니스 로직만 처리한다.
// src/system/system.service.ts

@Injectable()
export class SystemService {
    ...

    boot() {
        ...
        return { status: 'booted' };
    }
}
인터셉터를 활용함으로써 관심사의 분리(SoC) 를 수행할 수 있게 되었다.
- Controller: HTTP 요청을 받아 적절한 Service에 전달한다.
- Service: 비즈니스 로직을 처리하고 순수 데이터를 반환한다.
- Interceptor: 서비스가 반환한 순수 데이터를 공통 응답 형식으로 포장한다.