1. Google OAuth login 시나리오
OAuth 2.0을 사용하여 Google API에 액세스하기
- App-Client : 나 로그인 할래! Access Token 보내주라~
- Google Server : 짜 요기~ 이걸로 이따가 너네 앱에서 요청해봐!
- App-Server : 나 Access Token 들고왔어! 나 알아보겠어? 나 맞지?
- Google Server : 오 맞네! 맞다는 증거로 Token 이랑 User 정보 보내줄게!
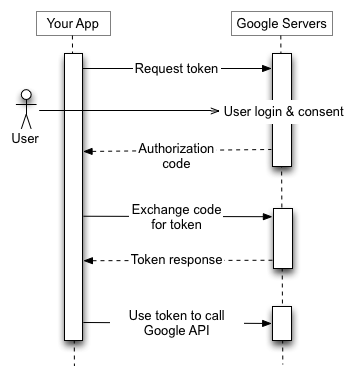
- 애플리케이션은 Google 승인 서버로 토큰 요청을 전송하고,
승인 코드를 수신하고,
코드를 토큰으로 교환하고,
이 토큰을 사용하여 Google API 엔드포인트를 호출
- Access Token : 애플리케이션이 Google API를 사용하여 비공개 데이터에 액세스하려면
먼저 해당 API에 대한 액세스 권한을 부여하는 액세스 토큰을 얻어야 합니다.
2. google-auth-library 설치
pakage.json
"google-auth-library": "^7.11.0",2. test용 access token 생성
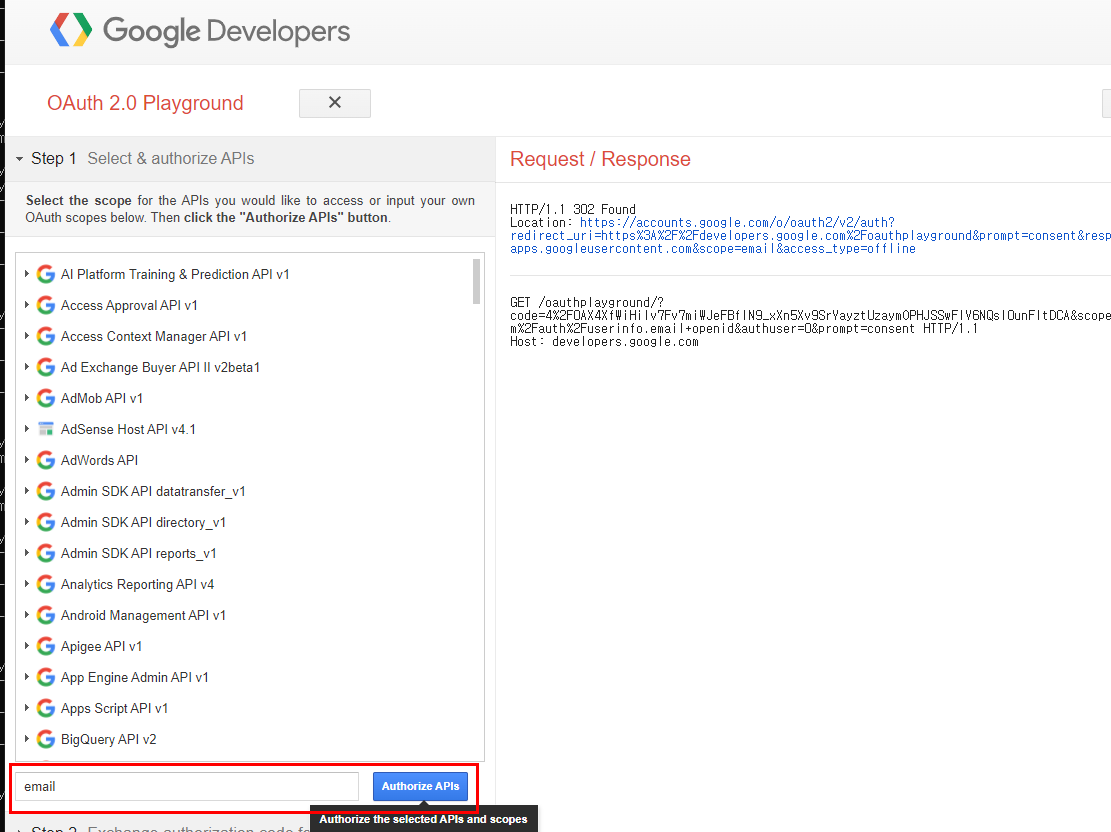
Google Oauth 2.0 playground
구글 oauth playground 에서 api를 통해 엑세스 토큰 발급 가능!
와 애플기기를 1도 안쓰는 사람으로서, 애플로그인 API를 구현해보니
이제야 깨달은 정말정말 고마웠던 구글 디벨로퍼....
Client단과 동시에 개발이 필요하기 때문에, 직접 모바일에서 요청을 보내지 않고도
OAuth playground를 통해 Access token을 발급받을 수 있다.
즉, 여기서
1. App-Client : 나 로그인 할래! Access Token 보내주라~
2. Google Server : 짜 요기~ 이걸로 이따가 너네 앱에서 요청해봐!
2번까지 실행하고 Access Token을 발급해주는 것!
여기서 발급 받은 토큰을 우리 측 서버로 들고가면 된다!
-
가져올 정보인 email을 입력하고
Athorize API
-
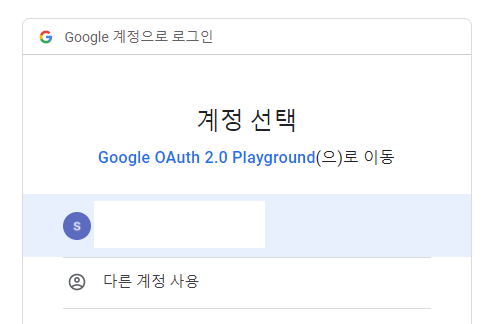
구글 계정 로그인
-
Exchange authorization code for tokens
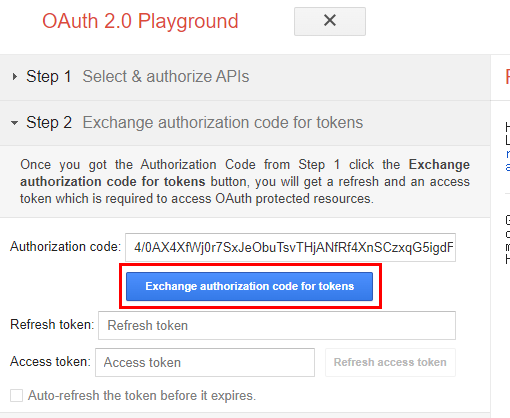
-
access token 복사
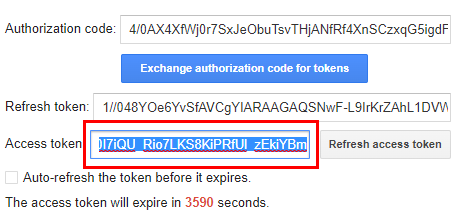
3. access token 으로 사용자 정보 가져오기
복사한 accesstoken을 body에 담아 서버로 post요청을 보내줌
-
login.ts
export default defineRoute('post', '/login', schema, async (req, res) => {
  const {accessToken} = req.body;

  try {
    const userInfo = await getGoogleOAuthInfo(accessToken);
    const existEmail = await getCustomRepository(UserRepository).checkEmail(userInfo.email);
    if (existEmail) {
      throw Wrongemail();
    }
    else {
      await getCustomRepository(UserRepository).createUser(userInfo.email,"test","google",userInfo.oauthId);
    }
    return res.send(`당신 정보는 ${userInfo.email}`);

  } catch (e) {
    throw WrongAuth();
  }
});
		```
-
oauth.ts
import {OAuth2Client} from 'google-auth-library';

export async function getGoogleOAuthInfo(accessToken: string) {
  const info = await new OAuth2Client().getTokenInfo(accessToken);

  return {
    email: info.email,
    oauthId: info.sub,
  };
}
		```
-
OpenID Connect https://www.ibm.com/docs/ko/sva/9.0.7?topic=concepts-openid-connect 참조!
-
body에 담아온 토큰을 getGoogleOAuthInfo 함수를 호출해 인자로 넣어준다.
-
getGoogleOAuthInfo 에서는 accesstoken을 구글 서버로 보내고 이메일과 subject(여기서는 oauthId)를 받아와서 리턴해준다.
-
login.ts 에서는 받아온 유저 정보 중 이메일로 기존에 가입된 회원인지 체크한다.
-
신규회원이라면 데이터 베이스 User 테이블에 새로 저장해준다.
4. POST 요청 보내기
POST http://localhost:3000/login
Content-Type: application/json

{
  "accessToken": "paste here"
}
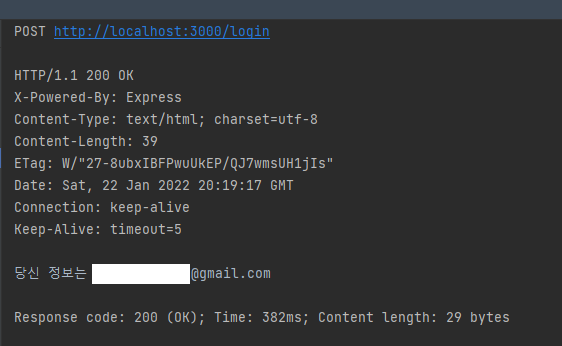
- 유저 정보 잘 가져온다!
- 로그인 끗!
간단해보이지만 난 이해하기 어려웠다 흒끆
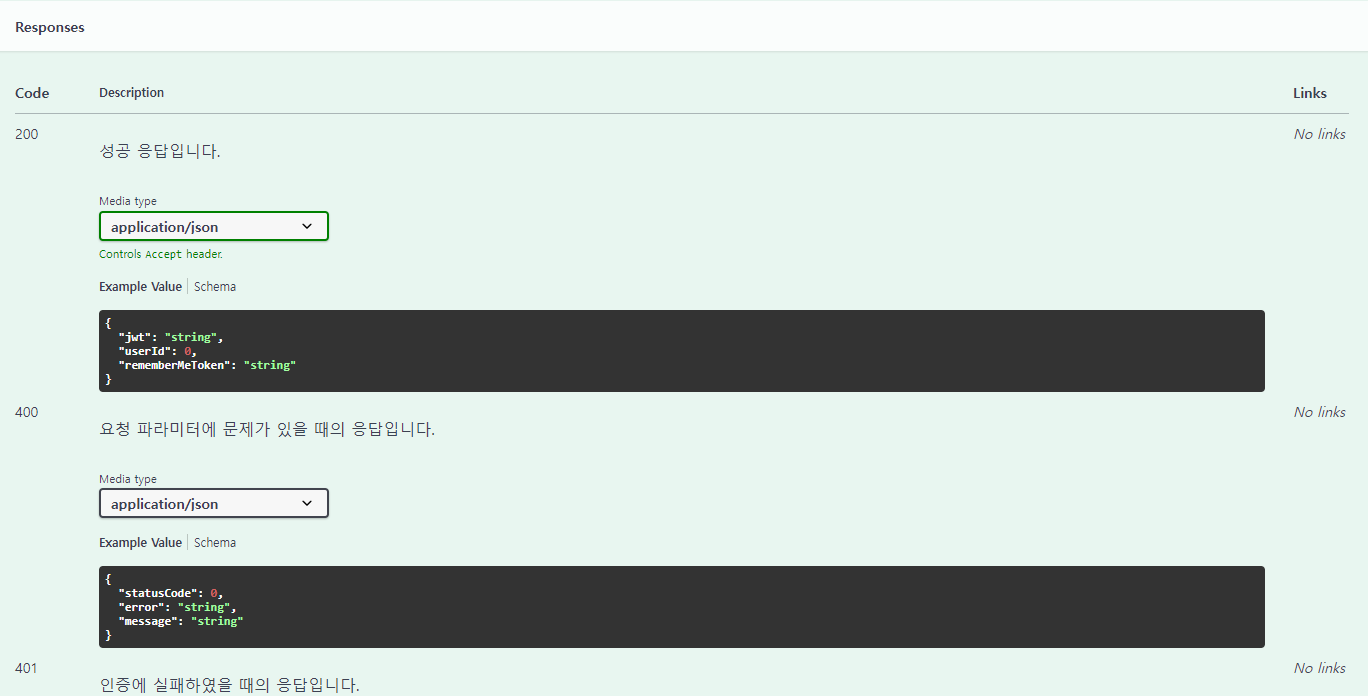
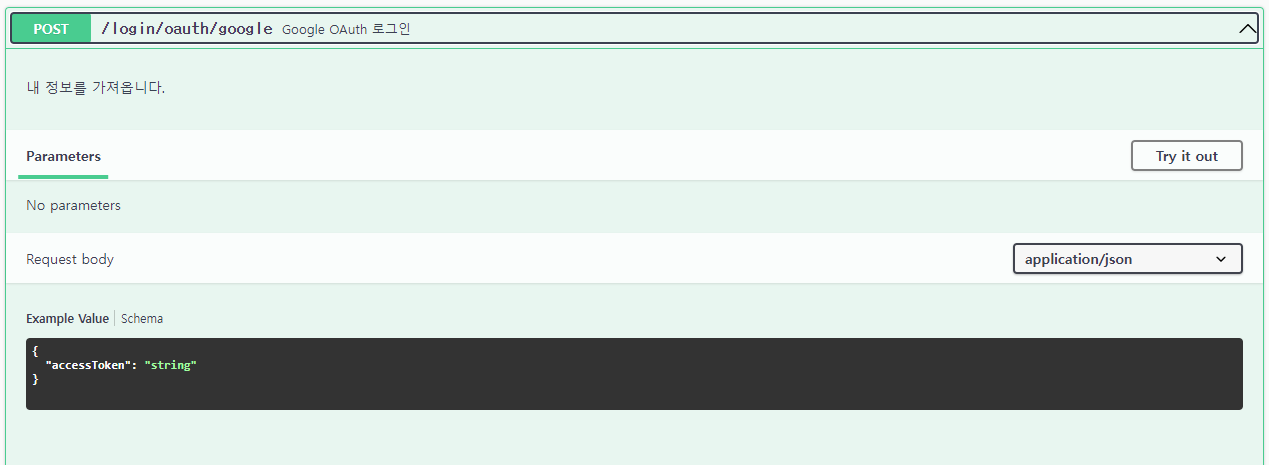
5. Swagger API 문서
-
요청
-
응답