

스프링 왜 나왔지~?
늘 그냥 사용했던 스프링에 대해 탐구하고, DI를 XML,어노테이션 방식으로 구현해보며 스프링 핵심기술들을 몸소 체험해보려고 한다 .
EJB (Enterprise Java Bean) , 스프링 이전의 개발기술
기존의 JAVA EE는 너무 무겁고, 설정이 복잡했다. 그래서, 대안으로 EJB라는 기술이 등장했다.
EJB
Enterprise 규모의 애플리케이션 개발을 단순화학 위한 기술 스택 , 하지만, 비즈니스 로직을 작성하기 위해 불필요한 환경 설정 코드가 많이 필요해서 배보다 배꼽이 커진다.
샘플 코드
public class TestEjbClient {

    public static void main(String[] args) throws NamingException {
        Properties properties = new Properties();
        properties.setProperty(Context.INITIAL_CONTEXT_FACTORY,
          "org.apache.openejb.client.LocalInitialContextFactory");
        properties.setProperty(Context.PROVIDER_URL, "ejbd://host:4201");

        Context context = new InitialContext(properties);

        TestStatelessEjbRemote testStatelessEjbRemote
          = (TestStatelessEjbRemote) context.lookup("ejb/TestStatelessEjbRemote");

        testStatelessEjbRemote.sayHello("Stackify");
    }
}
스프링의 프로토 타입은 기존의 Java EE의 경량급 대안이자, EJB에서의 단점(환경설정의 불편)을 극복하기 위한 목적이였다.
스프링은 뭐가 다른가?
스프링의 특징
- 스프링은 개발자가 서비스 도메인과 관련된 비즈니스 로직 작성에만 집중할 수 있도록 다양한
부가 기능들을 지원함.
로깅,트랜잭션,보안,인증등은 부가기능이라고 할 수 있다.- POJO 기반의 단순하고 유연한 비즈니스 로직 작성 지향 , 라이브러리에 의존한 코드로 작성하는것보다 순수 자바 객체로 작성할 수 있도록 제공한다.
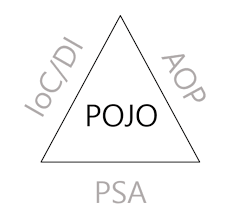
- POJO, Plain Old Java Object,
스프링의 핵심 메커니즘
- 스프링은 여러 사람이 함께 만든 프로젝트이다. 스프링 프로젝트를 개발할 때 지켜야 할 원칙이 존재한다.
- 스프링 프로젝트: Spring Boot, Spring Security, Spring Data..
- DI
- AOP
- PSA
DI Dependency Injection
- 개발자가 new 연산자를 직접 사용하지 않고, 스프링 컨테이너라고 불리는 별도의 컨테이너를 통해 비즈니스 객체를 대신 생성해서 주입해주는 기능.
- 우리가
Controller,Service등을 new로 객체를 만들지 않는것이 바로 이거다.
AOP - Aspect Oriented Programming
관점 지향 프로그래밍이라는 뜻으로, 프로그램 내에서 공통적으로 존재하는 반복적인 로직을 별도의 코드로 분리하는 방법 , 앞서 말한 로깅, 트랜잭션, 보안 등을 분리하여 별도의 코드로 작성하는 기법.
덕분에, 개발자는 비즈니스 로직에 집중할 수 있음
PSA - Portable Service Abstractions
본질적으로는 AOP와 유사하게 어떤 처리를 수행해야 함에 있어서,
별도의 코드를 작성하지 않고도 Annotation과 같이 코드를 추상화시킨 기능을 사용하여
개발자가 비즈니스 로직 작성에 더 집중할 수 있도록 도와주는 일련의 설계 개념
어노테이션 만으로 어떤 처리를 수행하는걸 추상화해주는 기법. 어노테이션만 있는것은 아니다. 아무튼 맥락은 비즈니스 로직 작성에 집중할 수 있도록 도와주는 개념.
스프링 컨테이너
애플리케이션의 동작에 필요한 의존성을 보관,관리하는 공간
IOC(제어의 역전), 의존성을 제어하는 방식을 개발자가 아닌 외부에서 주입해주기 때문에, 제어권의 방향이 역전되었다고 표현함.
컨테이너를 사용하면, 어떤 객체가 자신에게 필요한 의존성을 직접 new 연산자를 통해 해결하는것이 아니라, 외부에서 해당 의존성을 전달,주입 받을 수 있는것.
Bean,비즈니스 객체
- 애플리케이션이 동작하기 위해 호출되어 사용되는 비즈니스 객체를 의미한다.
- 개발자가 빈이 스프링 컨테이너에서 관리하도록 하도록 할 수 있다.
<beans xmlns="http://www.springframework.org/schema/beans"
       xmlns:xsi="http://www.w3.org/2001/XMLSchema-instance"
       xsi:schemaLocation="
        http://www.springframework.org/schema/beans http://www.springframework.org/schema/beans/spring-beans.xsd">
    <bean class="dev.spring.step03_setter_injections.TapeReader">
    </bean>
</beans>
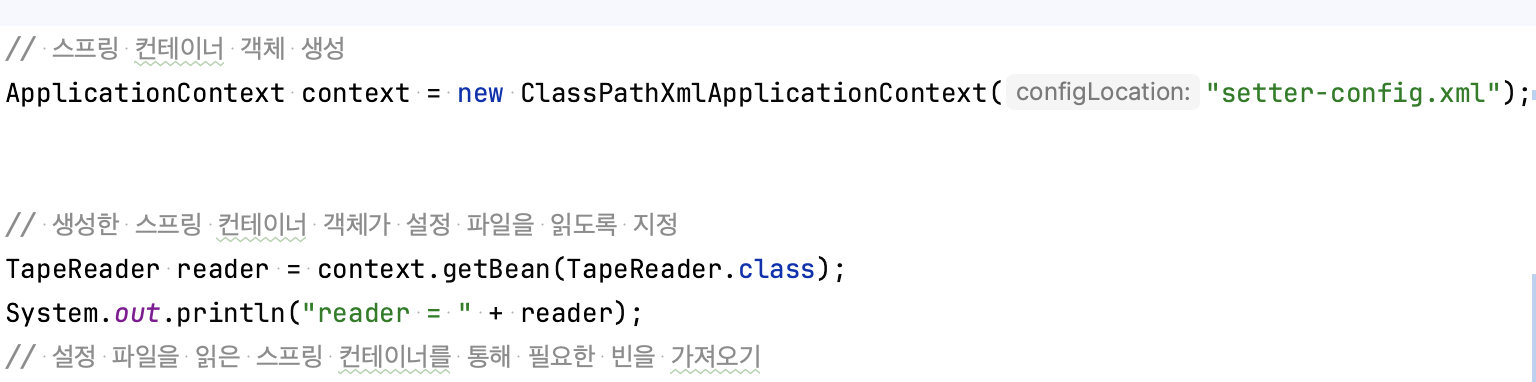

- 스프링 컨테이너를 객체를 생성하고, 빈을 꺼내서 출력해보면 TapeReader 객체를 실제로 가져온 것을 알 수 있다.
XML 사용해서 Setter Injection
<beans xmlns="http://www.springframework.org/schema/beans"
       xmlns:xsi="http://www.w3.org/2001/XMLSchema-instance"
       xsi:schemaLocation="
        http://www.springframework.org/schema/beans http://www.springframework.org/schema/beans/spring-beans.xsd">
    <bean class="dev.spring.domain.TapeReader">
        <property name="tape" ref="tape"></property>
    </bean>

    <bean id="tape" class="dev.spring.domain.Tape">
        <property name="name" value="아일랜드"/>
        <property name="worked" value="true"/>
    </bean>
</beans>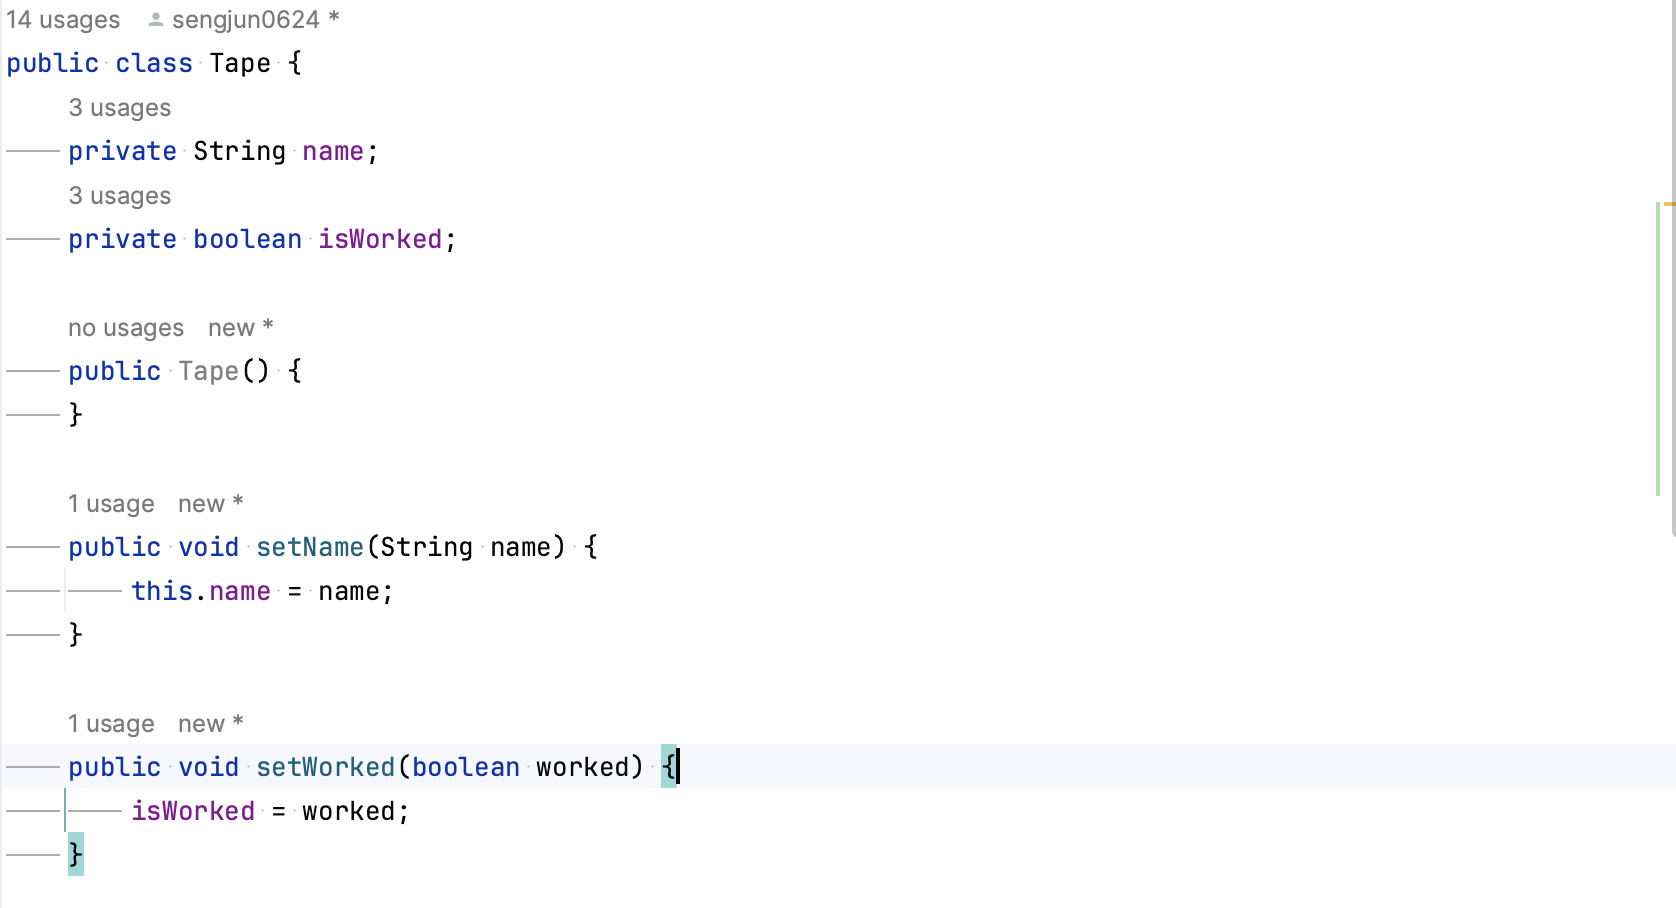
- Tape라는 클래스의 필드를 세터로 초기화 해주기 위해
<property>로 value를 집어 넣어 주었다.- 이렇게 하면 스프링이 알아서 setName,setWorked를 호출해주어, 값을 초기화해준다. setter가 없으면 값이 초기화가 되지 않음
- TapeReader 클래스는 Tape 클래스의 의존성을 가지고 있다.
<property>로 ref="tape"라고 지정해주면, 마찬가지로 setTape 메서드로 Tape의 의존성을 스프링이 주입해준다.
DI중 하나인 Setter_Injection을 설정파일을 통해 동작방식을 이해해보았다.
Setter Injection은 의존성이 주입되기전에 사용될 수 있고 Setter 메서드를 통해 의존성을 변경할 수 있기 때문에 불변객체를 만들기 어렵다.
XML Constructor-Injection
<beans xmlns="http://www.springframework.org/schema/beans"
       xmlns:xsi="http://www.w3.org/2001/XMLSchema-instance"
       xsi:schemaLocation="
        http://www.springframework.org/schema/beans http://www.springframework.org/schema/beans/spring-beans.xsd">

    <bean class="dev.spring.domain.TapeReader">
        <constructor-arg name="tape" ref="tape"></constructor-arg>
    </bean>

    <bean id="tape" class="dev.spring.domain.Tape">
        <constructor-arg name="name" value="아일랜드"></constructor-arg>
        <constructor-arg name="isWorked" value="true"></constructor-arg>
    </bean>
</beans>- 이렇게 xml을 구성하면, ApplicationContext가 Bean을 생성할 때 생성자가 자동으로 호출되며, value값을 tape에 넣어준다. 이후, TapeReader도 마찬가지로 Tape의 의존성을 자동으로 추가해준다.
package dev.spring.domain;

public class TapeReader {
	private Tape tape;

	public TapeReader(Tape tape) {
		this.tape = tape;
	}

	public TapeReader() {
	}

	public void setTape(Tape tape1) {
		this.tape = tape;
	}

	public void test() {
		if (tape.isWorked()) {
			System.out.println(tape.getName() + " 잘 동작합니다");
		} else {
			System.out.println(tape.getName() + " 사기당했어요 ㅋㅋ");
		}
	}
}
	public static void main(String[] args) {

		ApplicationContext context = new ClassPathXmlApplicationContext("constructor-config.xml");

		TapeReader reader = context.getBean(TapeReader.class);
		reader.test();

		Tape tape = context.getBean(Tape.class);
		reader.test();
	}
Tape라는 빈을 컨테이너에서 꺼내기전에 TapeReader를 먼저 꺼내어도TapeReader엔 Tape값이 정상적으로 들어가있다.- 이는 스프링이 의존 관계를 해석하고 자동으로 주입하기 때문이다.
- 스프링에선
생성자 주입이 권장되고 있다. 이유는 세터 DI에서 단점으로 작용했던불변 객체를 만들 수 있기 때문이다.- 의존성을 주입받을 필드에
final키워드를 지정해서 생성자로 초기화 한 이후에 수정할 수 없다.- 불변성을 유지하는 이유는?
- 값의 무분별한 변경을 막고,
동시성 문제에서 안전할 수 있다.
Annotation으로 DI해보기
- XML은 가장 오래된 빈 관리 방법이다. 어노테이션을 사용해서 DI를 구현해보자.
- 기본 XML 세팅, 아직 XML을 사용하긴 한다만 코드가 얼마나 짧아지는지 체험해보자
<?xml version="1.0" encoding="UTF-8"?>
<!-- xmlns:context attribute 추가 해당 xml 엘리먼트 참고 링크 https://docs.spring.io/spring-framework/reference/core/beans/annotation-config.html -->
<beans xmlns="http://www.springframework.org/schema/beans"
       xmlns:xsi="http://www.w3.org/2001/XMLSchema-instance"
       xmlns:context="http://www.springframework.org/schema/context"
       xsi:schemaLocation="http://www.springframework.org/schema/beans
    https://www.springframework.org/schema/beans/spring-beans.xsd
    http://www.springframework.org/schema/context
    https://www.springframework.org/schema/context/spring-context.xsd">


    <context:annotation-config/>
    <bean id="tapeReader" class="dev.spring.annotation.domain.TapeReader"></bean>

    <bean id="tape" class="dev.spring.annotation.domain.Tape"></bean>

</beans>
Annotation-Field 주입 방식
- @Value와 @Autowired를 사용할것이다.
public class Tape {
	// Value를 사용해 필드에 값을 직접 주입
	@Value("아일랜드")
	private String name;
	@Value("true")
	private boolean isWorked;
public class TapeReader {
@Autowired
private Tape tape;
- Autowired는 클래스의 멤버 변수에 Bean을 자동으로 주입하는 방식이다.
- 세터와 생성자없이 필드에 직접 어노테이션을 사용해서 주입해 주었다. 코드가 간결하지만, 불변성의 문제가 있다.
- 순환 참조 문제
- A가 B를 Autowired하고 B가 A를 Autowired하면 스프링 컨테이너가 두 객체를 생성하려다가 순환 참조 오류가 발생한다.
Setter 주입 방식
public class TapeReader {

	private Tape tape;
	@Autowired
	public void setTape(Tape tape) {
		this.tape = tape;
}- Setter 메서드위에 Autowired만 붙여주면 스프링이 자동으로 빈을 주입해준다는걸 확인할 수 있다.
생성자 주입 방식
public class TapeReader {

	private Tape tape;

	@Autowired
	public TapeReader(Tape tape) {
		this.tape = tape;
}- 생성자위에 마찬가지로 Autowired를 사용해주면 스프링이 자동으로 생성자 호출하면서 빈을 주입시켜준다.
- 해당 클래스에 생성자가 하나만 존재한다면 Autowired를 생략할 수 있다.
Coponent Scan 방식
- 매번 xml에 빈을 등록하는건 귀찮다. 그래서 스프링이 알아서 의존성을 스캔해서 필요한 곳에 주입할 수 있도록 적용해보자
<context:component-scan base-package="dev.spring.component_scan"/>
// TapeReader 클래스를 스프링의 컴포넌트 스캔 대상이 되도록 지정
// 해당 클래스는 애플리케이션에서 활용할 비즈니스 객체인 빈으로 등록하도록 선언,정의
// 결과적으로 해당 클래스를 스프링 컨테이너가 관리할 하나의 Bean으로 생성, 관리하도록 설정함
@Component
public class TapeReader {

	private Tape tape;

	public TapeReader(Tape tape) {
		this.tape = tape;
	}

	public void test() {
		if (tape.isWorked()) {
			System.out.println(tape.getName() + " 잘 동작합니다");
		} else {
			System.out.println(tape.getName() + " 사기당했어요 ㅋㅋ");
		}
	}
}
@Component
public class Tape {
private String name;
private boolean isWorked;
// @Autowired
public Tape(@Value("아일랜드") String name, @Value("true") boolean isWorked) {
super();
this.name = name;
this.isWorked = isWorked;
}
public String getName() {
return name;
}
public boolean isWorked() {
return isWorked;
}
}- 컴포넌트 스캔의 base 패키지를 지정해주고, 클래스 위에
@Component로 스캔할 컴포넌트를 지정해두면,스프링 컨테이너에서 자동으로 컴포넌트를스캐닝해서 빈으로 등록하고 의존성을 주입해준다. - 그치만 여전히 XML을 사용하고 있다. 그럼 xml대신 config.java 처럼 java 클래스로 사용할 수 있지않을까?
Config File 방식
public class BeanConfig {

	@Bean
	public TapeReader tapeReader(Tape tape){
		return new TapeReader(tape);
	}

	@Bean
	public Tape tape(){
		return new Tape("아일랜드", true);
	}
}- 이렇게 class에서 Bean을 직접 등록해주고,
new AnnotationConfigApplicationContext(BeanConfig.class).getBean(TapeReader.class).test();이런식으로 Config 파일을 인식시켜주면, XML을 사용하지 않고도 빈을 등록하고 의존성을 관리할 수 있다.
@ComponentScan(basePackages = "dev.spring.java_config_with_scan.domain")
public class ComponentScanConfig {

}- 이전에 Component Scan 방식을 XML에서 구현해보았는데, Config.java에서도
@Bean대신@ComponentScan을 사용해서 BasePackage를 지정해주면 직접 빈을 등록하지 않아도 의존성을 관리할 수 있다.