0629-AWS CLI
- IaC (Infrastructure as Code) - 구성 및 설정 자동화 - Terraform, Ansible
- Container 기술 - Docker, Kubernetes
- CI/CD (Continuous Integration/ Continuous Deployment, Delivery) - Jenkins, Git, Gitlab
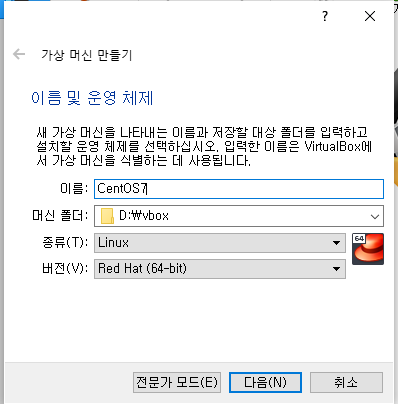
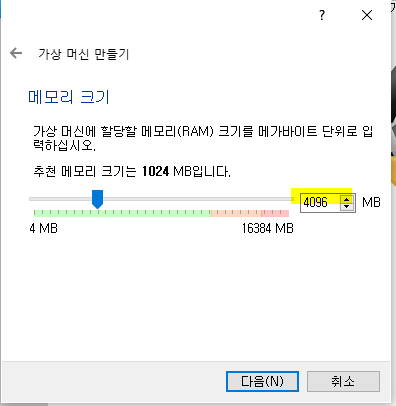
Oracle VM VirtualBox
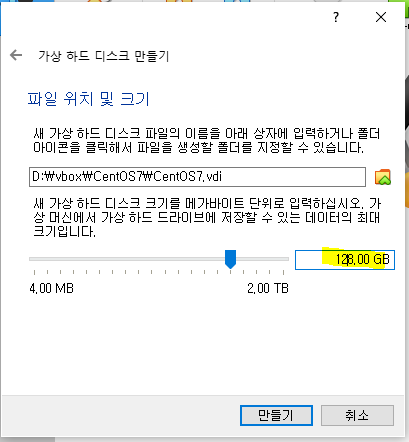
- 새로 만들기
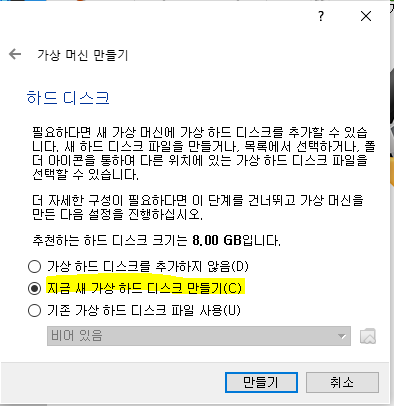
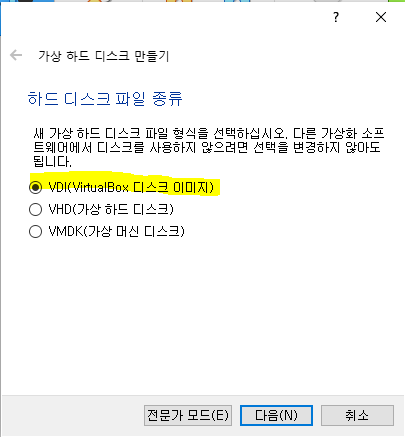
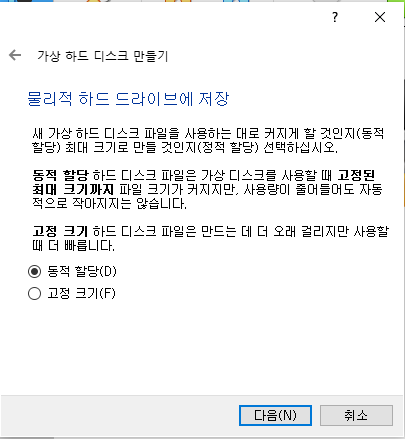
(실무에선 고정크기로)
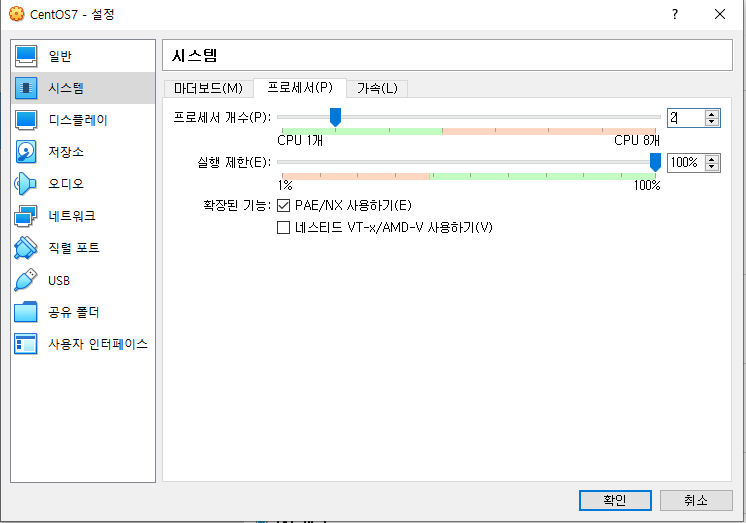
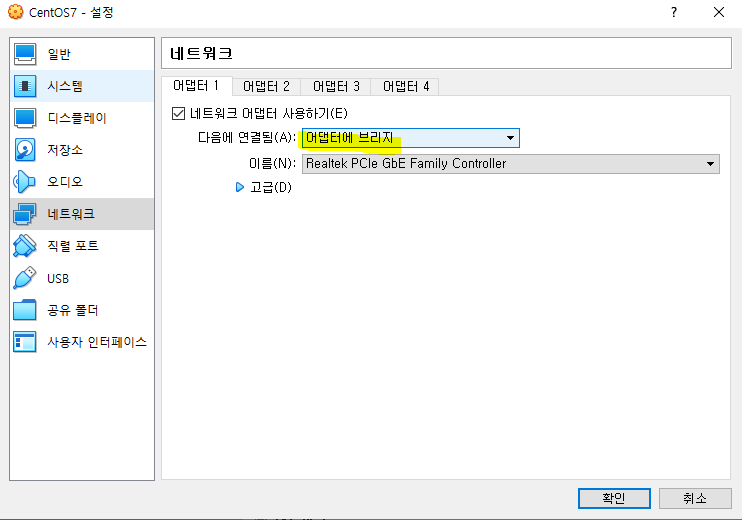
- 설정
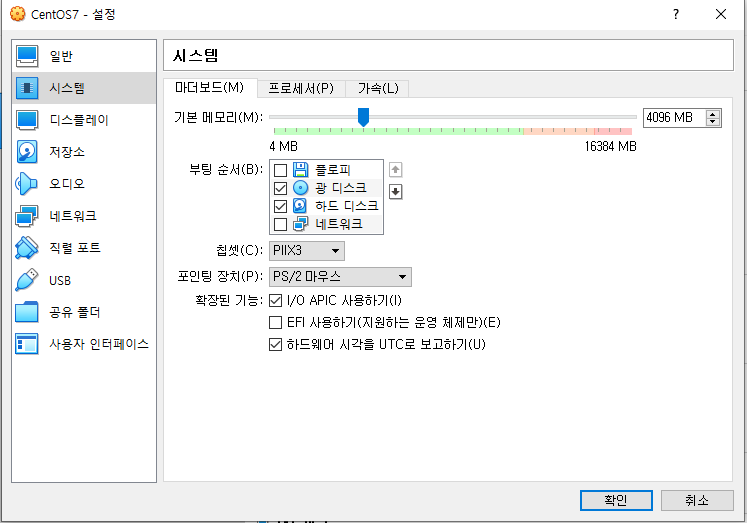
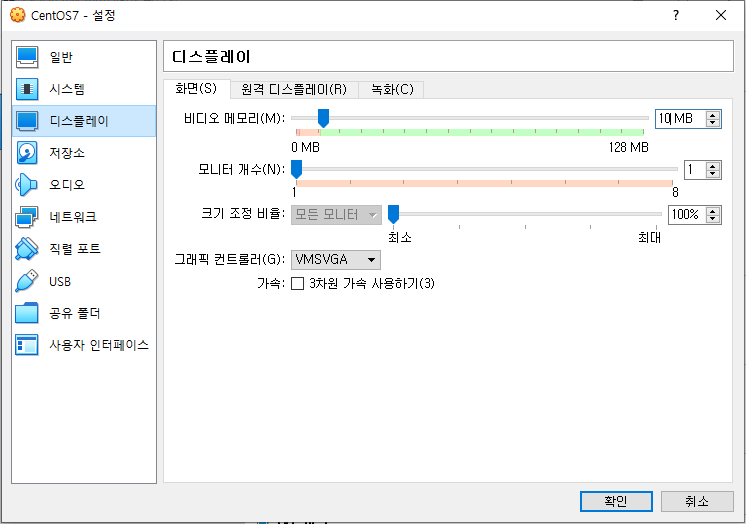
- 오디오 사용하기 체크 해제
- USB 컨트롤러 사용하기 체크 해제

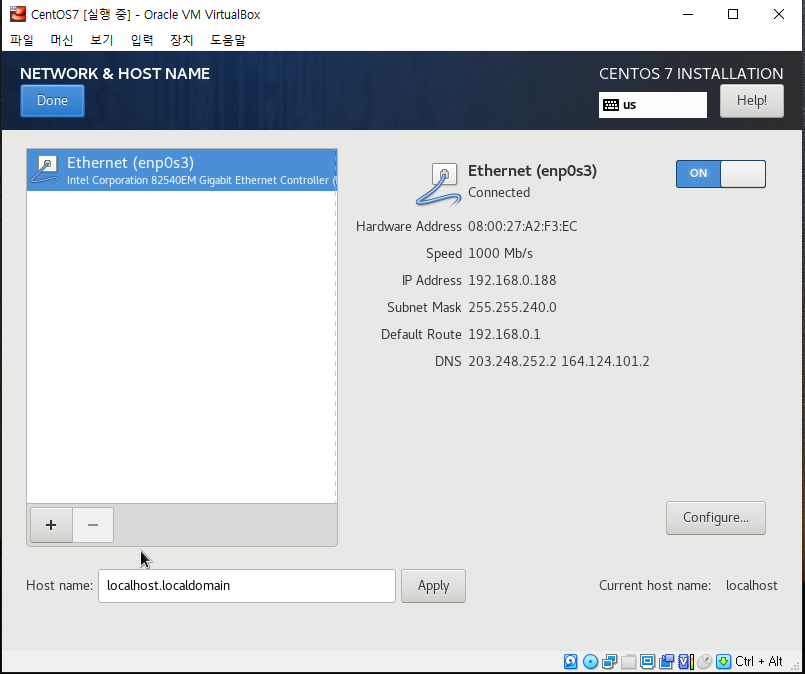
-> IP : 192.168.0.188
▶ mobaxterm
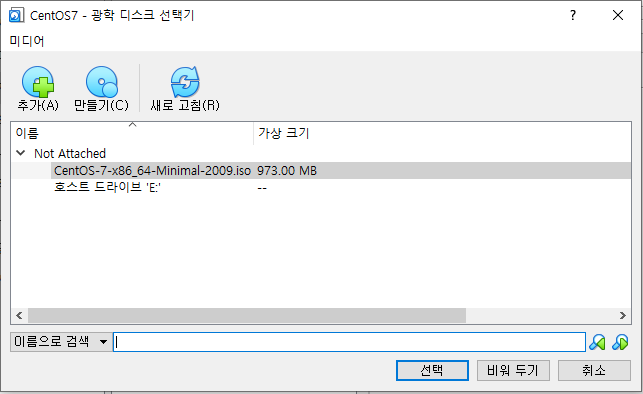
--- CentOS7 설정
# yum install -y bash-completion wget unzip rdate //bash-completion 자동
# timedatectl set-timezone Asia/Seoul
# rdate -s time.bora.net
# setenforce 0
# sed -i s/^SELINUX=.*$/SELINUX=disabled/ /etc/selinux/config
# cd /tmp
# systemctl disable --now firewalld
# yum update -y
# poweroff
.ova로 내보내기
- 파일 > 가상 시스템 내보내기 > CentOS7 선택
--- AWS CLI 설치
# curl "https://awscli.amazonaws.com/awscli-exe-linux-x86_64.zip" -o "awscliv2.zip"
# unzip awscliv2.zip
# ./aws/install
# aws --version
# aws configure
사용자 추가
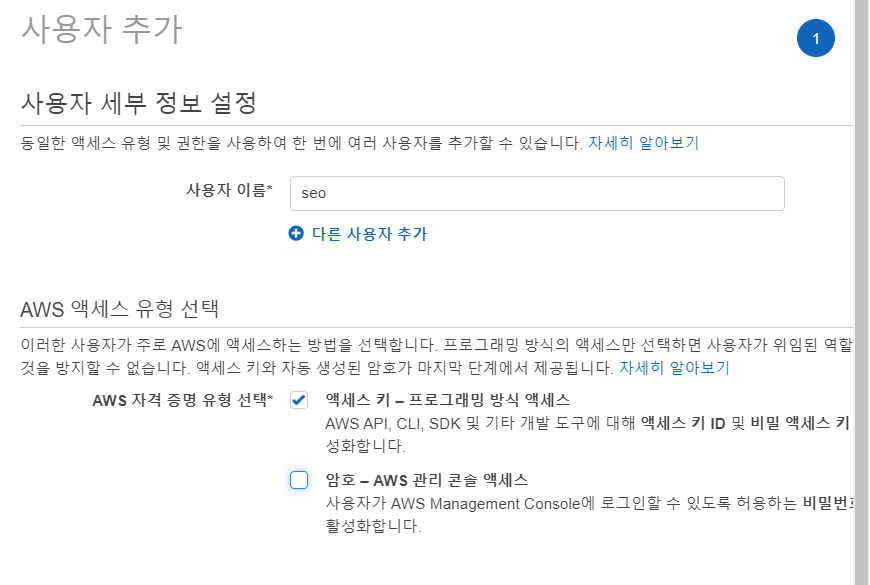
설치 이어서
[root@localhost ~]# aws configure
AWS Access Key ID [None]: .csv보고 입력
AWS Secret Access Key [None]: .csv보고 입력
Default region name [None]: ap-northeast-2
Default output format [None]: json
[root@localhost ~]# aws s3 ls
# aws ec2 create-vpc --cidr-block 192.168.0.0/16 --tag-specification "ResourceType=vpc,Tags=[{Key=Name,Value=NEW-VPC}]" --output text
# NEW_VPC=vpc-0b86b4b6ab0bce886
# echo $NEW_VPC
# aws ec2 create-subnet --vpc-id $NEW_VPC --cidr-block 192.168.0.0/20 --availability-zone ap-northeast-2a --tag-specification "ResourceType=subnet,Tags=[{Key=Name,Value=NEW-PUBLIC-SUBNET-2A}]"
# aws ec2 create-subnet --vpc-id $NEW_VPC --cidr-block 192.168.16.0/20 --availability-zone ap-northeast-2b --tag-specification "ResourceType=subnet,Tags=[{Key=Name,Value=NEW-PUBLIC-SUBNET-2B}]"
# aws ec2 create-subnet --vpc-id $NEW_VPC --cidr-block 192.168.32.0/20 --availability-zone ap-northeast-2c --tag-specification "ResourceType=subnet,Tags=[{Key=Name,Value=NEW-PUBLIC-SUBNET-2C}]"
# aws ec2 create-subnet --vpc-id $NEW_VPC --cidr-block 192.168.48.0/20 --availability-zone ap-northeast-2d --tag-specification "ResourceType=subnet,Tags=[{Key=Name,Value=NEW-PUBLIC-SUBNET-2D}]"
# aws ec2 describe-subnets --filters "Name=vpc-id,Values=$NEW_VPC" --query 'Subnets[*].{AZ:AvailabilityZone,CIDR:CidrBlock}'- VPC ID : vpc-06300d8e014dab747
[root@localhost ~]# aws ec2 create-subnet --vpc-id $NEW_VPC --cidr-block 192.168.0.0/20 --availability-zone ap-northeast-2a --tag-specifications "ResourceType=subnet,Tags=[{Key=Name,Value=NEW-PUBLIC-SUBNET-2A}]"
{
    "Subnet": {
        "AvailabilityZone": "ap-northeast-2a",
        "AvailabilityZoneId": "apne2-az1",
        "AvailableIpAddressCount": 4091,
        "CidrBlock": "192.168.0.0/20",
        "DefaultForAz": false,
        "MapPublicIpOnLaunch": false,
        "State": "available",
        "SubnetId": "subnet-029f9cef5f3d0262a",
        "VpcId": "vpc-06300d8e014dab747",
        "OwnerId": "050722723154",
        "AssignIpv6AddressOnCreation": false,
        "Ipv6CidrBlockAssociationSet": [],
        "Tags": [
            {
                "Key": "Name",
                "Value": "NEW-PUBLIC-SUBNET-2B"
            }
        ],
        "SubnetArn": "arn:aws:ec2:ap-northeast-2:050722723154:subnet/subnet-029f9cef5f3d0262a",
        "EnableDns64": false,
        "Ipv6Native": false,
        "PrivateDnsNameOptionsOnLaunch": {
            "HostnameType": "ip-name",
            "EnableResourceNameDnsARecord": false,
            "EnableResourceNameDnsAAAARecord": false
        }
    }
}
[root@localhost ~]# aws ec2 create-subnet --vpc-id $NEW_VPC --cidr-block 192.168.16.0/20 --availability-zone ap-northeast-2b --tag-specification "ResourceType=subnet,Tags=[{Key=Name,Value=NEW-PUBLIC-SUBNET-2B}]"
[root@localhost ~]# aws ec2 create-subnet --vpc-id $NEW_VPC --cidr-block 192.168.32.0/20 --availability-zone ap-northeast-2c --tag-specification "ResourceType=subnet,Tags=[{Key=Name,Value=NEW-PUBLIC-SUBNET-2C}]"
[root@localhost ~]# aws ec2 create-subnet --vpc-id $NEW_VPC --cidr-block 192.168.48.0/20 --availability-zone ap-northeast-2d --tag-specification "ResourceType=subnet,Tags=[{Key=Name,Value=NEW-PUBLIC-SUBNET-2D}]"
[root@localhost ~]# aws ec2 describe-subnets --filters "Name=vpc-id,Values=$NEW_VPC" --query 'Subnets[*].{AZ:AvailabilityZone,CIDR:CidrBlock}'
2. 서브넷을 퍼블릭 서브넷으로 만들기
[root@localhost ~]# aws ec2 create-internet-gateway --tag-specification "ResourceType=internet-gateway,Tags=[{Key=Name,Value=NEW-IGW}]" --output text
[root@localhost ~]# NEW_IGW=igw-00976419f3807f23f
[root@localhost ~]# aws ec2 attach-internet-gateway --vpc-id $NEW_VPC --internet-gateway-id $NEW_IGW
[root@localhost ~]# aws ec2 describe-internet-gateways --output table
[root@localhost ~]# aws ec2 describe-route-tables --filter "Name=vpc-id,Values=$NEW_VPC"
[root@localhost ~]# NEW_RTB=rtb-0c8756dd4212a8063
[root@localhost ~]# aws ec2 create-route --route-table-id $NEW_RTB --destination-cidr-block 0.0.0.0/0 --gateway-id $NEW_IGW
[root@localhost ~]# aws ec2 create-tags --resources $NEW_RTB --tags "Key=Name,Value=NEW-PUBLIC-SUBNET-RTB"
[root@localhost ~]# aws ec2 describe-route-tables --route-table-id $NEW_RTB --output table
[root@localhost ~]# aws ec2 describe-subnets --filters "Name=vpc-id,Values=$NEW_VPC" --query 'Subnets[*].{ID:SubnetId,CIDR:CidrBlock}'
[root@localhost ~]# NEW_SID1=subnet-0b9765c37da5995ab
[root@localhost ~]# NEW_SID2=subnet-0962713227118cf63
[root@localhost ~]# NEW_SID3=subnet-0193f7bcb2d805e97
[root@localhost ~]# NEW_SID4=subnet-09afc3d0f330ca658
[root@localhost ~]# aws ec2 associate-route-table  --subnet-id $NEW_SID1 --route-table-id $NEW_RTB
[root@localhost ~]# aws ec2 associate-route-table  --subnet-id $NEW_SID2 --route-table-id $NEW_RTB
[root@localhost ~]# aws ec2 associate-route-table  --subnet-id $NEW_SID3 --route-table-id $NEW_RTB
[root@localhost ~]# aws ec2 associate-route-table  --subnet-id $NEW_SID4 --route-table-id $NEW_RTB
[root@localhost ~]# aws ec2 modify-subnet-attribute --subnet-id $NEW_SID1 --map-public-ip-on-launch
[root@localhost ~]# aws ec2 modify-subnet-attribute --subnet-id $NEW_SID2 --map-public-ip-on-launch
[root@localhost ~]# aws ec2 modify-subnet-attribute --subnet-id $NEW_SID3 --map-public-ip-on-launch
[root@localhost ~]# aws ec2 modify-subnet-attribute --subnet-id $NEW_SID4 --map-public-ip-on-launch
[root@localhost ~]# aws ec2 modify-vpc-attribute --vpc-id $NEW_VPC --enable-dns-hostnames
3. 키페어, 보안그룹 만들기
[root@localhost ~]# aws ec2 create-key-pair --key-name new-key --query 'KeyMaterial' --output text > new-key.pem
[root@localhost ~]# chmod 400 new-key.pem
[root@localhost ~]# aws ec2 create-security-group --group-name NEW-SG-WEB --description "Security group for HTTP_SSH access" --vpc-id $NEW_VPC
[root@localhost ~]# NEW_SG=sg-0deee543e78e477a1
[root@localhost ~]# aws ec2 authorize-security-group-ingress --group-id $NEW_SG --protocol tcp --port 22 --cidr 0.0.0.0/0
[root@localhost ~]# aws ec2 authorize-security-group-ingress --group-id $NEW_SG --protocol tcp --port 80 --cidr 0.0.0.0/0
[root@localhost ~]# aws ec2 authorize-security-group-ingress --group-id $NEW_SG --protocol icmp --port -1 --cidr 0.0.0.0/0
4. 볼륨 및 인스턴스 만들기
[root@localhost ~]# vi mapping.json
[
    {
        "DeviceName": "/dev/xvda",  //a로 끝나는것이 root볼륨
        "Ebs": {
            "VolumeSize": 8
        }
    }
    {
        "DeviceName": "/dev/xvdb",
        "Ebs": {
            "VolumeSize": 8
        }
    }
]

[root@localhost ~]# vi my_script.txt
#!/bin/bash
yum install -y httpd
systemctl enable --now httpd
echo "<h1>Hello AWS CLI</h1>" > /var/www/html/index.html

[root@localhost ~]# aws ec2 run-instances \
--image-id ami-0fd0765afb77bcca7 \
--count 1 \
--instance-type t2.micro \
--key-name new-key \
--security-group-ids $NEW_SG \
--subnet-id $NEW_SID1 \
--block-device-mappings file://mapping.json \
--user-data file://my_script.txt \
--tag-specifications 'ResourceType=instance,Tags=[{Key=Name,Value=NEW-WEB1}]' 'ResourceType=volume,Tags=[{Key=Name,Value=NEW-ROOT1}]'

[root@localhost ~]# NEW_IID=i-0273da71aa34f0924
[root@localhost ~]# aws ec2 describe-instances --instance-id $NEW_IID | grep PublicIp
[root@localhost ~]# ssh -i "new-key.pem" ec2-user@
[root@localhost ~]# curl 3.38.165.0
5. 정리
[root@localhost ~]# aws ec2 terminate-instances --instance-id $NEW_IID
[root@localhost ~]# aws ec2 delete-security-group --group-id $NEW_SG
[root@localhost ~]# aws ec2 delete-subnet --subnet-id $NEW_SID1
[root@localhost ~]# aws ec2 delete-subnet --subnet-id $NEW_SID2
[root@localhost ~]# aws ec2 delete-subnet --subnet-id $NEW_SID3
[root@localhost ~]# aws ec2 delete-subnet --subnet-id $NEW_SID4
[root@localhost ~]# aws ec2 detach-internet-gateway --internet-gateway-id $NEW_IGW --vpc-id $NEW_VPC
[root@localhost ~]# aws ec2 delete-internet-gateway --internet-gateway-id $NEW_IGW
[root@localhost ~]# aws ec2 delete-vpc --vpc-id $NEW_VPC