2. TCP 통신
목차
java File I/O program 패키지는 자바 프로그래밍 언어에서 입출력(Input/Output) 관련 작업을 수행하기 위한 클래스와 인터페이스를 제공하는 패키지이다. 이 패키지는 파일 처리, 네트워크 통신, 스트림 처리 등 다양한 입출력 작업을 지원한다.
java.io 패키지
- File
- 1byte file 전송
- 출력
- FileOutputStream
- BufferedOutputStream
- DataOutputStream
- 입력
- FileInputStream
- BufferedInputStream
- DataInputStream
- 출력
- text file 전송
- 출력
- FileWriter // network에서는 OutputStreamWriter
- BufferedWriter
- PrintWriter
- 입력
- FileReader // network에서는 InputStreamWriter
- BufferedReader
- 출력
- object file 전송
- 출력
- FileOutputStream
- BufferedOutputSteam
- ObjectOutputStream
- 입력
- FileInputStream
- BufferedInputStream
- ObjectInputStream
- 직렬화 : Serializable
: 인터페이스 serializable 을 상속받은 객체는 직렬화 역직렬화를 알아서 해 준다.
// 객체를 바이트로 변환해서 외부로 송출 = 직렬화
// 파일이나 네트워크로 들어온 바이트를 다시 객체로 변환 = 역직렬화
- 출력
(1) 1byte file
1byte 통신 : 입력
import java.io.*;
import javax.swing.JFileChooser;


public class Exam_01 {
	public static void main(String[] args) throws IOException {

		// 1 byte 통신

		File dir = new File("D:\\nam\\2_JAVA\\JAVA_Study\\Day15\\src");
		File file = new File(dir, "bbb.txt");

		FileOutputStream fos = new FileOutputStream(file, true);
		// 두 번째 매개 변수가 true 이면 append, false면 rewrite
		// default는 false이다.

		// 한 글자 넣기
		fos.write('A');
		fos.write(66);	// 아스키 코드 값도 가능하다

		// 이제 파일 열어보면 저장된 값이 보임

		// 문자열 넣어 보기 : 배열로 바꾸어서 넣을 수 있다.
		String str = "Hello, JAVA!";

		byte[] by = str.getBytes();
		fos.write(by);

		// 배열로 문자열 잘라서 넣어보기
		fos.write(by, 7, 4);

	}
}
1byte 통신 : 읽어오기
import java.io.*;

public class Exam_01 {
	public static void main(String[] args) throws IOException {

		// 입력

		File dir = new File("D:\\nam\\2_JAVA\\JAVA_Study\\Day15\\src");
		File file = new File(dir, "bbb.txt");

		FileInputStream fis = new FileInputStream(file);

		while (true) {
			int res = fis.read();
			// System.in.read() in은 표준 입력 장치이다.
			// 표준 입력 장치로부터 한 글자 읽겠다는 뜻
			// 객체 fis 가 가르키는 bbb.txt를 한 글자 읽어 오겠다

			if (res < 0) break;
			// 만약 파일이 끝났다면 나가자.
			// EOF(End Of File) : 1byte에서 파일의 끝은 음수 반환

			System.out.print((char) res);
		}

	}
}
1byte 통신 : 파일을 생성하고 해당 파일에 데이터 저장
import java.io.*;

public class Exam_01 {
	public static void main(String[] args) throws IOException {

		// 입력

		File dir = new File("D:\\nam\\2_JAVA\\JAVA_Study\\Day15\\src");
		File file = new File(dir, "ccc.txt");


		FileOutputStream fos = new FileOutputStream(file);
		BufferedOutputStream bos = new BufferedOutputStream(fos);
		DataOutputStream dos = new DataOutputStream(bos);

		dos.writeInt(10); 	// buffer 메모리에 미리 올려 놓고 dos 를 통해 집어 넣는 것이다
		dos.writeDouble(20.25);
		dos.writeUTF("Hello");

		// dos.flush();		// 버퍼 메모리의 값을 ccc.txt 파일로 옮겨라
		dos.close(); 		// 버퍼 메모리의 값을 비우고, dos 객체를 종료시킨다.
	}
}
import java.io.*;

public class Exam_01 {
	public static void main(String[] args) throws IOException {

		// 입력

		File dir = new File("D:\\nam\\2_JAVA\\JAVA_Study\\Day15\\src");
		File file = new File(dir, "ccc.txt");

		FileInputStream fis = new FileInputStream(file);
		BufferedInputStream bis = new BufferedInputStream(fis);
		DataInputStream dis = new DataInputStream(bis);

		int a = dis.readInt();
		double b = dis.readDouble();
		String str = dis.readUTF();

		System.out.println("a = " + a);
		System.out.println("b = " + b);
		System.out.println("str = " + str);
	}
}
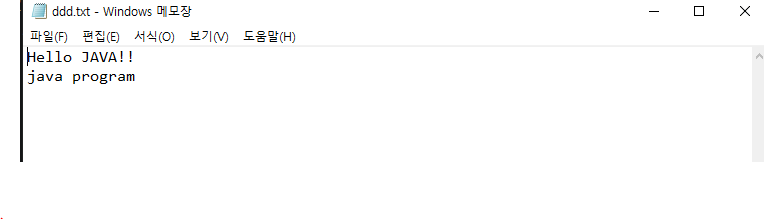
(2) text file 전송
text file : 입력
반면 텍스트 파일은 텍스트만을 조금 더 빠르게 전송할 수 있다.
import java.io.*;

public class Exam_01 {
	public static void main(String[] args) throws IOException {

		// text file 만들기
		File dir = new File("D:\\nam\\2_JAVA\\JAVA_Study\\Day15\\src");
		File file = new File(dir, "ddd.txt");

		FileWriter fw = new FileWriter(file);
		BufferedWriter bw = new BufferedWriter(fw);
		PrintWriter pw = new PrintWriter(bw);

		pw.print("Hello");
		pw.println(" JAVA!!");
		pw.println("java program");
		pw.close();		// 모두 저장하고 나가는 메서드

	}
}
text file : 읽어오기
import java.io.*;

public class Exam_01 {
	public static void main(String[] args) throws IOException {

		// text file 만들기
		File dir = new File("D:\\nam\\2_JAVA\\JAVA_Study\\Day15\\src");
		File file = new File(dir, "ddd.txt");

		FileReader fr = new FileReader(file);
		BufferedReader br = new BufferedReader(fr);

		while(true) {
			String str = br.readLine();	// ddd.txt 파일의 내용을 줄단위로 읽어서 처리
			if (str == null) break; 		// text 입력에서의 끝은 null. EOF 값이 null 이면 빠져나옴
			System.out.println(str); 		// 줄 단위로 읽어옴
		}

	}
}
(3) object file 전송
object 파일 전송은 1byte 파일 전송과 똑같이 한다.
그런데 그 전에 직렬화라는 개념을 알아두면 도움이 된다.
직렬화란?
객체의 내용을 바이트 단위로 변환하여 파일 또는 네트워크를 통해 스트림이 가능하도록 하는 것을 의미한다.
인터페이스 serializable 을 상속받은 객체는 직렬화 역직렬화를 알아서 해 준다.
객체를 바이트로 변환해서 외부로 송출 = 직렬화
파일이나 네트워크로 들어온 바이트를 다시 객체로 변환 = 역직렬화
직렬화한 object 객체를 저장
import java.io.*;

class A09 implements Serializable{
	int a;
	int b;
	int c;
	public A09() {
		a = 10;
		b = 20;
		c = 30;
	}
	public void disp() {
		System.out.println("a = " + a);
		System.out.println("b = " + b);
		System.out.println("c = " + c);
	}
}

public class Exam_09 {
	public static void main(String[] args) throws IOException{
		File dir = new File("D:\\fintech\\study\\day15\\src");
		File file = new File(dir, "ddd.txt");

		FileOutputStream fos = new FileOutputStream(file);
		BufferedOutputStream bos = new BufferedOutputStream(fos);
		ObjectOutputStream oos = new ObjectOutputStream(bos);

		A09 ap = new A09();
		oos.writeObject(ap);
		oos.close();
	}
}
직렬화한 object 객체를 불러오기
import java.io.*;

public class Exam_10 {
	public static void main(String[] args)
			throws IOException, ClassNotFoundException{
		File dir = new File("D:\\fintech\\study\\day15\\src");
		File file = new File(dir, "ddd.txt");

		FileInputStream fis = new FileInputStream(file);
		BufferedInputStream bis = new BufferedInputStream(fis);
		ObjectInputStream ois = new ObjectInputStream(bis);

		Object obj = ois.readObject();
		A09 ap = (A09)obj;
		ap.disp();
	}
}
(4) 응용 코드 만들어 보기
나만의 달력 일기장 만들어 보기
하루를 기록할 수 있는 일기장 만들기
-> 구성 형식
- 만년 달력 형식 구현
- 날짜 업앤다운을 클릭하면 달력이 움직이고,
- 날짜를 클릭하면 해당 날짜에 일기를 저장할 수 있는 프로그램
import java.io.*;
import java.awt.*;
import java.awt.event.*;
import java.util.*;

class CalendarFrame extends Frame implements ActionListener {
	private int year, month; 		// year, month 를 저장해 줄 변수
	private Calendar calendar; 		// calendar 클래스의 객체를 만들어 표준 날짜와 시간을 내려받을 준비
	private Scanner in = new Scanner(System.in); 	// 스캐너로 ??
	private Label lb = new Label("", Label.CENTER);
	private Button bt1 = new Button("  ▲  "); 		// 상하 버튼 만들어 주기
	private Button bt2 = new Button("  ▼  ");
	private Panel north_p = new Panel();			// 달, 상하버튼 panel
	private Panel north_east_p = new Panel();		// 날짜 panel
	private Button bt[] = new Button[49];			// 각 날짜 button
	private Panel center_p = new Panel();			//
	private String week_str = "일 월 화 수 목 금 토";		// 요일명을 string으로 만들어서 하나하나 끊어 배부해 줄 것

	private File dir = new File("D:\\nam\\2_JAVA\\JAVA_Study\\JumpToJava\\src");
	private File file = null;
	private int xpos, ypos;

	MyDialog mdl;

	class MyDialog extends Dialog {
		TextArea ta = new TextArea();
		Button yes_bt = new Button("저장");
		Button no_bt = new Button("취소");
		Panel p = new Panel();

		public MyDialog(Frame owner, String title, boolean modal) {
			super(owner, title, modal);
			this.setLayout(new BorderLayout());
			this.add("Center", ta);
			this.add("South", p);
			p.setLayout(new GridLayout(1,2));
			p.add(yes_bt);
			p.add(no_bt);
			this.setBounds(xpos-200, ypos, 200, 300);
			this.setResizable(false);
		}
		public void isVisible(boolean isVisible) {
			this.setVisible(isVisible);			// 켜져 있을 때만 보이게 만들기
		}

	}

	public void setDate() {
		// setDate 메서드
		// 무슨 기능? : 캘린더 클래스에서 표준 날짜를 받아와 알려준다 -> 이 경우에는 변수에 입히기
		calendar = Calendar.getInstance();
		year = calendar.get(Calendar.YEAR);	// 년도 가져오기
		month = calendar.get(Calendar.MONTH) + 1; // 월 가져오기 : 월은 0부터 시작해서 1 더해 줘야 한다
	}

	public void init() {
		this.setLayout(new BorderLayout());
		lb.setBackground(Color.gray);
		lb.setFont(new Font("", Font.BOLD, 30));
		this.add("North", north_p);
		north_p.setLayout(new BorderLayout());
		north_p.add("Center", lb);
		north_p.add("East", north_east_p);
		north_east_p.setLayout(new GridLayout(1,2));
		north_east_p.add(bt1);	bt1.addActionListener(this);
		north_east_p.add(bt2);	bt2.addActionListener(this);

		this.add("Center", center_p);
		center_p.setLayout(new GridLayout(7,7));
		String week[] = week_str.split(" ");
		int co = 0;
		for(int i=0; i<week.length; ++i) {
			bt[co] = new Button(week[i]);
			center_p.add(bt[co]);
			bt[co].setEnabled(false);
			co++;
		}
		for(int i=0; i<42; ++i) {
			bt[co] = new Button("");
			center_p.add(bt[co]);
			bt[co].addActionListener(this);
			co++;
		}
		mdl = new MyDialog(this, "", true);
		mdl.yes_bt.addActionListener(this);
		mdl.no_bt.addActionListener(this);
		settingDate(false);//처음시작시 Down버튼이 눌러진것처럼 셋팅을 한다.
	}


	public void settingDate(boolean buttonUp) {
		// 매개 변수 값이 전달로 가는지, 다음 달로 가는지 정의
		// true 다음 날, false 전달
		if (buttonUp) {
			month++;
			if (month>11) {
				month = 0;
				year++;
			}
		}else {
			month--;
			if (month<0) {
				month = 11;
				year--;
			}
		}
		calendar.set(year, month, 1);
		int w = calendar.get(Calendar.DAY_OF_WEEK);
		int co = 7;
		int lastDay = calendar.getActualMaximum(Calendar.DAY_OF_MONTH);
		lb.setText(year + "년" + (month+1) + "월");
		for (int i = 1; i < w; ++i) {
			bt[co].setLabel("");
			bt[co].setEnabled(false);
			co++;
		}
		for (int i = 1; i <= lastDay; ++i) {
			bt[co].setLabel(String.valueOf(i));
			bt[co].setEnabled(true);
			co++;
		}
		for (int i = co; i < bt.length; ++i) {
			bt[i].setLabel("");
			bt[i].setEnabled(false);
		}
	}

	@Override
	public void actionPerformed(ActionEvent arg0) {
		if (arg0.getSource() == mdl.yes_bt) {
			try {
				FileWriter fw = new FileWriter(file);
				BufferedWriter bw = new BufferedWriter(fw);
				PrintWriter pw = new PrintWriter(bw);
				pw.println(mdl.ta.getText());
				pw.close();
				mdl.ta.setText("");
				mdl.isVisible(false);
			}catch(IOException ee) {}
		}else if (arg0.getSource() == mdl.no_bt) {
			mdl.ta.setText("");
			mdl.isVisible(false);
		}else if (arg0.getSource() == bt1) {
			settingDate(false);
		}else if (arg0.getSource() == bt2) {
			settingDate(true);
		}else {
			for (int i = 0; i<bt.length; ++i) {
				if (arg0.getSource() == bt[i]) {
					String filename = String.valueOf(year);
					if (month+1 > 9) {
						filename += month+1;
					}else {
						filename += "0" + (month + 1);
					}
					String day = bt[i].getActionCommand();		// 이벤트를 발생시킨 객체의 문자열을 가지고 온다.\
					if (day.length() == 2) {
						filename += day + ".txt";
					}else {
						filename += "0" + day + ".txt";
					}
					file = new File(dir, filename);
					try {
						if (!file.createNewFile()) {
							FileReader fr = new FileReader(file);
							BufferedReader br = new BufferedReader(fr);
							int count = 0;
							while(true) {
								String str = br.readLine();
								if (str == null) break;
								count++;
								if (count == 1) mdl.ta.setText(str + "\n");
								else mdl.ta.append(str + "\n");
							}
						}
						mdl.setTitle(filename);
						mdl.isVisible(true);
					}catch(IOException ee){}

				}
			}
		}

	}

	public CalendarFrame(String title) {
		super(title);

		super.setSize(400, 300);
		Dimension screen = Toolkit.getDefaultToolkit().getScreenSize();
		xpos = (int)(screen.getWidth()/2 - this.getWidth()/2);
		ypos = (int)(screen.getHeight()/2 - this.getHeight()/2);
		this.setLocation(xpos, ypos);
		this.setResizable(false);
		setDate();
		init();
		this.setVisible(true);

	}
}

public class Exam_01 {
    public static void main(String[] args) {
        CalendarFrame frame = new CalendarFrame("일기장");
    }
}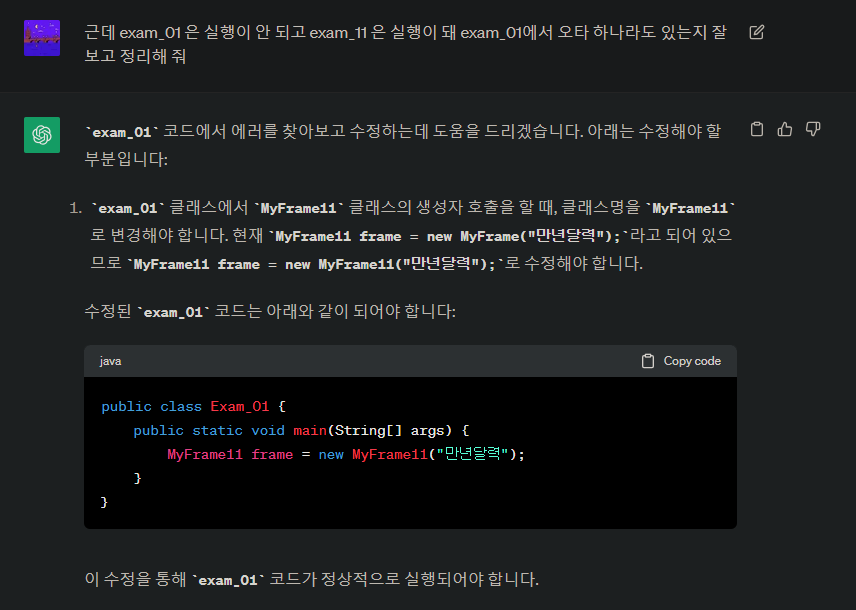
오류 잡느라 chatGPT 열심히 협박하기...
그런데 알고 보니까 폴더 설정을 없는 곳에다 만들어 둬서 그랬던 거였다
인간아...

자바 백엔드 개발자 개인 위키