
강의에서 진행하는 flutter 버전, webView 버전 등이 다르다보니 광고 연결 후 테스트 진행 시 compileSdkVersion 버전을 변경하라는 오류가 발생하곤 합니다.

이때 app/build.gradle에 있는 코드 변경을 통해 해결 가능합니다.
<해결방법>
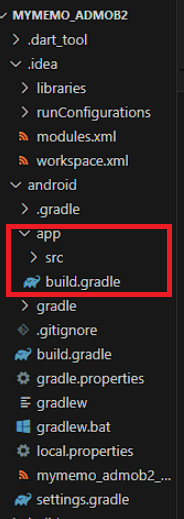
1. app/build.gradle 파일 오픈
폴더 트리를 열어보면 build.gradle 파일이 두개 생성되어있습니다.
그 중에서 android > app에 있는 build.gradle 파일을 열어주세요.
2. 코드 변경
아래와 동일한 코드 부분을 찾아주세요.
완벽하게 동일하지 않더라도 android, compileSdkVersion를 기준으로 찾아주시면 됩니다.
android {

    compileSdkVersion flutter.compileSdkVersion

    ndkVersion flutter.ndkVersion


    compileOptions {

        sourceCompatibility JavaVersion.VERSION_1_8

        targetCompatibility JavaVersion.VERSION_1_8

    }
이 부분을 아래와 같이 변경해주세요.
android {

    compileSdkVersion 33

    ndkVersion flutter.ndkVersion


    compileOptions {

        sourceCompatibility JavaVersion.VERSION_1_8

        targetCompatibility JavaVersion.VERSION_1_8

    }
해당 오류에서는 compileSdkVersion 33이라고 지정하고 있어 33으로 변경해주었지만, 만약 다른 숫자로 작성되어있다면 동일 숫자로 변경해주시면 됩니다.

3. 이어지는 오류
compileSdkVersion 버전을 수정했음에도 불구하고 에러가 추가적으로 발생할 수 있습니다.
오류 내용 중 *What went wrong: 부분을 찾아 아래와 동일한지 확인 후 동일하다면 해당 방법으로 코드 수정해주시면 됩니다.
* What went wrong:

Execution failed for task ':app:processDebugMainManifest'.

> Manifest merger failed : uses-sdk:minSdkVersion 16 cannot be smaller than version 19 declared in library [:google_mobile_ads]
먼저 아래 코드를 찾아주세요.
완벽하게 동일하지 않더라도 defaultConfig, minSdkVersion를 기준으로 찾아주시면 됩니다.
defaultConfig {

        // TODO: Specify your own unique Application ID (https://developer.android.com/studio/build/application-id.html).

        applicationId "com.example.mymemo_admob"

        // You can update the following values to match your application needs.

        // For more information, see: https://docs.flutter.dev/deployment/android#reviewing-the-build-configuration.

        minSdkVersion flutter.minSdkVersion

        targetSdkVersion flutter.targetSdkVersion

        versionCode flutterVersionCode.toInteger()

        versionName flutterVersionName

    }
그리고 아래 코드와 같이 변경해주시면 됩니다.
defaultConfig {

        // TODO: Specify your own unique Application ID (https://developer.android.com/studio/build/application-id.html).

        applicationId "com.example.mymemo_admob"

        // You can update the following values to match your application needs.

        // For more information, see: https://docs.flutter.dev/deployment/android#reviewing-the-build-configuration.

        multiDexEnabled true

        minSdkVersion 19

        targetSdkVersion flutter.targetSdkVersion

        versionCode flutterVersionCode.toInteger()

        versionName flutterVersionName

    }
4. 다시 테스트 진행
수정한 코드를 Ctrl+s 눌러 모두 저장해주시고, 다시 테스트 진행하는 기기로 돌아가 정상적으로 작동하는지 확인해주시면 됩니다!
</해결방법>

강의에서 주로 질문하는 내용에 대한 답변과 각종 오류 해결방법에 대해 알려드립니다.