Desktop App는 자동 업데이트를 어떻게 하나요?
Sparkle 프레임워크는 macOS 앱의 자동업데이트를 지원하는 가장 널리 사용되는 프레임워크 중 하나입니다.
우리의 놀라운 친구 flutter는 모바일 앱 뿐만아니라 데스크톱 앱까지 지원하는데요 이때 desktop 앱을 자동으로 업데이트 하는 방법에 대해 알아보겠습니다.
저희가 사용할 패키지는 auto_updater입니다.
https://pub.dev/packages/auto_updater
같은 패키지를 쓴다 하더라도 os가 다르므로 macos와 windows 둘다 각각 조금 다른 세팅이 필요합니다.
순서대로 auto_updater를 사용해 자동 업데이트를 구현하는 과정을 설명하도록 하겠습니다.
MacOS
-
auto_updater 패키지 다운로드
-
main.dart에 앱을 시작하자마자 업데이트를 체크할 수 있도록 작성
Future<void> checkForUpdate() async {
  try {
    String feedURL = '${your_feed_url}';
    await autoUpdater.setFeedURL(feedURL);

    //sparkle 업데이트 상태 강제 초기화
    //sparkle이 업데이트 이미 진행중이면 새로운 업데이트를 실행할 수 없다.
    //업데이트 설치 후에도 sparkle 프로세스가 백그라운드에 남아있는경우가 있을 가능성이 있다
    Process.runSync("/usr/bin/pkill", ["-f", "Autoupdate"]);
    Process.runSync("/usr/bin/pkill", ["-f", "sparkle-cli"]);

    if (!_isCheckingForUpdate) {
      _isCheckingForUpdate = true;
      await autoUpdater.checkForUpdates(inBackground: true);
      _isCheckingForUpdate = false;
    }

    await autoUpdater.setScheduledCheckInterval(3600);
  } catch (e) {
    _isCheckingForUpdate = false;
  }
}
참고:
Process.runSync("/usr/bin/pkill", ["-f", "Autoupdate"]);
Process.runSync("/usr/bin/pkill", ["-f", "sparkle-cli"]);
이 2줄의 코드는 “Error: -checkForUpdates called but .sessionInProgress == YES" 라는 오류가 자주 발생하여 강제로 sparkle 프로세스를 종료하고 새 업데이트 요청을 실행하기 위해 추가하였습니다. 만약 이 오류가 자주 발생하지 않는다면 무시해도 좋습니다.
- private key 생성 후 Info.plist에 추가
//Terminal 명령어
dart run auto_updater:generate_keys

//info.plist에 추가
    <key>SUPublicEDKey</key>
    <string>${YourPrivateKey}</string>

//Info.plist에 추가해야할 전체 코드
<key>SUAutomaticallyUpdate</key>
    <false/>
    <key>SUAllowsAutomaticUpdates</key>
    <true/>
    <key>SUEnableAutomaticChecks</key>
    <false/>
    <key>SUEnableInstallerLauncherService</key>
    <true/>
    <key>SUPublicEDKey</key>
<string>${YourEDKey}</string>- SUPublicEDKey란? sparkle이 업데이트를 설치하기 전에 해당 업데이트가 신뢰할 수 있는지 검증하는 공개키, Sparkle은 EdDSA 서명방식을 사용해 업데이트의 무결성을 보장합니다. 따라서 서버에서 배포하는 업데이트가 서명된 것이 맞는지 Sparkle이 검증하는 키 입니다.
- SU(Software Update)들은 Sparkle에서 자체적으로 만든 설정값들 입니다.
- 서버에서 내려와야 하는 appcast.xml
저는 postman에서 Mock server를 만들어 appcast.xml을 응답받는 api를 만들어 사용했습니다. 실제 개발에서는 실서버를 구축하여 사용해야겠죠?
만약 저와 같이 mock server를 만들어서 한다면 필수사항!!!
appcast.xml을 받는 api의 header의 key는 Content-Type이고 value는 application/xml이어야 합니다.
<?xml version="1.0" encoding="UTF-8"?>
<rss version="2.0" xmlns:sparkle="http://www.andymatuschak.org/xml-namespaces/sparkle">
    <channel>
        <title>App Updates</title>
        <link>${mock_server_baseurl}/appcast.xml</link>
        <description>You are ready to use New Version!</description>
        <language>en</language>

        <item>
            <title>App 3.1.0</title>
            <sparkle:version>289</sparkle:version>
            <sparkle:shortVersionString>3.2.0</sparkle:shortVersionString>
            <sparkle:criticalUpdate>true</sparkle:criticalUpdate> //이걸하면 remindme later과 같은 창이 뜨지 않는 일명 강제 업데이트가 가능하다 필수 사항은 아님
            <description>Initial Release</description>
            <pubDate>Fri, 26 Feb 2025 12:00:00 +0000</pubDate>
            <enclosure url="${pkg_download_url}"
                sparkle:edSignature="${your_ed_signature}" length="${your_length}"
                sparkle:os="macos"
                type="application/octet-stream"
                />
        </item>
    </channel>
</rss>- 업데이트 할때마다 version(빌드 넘버) shortVersionString(버전 명)이 변경되어야 합니다.
- enclosure url은 pkg를 바로 다운로드 받을 수 있는 링크가 포함됩니다. (전 예시로 만들기 위해서 드롭박스 다운로드 url을 사용했습니다.)
- edSignature이 appcast.xml에 포함되어야합니다. 이는 파일 자체에 의존한다 pkg를 새롭게 추출할때마다 새롭게 갱신해주어야 합니다.
-
추출 명령어 ~~sing_update ${추출하여 저장하는 경로}
/sparkle/2.7.0/bin/sign_update /Users/Desktop/${App_name}.pkg(fastlane을 돌리고 output 결과 추출한 경로 대입)
-
- DebugProfile.entitlements과 Release.entitlements에 포함(샌드박싱 정책 일부 예외를 허용하기 위함)
	 <key>com.apple.security.app-sandbox</key>
	<true/>
	 <key>com.apple.security.temporary-exception.mach-lookup.global-name</key>
         <array>
             <string>$(PRODUCT_BUNDLE_IDENTIFIER)-spks</string>
             <string>$(PRODUCT_BUNDLE_IDENTIFIER)-spki</string>
         </array>
     <key>com.apple.security.cs.disable-library-validation</key>
     <true/>
     <key>com.apple.security.temporary-exception.files.absolute-path.read-write</key>
          <array>
              <string>/Applications/Luke.app</string>
          </array>
위 코드의 역할 → Sparkle이 업데이트를 수행하는데 필요한 예외 권한 부여하는 역할입니다.
여기서 잠깐!
- 샌드박싱이란?
- macos에서 애플리케이션이 시스템을 보호하기 위해 제한된 환경내에서 실행되는 보안 메커니즘
- 네트워크 접근 제한, 자동 업데이트 기능 제한 따라서 이를 해제해야한다. (App store에서 배포할 경우 샌드박싱 해제 불가)
- 기존 앱을 덮어씌워 사용자가 새 버전의 앱을 사용할 수 있도록 하기위함
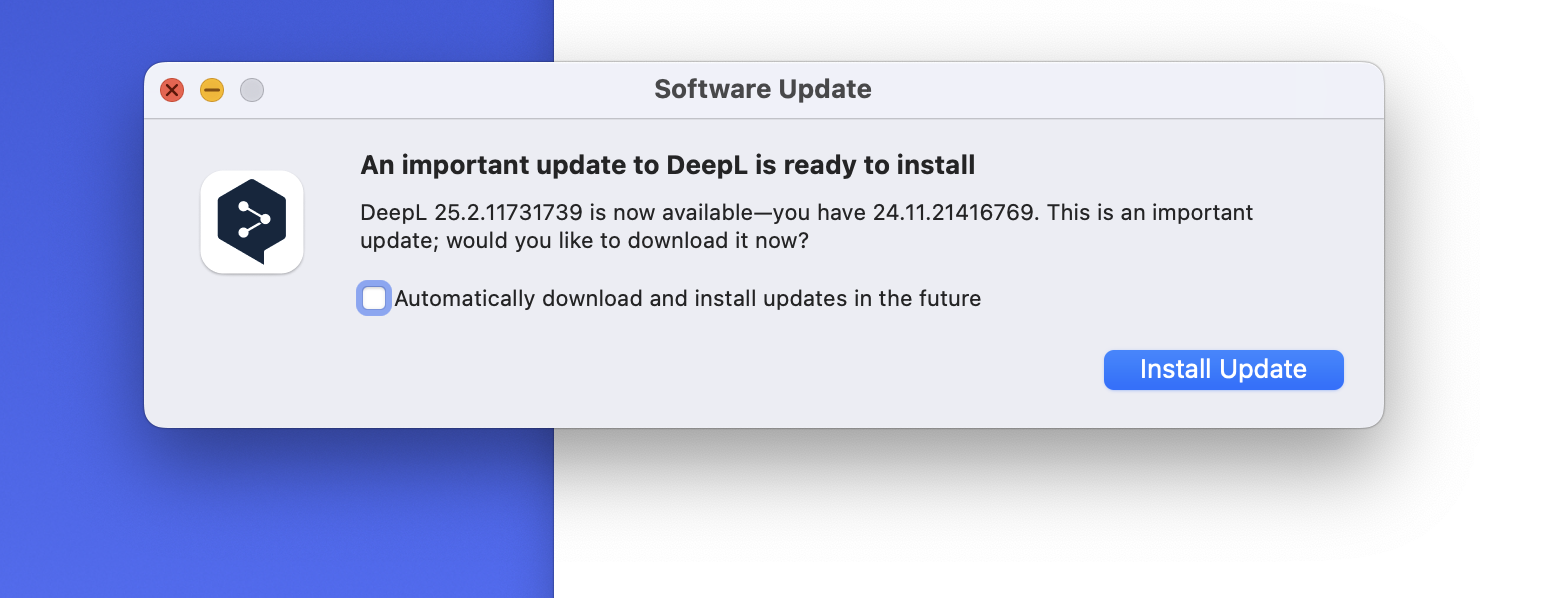
이렇게 하면 그림과 같이 Macos desktop App을 시작하자마자 새로운 버전이 있으니 업데이트 하라는 안내창을 볼 수 있습니다. install 버튼을 누르면 새로운 버전의 앱이 설치되고 기존 앱에 덮어 씌워져서 사용자는 새로운 버전의 앱을 사용할 수 있게됩니다.
Windows
- 필수 사항: openssl 설치
- 사전 진행 사항: msix 패키징
Windows는 패키징 부터 라이브러리를 사용해서 msix로 패키징 해주어야합니다. Msix는 Microsoft store가 배포시 권장하는 파일 확장자 형식입니다. 다른 걸로 해도 무관하겠지만 저는 권장사항에 맞게 msix로 진행했습니다.
- 인증서 생성 후 원하는 경로에 저장
$cert = New-SelfSignedCertificate -DnsName www.yourwebsite.com -Type CodeSigning -CertStoreLocation Cert:\CurrentUser\My
$CertPassword = ConvertTo-SecureString -String "my_passowrd" -Force -AsPlainText
Export-PfxCertificate -Cert "cert:\CurrentUser\My\$($cert.Thumbprint)" -FilePath "d:\selfsigncert.pfx" -Password $CertPassword
msix로 패키징하기 위해서는 앱에 적용할 인증서가 필요합니다. 일단 저는 개인 인증서를 생성해서 앱에 적용해주었습니다.
- Pubspec.yaml에 msix로 패키징할 내용 정의
msix_config:
  display_name: ${your_display_name}
  publisher_display_name: ${your_publisher_name} //증명서의 publisher과 동일해야한다
  identity_name: ${your_identity_name}
  msix_version: 1.0.0.0 //업데이트 하고자 하는 파일은 버전을 이전보다 높아져야 덮어씌워진다
  certificate_path: "${your_certificate_route}"
  certificate_password: "${certificate_password}"
  sign_msix: true
이때 증명서의 publisher과 identity name이 앱에 적용한 증명서와 동일해야 새로운 버전의 앱이 덮어 씌워질 수 있습니다. (이거 때문에 중복 설치되는 과정을 겪고 얻어낸 결과입니다..)
- 서버에서 받을 appcast.xml
<?xml version="1.0" encoding="UTF-8"?>
<rss version="2.0" xmlns:sparkle="http://www.andymatuschak.org/xml-namespaces/sparkle">
    <channel>
        <title>App Updates</title>
        <link>${your_base_url}/appcast.xml</link>
        <description>you are ready to use new version</description>
        <language>en</language>

        <item>
            <title>App 3.2.0</title>
            <pubDate>Fri, 26 Feb 2025 12:00:00 +0000</pubDate>
            <enclosure url="${your_download_url}"
                       sparkle:dsaSignature="${your_dsaSignature}"
                       sparkle:version="3.2.0+289"
                       sparkle:installerArguments="/quiet /norestart"
                       sparkle:os="windows"
                       length="0"
                       type="application/octet-stream" />
        </item>
    </channel>
</rss>- dsa 개인키 생성
openssl dsaparam -out dsaparam.pem 2048
openssl gendsa -out dsa_private.pem dsaparam.pem
- dsa 공개키 생성
openssl dsa -in dsa_private.pem -pubout -out dsa_public.pem
- 키 열람
Get-Content update_signature.b64
//이때 출력값을 dsaSignature값으로 넣는다
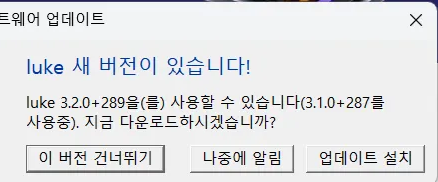
이렇게 하면 그림과 같이 Windows desktop App을 시작하자마자 새로운 버전이 있으니 업데이트 하라는 안내창을 볼 수 있습니다. install 버튼을 누르면 새로운 버전의 앱이 설치되고 기존 앱에 덮어 씌워져서 사용자는 새로운 버전의 앱을 사용할 수 있게됩니다.
정리
- Appcast.xml은 하나로 관리할 수도 있습니다. 저는 본 컴퓨터가 macOS인데 windows desktop app 같은 경우 window 컴퓨터로 돌려야 하는 이슈로 다른 컴퓨터로 작업해야 해서 분리해서 xml을 사용했을 뿐이지 auto_updater 개발 문서를 참고하면 하나의 xml 파일로 관리하고 있습니다. 공식 문서를 꼼꼼히 참고하면 알 수 있습니다.
출처 - auto_updater 공식문서
<?xml version="1.0" encoding="UTF-8"?>
<rss version="2.0" xmlns:sparkle="http://www.andymatuschak.org/xml-namespaces/sparkle">
    <channel>
        <title>auto_updater_example</title>
        <description>Most recent updates to auto_updater_example</description>
        <language>en</language>
        <item>
            <title>Version 1.1.0</title>
            <!-- For the macOS item, it is recommended to add 'sparkle:version' and 'sparkle:shortVersionString' to the item node, rather than as part of the enclosure. -->
            <sparkle:version>2</sparkle:version>
            <sparkle:shortVersionString>1.1.0</sparkle:shortVersionString>
            <sparkle:releaseNotesLink>
                https://your_domain/your_path/release_notes.html
            </sparkle:releaseNotesLink>
            <pubDate>Sun, 16 Feb 2022 12:00:00 +0800</pubDate>
            <enclosure url="1.1.0+2/auto_updater_example-1.1.0+2-macos.zip"
                       sparkle:edSignature="pbdyPt92pnPkzLfQ7BhS9hbjcV9/ndkzSIlWjFQIUMcaCNbAFO2fzl0tISMNJApG2POTkZY0/kJQ2yZYOSVgAA=="
                       sparkle:os="macos"
                       length="13400992"
                       type="application/octet-stream" />
        </item>
        <item>
            <title>Version 1.1.0</title>
            <sparkle:releaseNotesLink>
                https://your_domain/your_path/release_notes.html
            </sparkle:releaseNotesLink>
            <pubDate>Sun, 16 Feb 2022 12:00:00 +0800</pubDate>
            <enclosure url="1.1.0+2/auto_updater_example-1.1.0+2-windows.exe"
                       sparkle:dsaSignature="MEUCIQCVbVzVID7H3aUzAY5znpi+ySZKznkukV8whlMFzKh66AIgREUGOmvavlcg6hwAwkb2o4IqVE/D56ipIBshIqCH8rk="
                       sparkle:version="1.1.0+2"
                       sparkle:os="windows"
                       length="0"
                       type="application/octet-stream" />
        </item>
    </channel>
</rss>- 만약 이렇게 구현할 경우 appcast.xml의 틀은 서버에 두고 프론트에서는 appcast.xml을 배포할 때마다 수정하는 api, 배포시 pkg, msix 파일을 올리는 api 총 두개의 api에 요청값을 보내면 될 것입니다.
- windows 도 macos처럼 install만 설치 알람창에 나오게 할 수 없나요?
- 이 부분은 찾지 못했습니다. 아마 windows의 경우 그냥 Sparkle이 아닌 winSparkle을 따르고 있기 때문에 다른 방식이지 않을까 싶습니다만 아직 찾지 못했습니다.