Zabbix Agent 설치 (EC2)
Zabbix 서버설치는 이미 되어있다 가정하고 EC2에 Agent를 설치하고 메트릭에 추가하는법을 알아본다.
Agent 설치
-
운영체제 및 64bit인지 32bit인지 확인
> uname -m x86_64 > cat /etc/*release NAME="Amazon Linux" VERSION="2" ID="amzn" ID_LIKE="centos rhel fedora" VERSION_ID="2" PRETTY_NAME="Amazon Linux 2" ANSI_COLOR="0;33" CPE_NAME="cpe:2.3:o:amazon:amazon_linux:2" HOME_URL="https://amazonlinux.com/" Amazon Linux release 2 (Karoo) -
Zabbix Agent(v5.0.3) rpm 설치
- 링크에서 운영체제에 맞는 rpm파일의 주소를 복사후 아래 명령 실행
> rpm -ivh http://repo.zabbix.com/zabbix/5.0/rhel/7/x86_64/zabbix-agent-5.0.3-1.el7.x86_64.rpm -
Zabbix Agent(v5.0.3) 설치
> sudo yum localinstall http://repo.zabbix.com/zabbix/5.0/rhel/7/x86_64/zabbix-agent-5.0.3-1.el7.x86_64.rpm -
설치 확인
> zabbix_agentd -V
Revision 146855bff3 24 August 2020, compilation time: Aug 24 2020 10:04:33

Copyright (C) 2020 Zabbix SIA
License GPLv2+: GNU GPL version 2 or later <http://gnu.org/licenses/gpl.html >.
This is free software: you are free to change and redistribute it according to
the license. There is NO WARRANTY, to the extent permitted by law.

This product includes software developed by the OpenSSL Project
for use in the OpenSSL Toolkit (http://www.openssl.org/).

Compiled with OpenSSL 1.0.2k-fips  26 Jan 2017
Running with OpenSSL 1.0.2k-fips  26 Jan 2017
환경설정
-
Zabbix Agent 환경설정 변경
- Master에 대한 정보를 입력한다.
> vi /etc/zabbix/zabbix_agentd.conf LogFile=/var/log/zabbix/zabbix_agentd.log Server=111.111.111.111 Hostname=mamamoo-api-production PidFile=/run/zabbix/zabbix_agentd.pid -
Zabbix Agent Enable 및 Start
> systemctl enable zabbix-agent.service > systemctl start zabbix-agent.service -
Security Group 설정
-
Zabbix Server가 데이터를 Agent로 부터 폴링하려면 인바운드에 10050/TCP 포트를 열어줘야 한다.
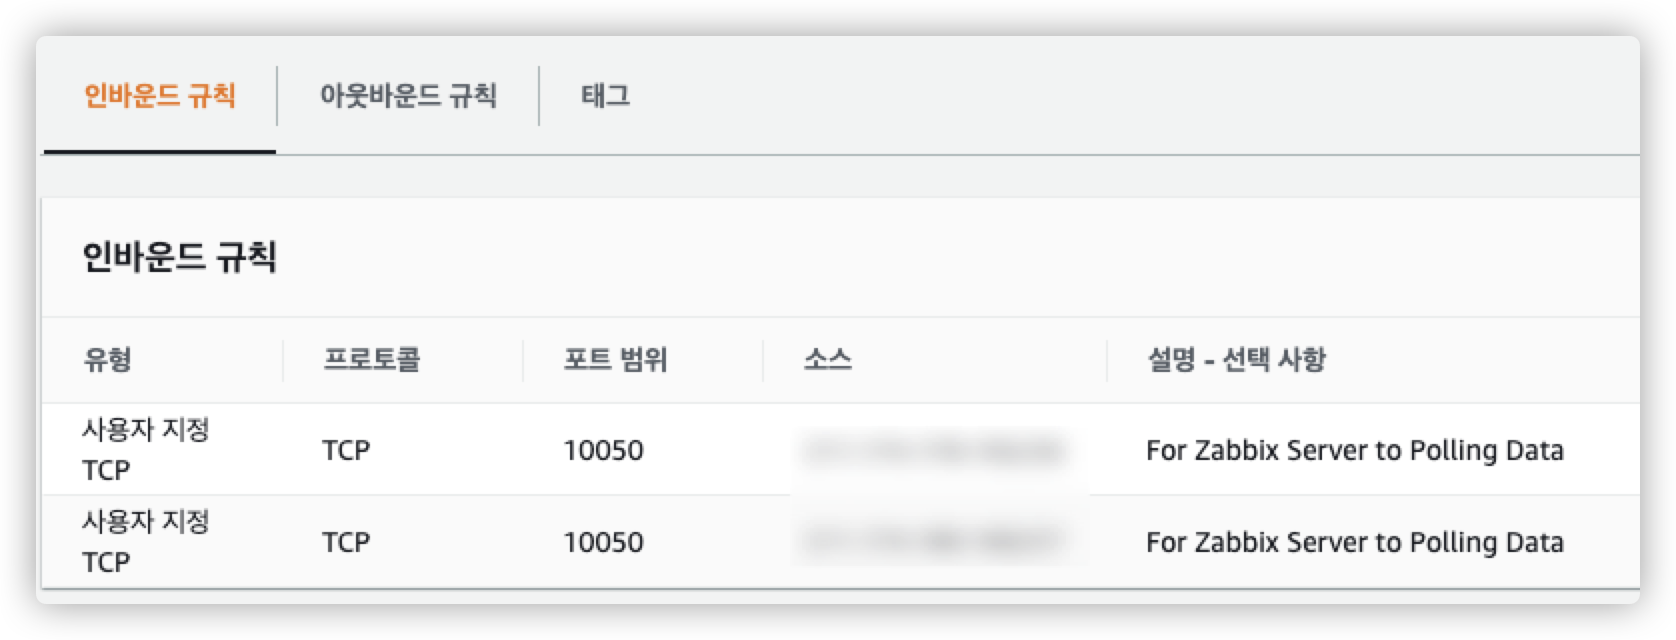
여기서 의문이 생겼던 부분이 Zabbix Agent는 분명 10050포트를 사용하고 있는데 왜 Zabbix Agent에 10050을 인바운드로 뚫어주느냐? 이다. 분명 서버는 10051로 들어올텐데 말이다. 이를 이해하려면 Zabbix의 Zabbix 서버의
Active&Passive방식을 이해해야 한다.Zabbix는
Active혹은Passive방식으로 데이터를 받아온다.Passive방식은 Default이고 Zabbix 서버가 Agent에게 10050포트를 사용하여 데이터를 Request하면 에이전트는 데이터를 서버에게 보내주는 방식이다. Server → 10050/TCP → AgentActive방식은 Zabbix 에이전트가 trap이 발생하게 되면 일방적으로 Zabbix 서버에게 10051포트로 Requests를 Push하게 된다. Server ← 10051/TCP ← Agent내 환경의 Zabbix 서버는
Passive방식이었다. Passive일 경우 Zabbix 에이전트에 10050포트를 뚫는게 맞고 당연히 Zabbix Server에는 10051포트를 뚫어줘야 한다. -
-
포트 연결 확인
-
Zabbix Server → Agent 확인
nc -v -z Zabbix_Agent_IP 10050 -
Zabbix Agent → Server 확인
nc -v -z Zabbix_Server_IP 10051
*혹시나 nc 명령어가 설치되어 있지 않은경우
yum install nc로 설치 가능하다. -
-
에이전트에서 로그 확인
> tail -f /var/log/zabbix/zabbix_agentd.log

5114:20210311:095136.075 **** Enabled features ****
  5114:20210311:095136.075 IPv6 support:          YES
  5114:20210311:095136.075 TLS support:           YES
  5114:20210311:095136.075 **************************
  5114:20210311:095136.075 using configuration file: /etc/zabbix/zabbix_agentd.conf
  5114:20210311:095136.075 agent #0 started [main process]
  5115:20210311:095136.076 agent #1 started [collector]
  5117:20210311:095136.076 agent #3 started [listener #2]
  5118:20210311:095136.076 agent #4 started [listener #3]
  5116:20210311:095136.078 agent #2 started [listener #1]
  5114:20210311:095306.318 Got signal [signal:15(SIGTERM),sender_pid:1,sender_uid:0,reason:0]. Exiting ...
  5114:20210311:095306.319 Zabbix Agent stopped. Zabbix 5.0.3 (revision 146855bff3).
  5131:20210311:095316.573 Starting Zabbix Agent [mamamoo-api-production]. Zabbix 5.0.3 (revision 146855bff3).
  5131:20210311:095316.573 **** Enabled features ****
  5131:20210311:095316.573 IPv6 support:          YES
  5131:20210311:095316.573 TLS support:           YES
  5131:20210311:095316.573 **************************
  5131:20210311:095316.573 using configuration file: /etc/zabbix/zabbix_agentd.conf
  5131:20210311:095316.574 agent #0 started [main process]
  5132:20210311:095316.574 agent #1 started [collector]
  5135:20210311:095316.574 agent #4 started [listener #3]
  5133:20210311:095316.575 agent #2 started [listener #1]
  5134:20210311:095316.576 agent #3 started [listener #2]
호스트 추가
-
호스트 설정
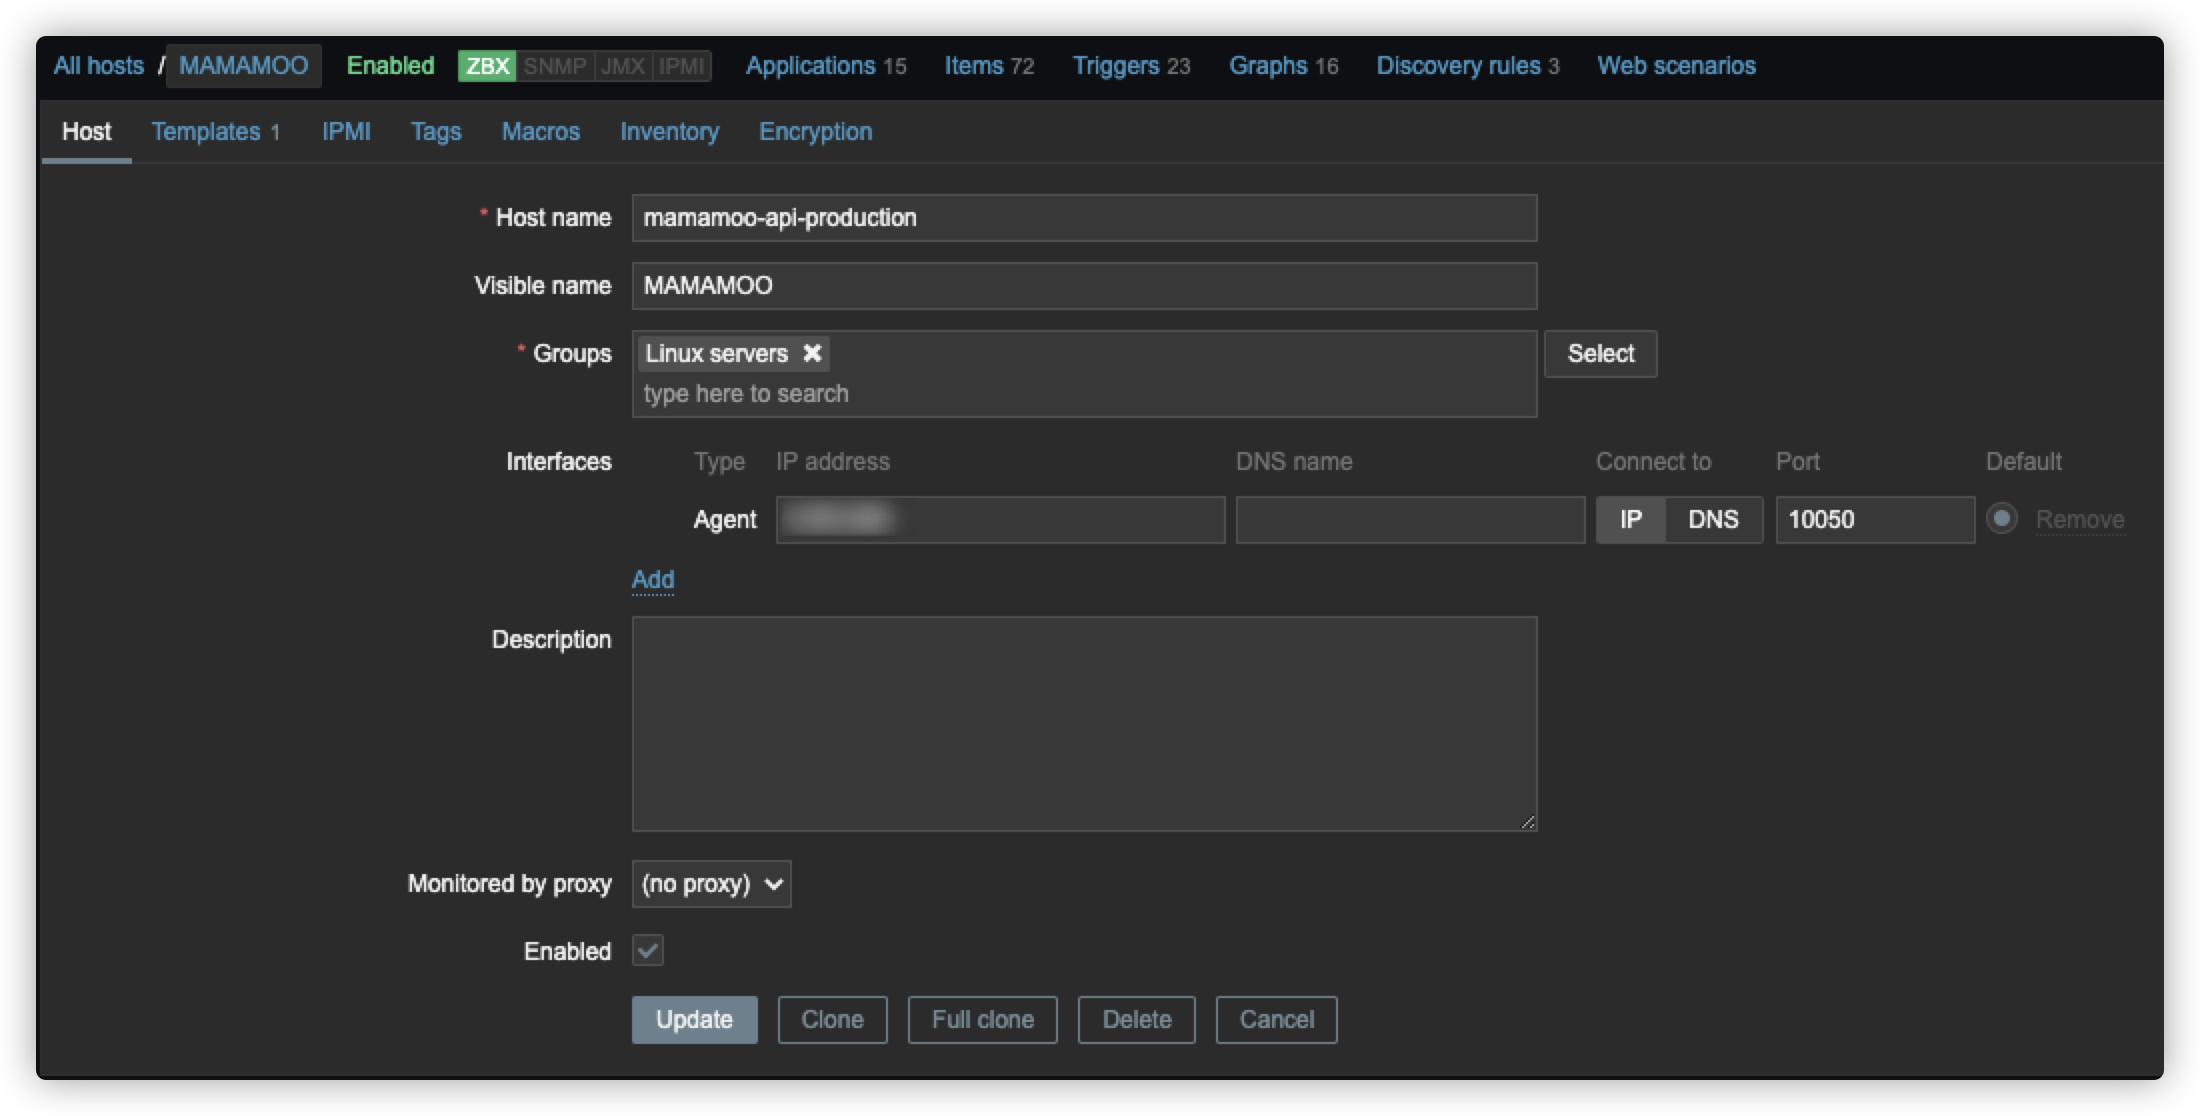
- 호스트의 이름을 적어주고 Group도 설정한다.
- Interface는 Agent를 선택하고 Agent호스트의 IP를 입력
-
Template 설정
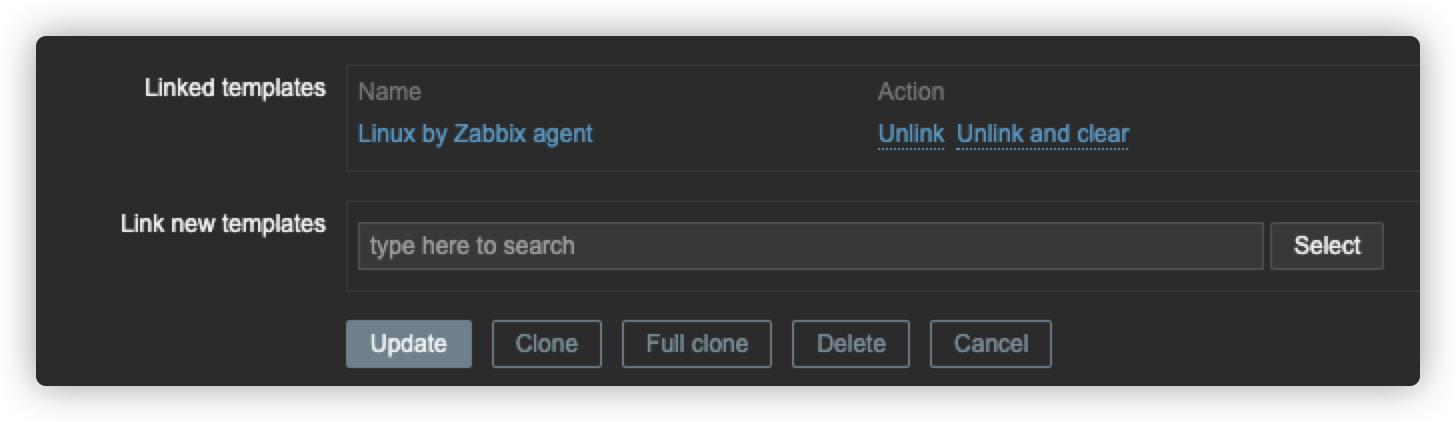
-
Zabbix에서 기본적으로 제공하는 템플릿인
Linux by Zabbix agent를 사용한다.*스위치의 경우 제조사별로 템플릿을 제공해줌
-
-
확인

- 추가가 완료되었다면 'Monitoring' → 'Hosts'에서 호스트를 확인할 수 있고 'Availability' 항목에 ZBX에 초록색불이 들어온다.
- 5분~10분 기다리면 Item, Graph 등 확인가능
