소개
일반적으로 사용하는 HTML Form을 통한 파일 업로드를 이해하려면 먼저 폼을 전송하는 다음 두 가지 방식의 차이를 이해해야 한다.
HTML 폼 전송 방식
application/x-www-form-urlencodedmultipart/form-data
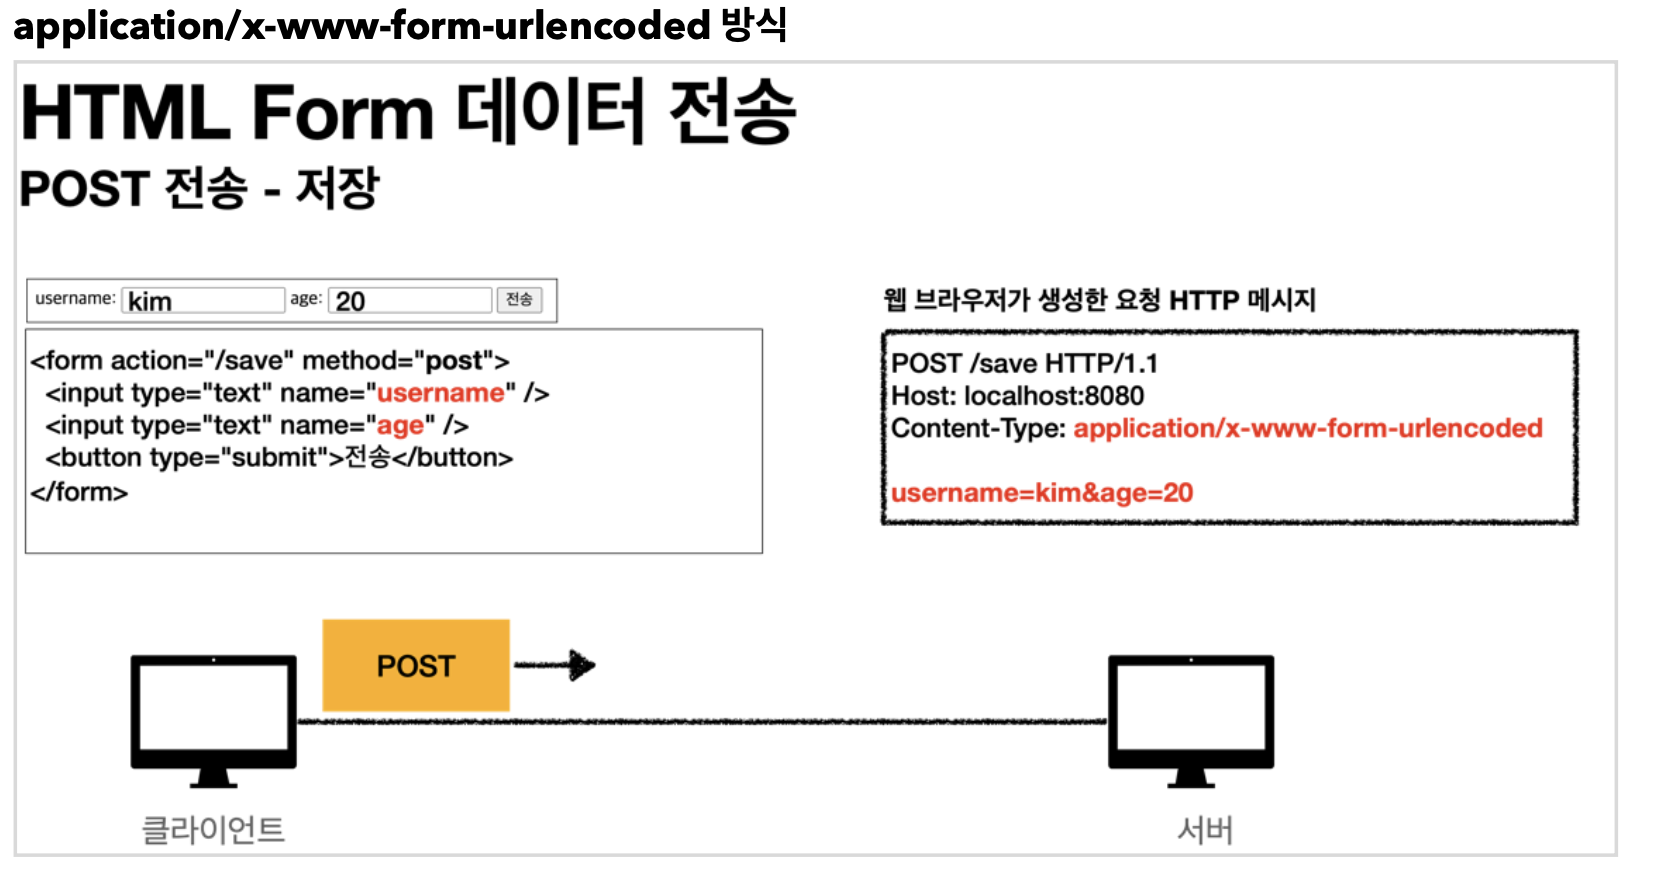
application/x-www-form-urlencoded 방식은 HTML 폼 데이터를 서버로 전송하는 가장 기본적인 방법이다. Form 태그에 별도의 enctype 옵션이 없으면 웹 브라우저는 요청 HTTP 메시지의 헤더에 다음 내용을 추가한다.
Content-Type: application/x-www-form-urlencoded
그리고 폼에 입력한 전송할 항목을 HTTP Body에 문자로 username=kim&age=20 와 같이 &로 구분해서 전송한다.
파일을 업로드 하려면 파일은 문자가 아니라 바이너리 데이터를 전송해야 한다. 문자를 전송하는 이 방식으로 파일을 전송하기는 어렵다.
그리고 또, 보통 폼을 전송할 때 파일만 전송하는 것이 아니다.
- 이름
- 나이
- 첨부파일
여기에서 문자와 바이너리를 동시에 전송해야 하는 상황이 있다.
이 문제를 해결하기 위해서 HTTP는 multipart/form-data라는 전송 방식을 제공한다.
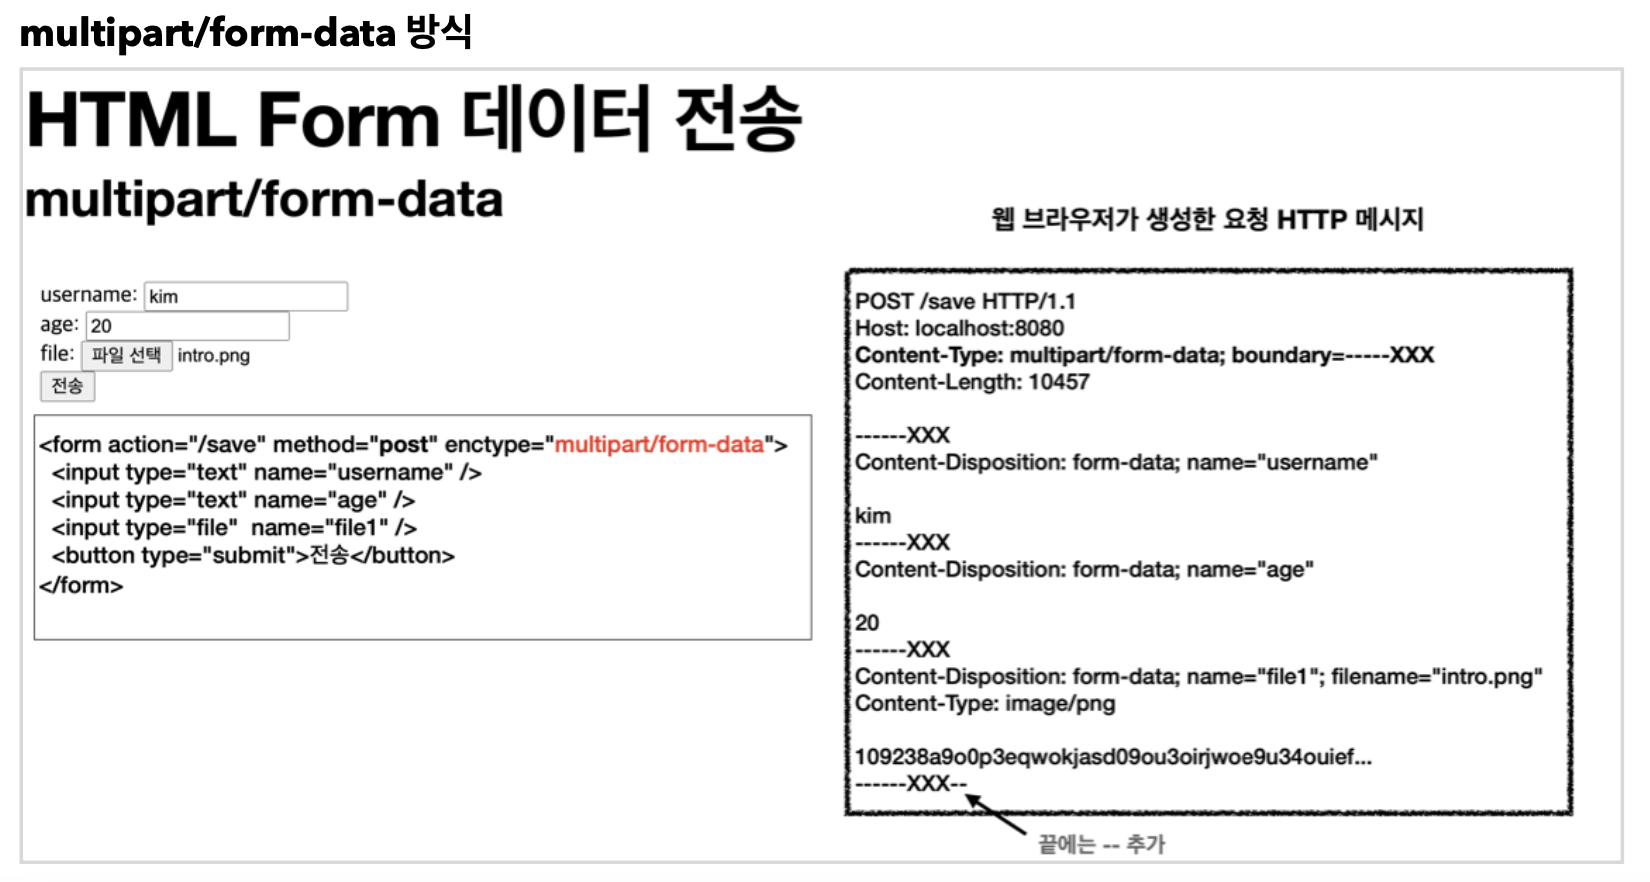
이 방식을 사용하려면 Form 태그에 별도의 entype="multipart/form-data"를 지정해야 한다.
multipart/form-data 방식은 다른 종류의 여러 파일과 폼의 내용을 함께 전송할 수 있다. (그래서 이름이 multipart)
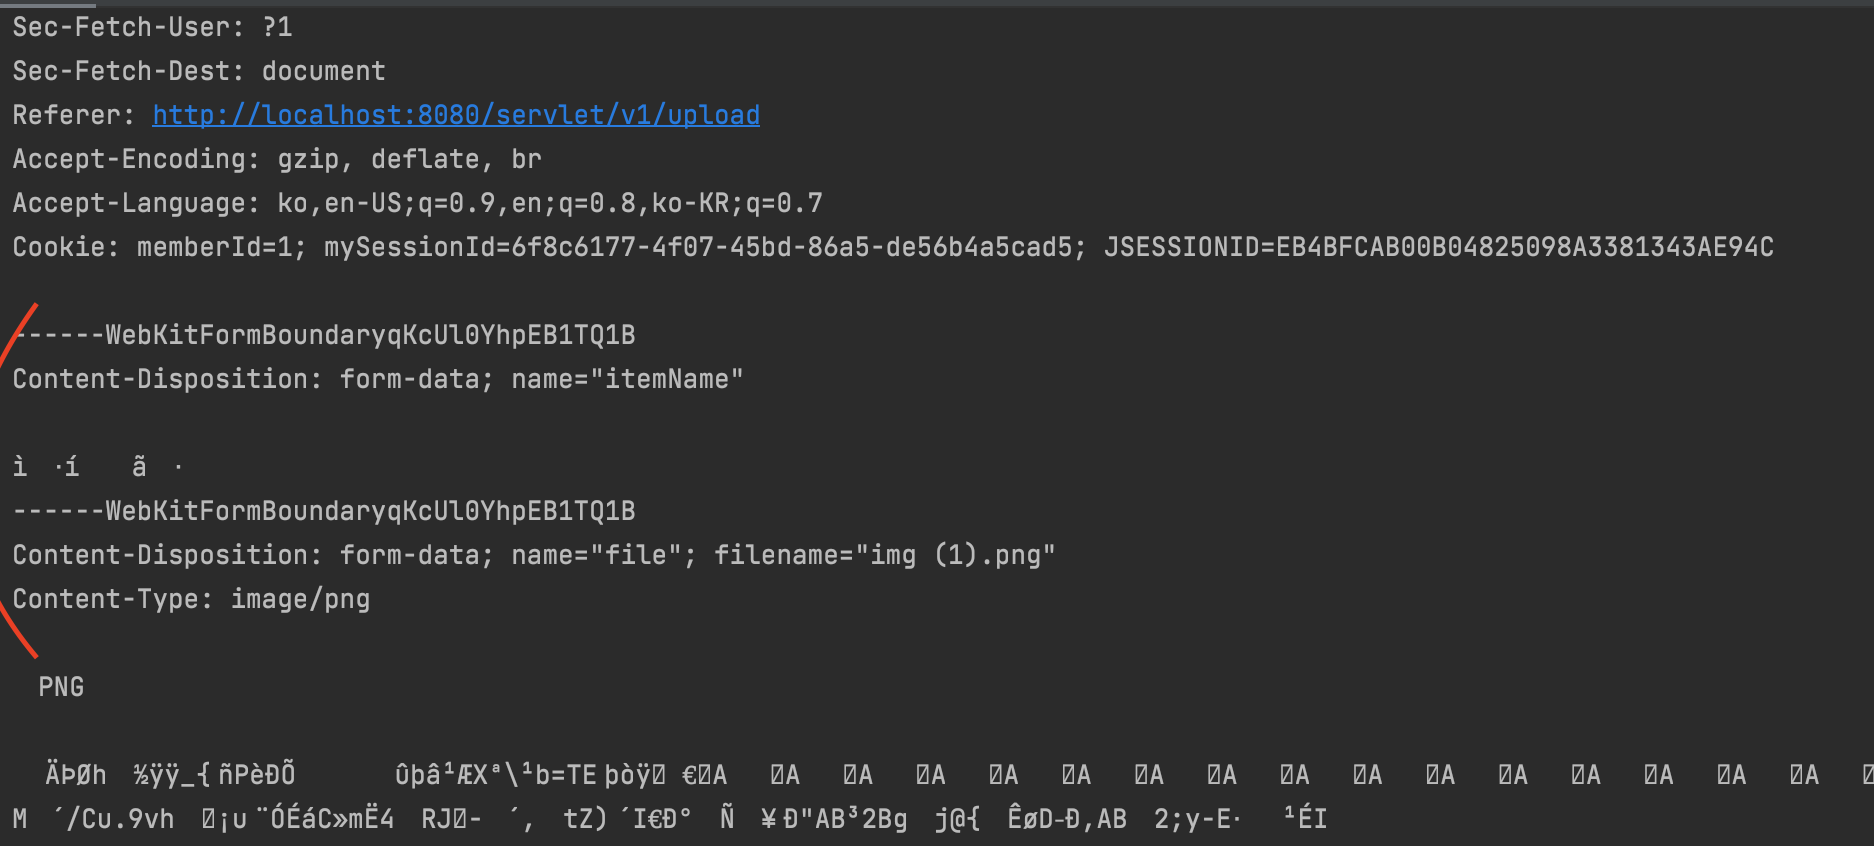
폼에 입력된 결과로 생성된 HTTP 메시지를 보면 각각의 전송 항목이 구분되어있다. username, age, file1이 각각 분리되어 있고, 폼의 일반 데이터는 각 항목별로 문자가 전송되고, 파일의 경우 파일 이름과 Content-Type이 추가되고 바이너리 데이터가 전송된다.
multipart/form-data는 이렇게 각각의 항목을 구분해서, 한번에 전송하는 것이다.
그럼 이 복잡한 내용을 서버에서는 어떻게 읽지?
프로젝트 생성
생략
index.html
<!DOCTYPE html>
<html>
<head>
    <meta charset="UTF-8">
    <title>Title</title>
</head>
<body> <ul>
    <li>상품 관리
        <ul>
            <li><a href="/servlet/v1/upload">서블릿 파일 업로드1</a></li>
            <li><a href="/servlet/v2/upload">서블릿 파일 업로드2</a></li>
            <li><a href="/spring/upload">스프링 파일 업로드</a></li>
            <li><a href="/items/new">상품 - 파일, 이미지 업로드</a></li>
        </ul>
    </li>
</ul>
</body>
</html>
서블릿과 파일 업로드
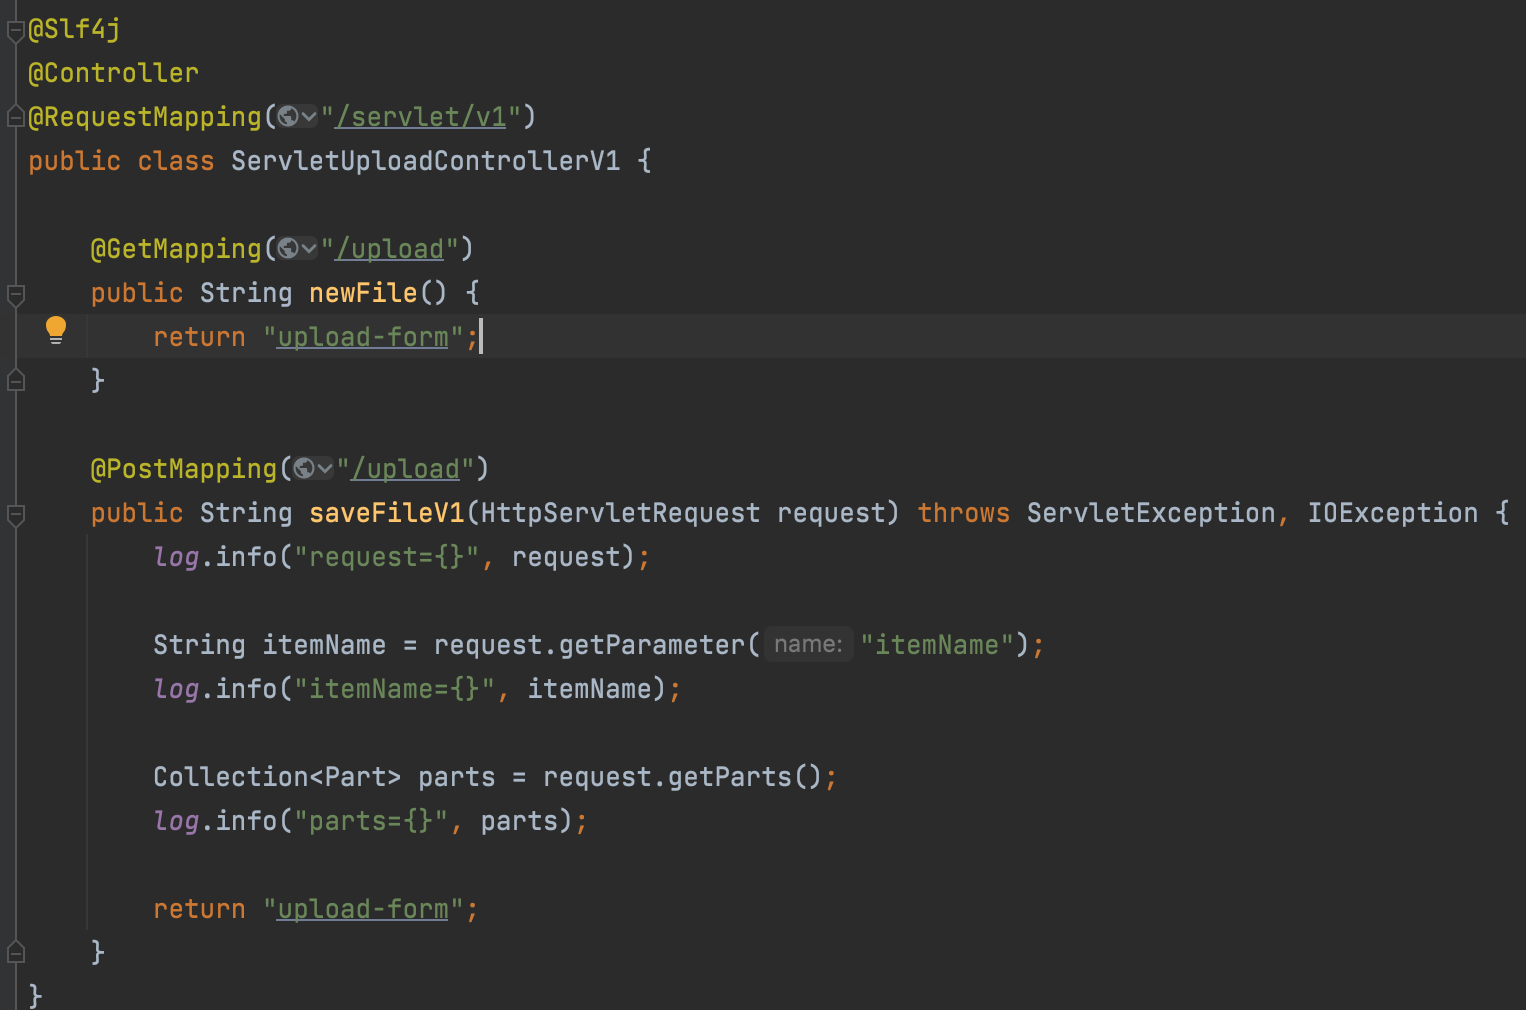

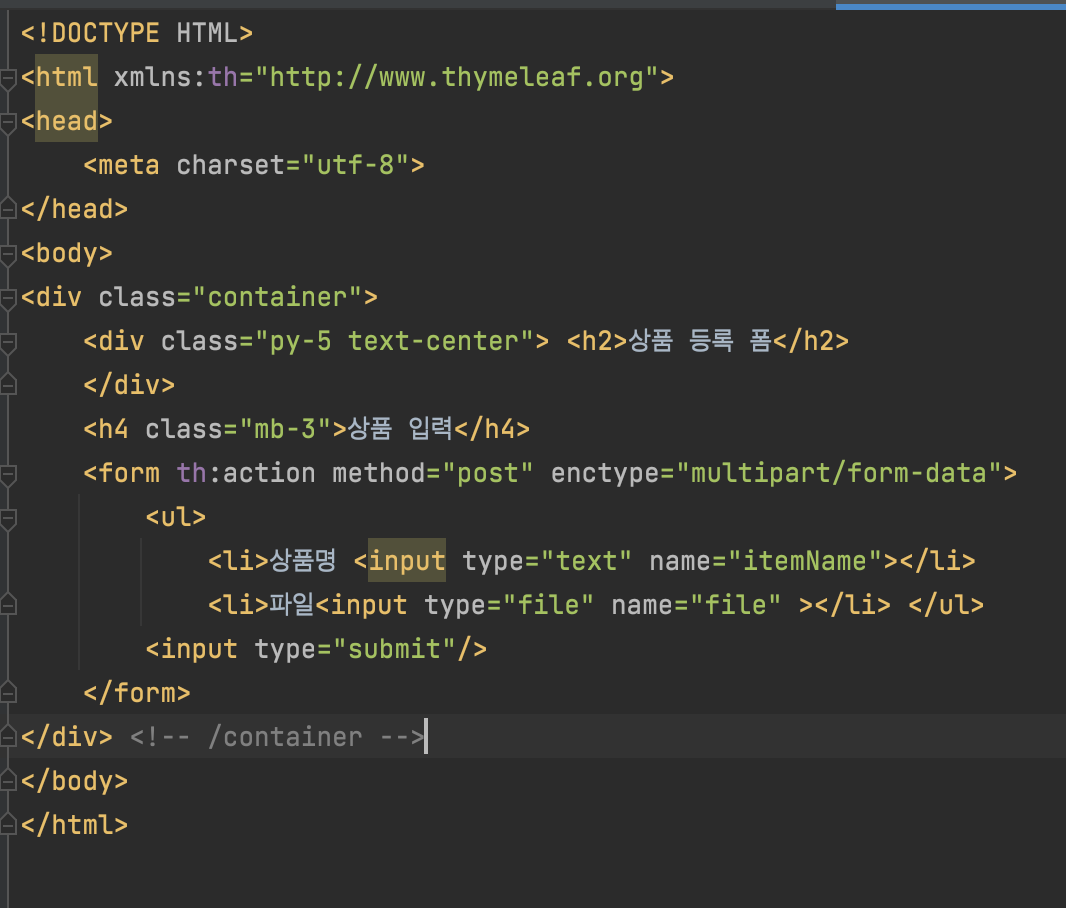

멀티파트 사용 옵션
업로드 사이즈 제한
spring.servlet.multipart.max-file-size=1MB
spring.servlet.multipart.max-request-size=10MB
큰 파일을 무제한 업로드하게 둘 수는 없으므로 업로드 사이즈를 제한할 수 있다.
사이즈를 넘으면 예외(SizeLimitExceededException)가 발생한다.
max-file-size: 파일 하나의 최대 사이즈, 기본 1MB
max-request-size: 멀티파트 요청 하나에 여러 파일을 어볼드 할 수 있는데,그 전체 합. 기본 10MB
중요한건 아닌데
spring.servlet.multipart.enabled=false
이렇게 설정하면 멀티파트 데이터 처리를 하지 않게 된다.
기본값은 true기 때문에 손대지 않으면 멀티파트 처리를 알아서 해준다.
멀티파트의 경우
HttpServletREquest 객체가 RequestFacade가 기본인데,
StandardMultipartHttpServletRequest로 변한다.
정확히는 컨트롤러 내부에서
checkMultipart(request) 메서드가 있는데 이를 통해 멀티파트 처리를 해야하는지 체크를 하고 처리를 해야 한다면, MultipartHttpServletRequest로 반환을 해준다.
근데 이후에 설명할 MultipartFile이라는 것을 사용하는게 더 편리해서 잘 안씀.
이제 전송받은 파일을 실제로 서버에 전송해보자.
먼저 저장할 경로가 필요하다.
application.properties
file.dir=파일 업로드 경로 설정(예): /Users/kimyounghan/study/file/
ServletUploadControllerV2
package hello.upload.controller;

import lombok.extern.slf4j.Slf4j;
import org.springframework.beans.factory.annotation.Value;
import org.springframework.stereotype.Controller;
import org.springframework.util.StreamUtils;
import org.springframework.util.StringUtils;
import org.springframework.web.bind.annotation.GetMapping;
import org.springframework.web.bind.annotation.PostMapping;
import org.springframework.web.bind.annotation.RequestMapping;

import javax.servlet.ServletException;
import javax.servlet.http.HttpServletRequest;
import javax.servlet.http.Part;
import java.io.IOException;
import java.io.InputStream;
import java.nio.charset.StandardCharsets;
import java.util.Collection;

@Slf4j
@Controller
@RequestMapping("/servlet/v2")
public class ServletUploadControllerV2 {

    @Value("${file.dir}")
    private String fileDir;

    @GetMapping("/upload")
    public String newFile() {
        return "upload-form";
    }

    @PostMapping("/upload")
    public String saveFileV2(HttpServletRequest request) throws ServletException, IOException {
        log.info("request={}", request);

        String itemName = request.getParameter("itemName");
        log.info("itemName={}", itemName);

        Collection<Part> parts = request.getParts();
        log.info("parts={}", parts);

        for (Part part : parts) {
            log.info("==== PART ====");
            log.info("name={}", part.getName());
            Collection<String> headerNames = part.getHeaderNames();
            for (String headerName : headerNames) {
                log.info("header {}: {}", headerName, part.getHeader(headerName));
            }
            //편의 메서드
            //content-disposition; filename
            log.info("submittedFilename={}", part.getSubmittedFileName());
            log.info("size={}", part.getSize()); //part body size

            //데이터 읽기
            InputStream inputStream = part.getInputStream();
            String body = StreamUtils.copyToString(inputStream, StandardCharsets.UTF_8);
            log.info("body={}", body);

            //파일에 저장하기
            if (StringUtils.hasText(part.getSubmittedFileName())) {
                String fullPath = fileDir + part.getSubmittedFileName();
                log.info("파일 저장 fullPath={}", fullPath);
                part.write(fullPath);
            }
        }

        return "upload-form";
    }
}
@Value("${file.dir}")
private String fileDir;application.properties에서 설정한 file.dir의 값을 주입한다.
멀티파트 형식은 전송 데이터를 하나하나 각각 부분(Part)으로 나눠서 전송한다.
Part 주요 메서드
part.getSubmittedFileName(): 클라이언트가 전달한 파일명
part.getInputStream(): Part의 전송 데이터를 읽을 수 있다.
part.write(...): Part를 통해 전송된 데이터를 저장할 수 있다.
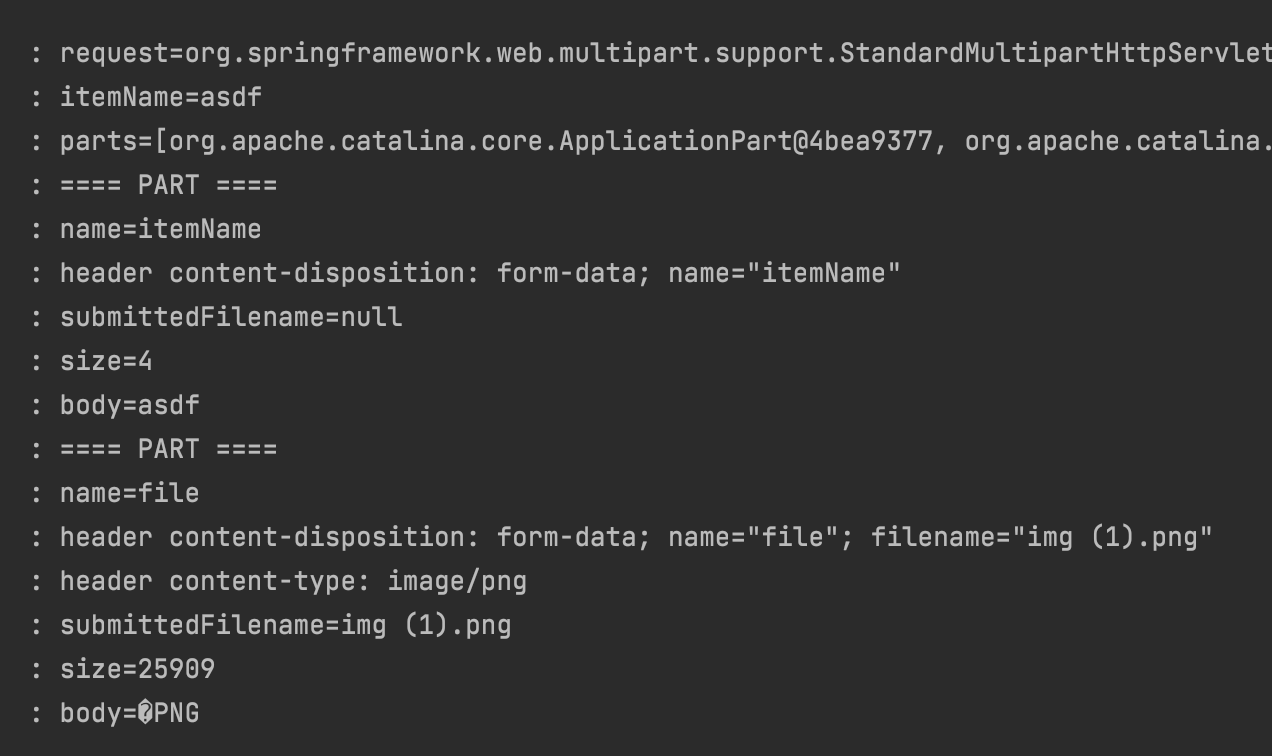
파트가 두번 오는데 위는 상품명, 밑에는 파일이다.
실제 경로에 파일이 저장되는 것을 확인할 수 있다.
참고로 큰 용량의 파일을 업로드할때는 로그가 너무 많이 남아서 이 옵션을 끄는것이 좋다.
loggin.level.org.apache.coyote.http11=debug
다음 부분도 파일의 바이너리 데이터를 모두 출력하므로 끄는 것이 좋다.
log.info("body={}", body)
서블릿이 제공하는 Part는 편하기는 하지만, HttpServletRequest를 사용해야 하고, 추가로 파일 부분만 구분하려면 여러가지 코드를 넣어야한다.
스프링이 이를 어떻게 편리하게 해줄까?
스프링과 파일 업로드
SpringUploadController
package hello.upload.controller;

import lombok.extern.slf4j.Slf4j;
import org.springframework.beans.factory.annotation.Value;
import org.springframework.stereotype.Controller;
import org.springframework.web.bind.annotation.GetMapping;
import org.springframework.web.bind.annotation.PostMapping;
import org.springframework.web.bind.annotation.RequestMapping;
import org.springframework.web.bind.annotation.RequestParam;
import org.springframework.web.multipart.MultipartFile;

import javax.servlet.http.HttpServletRequest;
import java.io.File;
import java.io.IOException;

@Slf4j
@Controller
@RequestMapping("/spring")
public class SpringUploadController {

    @Value("${file.dir}")
    private String fileDir;

    @GetMapping("/upload")
    public String newFile() {
        return "upload-form";
    }

    @PostMapping("/upload")
    public String saveFile(@RequestParam String itemName,
                           @RequestParam MultipartFile file, HttpServletRequest request) throws IOException {
        log.info("request={}", request);
        log.info("itemName={}", itemName);
        log.info("multipartFile={}", file);

        if (!file.isEmpty()) {
            String fullPath = fileDir + file.getOriginalFilename();
            log.info("파일 저장 fullPath={}", fullPath);
            file.transferTo(new File(fullPath));
        }

        return "upload-form";
    }
}
@RequestParam MultipartFile file
업로드하는 HTML Form의 name에 맞추어 @RequestParam을 적용하면 된다. 추가로 @ModelAttribute에서도 MultipartFile을 사용할 수 있다.
MultipartFile 주요 메서드
file.getOriginalFilename(): 업로드 파일 명
file.transferTo(...): 파일 저장
2022-02-28 17:07:27.220  INFO 93642 --- [nio-8080-exec-1] o.a.c.c.C.[Tomcat].[localhost].[/]       : Initializing Spring DispatcherServlet 'dispatcherServlet'
2022-02-28 17:07:27.221  INFO 93642 --- [nio-8080-exec-1] o.s.web.servlet.DispatcherServlet        : Initializing Servlet 'dispatcherServlet'
2022-02-28 17:07:27.224  INFO 93642 --- [nio-8080-exec-1] o.s.web.servlet.DispatcherServlet        : Completed initialization in 3 ms
2022-02-28 17:07:27.262  INFO 93642 --- [nio-8080-exec-1] h.u.controller.SpringUploadController    : request=org.springframework.web.multipart.support.StandardMultipartHttpServletRequest@16112a28
2022-02-28 17:07:27.262  INFO 93642 --- [nio-8080-exec-1] h.u.controller.SpringUploadController    : itemName=asdf
2022-02-28 17:07:27.263  INFO 93642 --- [nio-8080-exec-1] h.u.controller.SpringUploadController    : multipartFile=org.springframework.web.multipart.support.StandardMultipartHttpServletRequest$StandardMultipartFile@3a886971
2022-02-28 17:07:27.263  INFO 93642 --- [nio-8080-exec-1] h.u.controller.SpringUploadController    : 파일 저장 fullPath=/Users/seungjulee/study/upload/file/img (1).png
예제로 구현하는 파일 업로드, 다운로드
상품 도메인
package hello.upload.domain;

import lombok.Data;

import java.util.List;

@Data
public class Item {

    private Long id;
    private String itemName;
    private UploadFile attachFIle;
    private List<UploadFile> imageFiles;
}
UploadFile
package hello.upload.domain;

import lombok.Data;

@Data
public class UploadFile {

    private String uploadFileName;
    private String storeFileName;

    public UploadFile(String uploadFileName, String storeFileName) {
        this.uploadFileName = uploadFileName;
        this.storeFileName = storeFileName;
    }
}
uploadFileName : 고객이 업로드한 파일명
storeFileName : 서버 내부에서 관리하는 파일명
고객이 업로드한 파일명으로 서버 내부에서 파일을 저장하면 안된다. 이름이 겹치면 기존 파일과 충돌이 일어나기 때문이다. UUID로 저장할 예정
리포지토리
저장과 찾기 메서드를 만들었다. 생략
FileStore - 파일 저장
package hello.upload.file;

import hello.upload.domain.UploadFile;
import org.springframework.beans.factory.annotation.Value;
import org.springframework.stereotype.Component;
import org.springframework.web.bind.annotation.PathVariable;
import org.springframework.web.multipart.MultipartFile;

import java.io.File;
import java.io.IOException;
import java.util.ArrayList;
import java.util.List;
import java.util.UUID;

@Component
public class FileStore {

    @Value("${file.dir}")
    private String fileDir;

    public String getFullPath(String filename) {
        return fileDir + filename;
    }

    public List<UploadFile> storeFiles(List<MultipartFile> multipartFiles) throws IOException {
        List<UploadFile> storeFileResult = new ArrayList<>();
        for (MultipartFile multipartFile : multipartFiles) {
            if (!multipartFile.isEmpty()) {
                storeFileResult.add(storeFile(multipartFile));
            }
        }
        return storeFileResult;
    }

    public UploadFile storeFile(MultipartFile multipartFile) throws IOException {
        if (multipartFile.isEmpty()) {
            return null;
        }

        String originalFilename = multipartFile.getOriginalFilename();
        String storeFileName = createStoreFileName(originalFilename);
        multipartFile.transferTo(new File(getFullPath(storeFileName)));
        return new UploadFile(originalFilename, storeFileName);
    }

    private String createStoreFileName(String originalFilename) {
        String uuid = UUID.randomUUID().toString();
        String ext = extractExt(originalFilename);
        return uuid + "." + ext;
    }

    private String extractExt(String originalFilename) {
        int pos = originalFilename.lastIndexOf(".");
        return  originalFilename.substring(pos + 1);
    }
}
createStoreFileName(): UUID.확장명으로 새롭게 파일 이름을 만들어준다.
extractExt():확장명을 UUID뒤에 붙이기 위해 별도로 추출한다.
ItemForm
package hello.upload.controller;

import lombok.Data;
import org.springframework.web.multipart.MultipartFile;

import java.util.List;

@Data
public class ItemForm {

    private Long itemId;
    private String itemName;
    private List<MultipartFile> imageFiles;
    private MultipartFile attachFile;
}
입력을 받기 위한 폼
ItemController
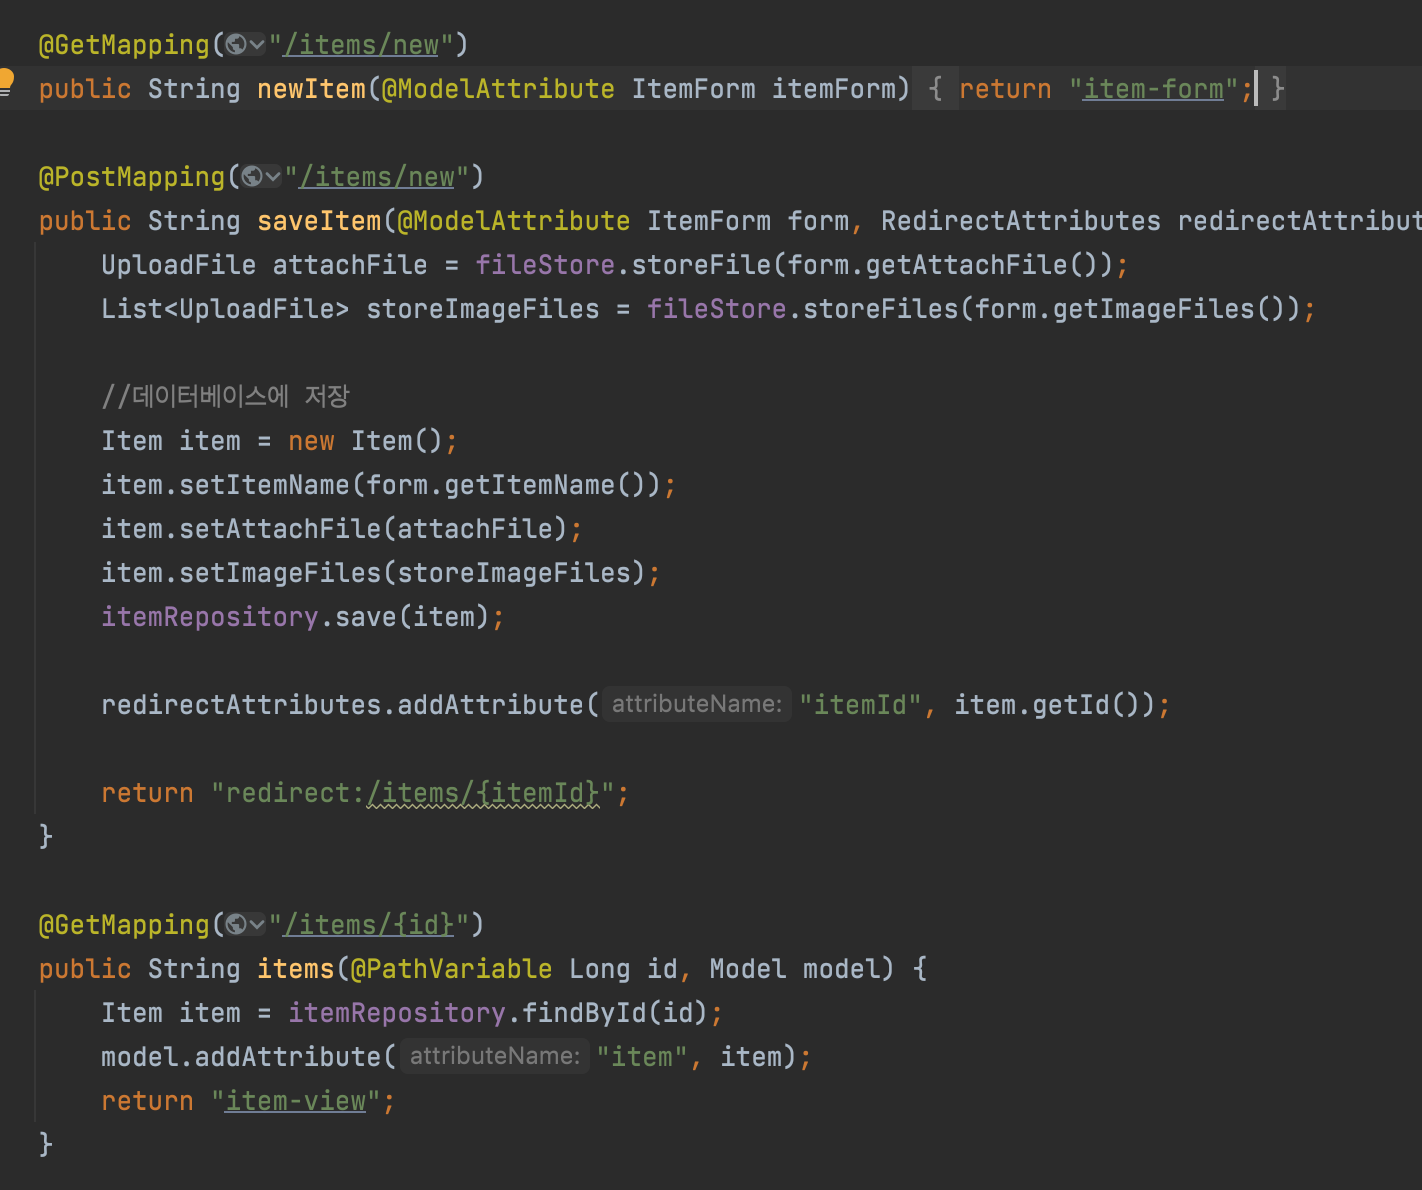
만들어놨던, FileSotre를 통해
form.getAttachFile() -> MultipartFile
form.getIamgeFiles() -> List<MultipartFile>
을 넣고, UploadFile에 본래 저장 이름과, UUID 저장 이름 두개를 받는다.
이를 Item 데이터베이스에 저장한다.
그 후에 아이템을 보여주는 /items/{id}를 작성한다.
item-view.html
<!DOCTYPE HTML>
<html xmlns:th="http://www.thymeleaf.org">
<head>
    <meta charset="utf-8">
</head>
<body>
<div class="container">
    <div class="py-5 text-center">
        <h2>상품 조회</h2>
    </div>
    상품명: <span th:text="${item.itemName}">상품명</span><br/>
    첨부파일: <a th:if="${item.attachFile}" th:href="|/attach/${item.id}|" th:text="${item.getAttachFile().getUploadFileName()}" /><br/>
    <img th:each="imageFile : ${item.imageFiles}" th:src="|/images/${imageFile.getStoreFileName()}|" width="300" height="300"/>
</div> <!-- /container -->
</body>
</html>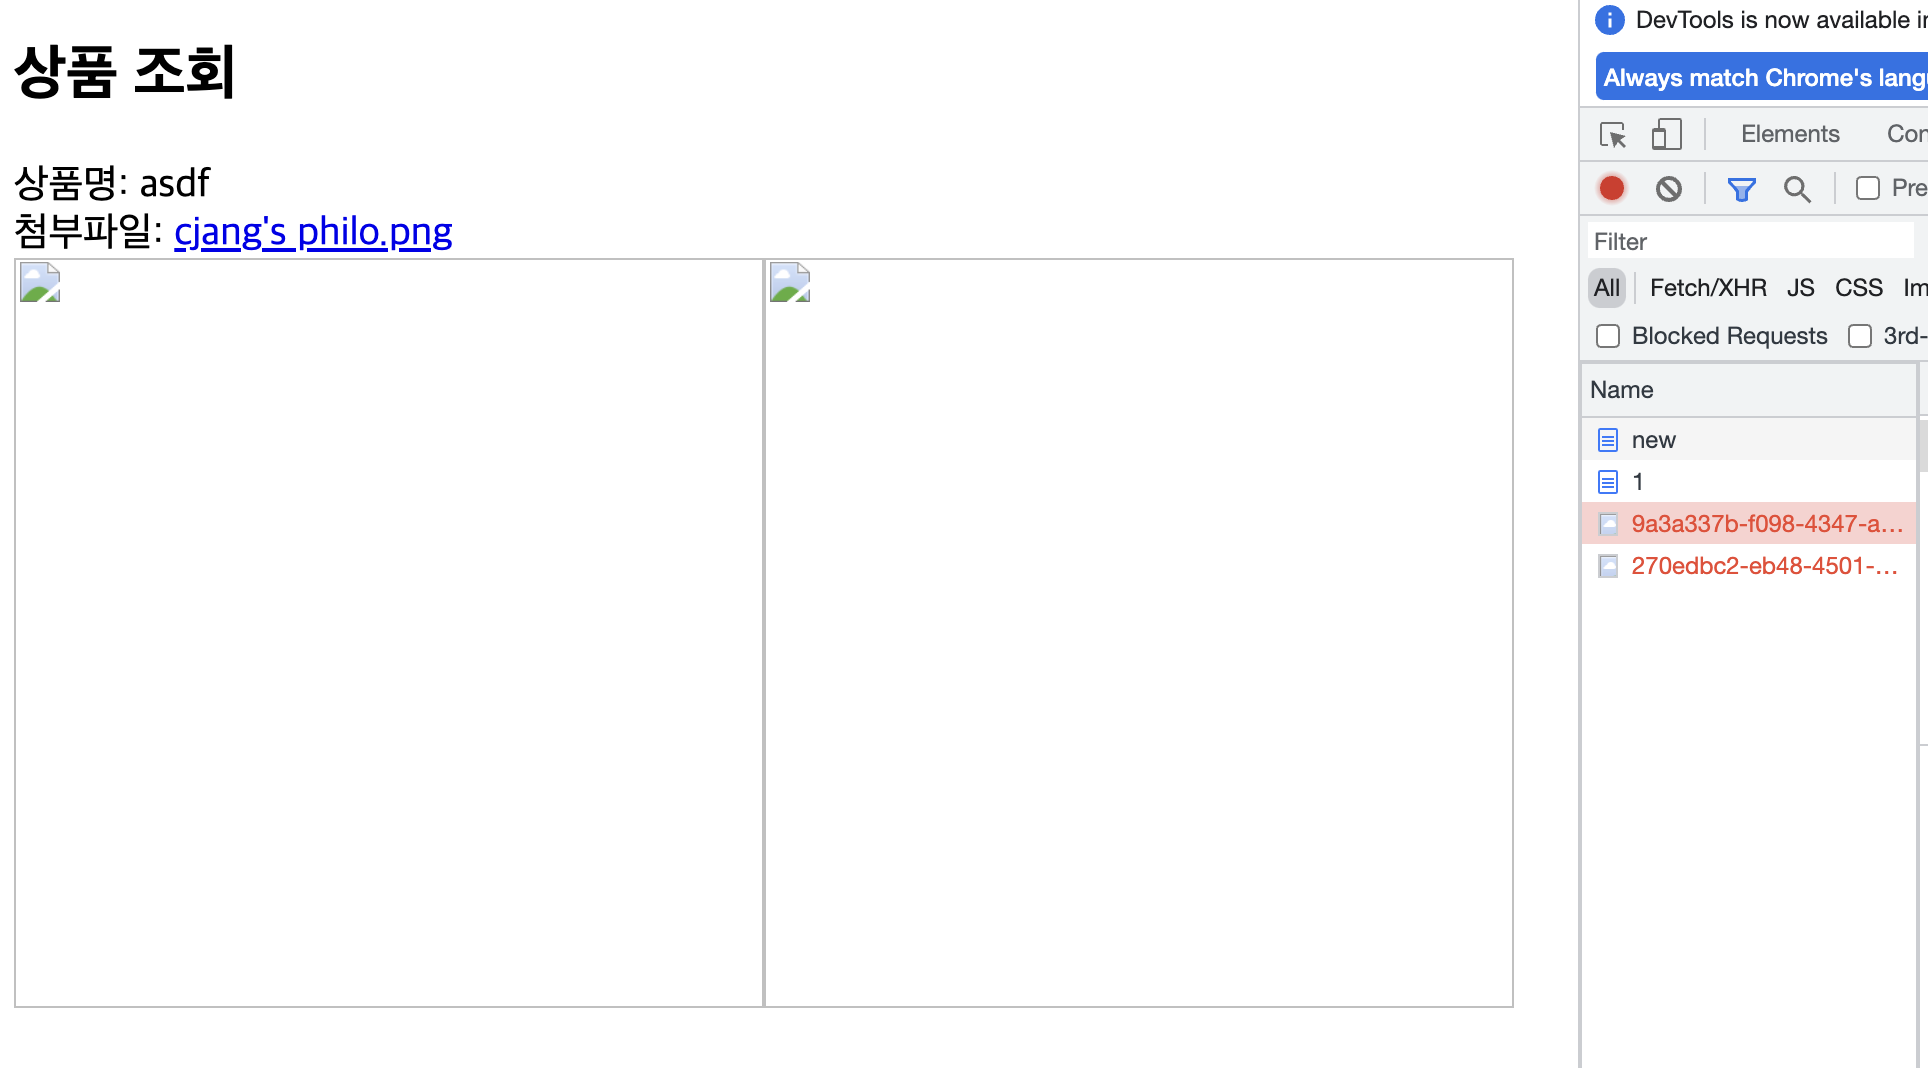
오른쪽에 보면 UUID가 포함된 파일 이름이 나온것을 확인할 수 있다.
이처럼 필요한 경우가 아니면, 저장한 파일이름보다는 UUID로 만든 이름을 노출하는 것이 좋다.
또, 그림이 액박뜨는것을 확인할 수 있다.
파일 다운로드도 안된다.
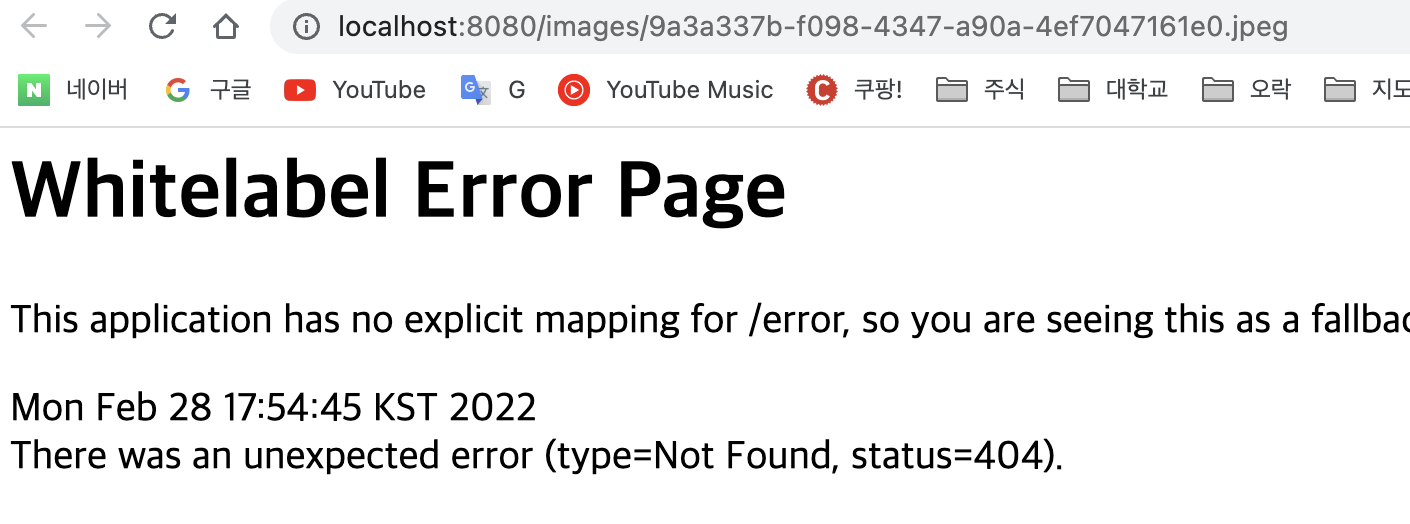
그 이유는 이렇게 이미지가 나오도록 설정하지 않아서이다.
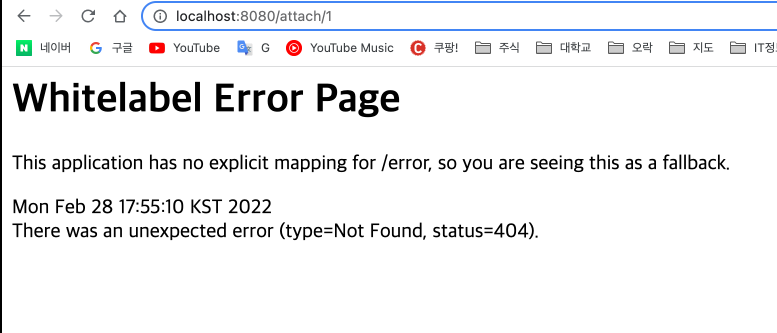
파일 다운로드도 마찬가지다. 이 두 작업을 해줘야 한다.

아이템 컨트롤러에 추가해줬는데, 스프링의 Resource라는 것을 이용해서 해결하였다.
여기에 대해서는 많은 방법이 있는데 그중에 간단한 방법으로 해결하였다.
이 방법은 보안에 좀 취약할 수 있기 때문에 중간에 체크하는 것을 몇개 넣는 것이 좋다.

이제 파일 다운을 할 수 있도록 기능을 추가해보자.
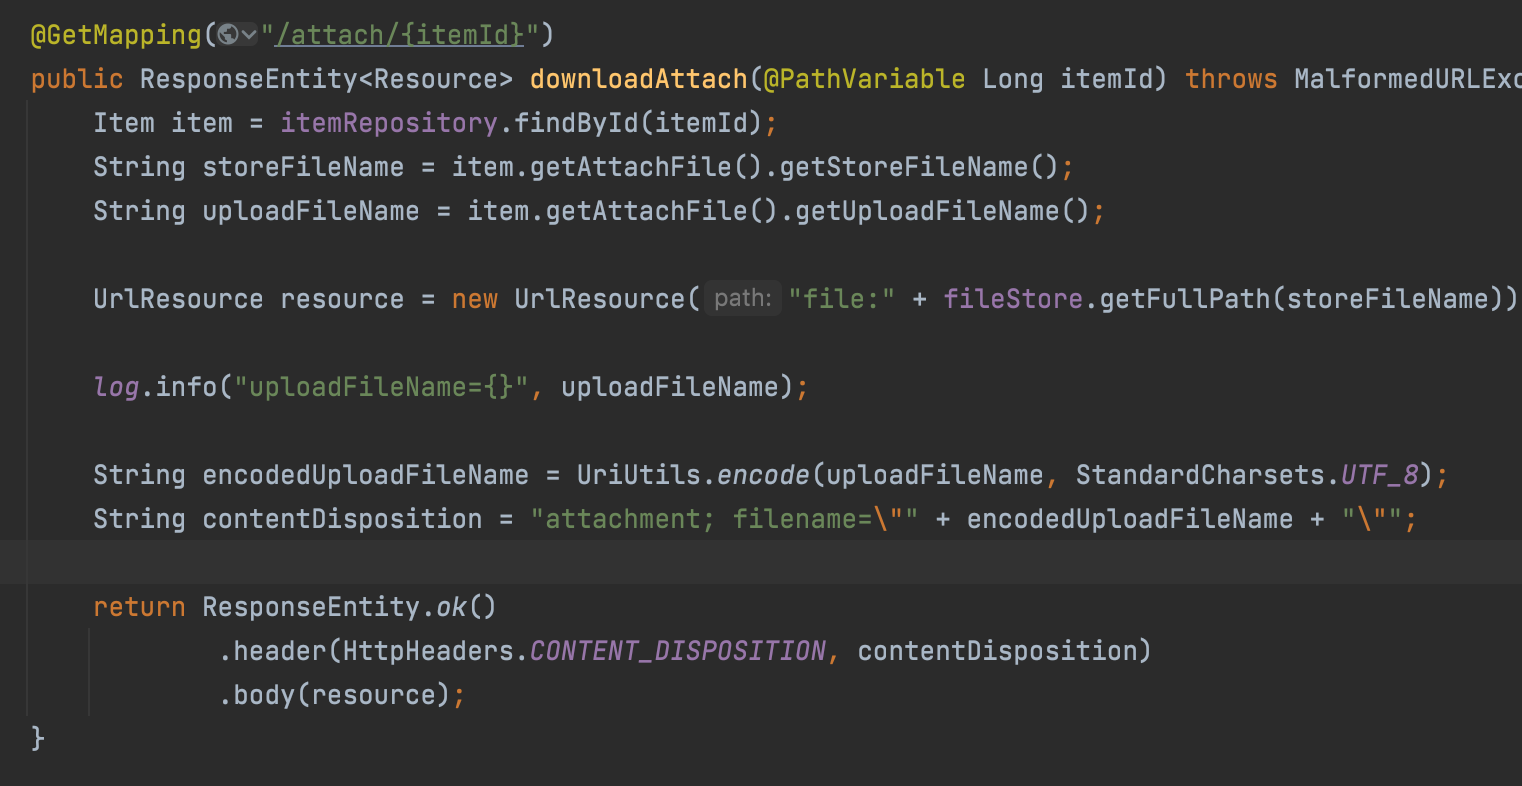
먼저 왜 itemId를 이용해서 접근할까?
이는 파일을 다운할때 다운할 수 있는 권한을 가지고 있는지 확인하기 위해서이다.
쉽게 말해 아무나 이 파일을 다운하지 못하도록 하기 위해서이다.
UriUtils.encode() : 한글이 깨지지 않도록 인코딩해주는 역할을 한다.(UTF_8을 넣어야 한다.)
contentDisposition : attachment는 첨부라는 뜻이다. 즉, 헤더에 첨부한 파일이라는 것을 알림과 동시에 filename을 넣어 다운할 수 있도록 추가해준 것이다.
이 문장을 추가하지 않으면, 파일이 저장되지 않고 그냥 텍스트면, 텍스트가 열리고, 사진이면, 바이너리 코드가 그냥 출력된다.
Disposion은 HTTP Response Body에 오는 컨텐츠의 기질/성향을 알려주는 것이다.
attachment를 넣을 경우에 Body에 오는 값을 다운로드 하라는 뜻이다.
