WHY
하나의 heroku 인스턴스를 사용해서 frontend와 backend를 동시에 호스팅하기 위해
WHAT
셋업 가이드
HOW
-
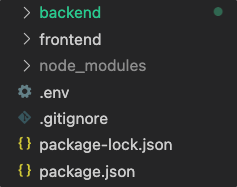
set up folder structure
node_modules,package.jsonare for thebackend- frontend folder has separate
package.json,node_modules,.gitignore
-
set up frontend folder
- go to frontend folder and run in terminal
ls -a - if there is a .git file, get rid of it:
rm -rf .git - add a proxy to
frontend package.jsonroot"proxy": "http://localhost:8000" // this is the server's base URL
- go to frontend folder and run in terminal
-
set up
concurrently- front/back runs on one terminalnpm i concurrently -
add
concurrentlyto script"start": "node backend/server.js", "server": "nodemon backend/server.js", "client": "npm start --prefix frontend", **"dev": "concurrently \"npm run server\" \"npm run client\"",** //or "start": "node backend/bin/www", "server": "nodemon backend/bin/www", "client": "npm start --prefix frontend", **"dev": "concurrently \"npm run server\" \"npm run client\"",** -
set up
axiosin the frontend so that it just calls the api route without the url- ex) localhost:8000/api/users → api/users
-
serve static assets if in production - serve the frontend react app (build file)
-
backend
server.js- serve frontend// import path const path = require('path') // paste code below 'Routes' logic // Serve Frontend if (process.env.NODE_ENV === 'production') { // Set build folder as static app.use(express.static(path.join(__dirname, '../frontend/build'))) // FIX: below code fixes app crashing on refresh in deployment app.get('*', (_, res) => { res.sendFile(path.join(__dirname, '../frontend/build/index.html')) }) } else { app.get('/', (req, res) => { res.status(200).json({ message: 'Welcome to the Party-Invitation API' }) }) } -
add to script
"scripts": { "start": "node backend/server.js", "server": "nodemon backend/server.js", "client": "npm start --prefix frontend", "dev": "concurrently \"npm run server\" \"npm run client\"", **"heroku-postbuild": "NPM_CONFIG_PRODUCTION=false npm install --prefix frontend --legacy-peer-deps && npm run build --prefix frontend"** }, -
install heroku CLI
-
go to terminal and
heroku loginheroku create <project name> -
set environment variables in heroku
- heroku dashboard > go to your project > settings
- add environment variables to heroku(Config Vars)
NODE_ENV = productionMONGO_URI = your mongo uri
-
Deploy - to see instructions, go to heroku dashboard > deploy
heroku git:remote -a <project name>git push heroku main -
run the app -
heroku open -
(optional) connect github
- Deploy > Github > connect > enable
-
use keepawake to keep it alive
- why? free version of heroku makes the app go to sleep after 10 mins without activity, making the first call to the server quite slow.
- How to keep heroku alive - 링크

세상을 더 즐겁게