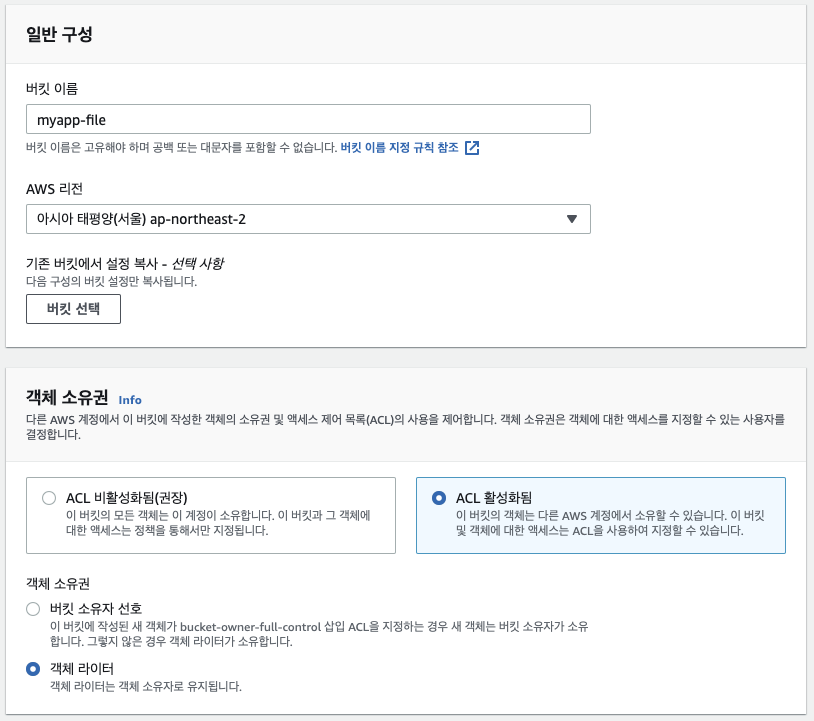
✏️ S3 버킷 생성
- Spring 을 통해 S3 에 파일을 업로드 하려면 ACL 을 활성화 해야 한다.
- 비활성화 상태라면
AmazonS3Exception: The bucket does not allow ACL이 발생한다
- 비활성화 상태라면
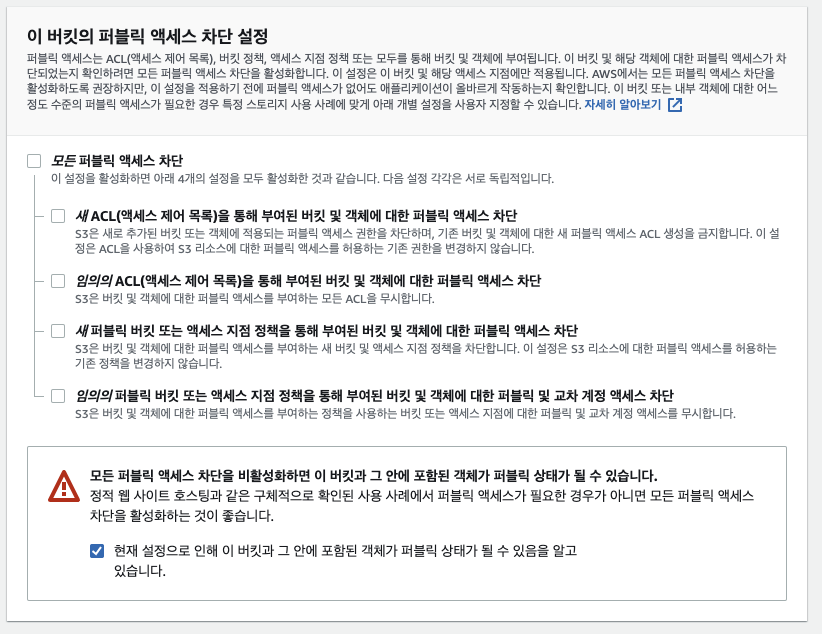
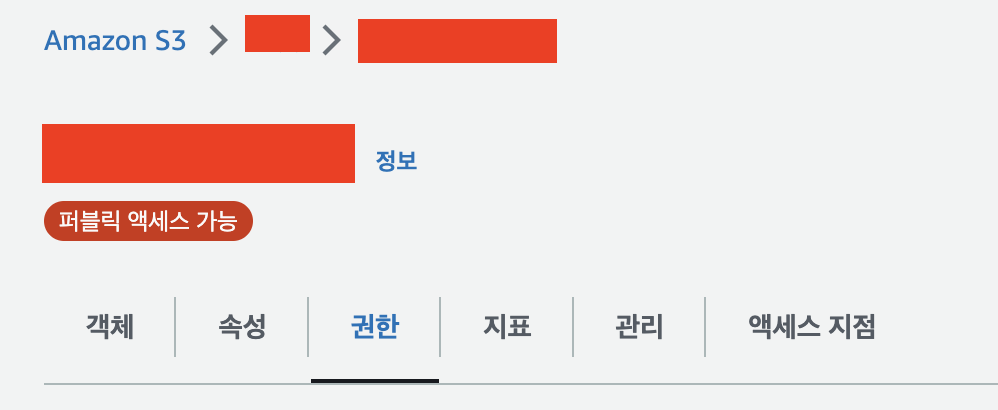
📍 퍼블랙 엑세스 허용
- 위에서 버킷을 생성할 때 퍼블릭으로 설정했어도 외부에선 이미지를 확인할 수 없기 때문에 ssr 이 아니라면 완전 퍼블릭으로 수정해줘야 한다.
- 버킷 -> 허용할 디렉토리 -> 권한
- 버킷 -> 허용할 디렉토리 -> 권한
- 하단의 버킷 정책 -> 편집 -> 아래내용 작성 후 변경사항 저장
{
"Version": "2012-10-17",
"Statement": [
{
"Sid": "Stmt1405592139000",
"Effect": "Allow",
"Principal": "*",
"Action": "s3:*",
"Resource": "arn:aws:s3:::버킷이름/*"
}
]
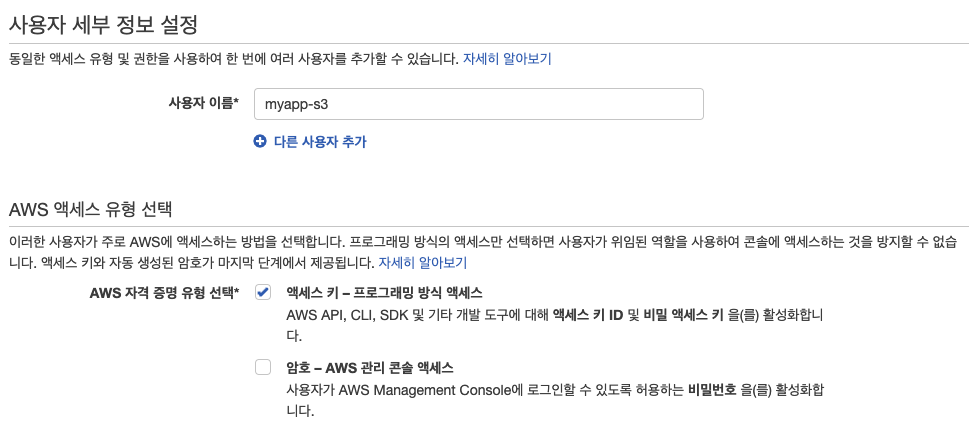
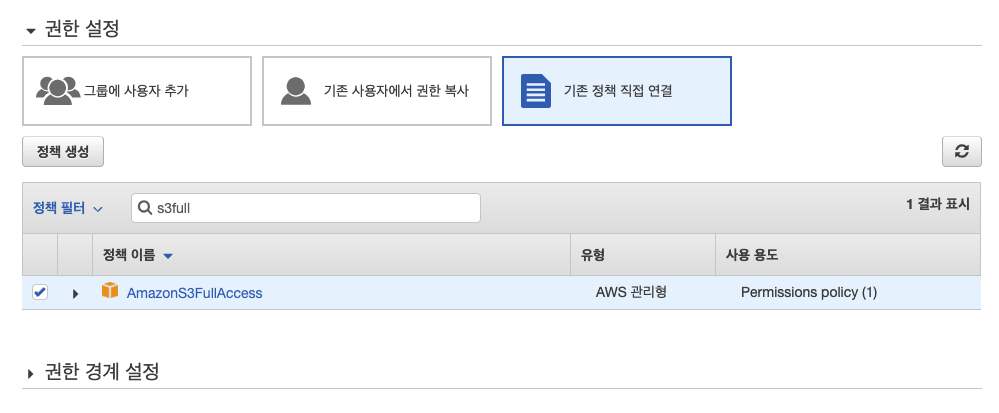
}📍 IAM 사용자 생성
- 사용자 이름이 식별값이 된다.
- AmazonS3FullAccess 권한을 추가한다.
✏️ Spring boot 환경설정
📍 dependency
// S3
implementation 'org.springframework.cloud:spring-cloud-starter-aws:2.2.6.RELEASE'
📍 application yml
- key 에는 IAM 에서 생성한 사용자의 키값을 입력한다.
cloud:
  aws:
    credentials:
      access-key: 엑세스키
      secret-key: 시크릿키
    s3:
      bucket: ${custom.bucket}
      storage: ${custom.storage}
    region:
      static: ap-northeast-2
    stack:
      auto: false
📍 AWS S3 Config 객체
- application yml 에 설정해준 값들을 불러온다.
import com.amazonaws.auth.AWSStaticCredentialsProvider;
import com.amazonaws.auth.BasicAWSCredentials;
import com.amazonaws.services.s3.AmazonS3;
import com.amazonaws.services.s3.AmazonS3ClientBuilder;
import lombok.Getter;
import org.springframework.beans.factory.annotation.Value;
import org.springframework.context.annotation.Bean;
import org.springframework.context.annotation.Configuration;

@Getter
@Configuration
public class S3Config {

    @Value("${cloud.aws.credentials.access-key}")
    private String accessKey;

    @Value("${cloud.aws.credentials.secret-key}")
    private String secretKey;

    @Value("${cloud.aws.region.static}")
    private String region;

    @Value("${cloud.aws.s3.bucket}")
    private String bucket;

    @Value("${cloud.aws.s3.storage}")
    private String storage;

    @Bean
    public AmazonS3 amazonS3() {
        BasicAWSCredentials awsCreds = new BasicAWSCredentials(accessKey, secretKey);
        return AmazonS3ClientBuilder
                .standard()
                .withCredentials(new AWSStaticCredentialsProvider(awsCreds))
                .withRegion(region)
                .build();
    }
}
✏️ S3 를 이용한 업로드
📍 Controller
- 업데이트하는 id 값은 path variable 로 매핑하고,
img 파일은 request part 로 매핑시켰다.
@PostMapping("/v1/profile-img/{id}")
public RsData updateProfileImg(
        @PathVariable Long id,
        @RequestPart MultipartFile img
) {
    log.info("profile img 수정 요청 확인");

    Member member = memberService.updateImg(img, id);

    log.info("profile img 수정 완료");
    return RsData.of("S-1", " 이미지 update 완료", member.getProfileImg());
}
📍 Service
- update method
@Transactional
public Member updateImg(MultipartFile img, Long id) {
    Member member = this.findById(id);

    String profileImg = s3Upload(img, id);

    return memberRepository.save(member.updateProfileImg(profileImg));
}- S3 upload method
private String s3Upload(MultipartFile file, Long id) {
String name = "profile_img" + id;
String url = "https://s3." + s3Config.getRegion()
+ ".amazonaws.com/" + s3Config.getBucket()
+ "/" + s3Config.getStorage()
+ "/" + name;
try {
ObjectMetadata data = new ObjectMetadata();
data.setContentType(file.getContentType());
data.setContentLength(file.getSize());
amazonS3.putObject(new PutObjectRequest(
s3Config.getBucket(),
s3Config.getStorage() + "/" + name,
file.getInputStream(),
data
));
} catch (IOException e) {
e.printStackTrace();
} catch (NullPointerException e) {
throw new NullPointerException("프로필 이미지가 없습니다.");
}
return url;
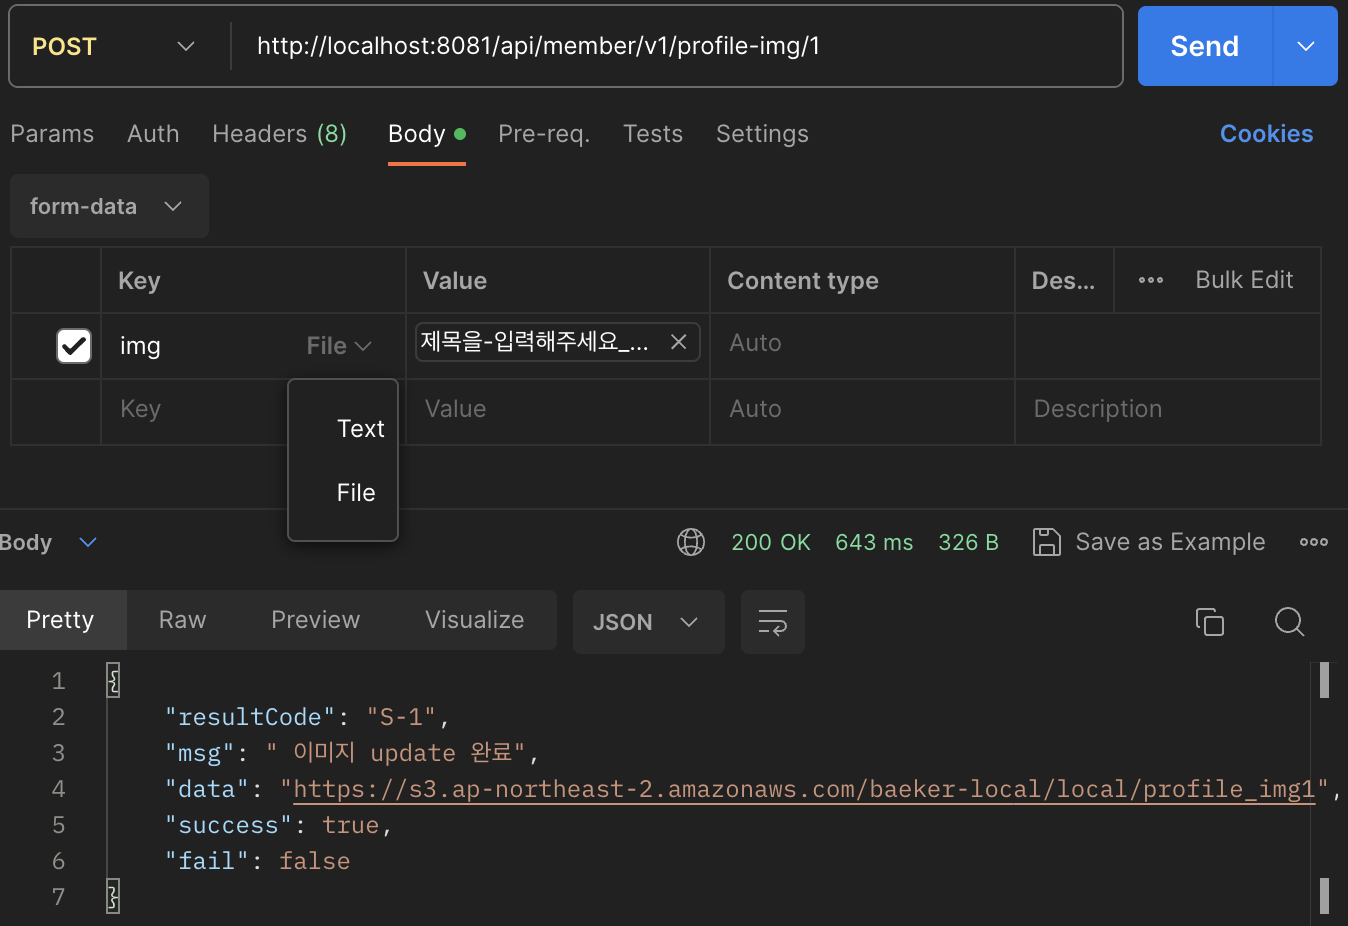
}✏️ Post man Test
📍 단순 파일만 전달할 경우
- POST 설정 후 Body 를 form-data 로 변경한다.
- key 타입을
Text가 아닌File로 변경해준다. - key 값을 Controller 에서 요구하는 변수명으로 바꾼뒤 value 에 원하는 파일을 추가해주면 된다.
- key 타입을
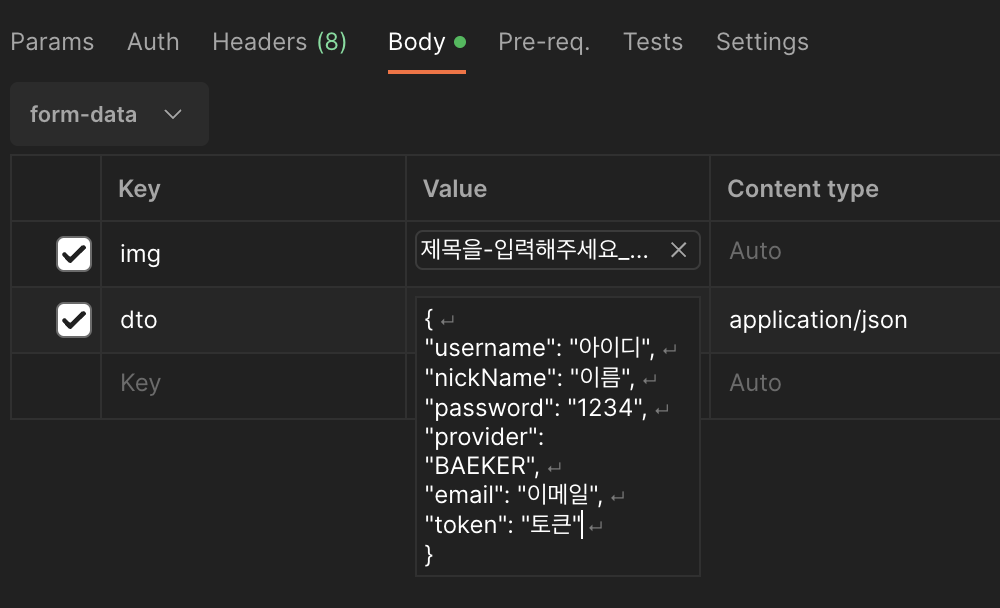
📍 DTO + 파일을 전달해야 할 경우
- 이 경우는 Controller 의 파라미터값도 수정해야한다.
@RequestBody사용할 때랑 같지만 DTO 도@RequestPart어노테이션을 사용해야 한다.
@PostMapping("/v1/profile-img/{id}")
public RsData updateProfileImg(
        @RequestPart UpdateReqDto dto,
        @RequestPart MultipartFile img
) {

    ...

}- 포스트맨에서는
Text타임의 파라미터를 추가해주고 key 값은 dto 의 변수명으로 바꿔준다.- value 에 dto 의 필드값을 json 형식으로 작성해준다.
- Content type 을
application/json으로 수정해준다.

잘못된 내용 PR 환영