REST 강좌정리
1. REST
- REpresentational State Transfer (표현 상태 전송)
- 웹 어플리케이션 개발 방법론중의 하나로서 클라이언트와 서버간의 상태정보를 표현하는 방식을 의미
(어제까지의 개발 방법론이 SOAP임)
1. SOAP 아키텍처
- 클라이언트 ---요청---> 서버
(웹브라우저) <------ (JSP/Thymeleaf 등) - 서버 응답(html)
2. REST 아키텍처
- 클라이언트 ---요청---> 서버
(웹브라우저, <---------------
TV, 자동차, 응답(XML, JSON)
등등)
2. REST 디자인 가이드 구글링 할 것
3. REST 표현
1) 데이터는 URI에 포함되어 전달된다
-
예 > 이전 SOAP 방식
http://localhost:8090/app/delMember?userid=1 -
REST 방식에서 회원을 삭제하는 작업
http://localhost:8090/app/delMember/1
2) 클라이언트 요청 방식
이전 SOAP 방식
- GET : 조회
- POST : 생성/수정/삭제
REST 방식
- GET :조회
- POST : 생성
- PUT : 수정
- DELETE : 삭제
기본적으로 form을 사용하는 html에서는 GET/POST 방식만 지원된다
따라서 도구가 필요하다 (curl, postman, 크롬브라우저의 플러그인 Talend Test API)
4. REST 실습
1) 의존성
<dependency>
	  <groupId>org.springframework.boot</groupId>
	  <artifactId>spring-boot-starter-web</artifactId>
	</dependency>
	<!-- https://mvnrepository.com/artifact/org.springframework.boot/spring-boot-devtools -->
	<dependency>
	    <groupId>org.springframework.boot</groupId>
	    <artifactId>spring-boot-devtools</artifactId>
	</dependency>
2) application.properties
`  # application.properties
	logging.level.com.exam=info
	logging.level.org.springframework=info

	# tomcat port 번호 변경
	server.port=8090

	# context 명 변경
	server.servlet.context-path=/app`
3) UserDTO.java 작성
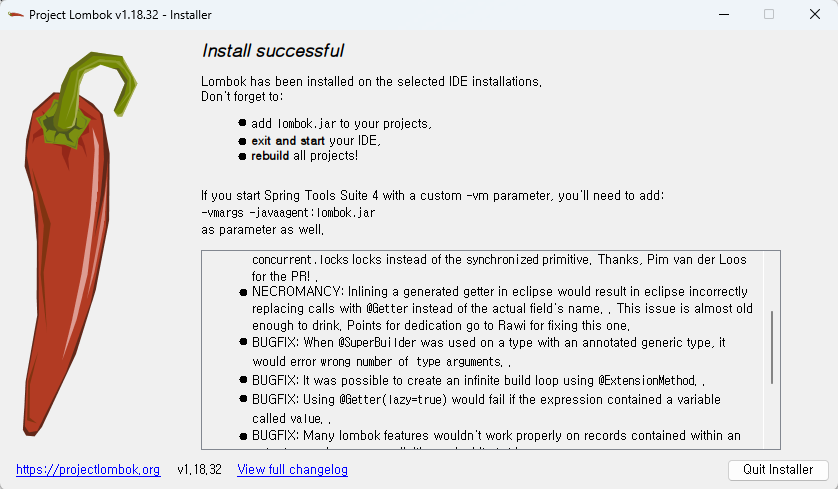
- lombok 라이브러리
가. pom.xml 등록
나. 현재 사용중인 sts(eclipse)에 lombok 설정
https://projectlombok.org/download 가서 lombok 다운
C:\ 에 저장
cmd 창 열고 cd C:\
lombok.jar 실행
java -jar lombok.jar

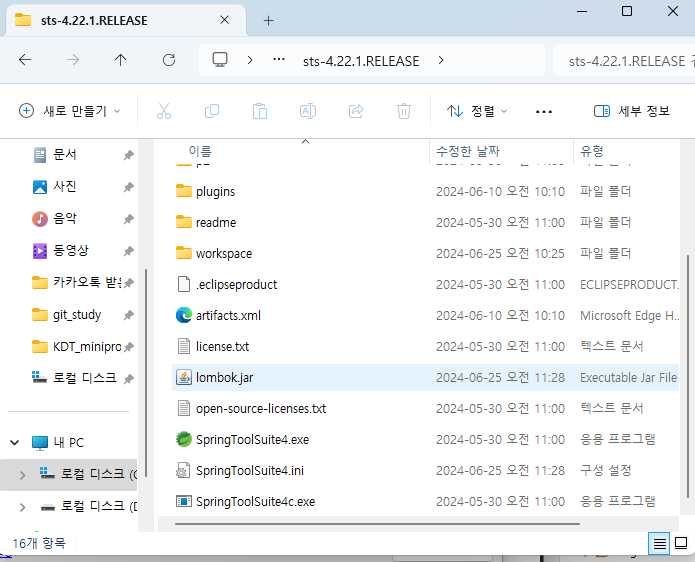
maven update 하기
sts 재시작
5. REST + MySQL + MyBatis 연동
1) 의존성
     		<dependency>
			<groupId>org.springframework.boot</groupId>
			<artifactId>spring-boot-starter-web</artifactId>
		</dependency>
<!-- https://mvnrepository.com/artifact/org.springframework.boot/spring-boot-devtools -->
		<dependency>
		    <groupId>org.springframework.boot</groupId>
		    <artifactId>spring-boot-devtools</artifactId>
		</dependency>

	<!-- https://mvnrepository.com/artifact/org.projectlombok/lombok -->
		<dependency>
		    <groupId>org.projectlombok</groupId>
		    <artifactId>lombok</artifactId>
		</dependency>
		<dependency>
		    <groupId>org.mybatis.spring.boot</groupId>
		    <artifactId>mybatis-spring-boot-starter</artifactId>
		    <version>2.1.4</version>
		</dependency>
		<!-- https://mvnrepository.com/artifact/mysql/mysql-connector-java -->
		<dependency>
		    <groupId>mysql</groupId>
		    <artifactId>mysql-connector-java</artifactId>
		    <version>8.0.33</version>
		</dependency>
2) application.properties 설정
# DB 연동위한 4가지 정보 설정
spring.datasource.driver-class-name=com.mysql.cj.jdbc.Driver
spring.datasource.url=jdbc:mysql://localhost:3306/testdb
spring.datasource.username=root
spring.datasource.password=1234
# 별칭
mybatis.type-aliases-package=com.exam.dto
# mapper 등록
mybatis.mapper-locations=com/exam/mapper/*Mapper.xml`
3) table 생성
`
use testdb;
create table person (
id int primary key,
username varchar(20) not null,
birthdate date
);
insert into person (id, username, birthdate ) values ( 10, '홍길동', current_date() );
insert into person (id, username, birthdate ) values ( 20, '이순신', current_date() );
insert into person (id, username, birthdate ) values ( 30, '유관순', current_date() );
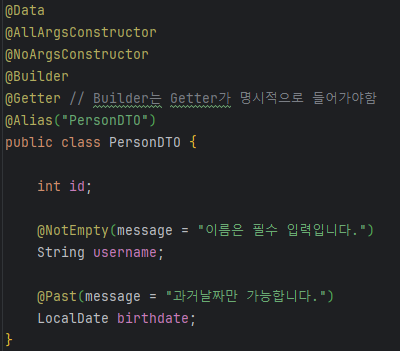
commit;4) PersonDTO.java ( lombok 사용 )
@Data
	@AllArgsConstructor
	@NoArgsConstructor
	@Builder
	@Getter
	@Alias("PersonDTO")
	public class PersonDTO {

int id;
String username;
LocalDate birthdate;
	}
5) PersonMapper.xml 와 PersonMapper.java
  <mapper namespace="com.exam.mapper.PersonMapper">

	    <select id="findAll" resultType="PersonDTO">
	       select id, username, birthdate
	       from person
	       order by id desc
	    </select>

	</mapper>

	@Mapper
	public interface PersonMapper {

		public List<PersonDTO>  findAll();
	}
6) PersonService.java , PersonServiceImpl.java
  public interface PersonService {

	      public List<PersonDTO>  findAll();

	 }

	 @Service
	public class PersonServiceImpl implements PersonService {

		PersonMapper personMapper;

		public PersonServiceImpl(PersonMapper personMapper) {
			this.personMapper = personMapper;
		}

		@Override
		public List<PersonDTO> findAll() {
			return personMapper.findAll();
		}

	}
7) PersonController.java
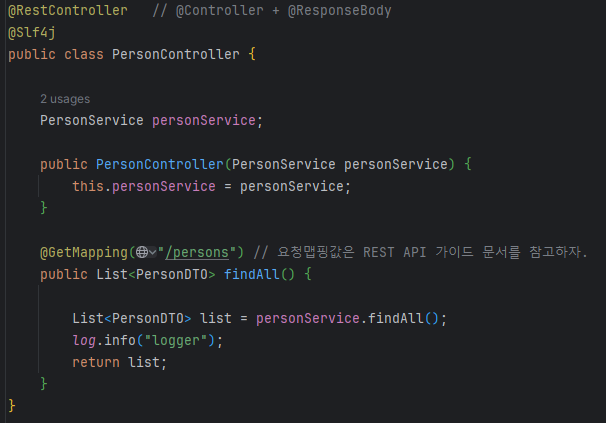
6. 파라미터 전달
- REST는 기본적으로 데이터가 URI에 포함되어 전달된다
예 SOAP 방식
GET http://localhost:8090/app/persons?id=10
GET http://localhost:8090/app/persons?id=20
=> @GetMapping("/"/persons)
@RequestParam("id") String id
REST방식
GET http://localhost:8090/app/persons/10
GET http://localhost:8090/app/persons/20
@GetMapping("/persons/{변수}") <= URL은 마지막 값까지 포함
@PathVariable("변수") String id
GET http://localhost:8090/app/persons/10/서울
GET http://localhost:8090/app/persons/20/부산
@GetMapping("/persons/{id}/{주소}")
@PathVariable("변수1") String id, @PathVariable("변수2") String address
GET http://localhost:8090/app/persons/10/address/서울
GET http://localhost:8090/app/persons/20/address/부산
@GetMapping("/persons/{id}/address{주소}")
@PathVariable("변수1") String id, @PathVariable("변수2") String address
6. 데이터 저장 (PUT/POST) => Security 관련에서는 csrf 이슈가 발생. 비활성화 필요
Security 주요 고려사항( 인증 및 인가 Authentication and Authorization) ,csrf 보호, 데이터 검증 및 유효성 검사(Validation),
cors 설정(다른 도메인에서 API를 호출할 때), HTTP 메서드 보안(특정 HTTP 메서드에 대한 접근 제한), 입력 데이터 암호화,
로깅 및 모니터링
-
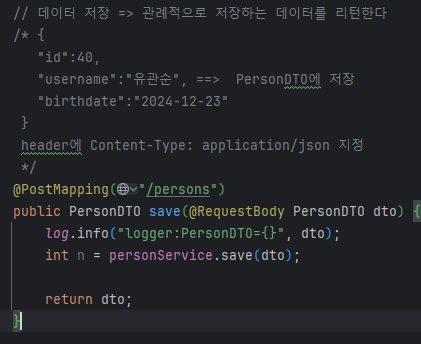
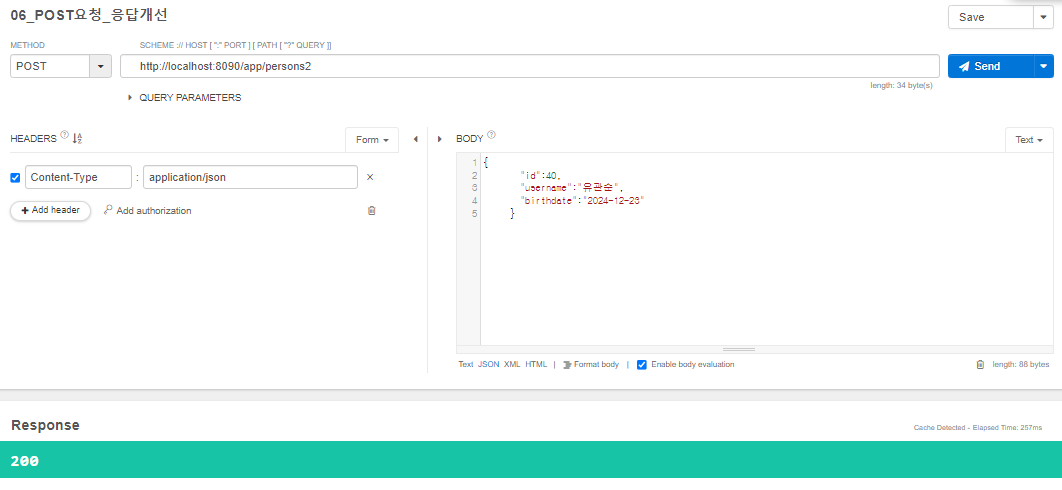
POST 방식.
-
전달되는 데이터는 JSON 형식.
{
"id":40,
"username":"유관순", ==============> PersonDTO 에 저장. (@RequestBody) 로 저장
"birthdate":"2024-12-23"
}-
header에 전달되는 타입을 지정해애 된다.
Content-Type: application/json
-
LocalDate 사용하는 경우에는 날짜 포맷 설정 필요
LocalDate 날짜 포맷 지정
spring.mvc.format.date=yyyy-MM-dd
-
7. 데이터 수정
-
put 방식
-
JSON + @PathVariable
{
"username":"유관순2",
"birthdate":"2024-12-25" => (@RequestBody) 와 @PathVariable 같이 사용 가능
}-
header에 전달되는 타입을 지정해애 된다.
Content-Type: application/json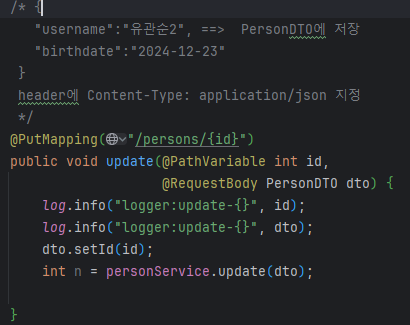
-
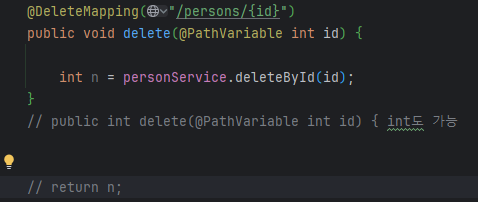
8. 데이터 삭제
- DELETE 방식
- @PathVariable
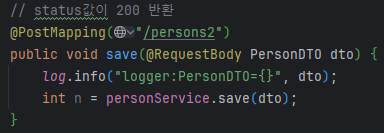
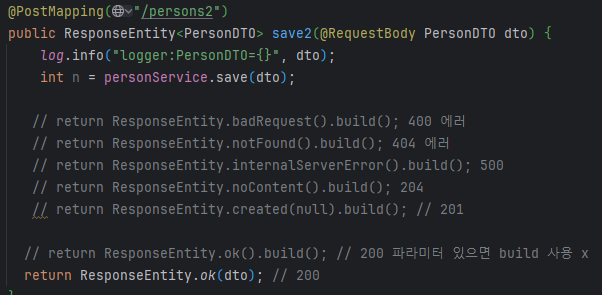
9. POST 응답 처리 개선하기
1) status 명시적으로 설정
- ResponseEntity의 메서드 사용해서 status값 반환 가능
Status 값 종류
2xx (Successful)
클라이언트의 요청을 성공적으로 처리- 200 OK
- 201 Created
- 202 Accepted
- 204 No Content
200 OK → 요청 성공
201 Created → 요청 성공해서 새로운 리소스가 생성
- 생성된 리소스는 응답의 Location 헤더 필드로 식별
202 Accepted → 요청이 접수되었으나 처리가 완료되지 않음
- 배치 처리 같은 곳에서 사용
- 예) 요청 접수 후 1시간 뒤에 배치 프로세스가 요청을 처리
204 No Content → 서버가 요청을 성공적으로 수행했지만, 응답 페이로드 본문에 보낼 데이터가 없음
- 웹 문서 편집기에서 save 버튼
- save 버튼의 결과로 아무 내용이 없어도 된다
- save 버튼을 눌러도 같은 화면을 유지해야 한다
- 결과 내용이 없어도 204 메시지(2xx) 만으로 성공을 인식할 수 있다
3xx - 리다이렉션
3xx (Redirection)
요청을 완료하기 위해 유저 에이전트의 추가 조치 필요
- 300 Multiple Choices
- 301 Moved Permanently
- 302 Found
- 303 See Other
- 304 Not Modified
- 307 Temporary
- 308 Permanent Redirect
2) status + location 알려주기
10. HATEOAS (헤이티오스 : Hypermedia as the Engine of Application State) REST API 설계 원칙의 하나
- HATEOAS : 소스와 관련된 가능한 작업(링크)을 API 응답에 포함하여 클라이언트가 리소스 상태와 전이(transition)에 대한 정보를 얻고 사용할 수 있도록함
REST API 성숙도 모델 4단계
- Roy Fielding이 제안한 REST 아키텍처 스타일을 기반으로, Leonard Richardson이 정의한 모델
- 모델은 RESTful API의 성숙도를 4단계로 나눠 설명하고 각 단계는 이전 단계의 기능을 포함하며, 점점 더 RESTful한 특성을 갖추게 됨
0단계: The Swamp of POX (Plain Old XML)
특징: HTTP를 단순한 전송 메커니즘으로만 사용합니다.
설명: 리소스 식별이나 HTTP 메서드의 사용이 없이, XML 또는 JSON을 전송하는 데에만 초점을 맞춥니다. 이는 단순한 원격 프로시저 호출(RPC) 방식과 유사합니다.
예시: 모든 요청이 동일한 URL로 전송되고, 동작의 구분이 URL이 아닌 요청 본문의 내용에 의해 결정됩니다.
1단계: 리소스(Resource)
특징: 개별 리소스에 대한 고유한 식별자(URI)를 사용합니다.
설명: 각 리소스를 고유한 URI로 식별하지만, HTTP 메서드(GET, POST, PUT, DELETE 등)는 제대로 활용되지 않습니다.
예시 :
GET /articles
GET /articles/123
2단계: HTTP 메서드(Verbs)
특징: HTTP 메서드를 활용하여 리소스에 대한 다양한 작업을 수행합니다.
설명: 리소스를 고유한 URI로 식별하며, HTTP 메서드를 통해 리소스에 대한 동작을 정의합니다. GET, POST, PUT, DELETE 등의 메서드를 적절히 사용합니다.
예시:
GET /articles      - 모든 기사 조회
GET /articles/123  - 특정 기사 조회
POST /articles     - 새로운 기사 작성
PUT /articles/123  - 특정 기사 업데이트
DELETE /articles/123 - 특정 기사 삭제
3단계: 하이퍼미디어(HATEOAS)
특징: 응답에 하이퍼미디어 링크를 포함하여, 클라이언트가 리소스 상태 전이를 동적으로 발견하고 사용할 수 있도록 합니다.
설명: API 응답에 포함된 링크를 통해 클라이언트가 다음 가능한 작업을 발견할 수 있도록 하여, 클라이언트와 서버 간의 상호작용을 더욱 유연하게 만듭니다.
예시:
{
  "id": 123,
  "title": "RESTful API Design",

  "content": "Some content",
  "_links": {
    "self": {
      "href": "/articles/123"
    },
    "update": {
      "href": "/articles/123",
      "method": "PUT"
    },
    "delete": {
      "href": "/articles/123",
      "method": "DELETE"
    },
    "author": {
      "href": "/authors/1"
    }
  }
}
요약
0단계: HTTP는 단순한 전송 메커니즘으로 사용됩니다.
1단계: 리소스를 URI로 식별하지만, HTTP 메서드는 제대로 활용되지 않습니다.
2단계: 리소스를 URI로 식별하고, HTTP 메서드를 통해 리소스에 대한 다양한 작업을 수행합니다.
3단계: API 응답에 하이퍼미디어 링크를 포함하여, 클라이언트가 동적으로 상태 전이를 발견하고 사용할 수 있게 합니다.
11. 요청한 데이터가 없을 때 처리 방법 개선
1) 개요
현재는 요청한 데이터가 없어도 status 값은 200 이고 body는 No Content로 반환됨.
이상황을 좀 더 직관 적인 status 값을 404로 알려주자
2) 구현
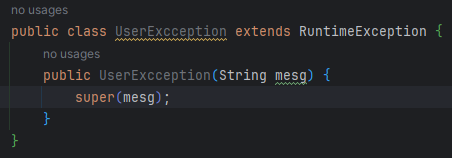
가. 사용자 예외 클래스 생성
나.
return ResponseEntity.status(HttpStatus.CREATED).build(); // 201

REST에서는 바인딩result 필요없고 @Valid만 필요
12. 폼 유효성 체크
1)
2) DTO에 조건 지정
3)
4) 발생된 예외에 대한 커스터마이징 처리
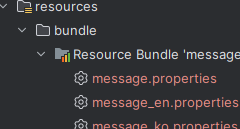
13. I18N
1) 리소스 번들 파일 작성
src/main/resource
bundle
message.properties (기본)
message_en.properties (영어)
message_ko.properties (한국어)
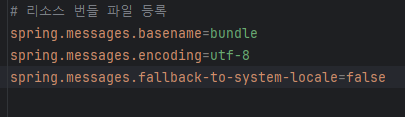
2) application.properties에 등록
3) Controller에서 번들 참조
- MessageSource API 이용
- header 값 얻기
4) 요청 header값으로 언어 선택
- Talend Test API 에서 header 설정
14. 필터링(filtering)
1) 기능 2가지
- json 키값 변경 : @JsonProperty("변경할key")
- 값 제외 : @JsonIgnore
==> 같이 사용 불가
2) 구현
    public class PersonDTO {

	int id;

	@JsonProperty("user_name")
	String username;

	@JsonIgnore
	LocalDate birthdate;


   }
15. REST 기반의 Spring Security 적용
1) 의존성 설정
org.springframework.boot spring-boot-starter-security16. Token **
1) 개요
- REST 기반의 어플리케이션에서 사용되는 인증방식
- 사용자의 id + pw 추가정보를 암호화한 것이다
2) Token 구성요소
- header, payload, signature 3가지로 구성
가. header
type : jwt
암호화 알고리즘
나. payload
- 사용자가 원하는 데이터 설정
- 표준속성이 제공
(sub : 주제,
exp : 만기일
iat : token 생성시간
..
)
다. signature
- 시크릿 정보 (토큰이 유효한지 체크 기능)
=> 암호화된 토큰의 decode는 jwt.io에서 확인 가능
3) Token flow
request :
{
"userid":"user",
"passwd":"1234",
추가정보:값
}
response :
{
"token":토큰값
}
=> react 에서 local storage에 저장됨
===> react에서 local storage에 저장해두고 필요시 사용됨.
4) Token header 설정
{
Authorization : BEARER 토큰값
}