앱을 만드는 중 사용자가 메모를 할 수 있는 공간이 필요했습니다.
EditText를 가져와 보았지만, 테두리가 없어서 그런지 전혀 메모 공간의 느낌이 나지 않았습니다.
오늘은 EditText의 테두리를 표시하는 방법을 포스팅해보겠습니다.
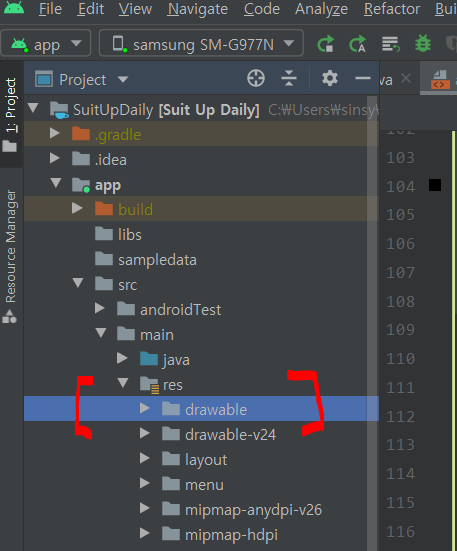
먼저, drawable 폴더에서 우클릭 -> new -> Drawable Resource File 클릭!

임의의 파일이름을 정하여 xml 파일을 만들고 코드 입력
본 예제에서는 파일 이름을 memo_border 로 만들었습니다.
<?xml version="1.0" encoding="utf-8"?>
<layer-list xmlns:android="http://schemas.android.com/apk/res/android">

    <item>
        <shape android:shape="rectangle">
            <solid android:color="#000000" />
        </shape>

    </item>

    <item android:top = "1dp"
        android:right= "1dp"
        android:left="1dp"
        android:bottom="1dp">

        <shape android:shape="rectangle">
            <solid android:color="#ffffff" />
        </shape>

    </item>

</layer-list>
"#000000"은 블랙을 표시합니다.
EditText의 경계선을 블랙 컬러로 지정하였습니다.
"#ffffff"는 화이트 색상입니다.
바탕색으로 화이트를 지정하였습니다.
물론 컬러는 임의로 커스텀 할 수 있습니다.
테두리를 설정할 EditText가 있는 xml 파일에 제작했던 테두리 파일 적용하기

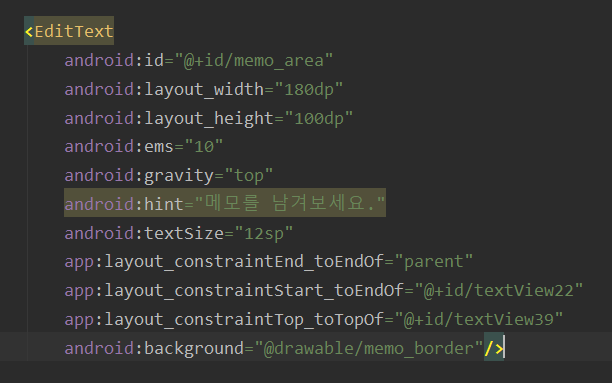
맨 마지막 줄에 있는 코드
android:background="@drawable/memo_border"
처럼 drawable 폴더에 제작하였던 xml 파일을,
EidtText의 background에 적용하면 됩니다.
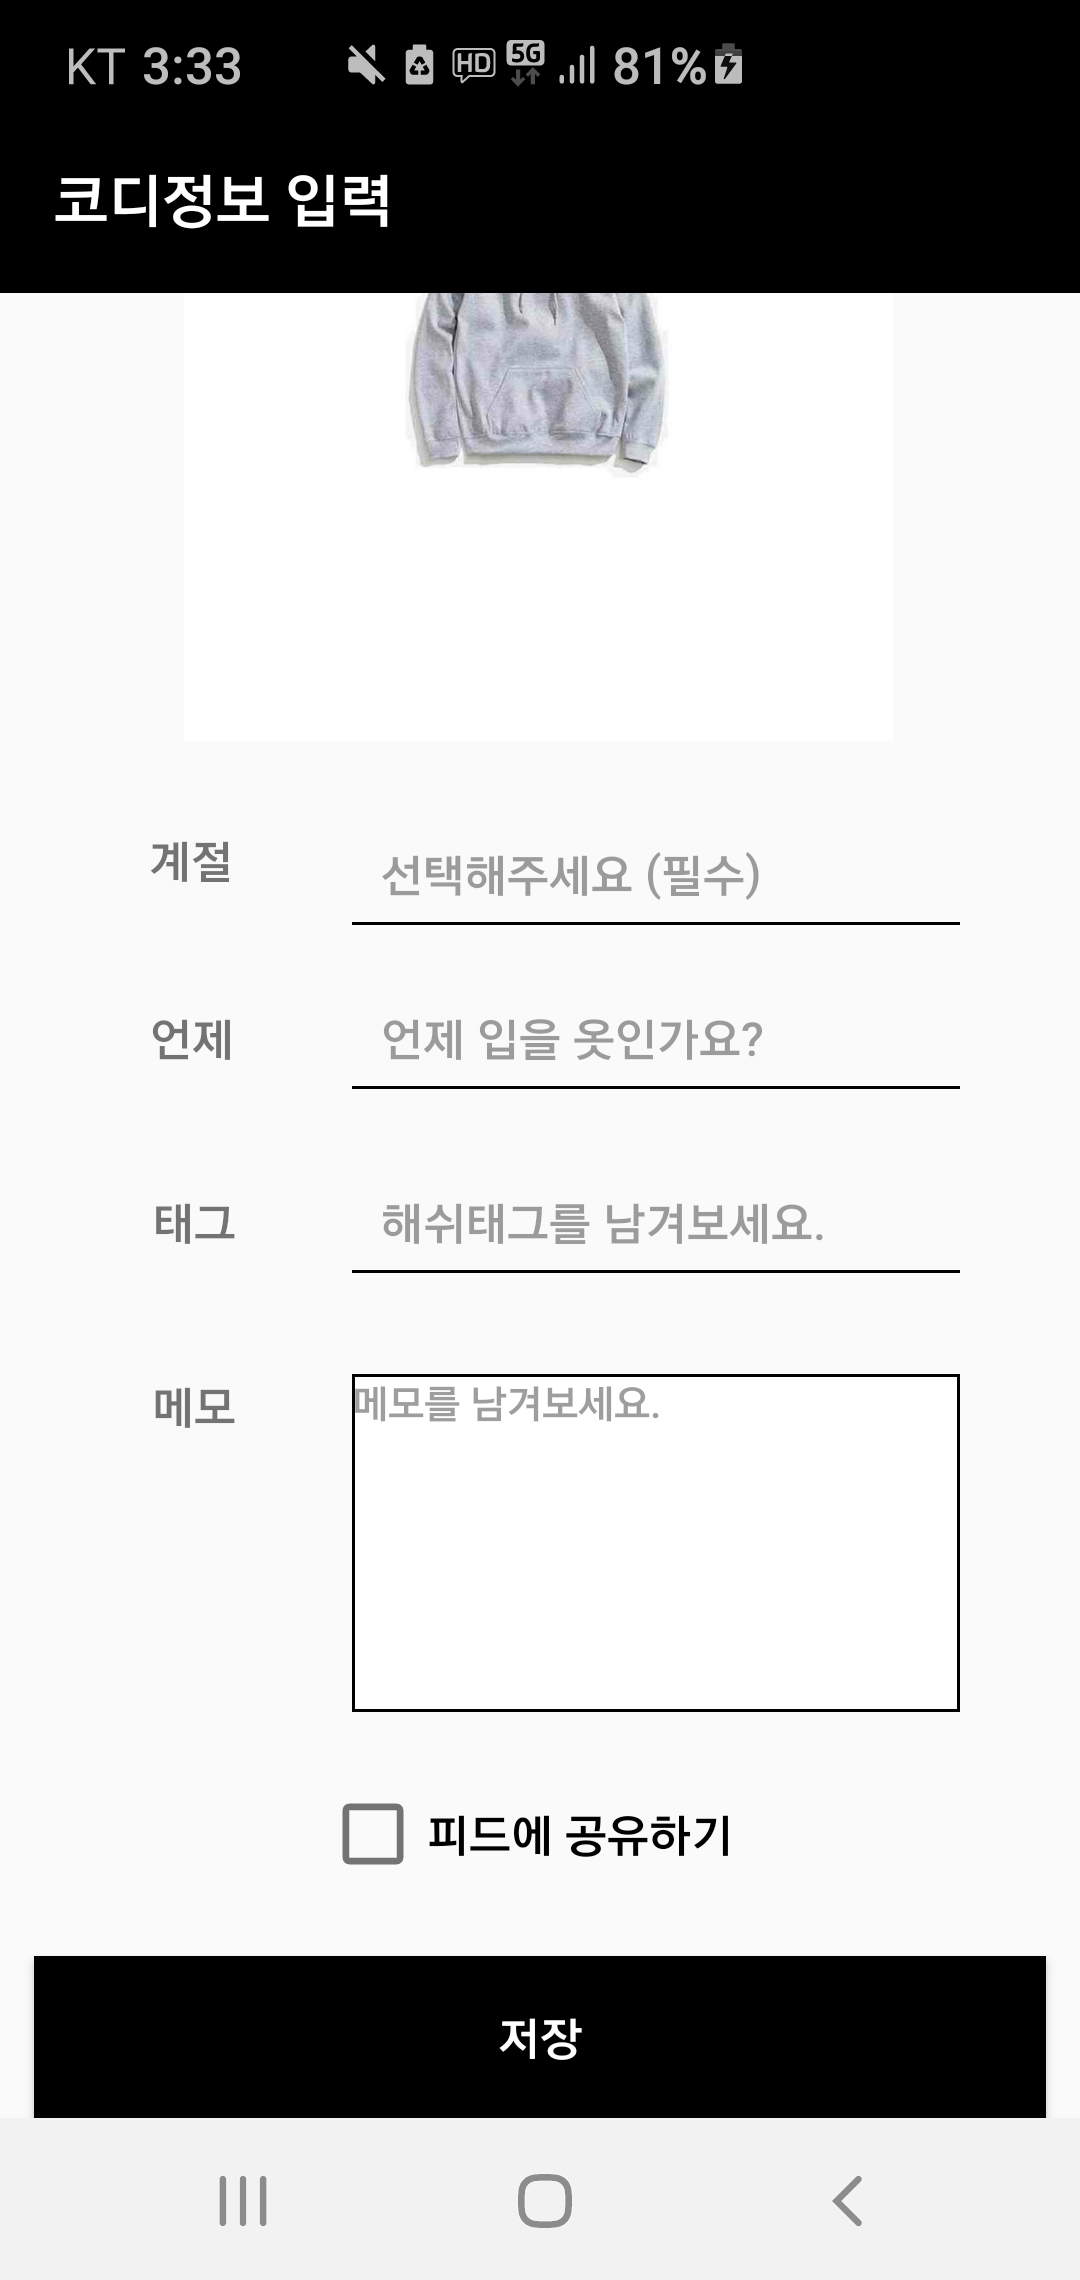
적용하고 나면 기본 형식의 EditText가 아닌,
4면에 테두리가 생긴 EditText를 확인해 볼 수 있습니다.


감사합니다