우선 swagger 기본적인 설정을 소개한 이후에 깔끔하게 관리하는 방식에 대해서 소개하려고 한다.
⚙️ Swagger UI 기본적인 설정
1. Swagger 관련 의존성 설치 (build.gradle)
- 25.08.20 기준
implementation 'org.springdoc:springdoc-openapi-starter-webmvc-ui:2.8.9'2. Swagger 설정 파일 생성 (SwaggerConfig.java)
import io.swagger.v3.oas.models.OpenAPI;
import io.swagger.v3.oas.models.info.Contact;
import io.swagger.v3.oas.models.info.Info;
import io.swagger.v3.oas.models.info.License;
import io.swagger.v3.oas.models.security.SecurityRequirement;
import io.swagger.v3.oas.models.security.SecurityScheme;
import io.swagger.v3.oas.models.Components;
import io.swagger.v3.oas.models.servers.Server;
import org.springframework.context.annotation.Bean;
import org.springframework.context.annotation.Configuration;

import java.util.List;

@Configuration
public class SwaggerConfig {

    @Bean
    public OpenAPI openAPI() {
        return new OpenAPI()
                .info(getInfo()) // Swagger 문서 설명(API 기본 정보)
                .addSecurityItem(getSecurityRequirement())	// 전역 JWT 인증 설정
                .components(getComponents());	// 공통 스키마/응답 정의
    }

	// 이 부분은 자율적으로 진행(title, description 정도만 넣어도 괜찮다)
    private Info getInfo() {
        return new Info()
                .title("Ddu-ru Backend API")
                .description("Ddu-ru REST API 문서")
                .version("1.0.0")
                .contact(new Contact()
                        .name("길동무 팀")
                        .url("https://github.com/GIL-DONG-MU")
                        .email("gildongmu.team@gmail.com"));
    }

    // JWT 토큰 발급하는 서비스일 시
    private SecurityRequirement getSecurityRequirement() {
        return new SecurityRequirement().addList("JWT");
    }

    private Components getComponents() {
        return new Components()
                .addSecuritySchemes("JWT", new SecurityScheme()
                        .name("JWT")
                        .type(SecurityScheme.Type.HTTP)
                        .scheme("bearer")
                        .bearerFormat("JWT")
                        .in(SecurityScheme.In.HEADER)
                        .description("Access Token"));
    }
}
3. Security 사용 시, SecurityConfig 수정
- Swagger UI 관련 URL들을 인증 없이 접근할 수 있도록 수정
@Bean
    public SecurityFilterChain filterChain(HttpSecurity http) throws Exception {
        http
           // ...
           .authorizeHttpRequests(authz -> authz
                .requestMatchers("/swagger-ui/**", "/v3/api-docs/**", "/swagger-ui.html").permitAll()
4. 모든 Controller에 Swagger 어노테이션 추가
- 컨트롤러 클래스 상단 → @Tag : API 그룹(카테고리) 지정
- 엔드포인트 메서드 위 → @Operation : 해당 API의 설명 추가
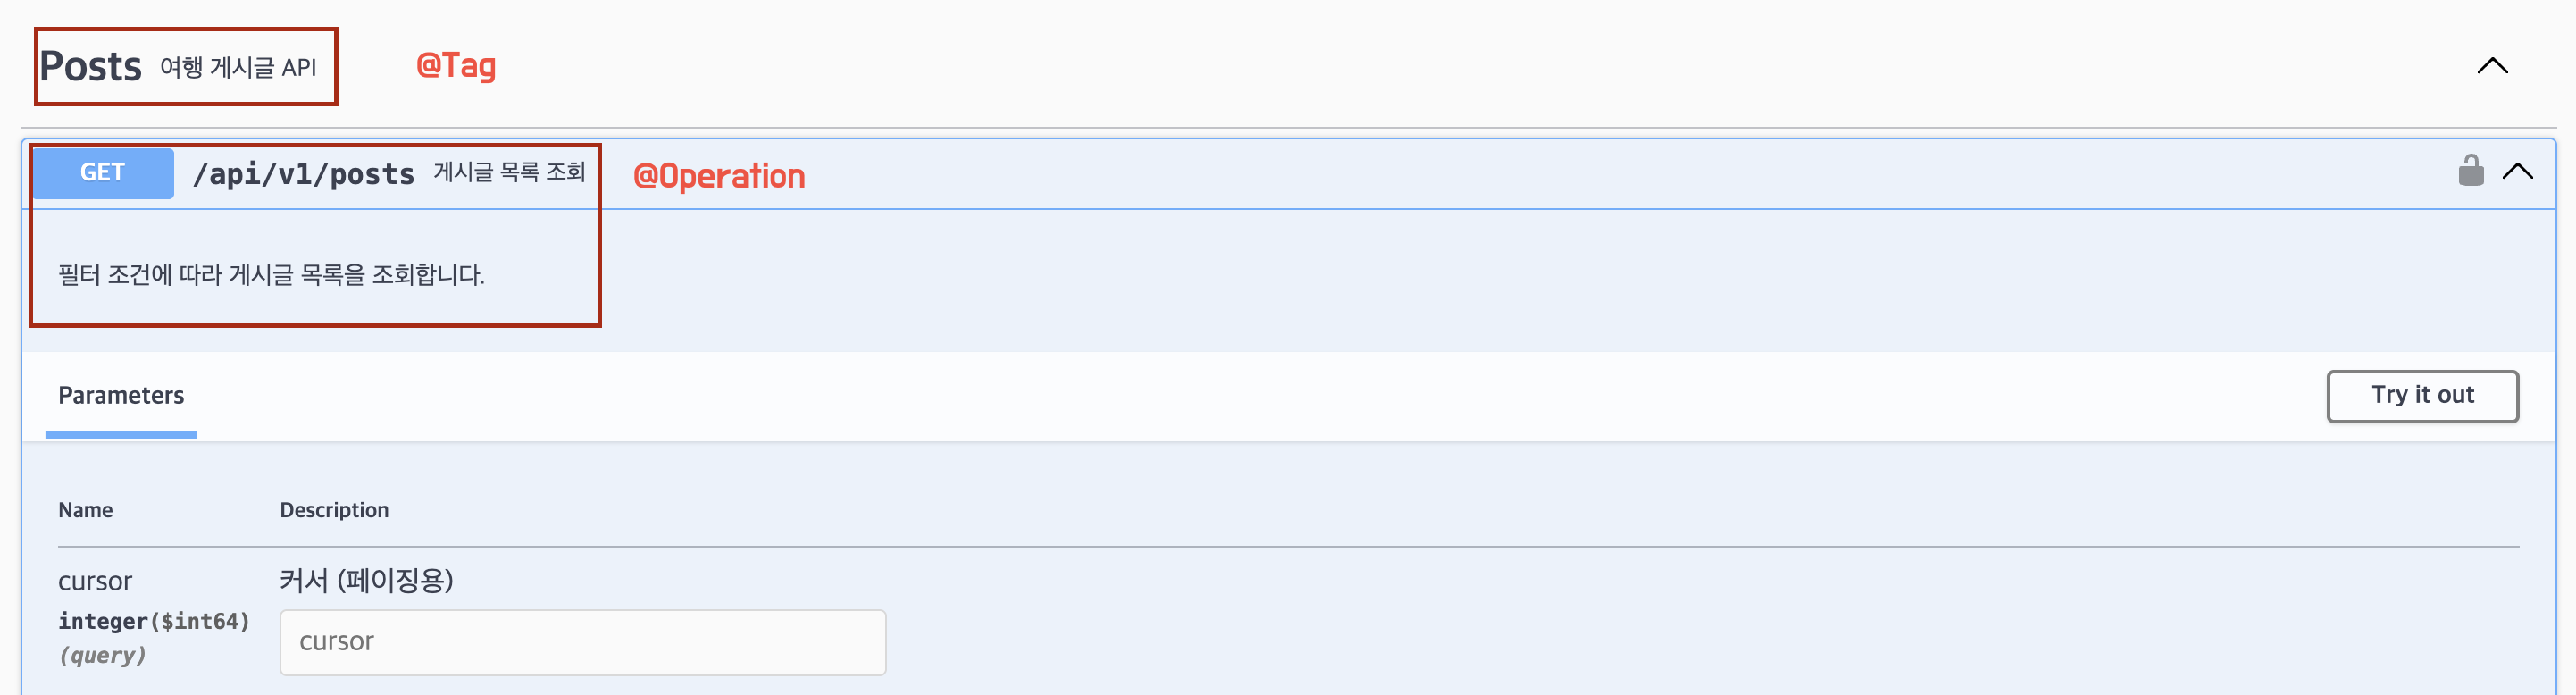
Controller 예시 (Post 쪽 수정 API 부분)
// @Tag(API 그룹 지정 및 설명)
@Tag(name = "Posts", description = "여행 게시글 API")
@RestController
public class PostController {
// ...
// @Operation(엔드포인트 설명)
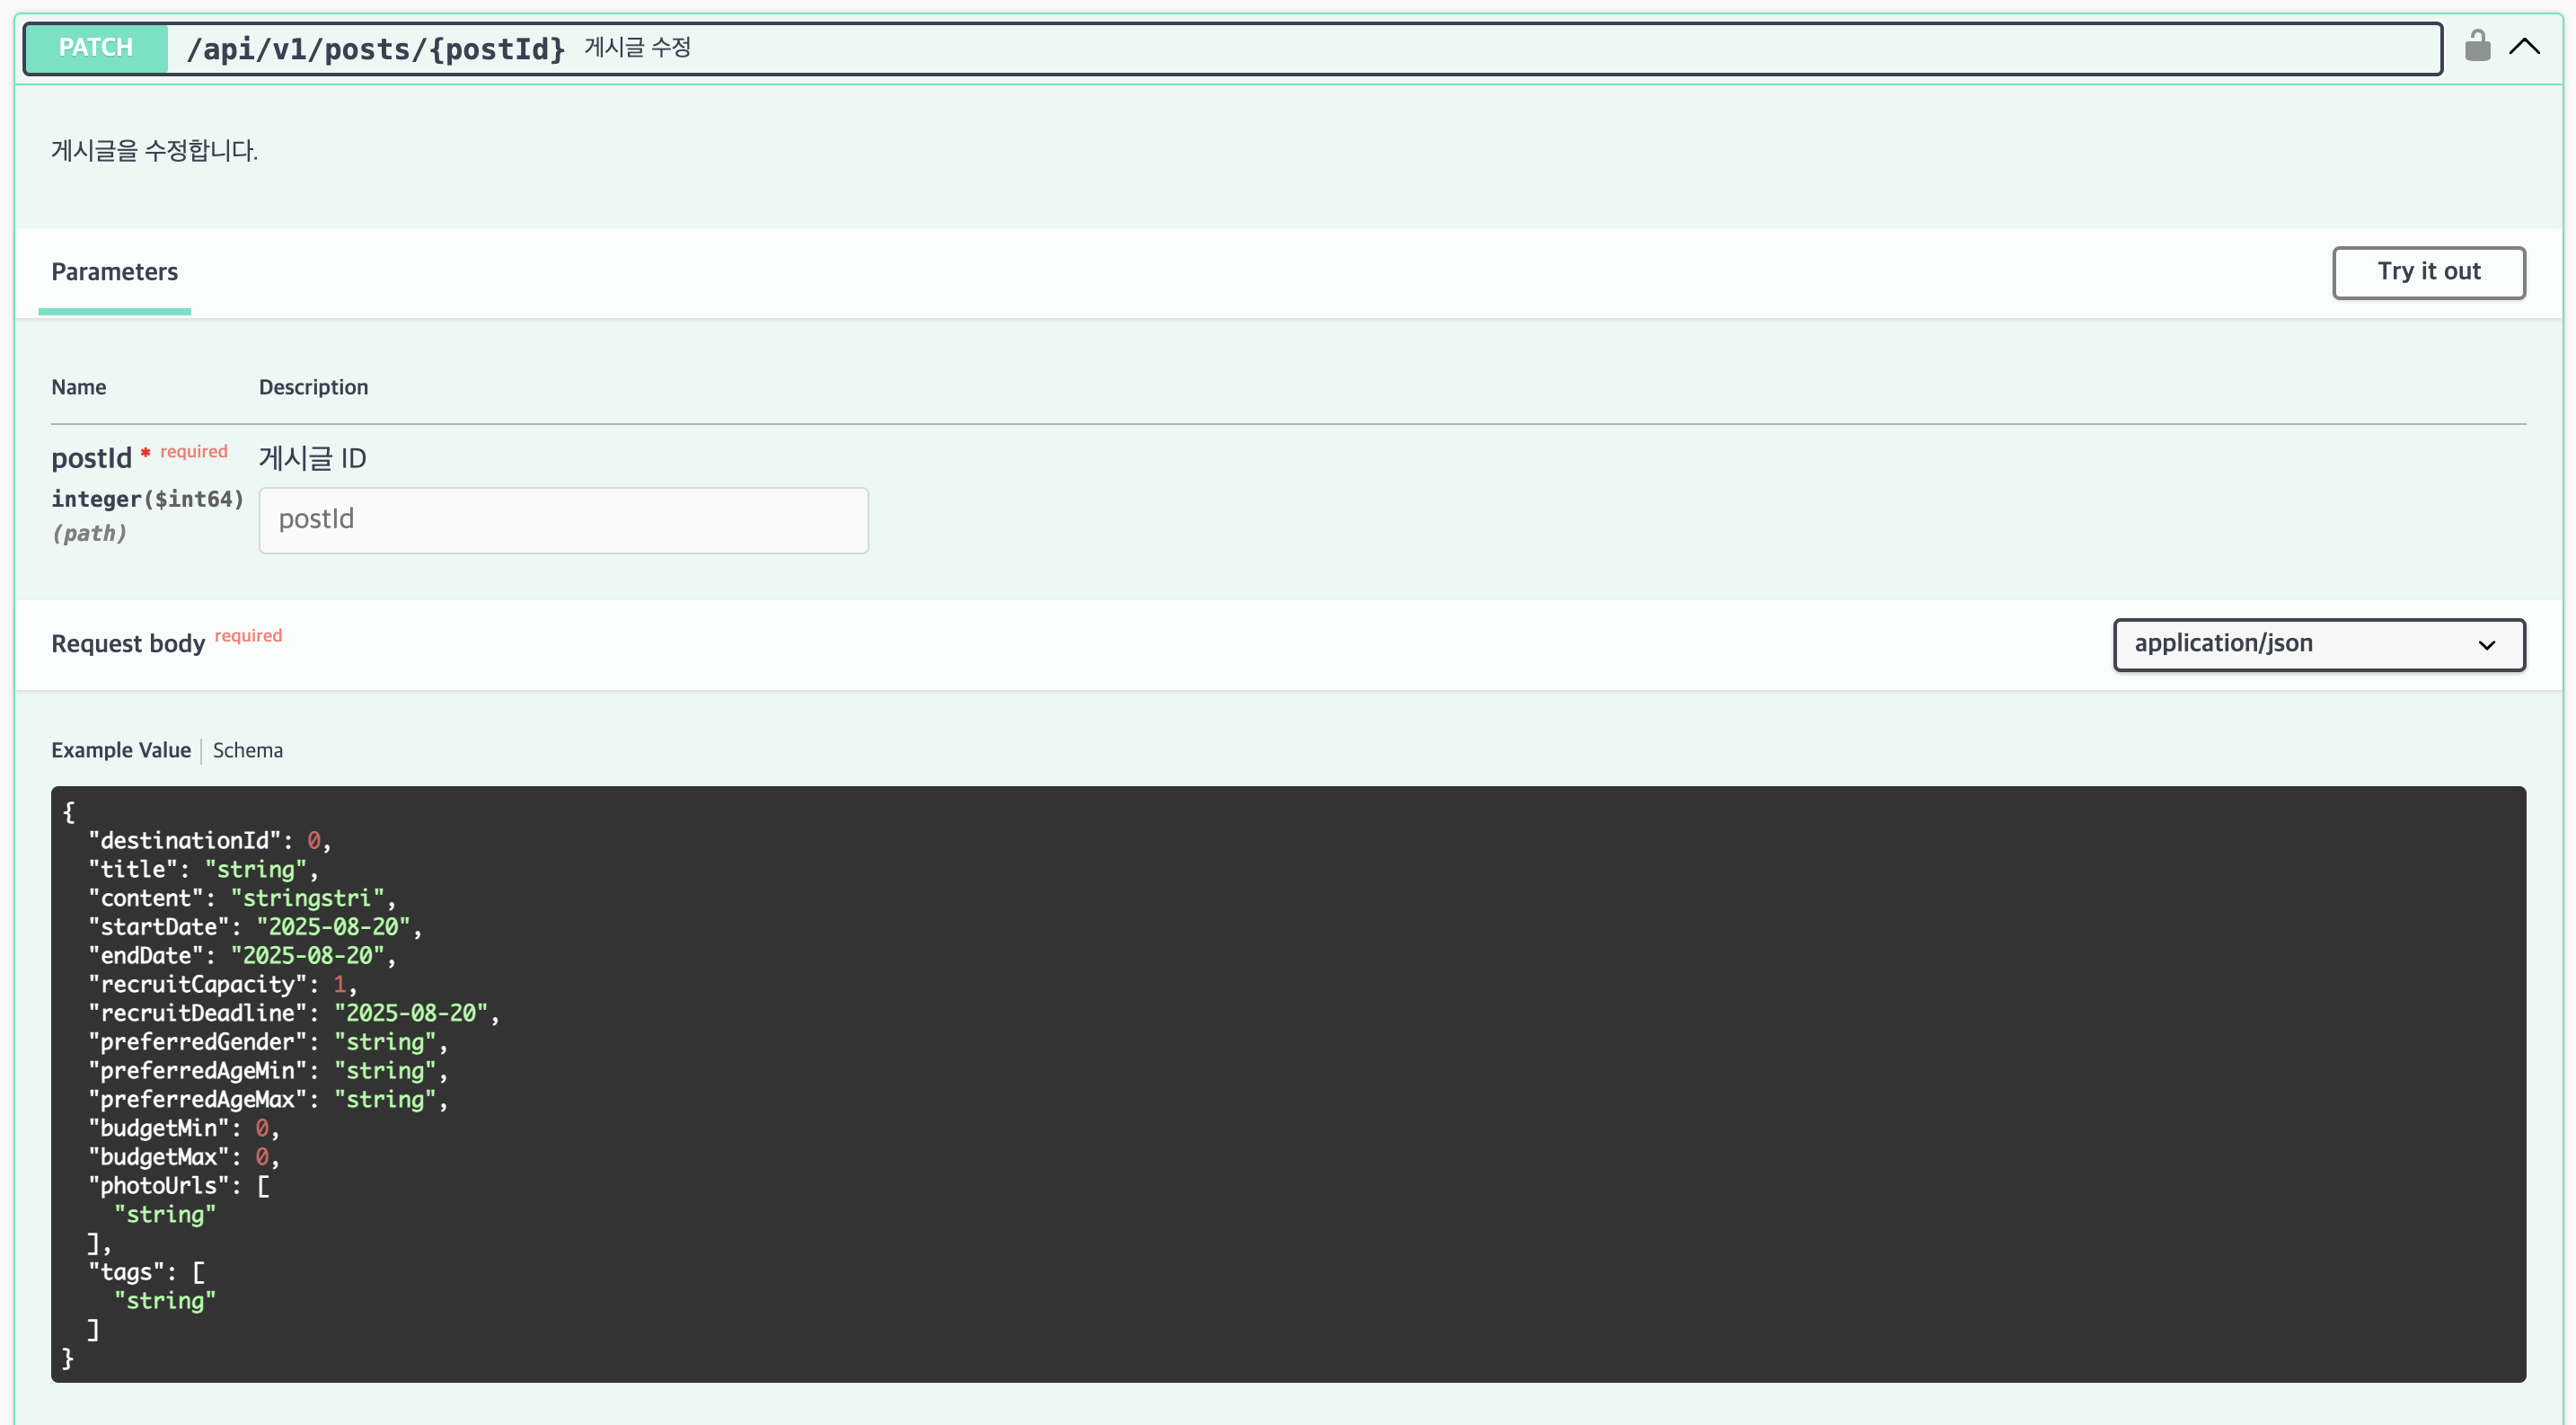
@Operation(summary = "게시글 수정", description = "게시글을 수정합니다.")
@ApiResponses({
@ApiResponse(responseCode = "204", description = "수정 성공")
@ApiResponse(responseCode = "403", description = "권한 없음"),
@ApiResponse(responseCode = "404", description = "게시글을 찾을 수 없음")
})
// @SecurityRequirement(JWT 보안 스키마를 필요로 하는 API일 시에 명시)
@SecurityRequirement(name = "JWT")
@PatchMapping("/{postId}")
// 게시글 수정 API
public ResponseEntity<Void> updatePost(
// @Parameter(파라미터 설명)
@Parameter(description = "게시글 ID") @PathVariable Long postId,
@CurrentUser Long userId,
@Valid @RequestBody PostUpdateRequest request
){
// ...
return ResponseEntity.noContent().build();
}5. (선택) yml에 편의성을 위한 기타 Swagger 설정
springdoc:
api-docs:
path: /v3/api-docs
swagger-ui:
path: /swagger-ui.html # 더 간단한 url, /docs 등...편한대로 설정하면 된다.
# 정렬 순서 관련
operations-sorter: alpha
tags-sorter: alpha
disable-swagger-default-url: true
# 기본 미디어 타입 명시
default-consumes-media-type: application/json
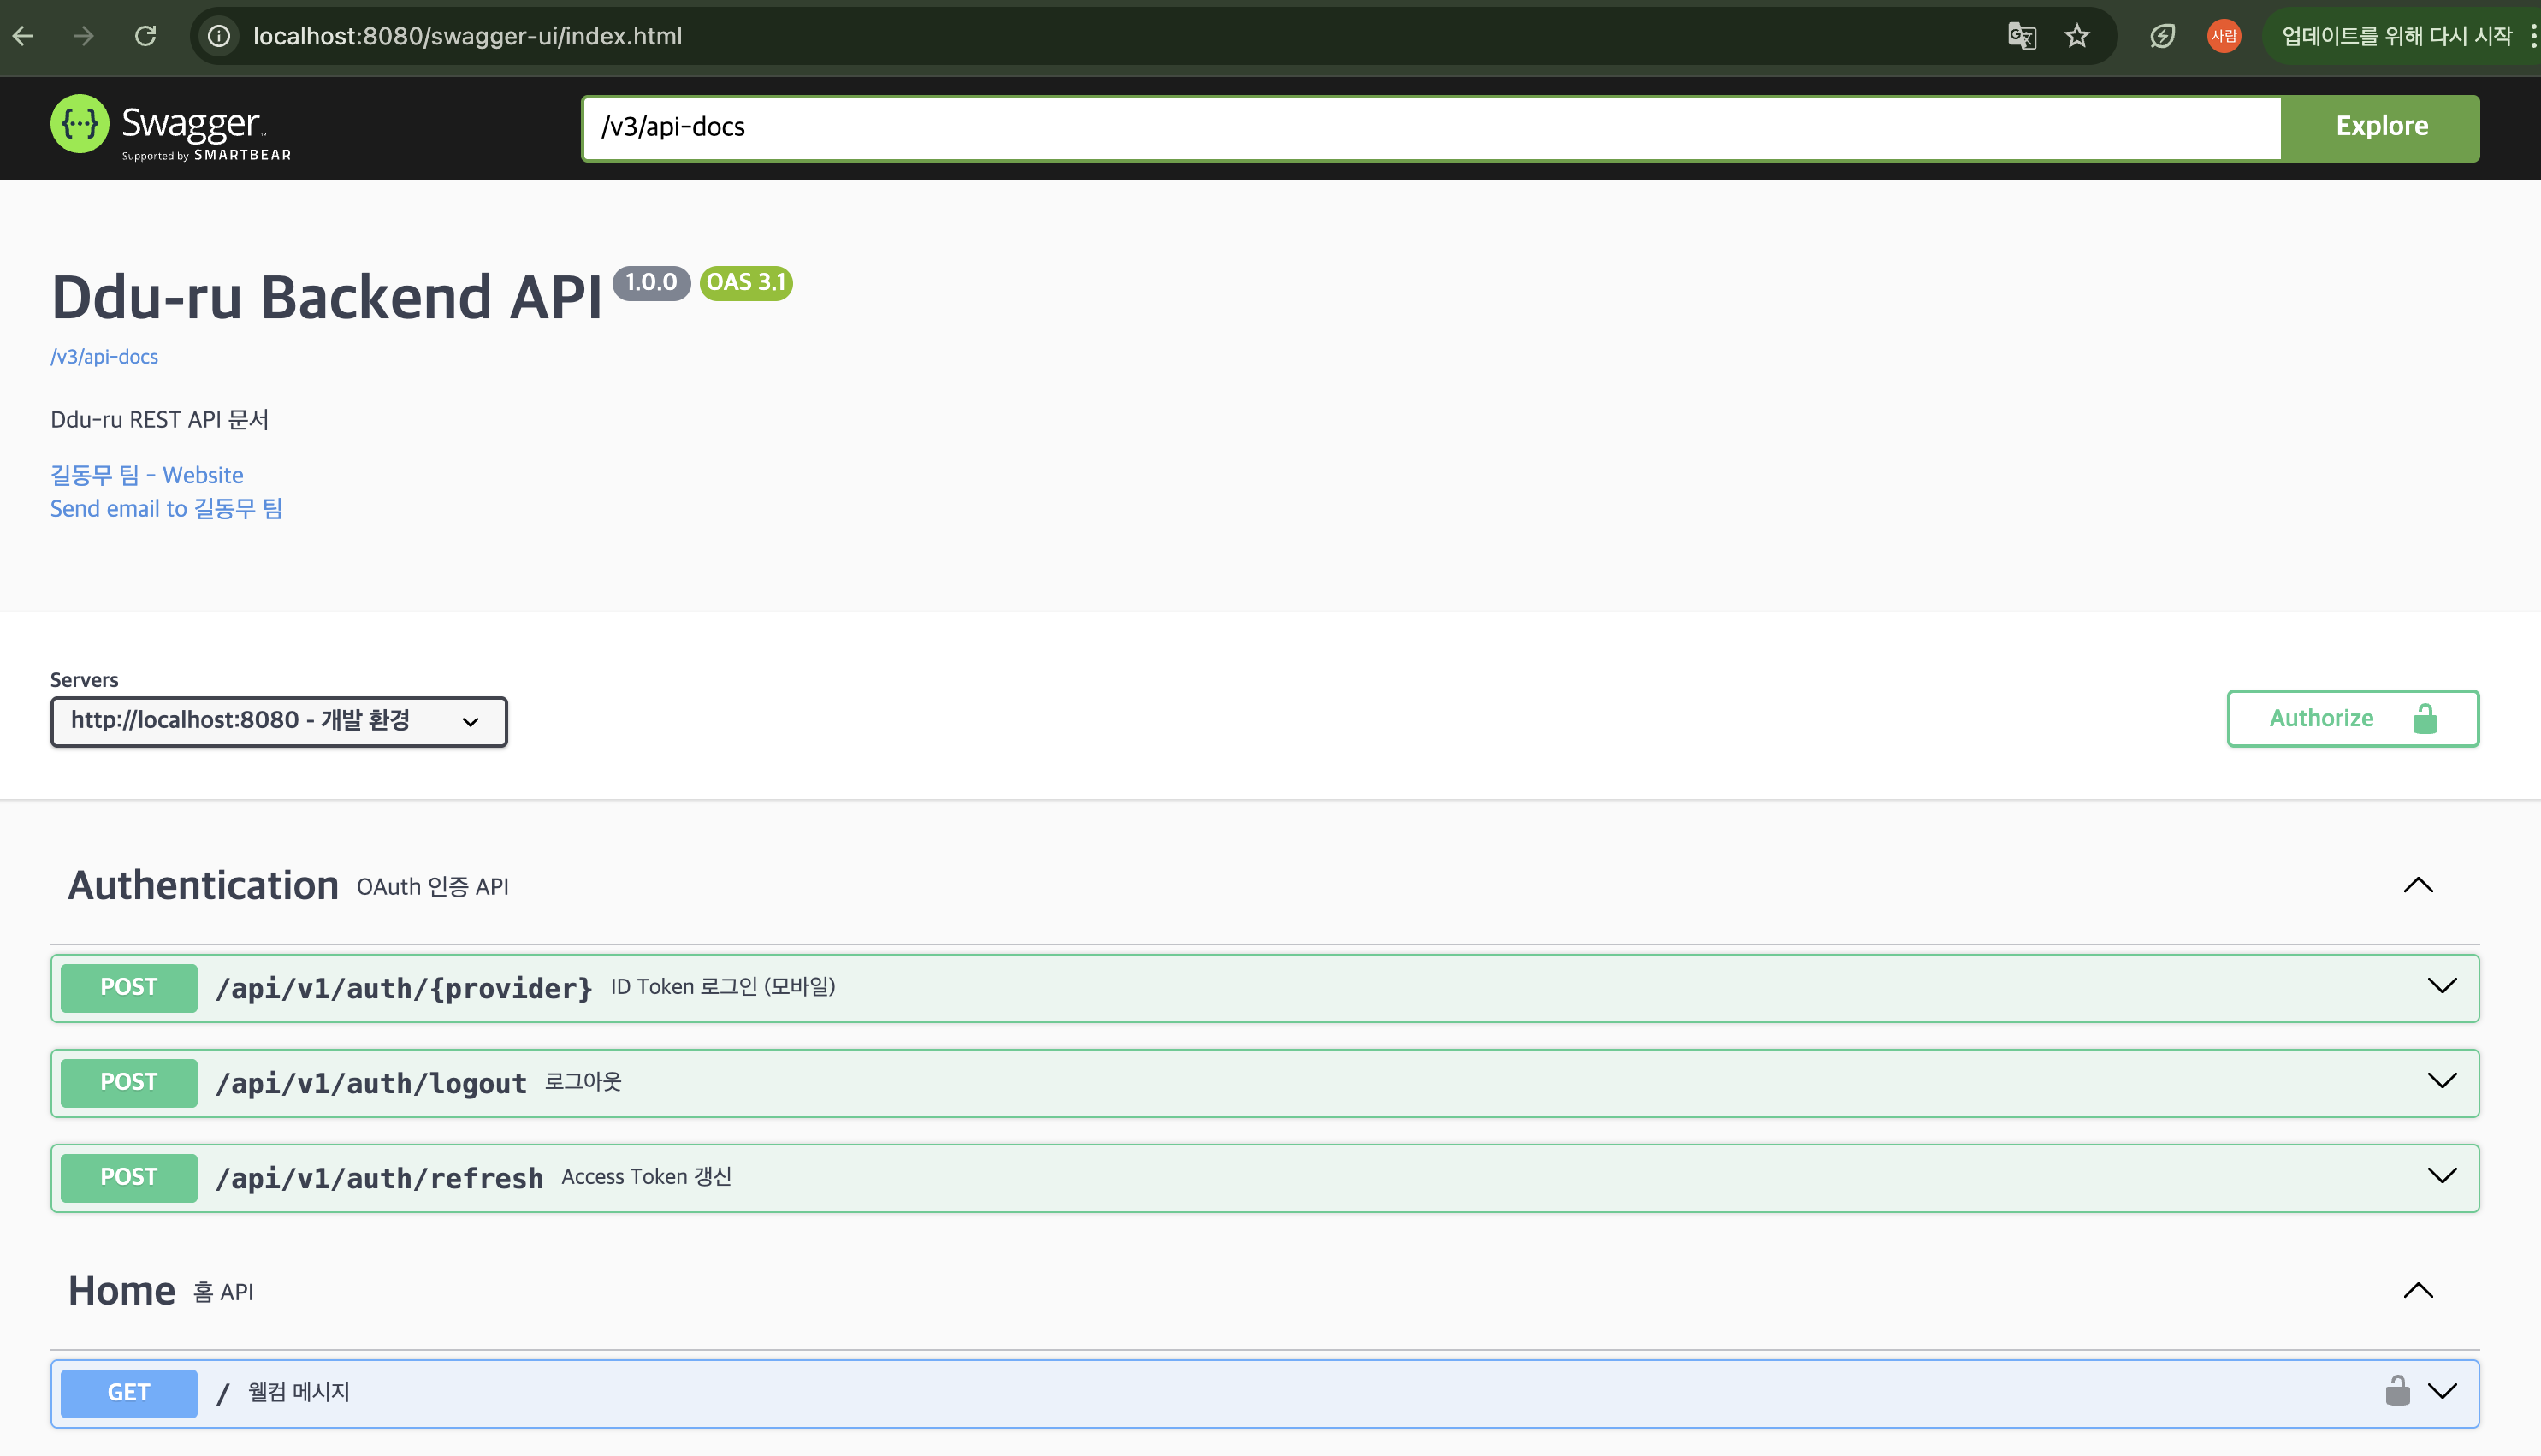
default-produces-media-type: application/json6. Swagger UI 접속 방법
- 위처럼 yml에 직접
path를 설정해줬기 때문에 아래로 접속하면 된다.
- Swagger UI: http://localhost:8080/swagger-ui.html
// yml 설정 안했을 시: http://localhost:8080/swagger-ui/index.html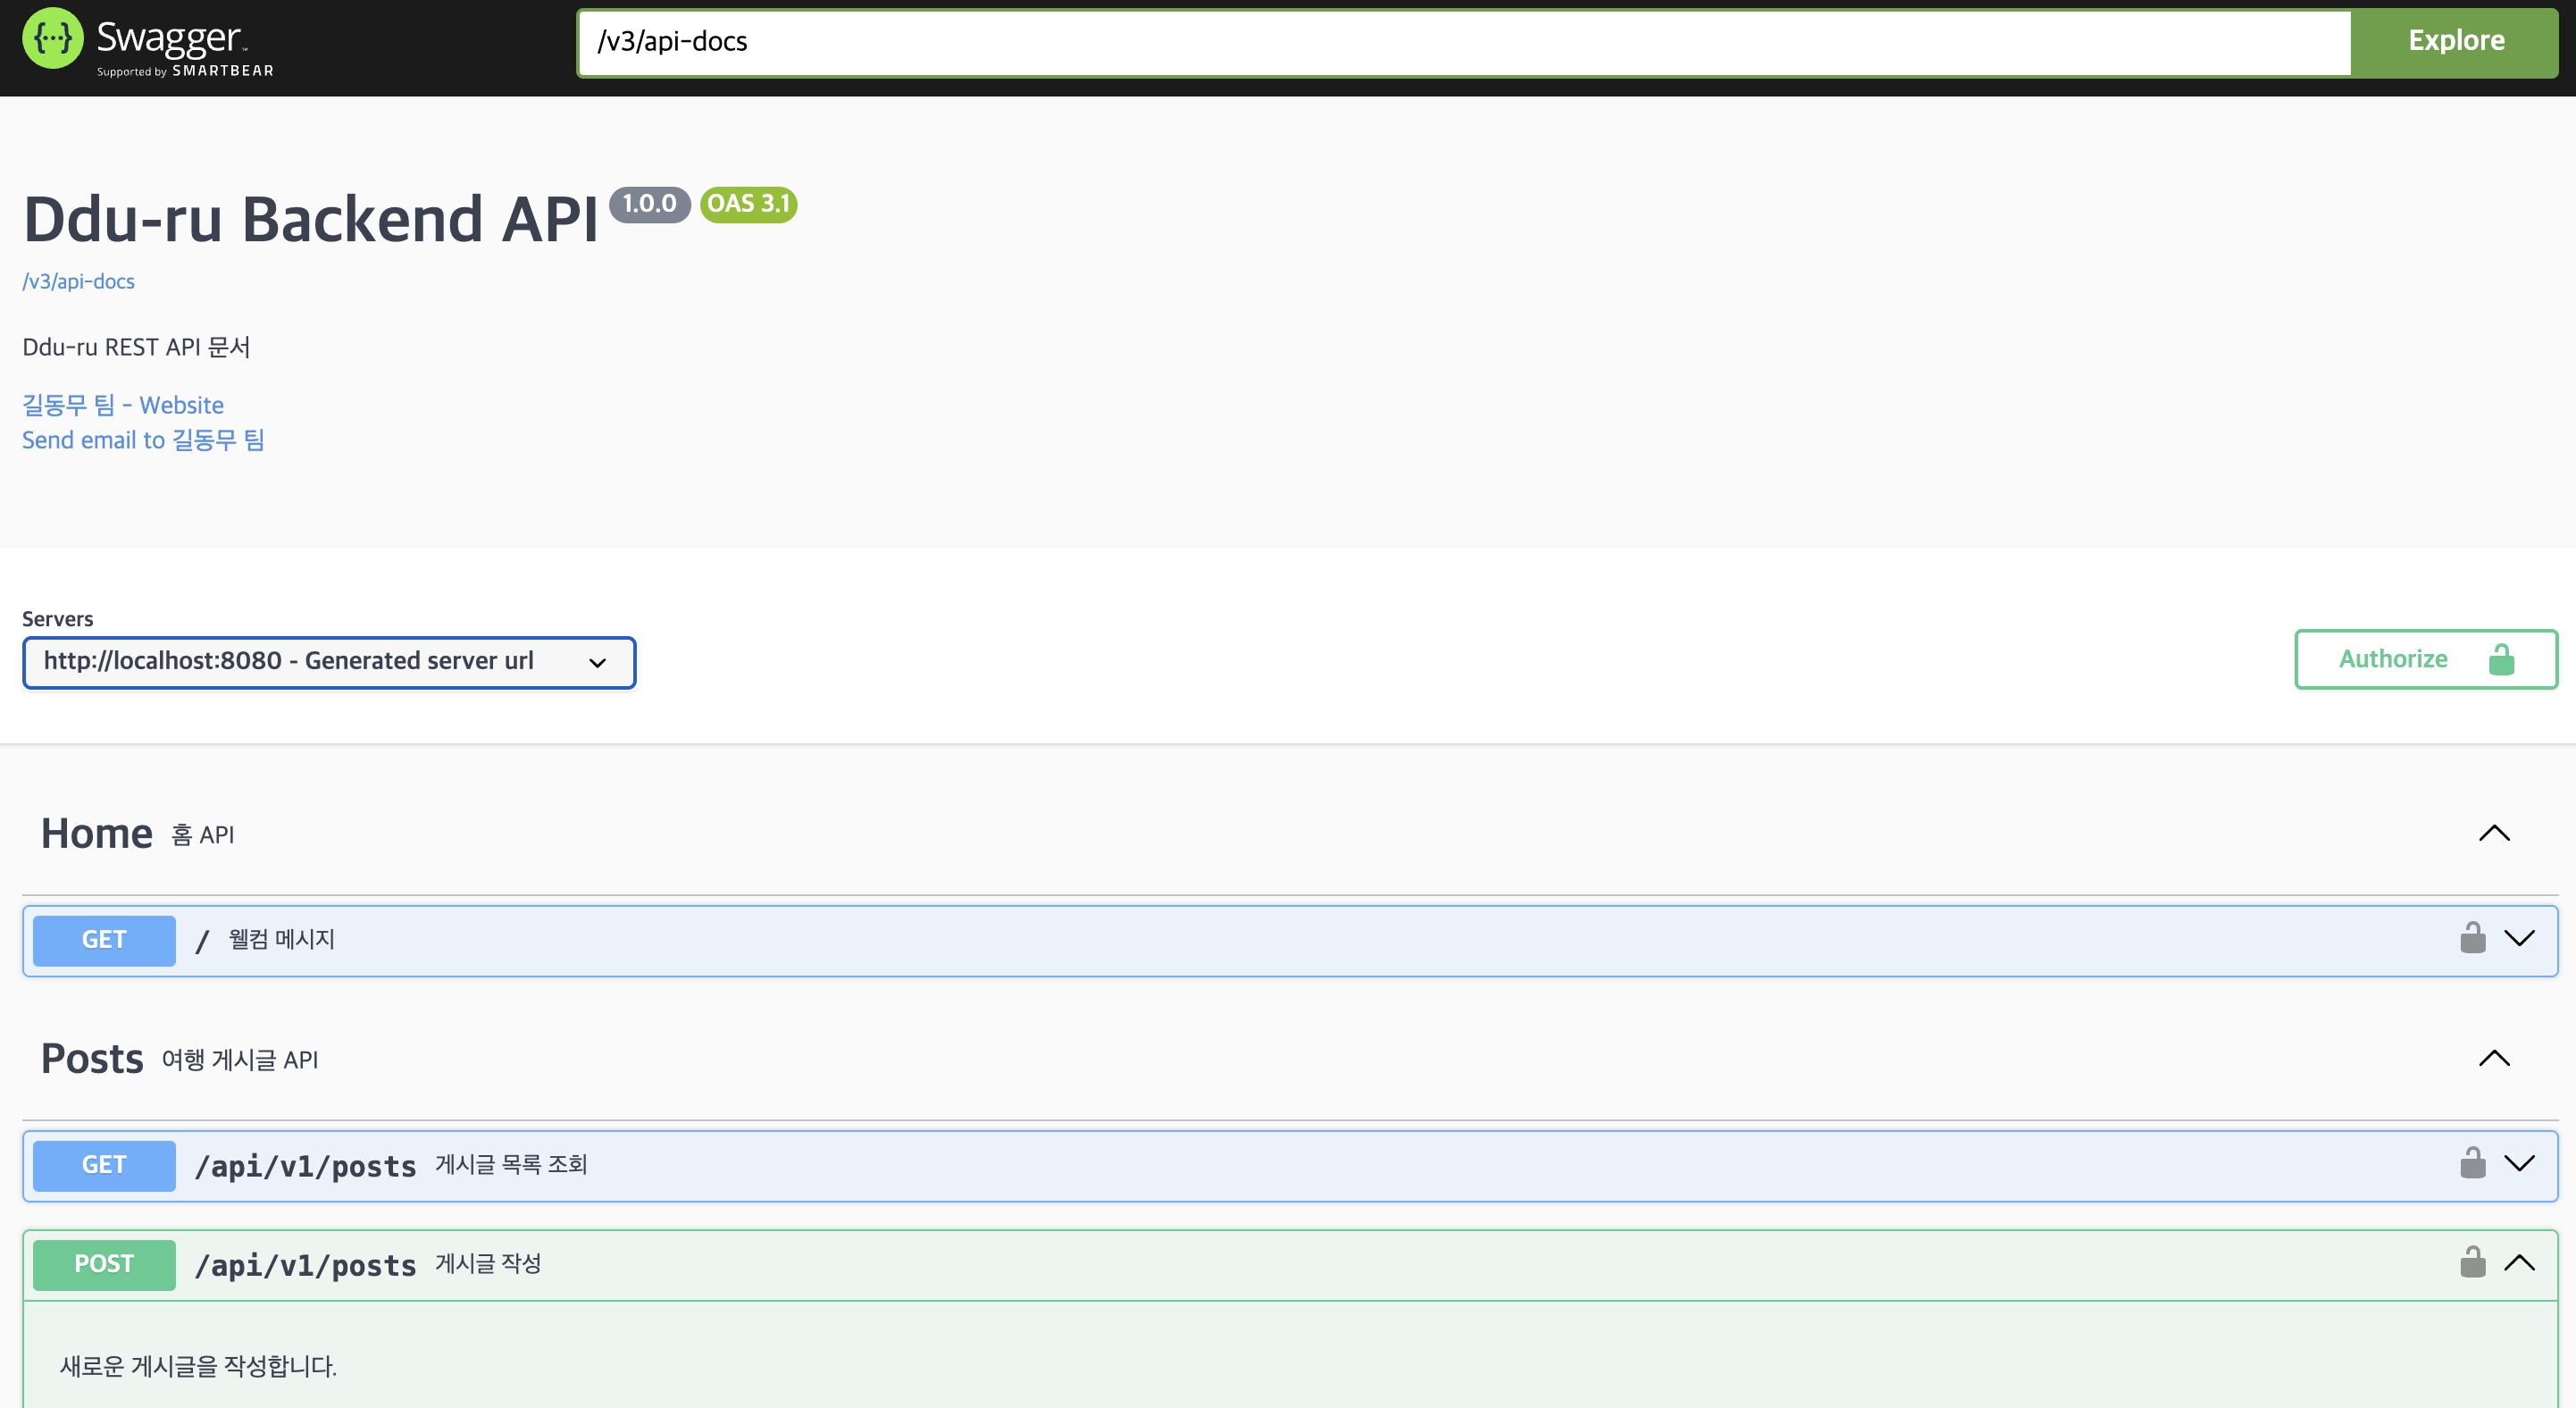
- API 문서 JSON: http://localhost:8080/v3/api-docs- Swagger UI - 전체 화면 (SwaggerConfig 설정, @Tag, @Operation)
- Swagger UI - API 화면(Postman 대신 사용) ex. 게시글 수정 API
- API 문서 JSON

✨ Swagger UI 더 깔끔하게 관리하는 방법
1. API 문서를 인터페이스로 분리 (강추)
// 👁️🗨️ Docs 클래스 예시
@Tag(name = "Posts", description = "여행 게시글 API")
public interface PostApiDocs {
@Operation(summary = "게시글 수정", description = "게시글을 수정합니다.")
@ApiResponses({
@ApiResponse(responseCode = "204", description = "수정 성공"),
@ApiResponse(responseCode = "403", description = "권한 없음"),
@ApiResponse(responseCode = "404", description = "게시글을 찾을 수 없음")
})
ResponseEntity<Void> updatePost(
@Parameter(description = "게시글 ID") Long postId,
@Parameter(hidden = true) Long userId,
@Valid PostUpdateRequest request
);
// 👁️🗨️ Controller 클래스 예시
@RestController
public class PostController implements PostApiDocs { // implements docs
@Override // 오버라이드 하기
@PatchMapping("/{postId}")
public ResponseEntity<Void> updatePost(
@PathVariable Long postId,
@CurrentUser Long userId,
@Valid @RequestBody PostUpdateRequest request
){
// ...
return ResponseEntity.noContent().build();
}2. JWT 인증 요구사항 간단히 표시
2.1. 커스텀 어노테이션 활용
@Target({ElementType.METHOD, ElementType.TYPE})
@Retention(RetentionPolicy.RUNTIME)
@SecurityRequirement(name = "JWT")
public @interface ApiAuthRequired {
}
2.2. 혹은 맨 위의 SwaggerConfig에 설정처럼
@Bean
    public OpenAPI openAPI() {
        return new OpenAPI()
        // ...
                .addSecurityItem(getSecurityRequirement())	// 전역 JWT 인증 설정
    }

    private SecurityRequirement getSecurityRequirement() {
        return new SecurityRequirement().addList("JWT");
    }
3. DTO에 Schema 어노테이션 추가해서 상세 값 표시
- 클래스 상단, 각 필드 위에
@Schema로 설명 및 예시 넣기
@Builder
@Schema(description = "게시글 수정 요청")
public record PostUpdateRequest(
       @Schema(description = "제목", example = "후쿠오카 여행가실분")
       String title,
       @Schema(description = "내용", example = "안녕하세요.....")
       String content
       ) {
	// ..
}
if 에러 응답 전역 처리 시 문제점
사실 공통 응답을 전역 처리하거나 커스텀 어노테이션을 달아버릴 수도 있다.
- OpenApiCustomizer
@Bean
  public OpenApiCustomizer addCommonResponses() {
      // 모든 API에 400, 401, 403, 404, 500 응답 자동 추가
  }
- @ControllerAdvice + @ApiResponses
@ControllerAdvice
  @ApiResponses({
      @ApiResponse(responseCode = "400", ref = "#/components/responses/BadRequest"),
      @ApiResponse(responseCode = "401", ref = "#/components/responses/Unauthorized"),
      // ...
  })
  public class GlobalExceptionHandler {
      // 전역 예외 처리
  }
- 커스텀 어노테이션으로 공통 응답 처리
// ApiCommonResponses.java
@Target({ElementType.METHOD, ElementType.TYPE})
@Retention(RetentionPolicy.RUNTIME)
@ApiResponses({
    @ApiResponse(responseCode = "400", ref = "#/components/responses/BadRequest"),
    @ApiResponse(responseCode = "401", ref = "#/components/responses/Unauthorized"),
    @ApiResponse(responseCode = "403", ref = "#/components/responses/Forbidden"),
    @ApiResponse(responseCode = "404", ref = "#/components/responses/NotFound"),
    @ApiResponse(responseCode = "500", ref = "#/components/responses/InternalServerError")
})
public @interface ApiCommonResponses {
}
하지만 자동으로 모든 API에 공통 에러 응답을 추가를 한다는 건 많은 단점이 있다.
우선 아래처럼 불필요한 응답 코드까지 표시하게 된다.
 // 예: 파일 업로드 API
  @PostMapping("/upload")
  public ResponseEntity<String> uploadFile() {
      // 실제로는 400, 413(파일 크기 초과)만 발생하는데 401, 403, 404, 500도 모두 표시됨
  }

  // 예: 공개 API (인증 불필요)
  @GetMapping("/public/health")
  public ResponseEntity<String> health() {
      // 실제로는 401, 403이 절대 발생하지 않는데 Swagger에는 표시됨
  }
실제 API와 달라지기 때문에 문서의 정확성을 해치는 문제가 발생한다. 그러다보니 프론트와 원활할 협업을 위해 사용됨에도 혼란을 야기할 수 있다는 점이 포인트이다.

개발 log
블로그의 악마 신희님 ㄷㄷㄷ