
Section 1
Create a Landmark Model
이번에는 뷰에 전달할 수 있는 데이터를 저장하기 위한 소모델을 만들어보자.
일단 json파일을 다운로드해서 프로젝트 안에 넣는다.
다음 Landmark.swift파일을 생성하여 DTO나 VO와 같은 형태로 struct하나를 만든다.
DTO나 VO를 모른다면 다음 글을 참조하자.
DTO, VO에 대한 설명
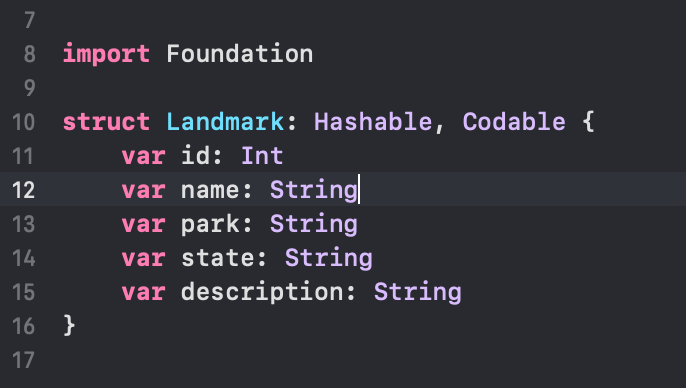
여기서 생각해봐야하는 점은, Codable과 Hashable이 뭐냐이다.
Hashable은 우리가 알고리즘에서 배운 해시테이블을 생각하면 편하다. 해시는 Key-Value로 값을 저장하는데 Key 값을 해싱 함수에 넣어 해시하여 배열의 주소값(해시 주소값)을 얻고, 그 주소값에 맞는 index에 Value값을 저장하는 것이다.
일반적으로 딕셔너리에서 Key값으로 기본 자료형으로 만들면 프로토콜에 의해서 알아서 Hashable이 채택된다.
뭐 쨋든 Hashable을 살펴보면
public protocol Hashable : Equatable {
    var hashValue: Int { get }
    func hash(into hasher: inout Hasher)
}
주석처리된 부분을 제외하고 본다면 hash함수를 통해서 전달하는 것으로 나와있다. hashValue는 더이상 사용하지 않는 프로퍼티라고한다. 그리고 다시 또 보면 Hashable은 Equatable을 따르는 것을 볼 수 있다. 따라서 자동으로 구현되지 않는 클래스의 경우 직접 구현을 해줘야한다.
Codable은 Encodable과 Decodable이 합쳐진 것이다. 코드를 살펴보면
public typealias Codable = Decodable & Encodable

/// A type that can be used as a key for encoding and decoding.
public protocol CodingKey : CustomDebugStringConvertible, CustomStringConvertible, Sendable {
    var stringValue: String { get }
    init?(stringValue: String)
    var intValue: Int? { get }
    init?(intValue: Int)
}
Codable = Decodable & Encodable이 된 것을 볼 수 있다.
Encodable은 data를 Encoder에서 변환해주려는 프로토콜로 바꿔주는 것이고 Decodable은 data를 원하는 모델로 Decode해주는 것이다. struct, enum, class 전부 채택이 가능하다고 한다.
또한 코드의 아래 CodingKey라는 protocol이 있는데 이것은 jsonkey가 아닌 내가 원하는 이름으로 지정해줄 수 있도록하는 프로토콜이다.
그렇다면 코드를 짤 때 전부다 Codable로 채택해버리면 편한거 아냐? 라고 할 순 있지만 사실 Decode만 필요하거나 Encode만 필요한 경우에는 Decodable, Encodable 중 한 가지로 하는 것이 더 낫다. 왜냐하먄 한 가지만 필요할 경우에도 Codable을 불러와버리면 메모리 공간을 차지할 뿐이다라고 생각해서이다.
Hashable 설명 참고 :
https://babbab2.tistory.com/149
Codable 설명 참고 :
https://shark-sea.kr/entry/Swift-Codable-%EC%95%8C%EC%95%84%EB%B3%B4%EA%B8%B0
https://zeddios.tistory.com/373
다음 기존에 Landmark에 해당하는 이미지들을 Asset에 추가해주고 각 이미지들의 이름을 불러오는 변수를 만들어준다.
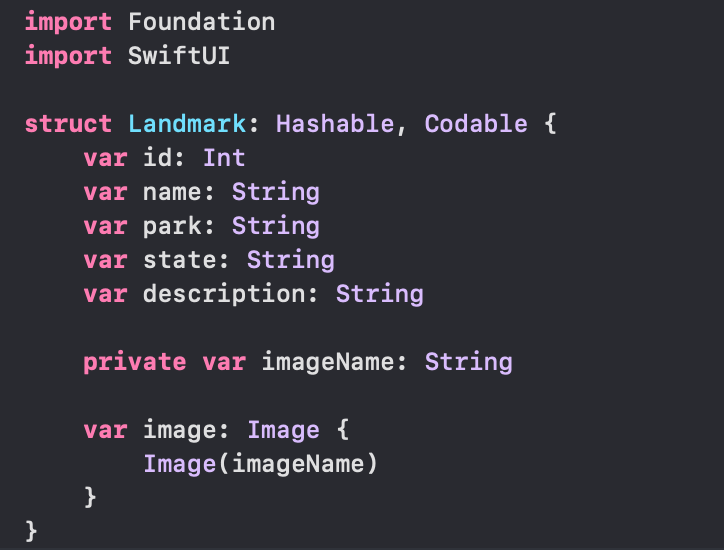
여기서 가만보면 image라는 변수를 Image타입으로 채택하는데 진짜 난생 첨 보는 타입이다. 그래서 들여다보았다.
@frozen public struct Image : Equatable {
    public static func == (lhs: Image, rhs: Image) -> Bool
}
일단 @frozen으로 되어있는데 frozen attributes는 무엇인지 잠시 살펴보자. 이 @frozen을 붙이게 되면 나중에 새로운 case가 추가될 수 없게한다고 한다. 이를 통해서 default값을 줄이고 추가적인 시간 소요를 없앤다고 한다. enum인 경우는 이렇지만 struct인 경우에는 라이브러리의 다음 버전에서 만약 @frozen이 붙은 struct에서 변경을 하거나 제거하거나 프로퍼티의 순서를 변경하려고 하지 못하게 하는 것이라고 한다.
또한 Equatable을 채택한다고 되어있다. Equatable은 뭘까? Equatable은 동등성을 비교하는 프로토콜이다.
따라서 이를 토대로 보자면 Image라는 새 데이터타입 비교를 하기 위해서 Equatable을 채택하고 있는 것이다.
그리고 다시 위에 image변수 코드를 살펴보면 private var로 imageName을 설정하고 이를 Image를 통해 접근한다. 어차피 Landmark라는 struct는 image만 접근하면 그만이기 때문이다.
@frozen 참고자료: https://ios-development.tistory.com/1093
Equatable 참고자료 : https://www.zehye.kr/swift/2020/07/16/11swift_equatable/
다음은 coordinate를 추가한다. 위도와 경도에 해당하는 좌표를 넣는 것이다. coordinate에 관한 내용을 Landmark.swift에 넣었다면 새 Swift 파일을 생성한다.
import Foundation

var landmarks: [Landmark] = load("landmarkData.json")

func load<T: Decodable>(_ filename: String) -> T {
    let data: Data

    guard let file = Bundle.main.url(forResource: filename, withExtension: nil)
    else {
        fatalError("Couldn't find \(filename) in main bundle.")
    }

    do {
        data = try Data(contentsOf: file)
    } catch {
        fatalError("Couldn't load \(filename) from main bundle:\n\(error)")
    }

    do {
        let decoder = JSONDecoder()
        return try decoder.decode(T.self, from: data)
    } catch {
        fatalError("Couldn't parse \(filename) as \(T.self):\n\(error)")
    }
}
이젠 각 데이터 파일들을 받아줄 Model을 생성하는 것이다. 보면 load명 옆에 제네릭함수가 있다. return 또한 T로 반환한다. 그리고 그 T는 Decodable을 채택한다. 그다음 받는 파일을 guard let 으로 지정해놨다.
guard let 참고글 : if let과 guard let
그리고 아래는 do catch 구문으로 처리되어있다.
Section 2
Create the Row View
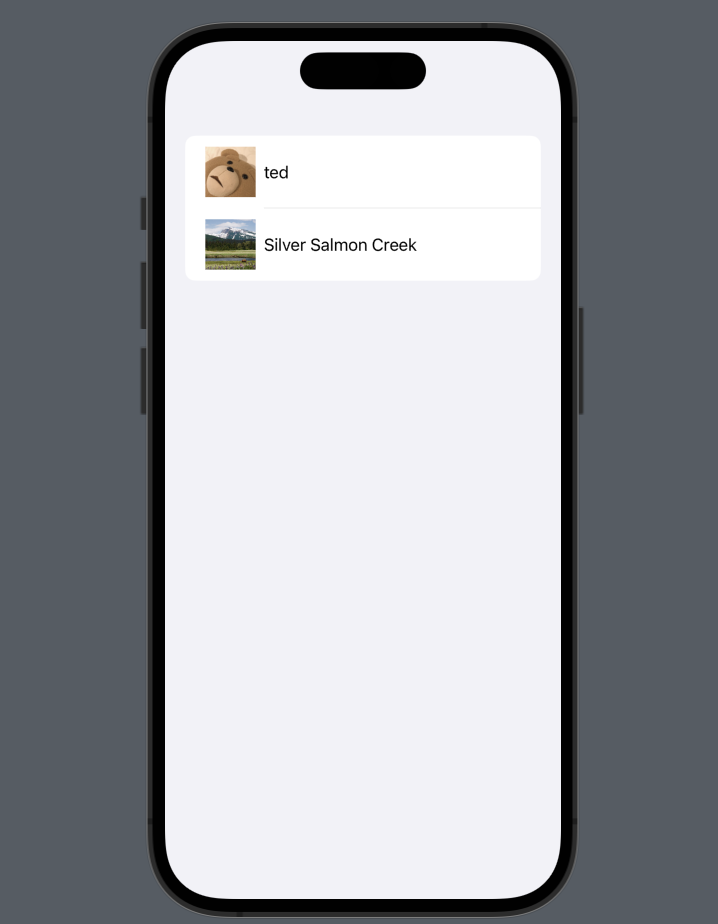
LandmarkRow.swift라고 새 view파일을 만든 다음. 이번엔 사진과 이름, spacer를 한 블럭으로 생각해서 한 개의 블럭을 일단 만들어 본다.
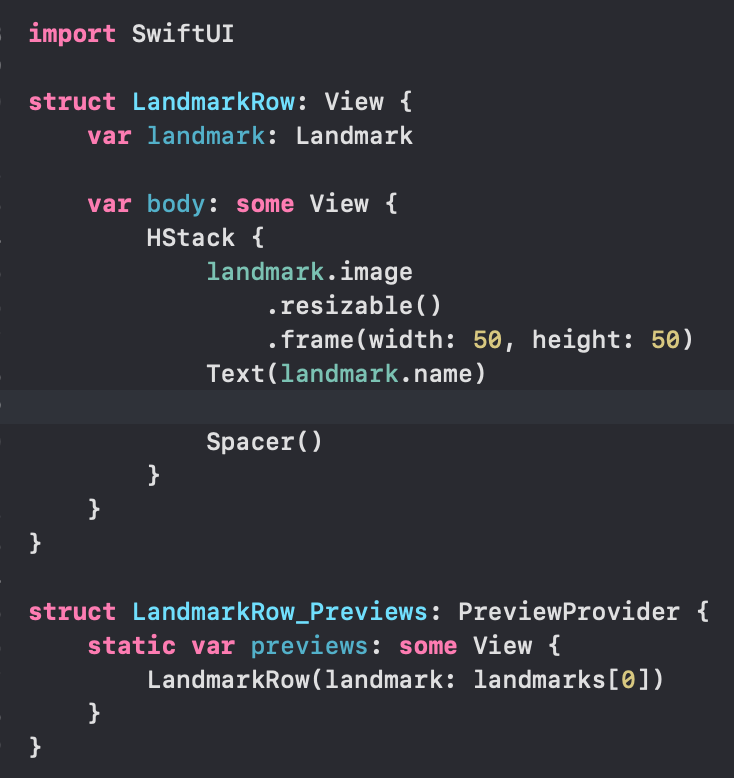
가만보연 struct로 만들었는데 class와는 다르게 생성자가 없어도 자동으로 인자를 받아준다. struct에서는 Memberwise Initializer를 통해서 자동으로 생성자를 정의해준다고 한다.
이렇게 만들어보면 이런식으로 뜬다..! 호우 맨

Section 3
Customize the Row Preview
Xcode의 캔버스는 현재 편집기에서 Preview Provider 프로토콜을 준수하는 모든 유형을 자동으로 인식하고 표시한다고 한다. Preview Provider는 크기 및 장치를 구성하는 옵션과 함께 하나 이상의 보기를 반환한다.
사용자에게 가장 유용한 미리보기를 정확하게 렌더링하도록 Preview Provider에서 반환된 내용을 사용자 정의할 수 있다.
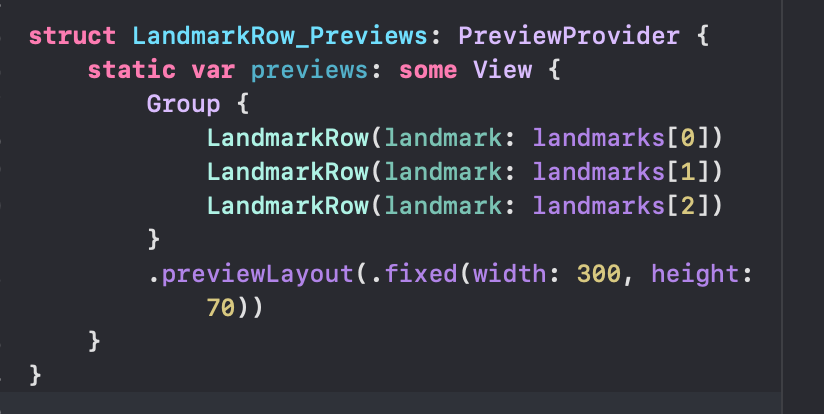
레이아웃 뷰를 담당하는 묶음 밖에 속성을 추가하면 안에 내용들에 해당 속성이 동일하게 들어간다.
Group에 대해서 살펴보면 @ViewBuilder 클로져로 뷰들을 받는다. ,없이 어떻게 뷰들이 나란하게 받아질까에 대해서 생각해봤더니 이 @ViewBuilder가 입력되는 View 속성들을 child로 받아서 가능한 일이었다.
Section 4
Create the List of Landmarks
SwiftUI의 List를 활용해서 목록 유형, 플랫폼별 보기 목록을 표시할 수 있다. 스택에서의 하위 뷰들 처럼 정적으로도 동적으로도 만들 수 있으며, 동시에 둘 다도 가능하다.
그럼 만들어보자
import SwiftUI

struct LandmarkList: View {
    var body: some View {
        List {
            LandmarkRow(landmark: landmarks[0])
            LandmarkRow(landmark: landmarks[1])
        }
    }
}

struct LandmarkList_Previews: PreviewProvider {
    static var previews: some View {
        LandmarkList()
    }
}
일단 List에 대해서 탐구해보자.
@available(iOS 13.0, macOS 10.15, tvOS 13.0, watchOS 6.0, *)
@MainActor public struct List<SelectionValue, Content> : View where SelectionValue : Hashable, Content : View {

    @available(watchOS, unavailable)
    @MainActor public init(selection: Binding<Set<SelectionValue>>?, @ViewBuilder content: () -> Content)

    @available(watchOS, unavailable)
    @MainActor public init(selection: Binding<SelectionValue?>?, @ViewBuilder content: () -> Content)

    @MainActor public var body: some View { get }

    public typealias Body = some View
}
일단 List는 제네릭 타입으로 SelectionValue, Content를 타입으로 가지고 있다. 그리고 View where SelectionValue라고 되어있는 것을 볼 수 있는데 여기서 where은 swift 패턴들과 결합되어 조건을 추가하거나 타입에 대한 제약을 거는 용도이다.
where 참고자료 : https://dongminyoon.tistory.com/38
그렇다면 SelectionValue, Content로 제약이 걸렸다고 볼 수 있는데 이 둘은 각각 Hashable과 View를 채택하고 있다.
즉 SelectionValue는 해당 hash값을 통해 데이터를 가져오는 용도이고 Content는 이를 보여주는 용도로 이해해도 되는지 모르겠다...
더 자세하게 뜯어보면
@MainActor public init<Data, ID, RowContent>(_ data: Data, id: KeyPath<Data.Element, ID>,
selection: Binding<SelectionValue?>?, @ViewBuilder rowContent: @escaping (Data.Element) -> RowContent)
where Content == ForEach<Data, ID, RowContent>, Data : RandomAccessCollection, ID : Hashable, RowContent : View
이렇게 되어있다. 일단 data, id, selection, rowContent를 인자로 받는다. rowContent의 경우 child로 들어가게 되며 id는 KeyPath 형식으로 되어있다. KeyPath는 <Data.Element, ID>로 제네릭으로 되어있는데 iterator를 통해서 data로 받은 컨테이너를 하나씩 순회하면서 매칭되는 아이템이 Data.Element라고 한다. KeyPath는 미리 Root에서 해당 Value로 가는 길을 정해두는 것이다.
그리고 @MainActor라는 attribute가 있는데 이는 Concurrency 의 Actors API collection 중 하나이다. 이를 통해서 메인 스레드에서의 동작을 보장해준다고 한다.
자세한 내용은 이 글을 참조하면 좋겠다.
https://sujinnaljin.medium.com/swift-actor-%EB%BF%8C%EC%8B%9C%EA%B8%B0-249aee2b732d
쨋든 그렇게 해서 뷰는 이렇게 나타난다.
아니 이렇게 블록 하나씩 하나씩 넣으면 언제 다넣어?
바로 다음 섹션이 이걸 해결한다.
Section 5
Make the List Dynamic
직접 하나하나 넣는 것이 아닌 데이터 집합에서 통으로 들고오는 것이다.
정적으로 넣었던 줄을 삭제하고
struct LandmarkList: View {
    var body: some View {
        List(landmarks, id: \.id) { landmark in
            LandmarkRow(landmark: landmark)
        }
    }
}
동적으로 설정해준다.
앞에서 봤듯, List함수는 SelectionValue와 해당 Content로 이루어져있다. 그래서 인수로 landmarks와 id를 넣어준다.
그리곤 단 한 줄! LandmarkRow(landmark: landmark)면 이제 List가 주르륵 뜬다.
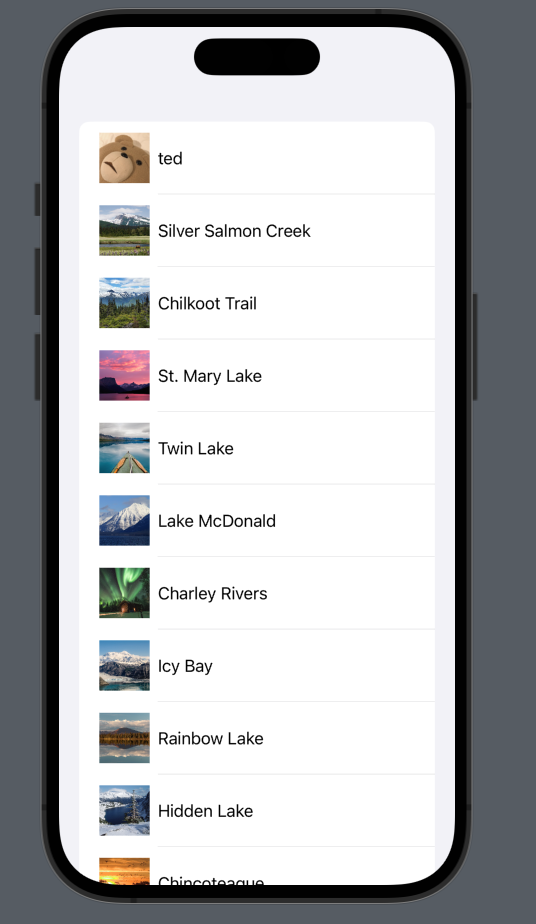
되...된다!

다음은 Identifiable를 Landmark에 추가하여 List 코드를 단순화하는 작업이다.
@MainActor public init<Data, RowContent>(_ data: Data, @ViewBuilder rowContent: @escaping (Data.Element) -> RowContent)
where Content == ForEach<Data, Data.Element.ID, RowContent>, Data : RandomAccessCollection, RowContent : View, Data.Element : Identifiable
각각의 data요소가 Identifiable을 지원하면 이 init을 쓸 수 있게 된다. 따라서 이미 Json에 Identifiable에 필요한 id property를 얘는 들고 있어서 우리는 단순히 디코딩할 property만 추가해주면 된다.
struct LandmarkList: View {
    var body: some View {
        List(landmarks) { landmark in
            LandmarkRow(landmark: landmark)
        }
    }
}
따라서 id를 없애준다.
Section 6
Set Up Navigation Between List and Detail
이젠 List에 해당 블록을 눌렀을 때 자세한 내용이 나타나는 뷰로 이동하는 것을 해볼 작정인가보다.
기존에 ContentView에서 했던 코드를 고대로 LandmarkDetail을 새로 만들어서 복사해준다. 그다음 LandmarkList의 코드를 변경해준다.
struct LandmarkList: View {
    var body: some View {
        NavigationView{
            List(landmarks) { landmark in
                NavigationLink {
                    LandmarkDetail()
                } label: {
                    LandmarkRow(landmark: landmark)
                }
            }
            .navigationTitle("Me and Landmarks")
        }
    }
}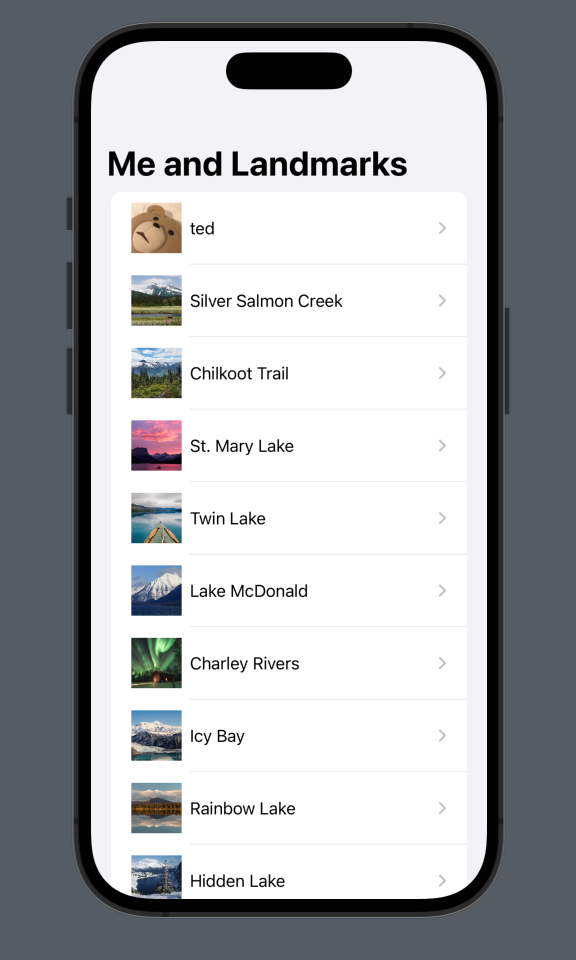
자자 이제 NavigationView, NavigationLink라는 새로운 녀석이 등장했다.
일단 NavigationView부터 보자.
public struct NavigationView<Content> : View where Content : View {
	public init(@ViewBuilder content: () -> Content)

    /// The type of view representing the body of this view.
    ///
    /// When you create a custom view, Swift infers this type from your
    /// implementation of the required ``View/body-swift.property`` property.
    public typealias Body = Never
}
이 친구도 List와 같이 Content를 받는 친구이다.
다음 NavigationLink인데 변수명에서부터 뭔가 연결느낌이 난다.
public struct NavigationLink<Label, Destination> : View where Label : View, Destination : View {
	public init(@ViewBuilder destination: () -> Destination, @ViewBuilder label: () -> Label)

	public init(isActive: Binding<Bool>, @ViewBuilder destination: () -> Destination, @ViewBuilder label: () -> Label)

	public init<V>(tag: V, selection: Binding<V?>, @ViewBuilder destination: () -> Destination, @ViewBuilder label: () -> Label) where V : Hashable

	@MainActor public var body: some View { get }

    public init(destination: Destination, @ViewBuilder label: () -> Label)
    public init(destination: Destination, isActive: Binding<Bool>, @ViewBuilder label: () -> Label)
	public init<V>(destination: Destination, tag: V, selection: Binding<V?>, @ViewBuilder label: () -> Label) where V : Hashable

    public typealias Body = some View
}
역시나! 제네릭으로 Label, Destination을 가지고 있다. 이 함수 내용을 보면 알 수 있는 것이
NavigationLink {
	LandmarkDetail()
} label: {
	LandmarkRow(landmark: landmark)
}
위의 이 코드에서 LandmarkDetail()이 destination이고 뒤의 label쪽 LandmarkRow()이 label에 해당하는 것이다.
근데 여기저기서 많이 보이는 것이 @ViewBuilder이다. 이놈은 뭐하는 놈일까?
Closure에서 View를 구성하는 custom parameter attritube라고 한다. Closure에서 Child View를 구성해주는 녀석이다.
@ViewBuilder 참고자료 갓 zedd: https://zeddios.tistory.com/1324
쨋든 이렇게 부모 List View를 만들었고 이번에는 해당 Child View를 만들어볼 시간이다.
++ NavigationView 대신 NavigationStack을 사용하고자 한다.
@MainActor struct NavigationStack<Data, Root> where Root : View현재 NavigationView는 쓰지말라고하고 이와 거의 동일한 NavigationStack을 쓰기를 권장한다.
NavigationStack {
    List(parks) { park in
        NavigationLink(park.name, value: park)
    }
    .navigationDestination(for: Park.self) { park in
        ParkDetails(park: park)
    }
}
공식문서 : https://developer.apple.com/documentation/swiftui/navigationstack
Section 7
Pass Data into Child Views
Landmark Detail 뷰는 여전히 hard-coding된 세부 정보를 사용하여 랜드마크를 표시한다. LandmarkRow와 마찬가지로 LandmarkDetailtype 및 이를 구성하는 뷰는 랜드마크 특성을 데이터 소스로 사용해야 한다.
하위 뷰부터 시작하여 CircleImage, MapView 및 LandmarkDetail을 변환하여 각 행을 hard-coding하는 대신 전달된 데이터를 표시한다.
여기서 hard-coding이란 데이터를 직접 내부에 입력하는 것을 의미한다.
일단 CircleImageView, MapView를 수정한다.
var landmark: Landmark그다음 이걸 LandmarkDetail에 추가한다. 다음 LandmarkList에 destination에 해당하는 파트에서 landmark: landmark로 해놓은 다음 LandmarkList에서 기존 VStack을 ScrollView로 변경하고 각 데이터에 필요한 파츠들을 landmark. 으로 이어준다.
import SwiftUI

struct LandmarkDetail: View {
    var landmark: Landmark

    var body: some View {
        ScrollView {
            MapView(coordinate: landmark.locationCoordinate)
                .ignoresSafeArea(edges: .top)
                .frame(height: 300)

            CircleImage(image: landmark.image)
                .offset(y: -130)
                .padding(.bottom, -130)

            VStack(alignment: .leading) {
                Text(landmark.name)
                    .font(.title)

                HStack {
                    Text(landmark.park)
                    Spacer()
                    Text(landmark.state)
                }
                .font(.subheadline)
                .foregroundColor(.secondary)

                Divider()

                Text("About \(landmark.name)")
                    .font(.title2)
                Text(landmark.description)
            }
            .padding()
        }
        .navigationTitle(landmark.name)
        .navigationBarTitleDisplayMode(.inline)
    }
}
그렇게 되면 다음과 같이 화면이 연결된다.
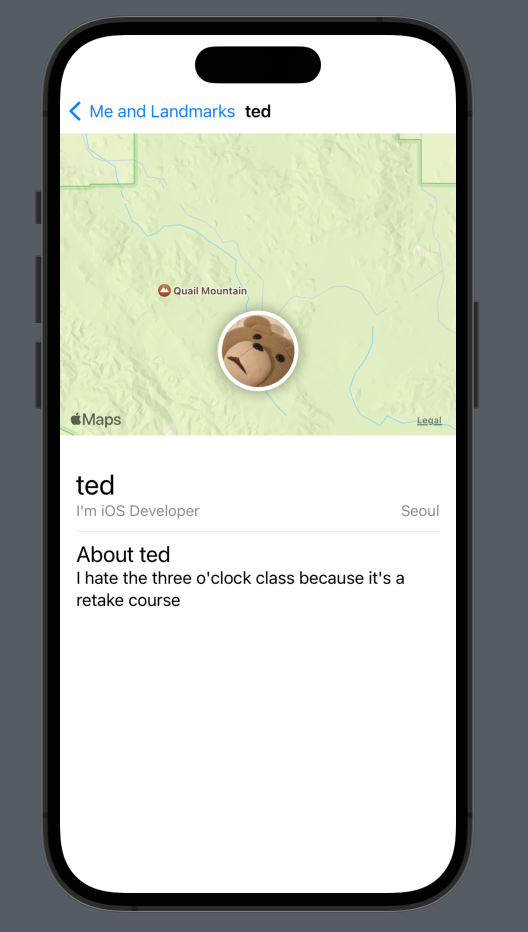
짜란!
Section 8
Generate Previews Dynamically
휴대폰의 기종이 다양하기에 그에 맞춰 Auto layout이 설정되어야 한다. 이 장에서는 그걸 하나보다.
ForEach(["iPhone SE (2nd generation)", "iPhone XS Max"], id: \.self) { deviceName in
            LandmarkList()
                .previewDevice(PreviewDevice(rawValue: deviceName))
        }
이런식으로 설정한다.

휴.. 2번째도 잘 마무리하였다.