지난 포스팅에 이어서 시작
1. Access_token을 이용하여 사용자 정보 조회하기

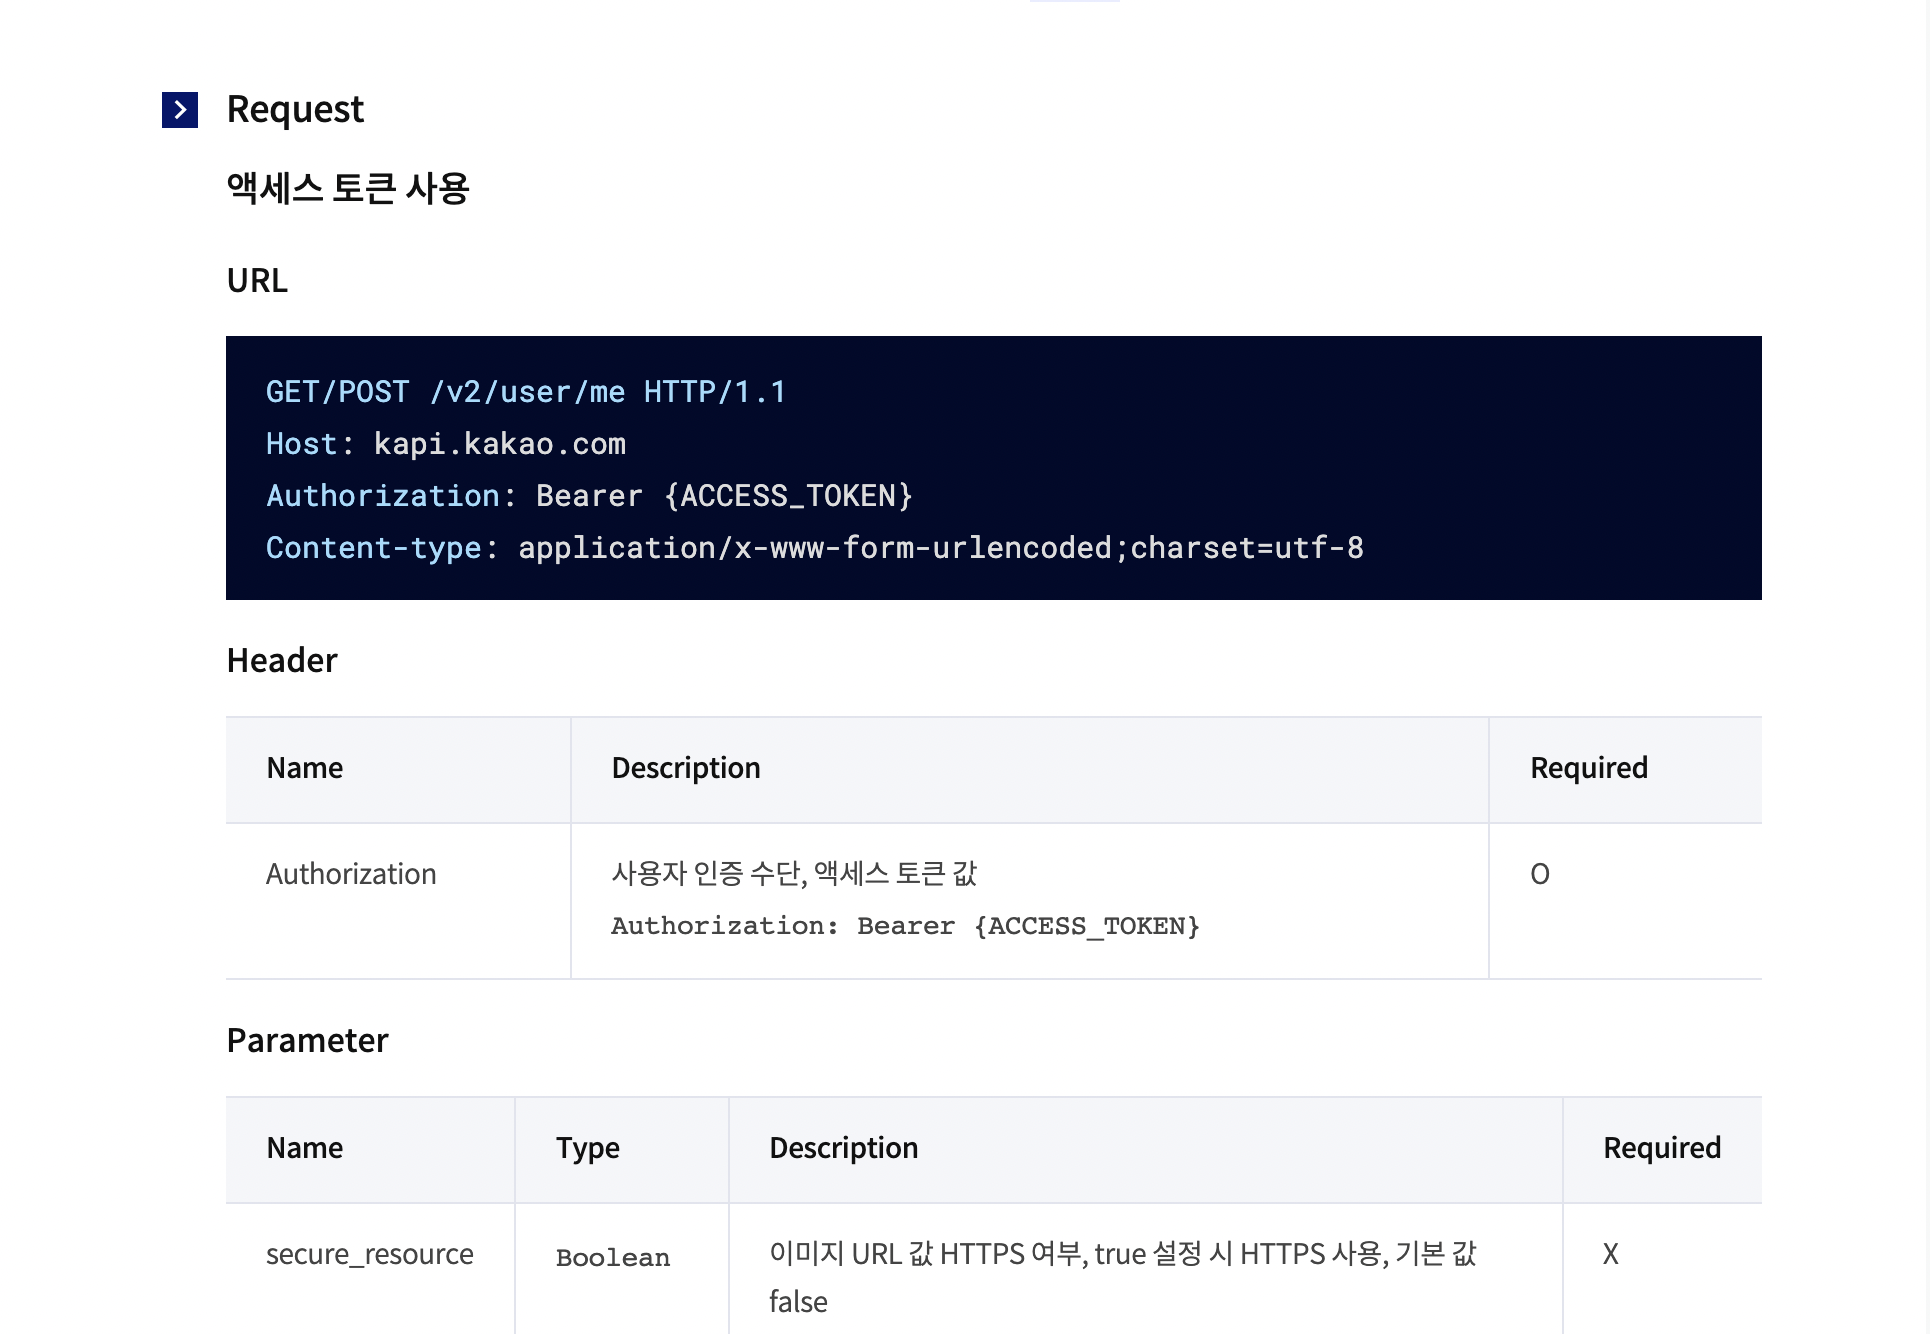
문서>카카오 로그인>REST API
문서를 참고하면 REST API 구현 방법에대한 좋은 가이드가 나와있으니 한 번 읽어보면 많이 도움된다.
GET 또는 POST방식으로 access_token에 값을 넣어줄건데 나는 POST 방식으로 넣어주겠다.
(** 주의 Bearer {ACCESS_TOKEN}에서 Bearer바로 뒤는 공백이다.)
UserService.java
public void createKakaoUser(String token) throws BaseException {

        String reqURL = "https://kapi.kakao.com/v2/user/me";

        //access_token을 이용하여 사용자 정보 조회
        try {
            URL url = new URL(reqURL);
            HttpURLConnection conn = (HttpURLConnection) url.openConnection();

            conn.setRequestMethod("POST");
            conn.setDoOutput(true);
            conn.setRequestProperty("Authorization", "Bearer " + token); //전송할 header 작성, access_token전송

            //결과 코드가 200이라면 성공
            int responseCode = conn.getResponseCode();
            System.out.println("responseCode : " + responseCode);

            //요청을 통해 얻은 JSON타입의 Response 메세지 읽어오기
            BufferedReader br = new BufferedReader(new InputStreamReader(conn.getInputStream()));
            String line = "";
            String result = "";

            while ((line = br.readLine()) != null) {
                result += line;
            }
            System.out.println("response body : " + result);

            //Gson 라이브러리로 JSON파싱
            JsonParser parser = new JsonParser();
            JsonElement element = parser.parse(result);

            Long id = element.getAsJsonObject().get("id").getAsLong();
            boolean hasEmail = element.getAsJsonObject().get("kakao_account").getAsJsonObject().get("has_email").getAsBoolean();
            String email = "";
            if (hasEmail) {
                email = element.getAsJsonObject().get("kakao_account").getAsJsonObject().get("email").getAsString();
            }

            System.out.println("id : " + id);
            System.out.println("email : " + email);

            br.close();

        } catch (IOException e) {
            e.printStackTrace();
        }
    }
이렇게 token을 이용하여 사용자 조회를 Service에서 구현해주고 아까 구현한 Controller를 살짝 바꿔주면
UserController.java
    @ResponseBody
    @GetMapping("/kakao")
    public void  kakaoCallback(@RequestParam String code) throws BaseException {

            String access_Token = userService.getKaKaoAccessToken(code);
            userService.createKakaoUser(access_Token);

    }
결과는

콘솔창에 잘 출력되는 것을 볼 수 있다.
이 정보를 이용하여 회원가입 또는 로그인을 진행하면 된다.
참고사이트:
https://suyeoniii.tistory.com/81
https://antdev.tistory.com/37?category=807235