PropTypes
1. PropTypes
린터로 인하여 컴포넌트에 매개 변수를 주려면 type을 지정 해줘야 한다
우선 typescript를 사용하지 않아서 prop-type 라이브러리를 이용 했다.
설치 방법
npm i prop-types
prop-types 적용 예제
  function Hello({ name }) {
    return <div>Hello {name}</div>;
  }
  Hello.propTypes = {
    name: PropTypes.string.isRequired
  }
2. 대화형 HTML 이벤트 핸들러.
기존에 하던 방식으로 li 요소에 이벤트 핸들러를 주려고 했더니 린터가 화를 낸다..
li 요소는 비대화형 HTML 이라 적용이 되지 않았다.
올바르게 핸들러를 제어하는법
  <div onClick={() => void 0} role="button" />
  <div onClick={() => void 0} role="presentation" />
  <input type="text" onClick={() => void 0} /> // Interactive element does not require role.
  <button onClick={() => void 0} className="foo" /> // button is interactive.
  <div onClick={() => void 0} role="button" aria-hidden /> // This is hidden from screenreader.
  <Input onClick={() => void 0} type="hidden" /> // This is a higher-level DOM component
잘못된 핸들 방법
	<li onClick={() => void 0} />
	<div onClick={() => void 0} role="listitem" />
비 대화형 HTML 요소 및 ARIA 역할은 이벤트 핸들러(마우스 및 키 핸들러)를 지원하지 않는다.
3. react 코드 자동 생성기
Reactjs code snippets 이라고 vscode에서 설치를 하면 간단한 명령어로 컴포넌트를 설치할 수 있다!
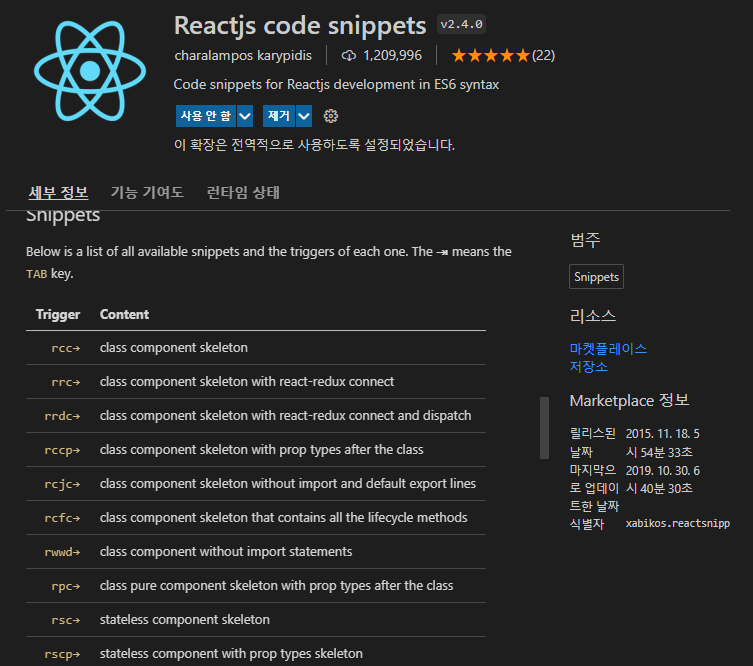
rcc => class 컴포넌트 생성
rrc =>class 컴포넌트 + react-redux추가
rccp =>class 컴포넌트 생성+ propTypes추가
rsf =>function 컴포넌트 생성
rsfp =>function 컴포넌트 생성 + propTypes추가
잘 활용해보자!
ps
여태 잘못된 습관을 하나하나씩 고처가면서 올바른 코딩생활하자..
참조
https://github.com/jsx-eslint/eslint-plugin-react/blob/master/docs/rules/prop-types.md

끄적 끄적