소감
일주일 동안 개고생하면서 저만의 방식으로 웹뷰에서 위치 서비스를 구현했습니다. 제가 서칭 능력이 부족했을 수도 있지만 웹뷰로 위치 서비스를 처음부터 끝까지 구현해 낸 자료를 찾기 어려웠습니다. 리액트 네이티브와 웹뷰 간의 통신, 모바일에서 위치 권한 얻는 법, 위치 정보 가져오기, 권한 요청 거부 시 재요청과 재요청에 따른 위치 정보 가져오기... 정말 다양하게 찾아보고 적용해 보고 수정한 것 같습니다.
리액트 네이티브와 웹뷰 간의 통신이 추가되니 정말 어지럽습니다. 계속해서 원리나 과정을 확인해 가면서 구현하다 보니 시간이 더 오래 걸린 것 같습니다. 마치 손에 모래주머니를 차고 코드를 치면서 수련하는 기분입니다. 이 프로젝트를 온전히 잘 끝낸다면 웹 서비스쯤은 한 손으로 구현할 수 있지 않을까 싶습니다.(농담)
한편으론 부족한 점이 많다고 생각이 들지만 계속해서 코드를 치고 회고하는 과정에서 조금씩 성장하는 느낌이 좋습니다.
서론
중점은 위치 서비스 Flow에 따른 기능 구현 같습니다.
자세한 내용들은 생략해 가면서 Flow를 중점으로 정리해 보도록 하겠습니다.
구현 원리

- 어디서 이벤트가 일어나고 어디서 이벤트를 처리해야 하는지 flow를 정리하였습니다.
- 예를 들면, 맨 처음 WebView에서 메인 화면에서 위치 액세스 권한 요청 신호를 React-Native에 전송하고 React-Native는 신호를 받아 위치 액세스 권한을 유저에게 요청하게 됩니다.
구현 내용
1. 위치 액세스 권한 승인 케이스
1) 위치 액세스 권한 요청 신호 전송 (WebView -> React-Native)
  useEffect(() => {
    if (isApp()) {
      window.ReactNativeWebView?.postMessage(
        JSON.stringify({ type: 'LOCATION_PERMISSION' }),
      );
    }
}, []);- type을 명시하여 React-Native에 신호를 전송합니다.
2) 위치 액세스 권한 요청 (React-Native -> User)
const locationPermit = async (
  e: WebViewMessageEvent,
  setGeoLocatonAccess: Dispatch<SetStateAction<boolean>>,
) => {
  const nativeEvent = JSON.parse(e.nativeEvent.data);

  if (nativeEvent.type === 'LOCATION_PERMISSION') {
    if (Platform.OS === 'android') {
      try {
        const garanted = await PermissionsAndroid.request(
          PermissionsAndroid.PERMISSIONS.ACCESS_FINE_LOCATION,
        );

        if (garanted === PermissionsAndroid.RESULTS.GRANTED) {
          setGeoLocatonAccess(true);
        }
      } catch (err) {
        console.error(err);
      }
    }
  }
};- 권한 요청을 확인 받는 함수 입니다.
- 이 함수는 WebView 컴포넌트의 onMessage에 등록됩니다.
- 권한 승인을 하였을 경우 setGeoLocatonAccess에 true 값을 주어 위치 정보를 업데이트 할 예정입니다.
3) 위치 정보 확인 후 전송 (React-Native -> WebView)
const WebViewcontainer = () => {
  const webViewRef = useRef<WebView>(null);
  const [geoLocation, setGeoLocation] = useState({latitude: 0, longitude: 0});
  const [geoLocationAccess, setGeoLocatonAccess] = useState(false);

  webViewRef.current?.postMessage(JSON.stringify(geoLocation));

  useEffect(() => {
    if (geoLocationAccess) {
      Geolocation.watchPosition(
        position => {
          const {latitude, longitude} = position.coords;
          setGeoLocation({latitude, longitude});
        },
        err => {
          console.error(err);
        },
        {
          enableHighAccuracy: true,
        },
      );
    }
  }, [geoLocationAccess]);

  return (
    <WebView
      ref={webViewRef}
      source={{uri: homeIp}}
      onMessage={(e: WebViewMessageEvent) => {
        locationPermit(e, setGeoLocatonAccess);
      }}
    />
  );
};- geoLocationAccess 값이 true일 경우 위치 정보를 확인합니다.
- 그리고 위치 정보를 webViewRef.current?.postMessage()를 통해 WebView로 전송합니다.
4) 위치 정보를 주소로 변환 후 저장 (WebView)
const useGeolocation = () => {
  const [geolocation, setGeolocation] = useState({
    latitude: 0,
    longitude: 0,
  });
  const [geolocationAccess, setGeolocationAccess] = useState(false);

  useEffect(() => {
    if (isApp()) {
      const location = (e: MessageEvent<string>) => {
        const data: { latitude: number; longitude: number } = JSON.parse(
          e.data,
        );

        if (data.latitude !== 0 && data.longitude !== 0) {
          setGeolocation(data);
          setGeolocationAccess(true);
        }
      };

      document.addEventListener('message', location);

      return () => {
        document.removeEventListener('message', location);
      };
    }
  }, []);

  return { geolocation, geolocationAccess };
};- React-Native에서 보낸 위치 정보를 받습니다.
- geolocationAccess는 React-Native에서 권한이 거부 되었을 때 위치 서비스 이용에 제한을 두고, 재요청을 위한 상태 입니다.
- document.addEventListener()는 React-Native에서 보낸 신호를 받아오는 방법 입니다.
const useReverseLocation = (geolocation: reverseLocation) => {
  const dispatch = useDispatch();

  useEffect(() => {
    const locationRequest = async () => {
      try {
        const result = await axios.get(
          `https://dapi.kakao.com/v2/local/geo/coord2address.json?x=${geolocation.longitude}&y=${geolocation.latitude}`,
          {
            headers: {
              Authorization: `KakaoAK ${process.env.REACT_APP_KAKAO_REST_API_KEY}`,
            },
          },
        );
        const region = translateLocationKorToEng(
          result?.data?.documents[0]?.address?.region_1depth_name as string,
        );
        const locationKor = translateLocationEngToKor(region);
        dispatch(locationActions.setLocation(locationKor));
      } catch (err) {
        console.error(err);
      }
    };

    void locationRequest();
  }, [geolocation]);
};- 받아온 위치 정보를 Kakao REST API를 사용해서 주소로 변환한 후 Redux toolkit을 사용하여 전역으로 저장하였습니다.
2. 위치 액세스 권한 거부 케이스
1) 위치 액세스 권한 거부 후 위치 액세스 권한 재요청 신호 전송 (WebView -> React-Native)
  const BtnHandler = () => {
    if (!geolocationAccess) {
      if (isApp()) {
        window.ReactNativeWebView?.postMessage(
          JSON.stringify({ type: 'LOCATION_PERMISSION_RETRY' }),
        );
        return;
      }
    }

    navigate('/home/nearby');
};- 위치 서비스 이용 관련된 버튼을 클릭 시 권한이 거부된 상태에서 권한을 재요청 하는 신호를 Reac-Native로 전송
2) 시스템 설정 권한 변경 요청 (React-Native -> User)
const locationPermitRetry = async (
  e: WebViewMessageEvent,
  setGeoLcationReAccess: Dispatch<SetStateAction<boolean>>,
  geoLocationAccess: boolean,
) => {
  const nativeEvent = JSON.parse(e.nativeEvent.data);
  if (Platform.OS === 'android') {
    if (nativeEvent.type === 'LOCATION_PERMISSION_RETRY') {
      if (geoLocationAccess) {
        Alert.alert(
          '위치 정보를 가져오는 중입니다.',
          '잠시 후 다시 시도해 주세요',
        );
        return;
      }

      Alert.alert(
        '위치 액세스 권한이 필요합니다.',
        '권한 허용 후 이용해 주시기 바랍니다.',
        [
          {
            text: '취소',
            onPress: () => {},
            style: 'cancel',
          },
          {
            text: '설정으로 이동',
            onPress: () =>
              Linking.openSettings().then(() => setGeoLcationReAccess(true)),
          },
        ],
        {cancelable: false},
      );
    }
  }
};- WebView로부터 LOCATION_PERMISSION_RETRY 요청을 받았을 때 Alert.alert로 설정에서 위치 액세스 권한을 재요청할 수 있도록 합니다.
- 혹시 권한을 재요청 했는데 위치 정보를 아직 가져오지 못한 경우 잠시 후 다시 요청하라는 알림을 띄웁니다.
const [geoLocationAccess, setGeoLocatonAccess] = useState(false);
const [geoLcationReAccess, setGeoLcationReAccess] = useState(false);
const appState = useRef(AppState.currentState);

useEffect(() => {
  const subscription = AppState.addEventListener('change', nextAppState => {
    if (appState.current.match(/background/) && nextAppState === 'active') {
      if (geoLcationReAccess) {
        setGeoLocatonAccess(true);
      }

      if (geoLocationAccess) {
        findLocation(setGeoLocation);
      }
    }

    appState.current = nextAppState;
  });

  return () => {
    subscription.remove();
  };
}, [geoLocationAccess, geoLcationReAccess]);- AppState를 통해 유저가 백그라운드로 나가 위치 액세스 권한을 설정하고 어플로 돌아가 활성화 됐을 때 위치 정보를 요청합니다.
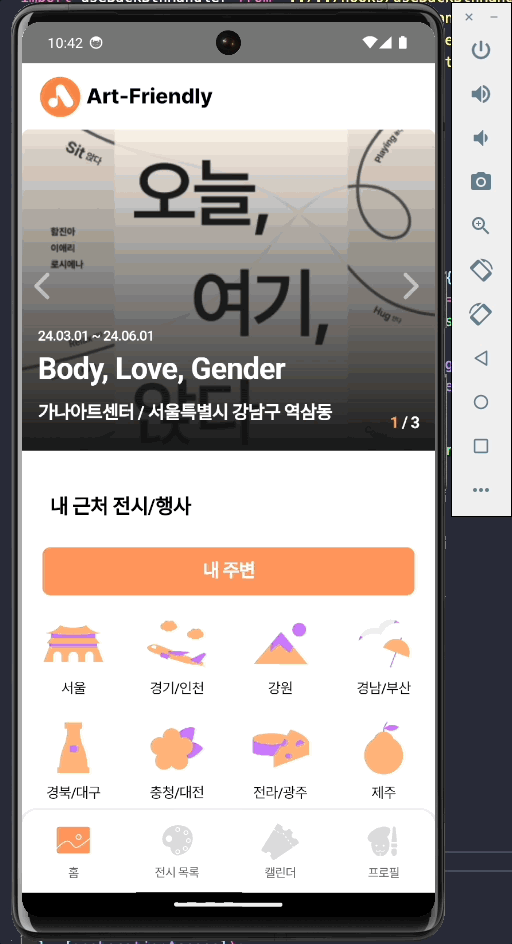
구현화면
1. 위치 액세스 권한 승인 시 화면

2. 위치 액세스 권한 거부 시 화면