
@DataJpaTest를 사용해서 JPA Repository를 테스트 해봅시다.
설정
build.gradle
plugins {
    id 'java'
    id 'org.springframework.boot' version '3.4.2'
    id 'io.spring.dependency-management' version '1.1.7'
}

group = 'com.sparta'
version = '0.0.1-SNAPSHOT'

java {
    toolchain {
        languageVersion = JavaLanguageVersion.of(17)
    }
}

configurations {
    compileOnly {
        extendsFrom annotationProcessor
    }
}

repositories {
    mavenCentral()
}

dependencies {
    implementation 'org.springframework.boot:spring-boot-starter-data-jpa'
    implementation 'org.springframework.boot:spring-boot-starter-security'
    implementation 'org.springframework.boot:spring-boot-starter-web'
    compileOnly 'org.projectlombok:lombok'
    runtimeOnly 'org.postgresql:postgresql'
    annotationProcessor 'org.projectlombok:lombok'
    testImplementation 'org.springframework.boot:spring-boot-starter-test'
    testImplementation 'org.springframework.security:spring-security-test'
    testRuntimeOnly 'org.junit.platform:junit-platform-launcher'
    testImplementation 'com.h2database:h2'
}

tasks.named('test') {
    useJUnitPlatform()
}spring-boot-starter-data-jpa, org.springframework.boot:spring-boot-starter-test, com.h2database:h2, org.junit.platform:junit-platform-launcher 이 4가지가 필요합니다.
실제 데이터에 사용되는 PostgreSQL를 사용하지 않고 H2를 사용하는 이유는 인메모리 DB로 테스트를 하기 위함입니다.
💡 인메모리 DB 테스트의 장점
- 개발 환경 DB를 어지럽히지 않습니다. 물론
@DataJpaTest를 통해 테스트를 수행하면 자동으로 롤백해주기는 하지만 시퀀스를 증가시킨 다던지, 테스트용 더미 데이터와 unique 제약 조건이 겹쳐 의도치 않은 에러가 난다던지 하는 상황들을 피할 수 있습니다.
- CI 구축이 편리해집니다. 로컬 DB로 테스트를 수행하면 CI를 수행하는 runner에도 동일한 DB 환경을 세팅해주어야 하지만 인메모리 DB를 사용하면 그럴 필요가 없어집니다. CI 수행시간 또한 단축이 됩니다.
application-test.yml
spring:
config:
activate:
on-profile: test
datasource:
driver-class-name: org.h2.Driver
url: 'jdbc:h2:mem:test;DB_CLOSE_DELAY=-1;MODE=PostgreSQL'
username: sa
password:
h2:
console:
enabled: true
path: /h2-console
jpa:
hibernate:
ddl-auto: create-drop
properties:
hibernate:
format_sql: true
show-sql: true
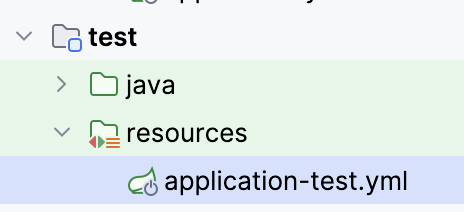
database: h2test의 resources에 위치시켜주면 됩니다. 메인 어플리케이션의 application.yml과 달리 테스트 어플리케이션에만 적용할 application.yml 입니다.
jdbc:h2:mem:test: mem은 인메모리를 칭하고 test는 DB 이름입니다.DB_CLOSE_DELAY=-1: 기본적으로는 DB에 대한 연결이 모두 닫히면은 인메모리의 DB가 날아갑니다. -1로 설정하여 어플리케이션이 실행되어 있는 동안 인메모리 DB가 닫히지 않기 위한 옵션입니다.MODE=PostgreSQL: H2 DB를 PostgreSQL 모드로 실행합니다. 실제 데이터를 저장한 메인 RDBMS를 지정해주면 됩니다.
Entity, Repository
@Getter
@Setter
@Entity
@Table(name = "p_order")
@NoArgsConstructor
public class Order extends BaseEntity {

    @Id
    @GeneratedValue(strategy = GenerationType.UUID)
    private UUID id;

    @Column(nullable = false)
    private Long totalPrice;

    @Column(nullable = false)
    @Enumerated(EnumType.STRING)
    private DeliveryType deliveryType;

    @Column(nullable = false)
    @Enumerated(EnumType.STRING)
    private OrderType orderType;

    @Column(nullable = false)
    @Enumerated(EnumType.STRING)
    private OrderStatus orderStatus;

    @OneToOne
    @JoinColumn(name = "payment_id", unique = true)
    private Payment payment;

    @OneToOne
    @JoinColumn(name = "delivery_address_id", unique = true)
    private DeliveryAddress deliveryAddress;

    public Order(Long totalPrice, DeliveryType deliveryType, OrderType orderType,
        OrderStatus orderStatus) {
        this.totalPrice = totalPrice;
        this.deliveryType = deliveryType;
        this.orderType = orderType;
        this.orderStatus = orderStatus;
    }
}
@Getter
@Entity
@Table(name = "p_payment")
@NoArgsConstructor
public class Payment extends BaseEntity {
@Id
@GeneratedValue(strategy = GenerationType.UUID)
private UUID id;
@Column(nullable = false)
private Long amount;
@Column(nullable = false)
@Enumerated(EnumType.STRING)
private PaymentStatus paymentStatus;
@OneToOne(mappedBy = "payment", cascade = CascadeType.REMOVE, orphanRemoval = true, optional = false)
private Order order;
public Payment(PaymentStatus paymentStatus, Long amount) {
this.paymentStatus = paymentStatus;
this.amount = amount;
}
}public interface OrderRepository extends JpaRepository<Order, UUID> {
}테스트를 수행할 Entity와 Repository를 구현해줍니다.
테스트
@ActiveProfiles("test")
@DataJpaTest
@TestPropertySource(locations = "classpath:application-test.yml")
@AutoConfigureTestDatabase(replace = AutoConfigureTestDatabase.Replace.NONE)
public class OrderRepositoryTest {

    @Autowired
    private OrderRepository orderRepository;

    @Test
    @DisplayName("order insert test")
    @Transactional
    void orderInsert() {
        Order order = new Order(10000L, DeliveryType.DELIVERY, OrderType.ONLINE,
            OrderStatus.ORDER_RECEIVED);

        Payment payment = new Payment(PaymentStatus.COMPLETED, 10000L);
        order.setPayment(payment);

        Order savedOrder = orderRepository.save(order);
        assertEquals(order, savedOrder);
        assertEquals(payment, savedOrder.getPayment());
    }
}@ActiveProfiles("test"): profile을 test로 지정해줍니다.@TestPropertySource(locations = "classpath:application-test.yml"): 사용할 설정 파일의 위치를 지정해줍니다.@AutoConfigureTestDatabase(replace = AutoConfigureTestDatabase.Replace.NONE): @DataJpaTest를 사용하면 자동으로 내장 DB를 이용하여 테스트를 수행합니다. 그 대신 우리가 직접 지정한 설정의 H2를 사용해서 테스트를 하기 위해 replace에 None 옵션을 줘서 우리의 설정대로 DataSource를 만들어 Bean에 등록하게 합니다.
💡 @DataJpaTest를 사용하면 어차피 인메모리 DB로 테스트하는데 왜 불필요하게 직접 설정을 할까?
기본 설정으로 만들어진 H2 DB는 저희가 컨트롤 할 수 없습니다.
예를 들어 JPA를 사용 할 때 MySQL이나 PostgreSQL을 사용하냐 등에 따라 데이터 타입이나 columnDefinition, 쿼리 동작 방식등이 미묘하게 다릅니다. 그에 따라 실제 어플리케이션의 동작과 테스트 할 당시의 동작을 완벽하게 일치시키기 위해MODE=PostgreSQL등으로 H2의 모드를 특정시킬 필요성이 있습니다. 추가로 로그나 기타 자잘한 설정들도 처음 설정하는 것이 귀찮지 나중에는 입맛대로 하는 것이 편합니다.
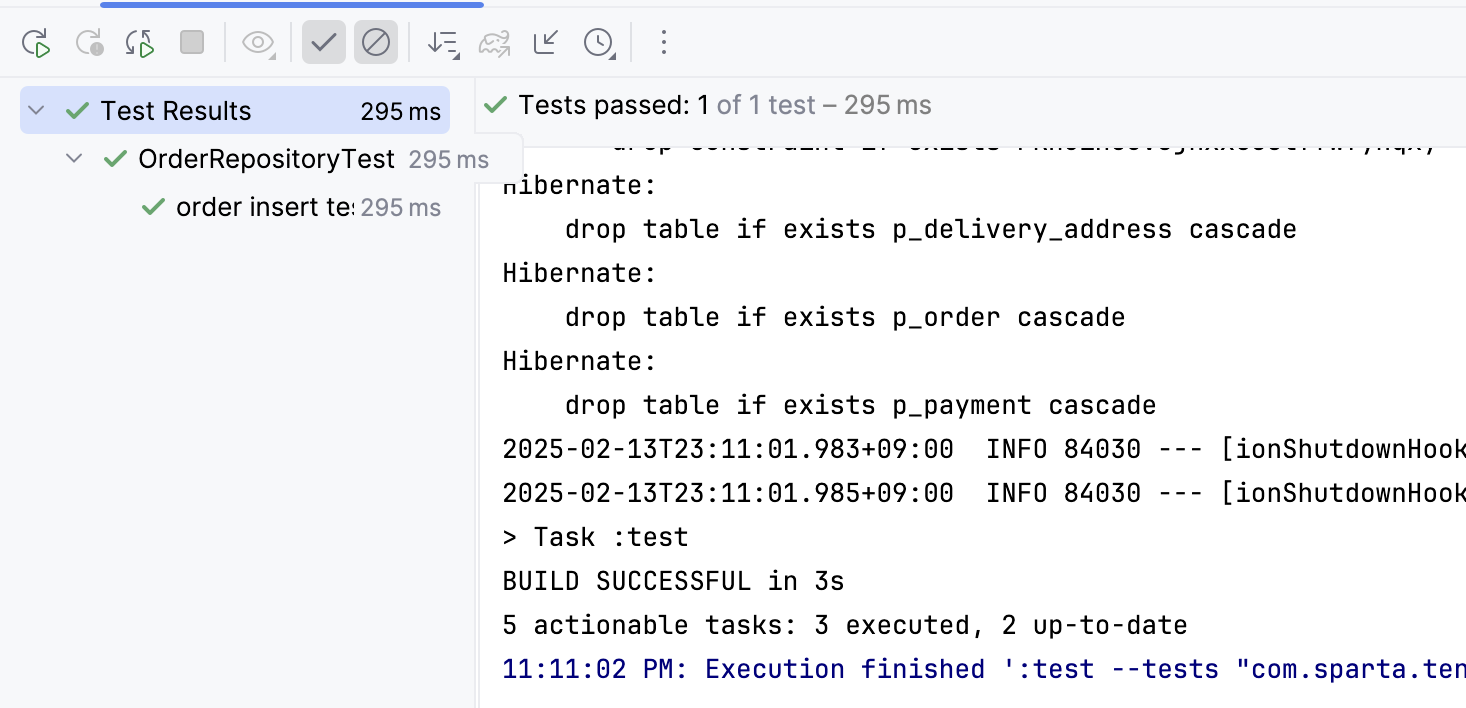
위와 같이 설정을 해주고 돌려주면 테스트를 성공하는 것을 확인할 수 있습니다. 이제 JUnit assert 메소드들을 이용해서 자유롭게 테스트를 작성하면 됩니다!