
1️⃣ StackView 활용
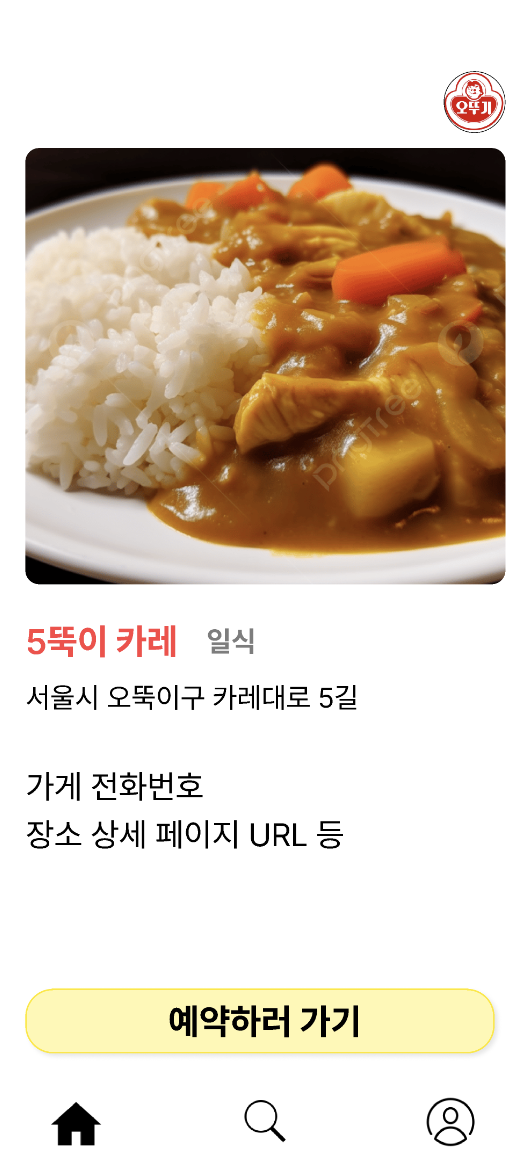
오늘은 CollectionView Cell을 선택했을 때, 상세화면을 띄워주는 View를 개발했다. 화면의 이동은 NavigationController를 사용해서 pushView로 띄웠다.
오늘 이 부분을 개발하면서 어려웠던 부분은. Figma를 사용해서 그린 화면처럼 UI들이 이쁘게 배치가 안된다는 점이였다. storyboard를 사용하면 이런 문제가 없지만, 최근에 코드를 사용해서 UI를 그리는 방법을 알게된 뒤로는 코드로만 작성하고 있었기 때문에 예쁜 화면을 구성하기 어려웠다.
하지만 StackView를 사용하면 AutoLayout을 개별로 설정하지 않고도 어느정도 통일성이 생겨 예쁘게 보이기 때문에 이번 프로젝트에서 View당 3개씩은 사용한것 같다.
"레이아웃을 잡을 때는, 무조건 Stack View부터 쓴다."
"Stack View로 해결할 수 없을 때만, 직접 조건(Constraints)을 설정한다."
라는 문장을 블로그에서 본적이 있다. 그 전에는 왜 이런 말을 작성했는지 이해가 가지 않았지만, 이렇게 레이아웃을 예쁘게 하려고 보니 왜 저 말이 맞는 말인지 깨닫게 되었다.
private func setBottomUIStackView() {
        view.addSubview(bottomUIStackView)
        bottomUIStackView.axis = .horizontal
        bottomUIStackView.distribution = .equalSpacing
        bottomUIStackView.isLayoutMarginsRelativeArrangement = true
        bottomUIStackView.directionalLayoutMargins = NSDirectionalEdgeInsets(top: 0, leading: 39, bottom: 0, trailing: 39)

        homeButton.setImage(homeImage, for: .normal)
        searchButton.setImage(searchImage, for: .normal)
        myInfoButton.setImage(myInfoImage, for: .normal)

        bottomUIStackView.addArrangedSubview(homeButton)
        bottomUIStackView.addArrangedSubview(searchButton)
        bottomUIStackView.addArrangedSubview(myInfoButton)

        bottomUIStackView.translatesAutoresizingMaskIntoConstraints = false
        NSLayoutConstraint.activate([
            bottomUIStackView.heightAnchor.constraint(equalToConstant: 40),
            bottomUIStackView.bottomAnchor.constraint(equalTo: view.safeAreaLayoutGuide.bottomAnchor),
            bottomUIStackView.leadingAnchor.constraint(equalTo: view.safeAreaLayoutGuide.leadingAnchor),
            bottomUIStackView.trailingAnchor.constraint(equalTo: view.safeAreaLayoutGuide.trailingAnchor)
        ])

        searchButton.addTarget(self, action: #selector(self.searchButtonTapped), for: .touchUpInside)
        myInfoButton.addTarget(self, action: #selector(self.myInfoButtonTapped), for: .touchUpInside)
    }
개발자