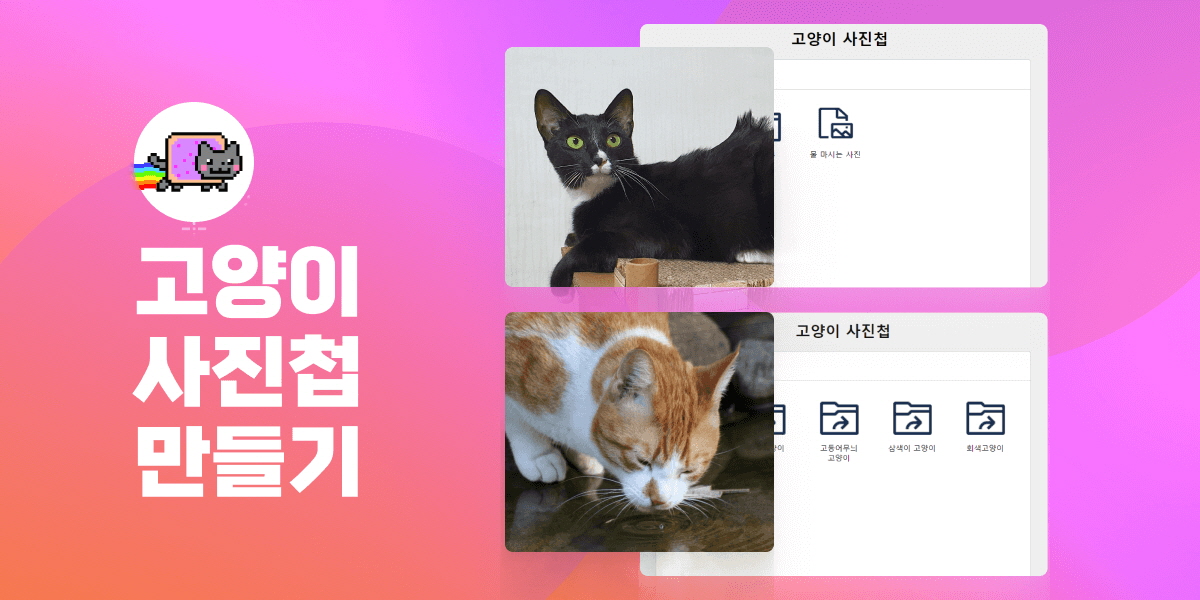
고양이 사진첩 만들기 풀이 3편
마지막편인 이번편에서는 가산점 및 옵션 구현사항에 대한 풀이를 진행해보겠습니다.
옵션 구현사항 풀이
옵션 구현사항
BreadCrumb에 렌더링 된 경로 목록의 특정 아이템을 클릭하면, 해당 경로로 이동하도록 처리합니다.
- 파일을 클릭하여 이미지를 볼 때 ESC를 누르거나 사진 영역 밖을 클릭한 경우 이미지를 닫아야합니다.
- 데이터가 로딩 중인 경우 로딩중임을 알리는 UI적 처리 및 로딩 중 디렉토리 이동이나 파일 클릭등의 액션이 일어나지 않도록 막아야 한다.
- 로딩된 데이터는 메모리에 캐시하고 이미 탐색한 경로를 다시 탐색할 경우 http 요청없이 캐시된 데이터를 불러와 렌더링 해야한다.
BreadCrumb 클릭이벤트 구현
먼저 App컴포넌트에서 BreadCrumb로 onClick이란 이름의 콜백함수를 전달합니다.
App.js
        this.breadCrumb = new Breadcrumb({
            $app,
            initialState: this.state.path,
            onClick: target => {
                const targetId = target.dataset.id;
                const currentNode = this.state.path[this.state.path.length-1];

                if(targetId !== currentNode.id) {
                    const targetIndex = parseInt(target.dataset.index);
                    const path = [...this.state.path];
                    path.splice(targetIndex + 1);

                    this.setState({
                        ...this.state,
                        items: this.cache[targetId],
                        isRoot: path.length === 1 ? true : false,
                        path
                    });
                }
            }
        });
BreadCrumb가 클릭됬을 때 해당 아이템의 id값이 있어야 알맞는 디렉토리로 이동할 수 있기 때문에 렌더링시 dataset의 id속성을 추가해줍니다.
BreadCrumb.js
export default class Breadcrumb {
    constructor({ $app, initialState, onClick }) {
        this.state = initialState;

        this.target = document.createElement("nav");
        this.target.className = "Breadcrumb";
        this.target.addEventListener("click", e => {
            if (e.target.dataset.id) {
                onClick(e.target);
            }
        });

=================================================

    render() {
        this.target.innerHTML = `
            ${this.state.map(({name, id}, index) => {
                return `<div data-id=${id} data-index=${index}>${name}</div>`;
            }).join("")}
        `;
    }
}
이벤트리스너 로직 내부에서는 이벤트의 타겟이 dataset.id를 가지고 있는지 확인하고 id가 있다면 onClick 함수를 호출하면서 타겟요소를 인자로 넘겨줍니다.
모달 닫기 이벤트 추가
ImageView에서는 selectedImage의 값을 기준으로 모달을 열고 닫기 때문에
selectedImage의 값을 null로 변경하는 onClick 함수를 App컴포넌트에서 ImageView컴포넌트로 전달합니다.
App.js
this.imageView = new ImageView({
	$app,
	initialState: this.state.selectedImage,
	onClick: () => {
		this.setState({
			...this.state,
			selectedImage: null
            });
	}
});
ImageView에서는 matches 메소드를 이용하여 타겟의 클래스가 ImageViewer인지 확인합니다.
사진 내부에서는 div 혹은 img태그가 타겟이되고 사진의 외부에서는 ImageViewer 요소가 타겟이되기 때문에 이를 판별한 후 맞다면 onClick 함수를 호출합니다.
ImageView.js
export default class ImageView {
    constructor({ $app, initialState, onClick }) {
        this.state = initialState;

        this.target = document.createElement("div");
        this.target.className = "Modal ImageViewer";
        this.target.addEventListener("click", e => {
            if (e.target.matches(".ImageViewer")) {
                onClick();
            }
        });
ESC 키보드 이벤트의 경우 body에 이벤트를 등록해야하기 때문에 App컴포넌트에서 body요소에 이벤트를 추가합니다.
이는 App컴포넌트의 constructor 내부에서 이루어집니다.
App.js
export default class App {
    constructor($app) {
		const body = document.querySelector("body");
		body.addEventListener("keyup", e => {
			if(e.key === "Escape" && this.state.selectedImage) {
				this.setState({
					...this.state,
					selectedImage: null
				});
			}
		});
로딩 UI처리 및 액션 막기
데이터가 로딩 중인 경우 로딩중임을 알리는 UI 처리를 하기 위해서 로딩스피너 역할을 할 Loading이라는 컴포넌트를 새로 생성합니다.
또한 App 컴포넌트에서 로딩중임을 알려줄 수 있는 isLoading이라는 state를 새로 생성하여 이 컴포넌트에 전달해줍니다.
App.js
export default class App {
    constructor($app) {
        this.state = {
            items: [],
            path: [],
            selectedImage: null,
            isRoot: true,
            isLoading: false
        };

		this.loading = new Loading({
            $app,
            initialState: this.state.isLoading
        });

}
Loading컴포넌트에서는 isLoading을 state로 받으면서 해당 값이 true일 때만 렌더링되도록 작성하고 이 컴포넌트의 컨테이너가 화면 전체를 덮기 때문에 로딩 중일 경우 유저가 다른 부분을 클릭할 수 없습니다.
Loading.js
export default class Loading {
    constructor({ $app, initialState }) {
        this.state = initialState;

        this.target = document.createElement("div");
        this.target.className = "Modal Loading";
        this.target.innerHTML = `<div class="content"><img src="./assets/nyan-cat.gif"></div>`;

        $app.appendChild(this.target);

        this.render();
    }

    setState(nextState) {
        this.state = nextState;
        this.render();
    }

    render() {
        this.state
        ? this.target.style.visibility = "visible"
        : this.target.style.visibility = "hidden";
    }
}
이후 App컴포넌트 내부에서 데이터를 받아오는 로직이 포함되어 있는 init함수와
Nodes의 onClick함수의 로직 내부에서 isLoading 값이 수정되도록 변경해줍니다.
App.js
this.nodes = new Nodes({

==================================

    onClick: async (target) => {
        if (target.dataset.type === "DIRECTORY") {
            this.setState({
                ...this.state,
                isLoading: true
            });

            const name = target.innerText;
            const id = target.dataset.id;
            let data;

            const path = [...this.state.path];
            path.push({name, id});

            if (this.cache[id]) {
                data = this.cache[id]
            } else {
                data = await request(id);
                this.cache[id] = data;
            }

            this.setState({
                ...this.state,
                items: data,
                isRoot: false,
                isLoading: false,
                path
            });
        } else if(target.dataset.type === "FILE") {
            this.setState({
                ...this.state,
                selectedImage: target.dataset.src
            });
        } else {}
    }
});


========================================

init = async () => {
    this.setState({
        ...this.state,
        isLoading: true
    });

    const data = await request();

    if (data) {
        this.setState({
            ...this.state,
            items: data,
            path: [{
                name: "root",
                id: 0
            }],
            isRoot: true,
            isLoading: false
        });
    }
}
로딩된 데이터 캐싱하기
http 요청없이 데이터를 가져와야 하기 때문에 App 컴포넌트 내부에 cache라는 객체를 만들어서 id: items형태로 저장하겠습니다.
이렇게 하면 cache.id 형태로 특정 데이터에 쉽게 접근할 수 있습니다.
위에서와 마찬가지로 init과 Nodes의 onClick함수에서만 새로운 아이템을 받아오기 때문에 해당 로직들에만 setState 이후에 캐시 데이터를 저장하고 만약 이미 데이터가 있다면 기존 캐시값을 사용할 수 있는 로직을 추가하겠습니다.
App.js
// constructor 내부
this.cache = {};


// nodes onClick
onClick: async (target) => {
    if (target.dataset.type === "DIRECTORY") {
        this.setState({
            ...this.state,
            isLoading: true
        });

        const name = target.innerText;
        const id = target.dataset.id;
        let data;

        const path = [...this.state.path];
        path.push({name, id});

		// cache 확인
        if (this.cache[id]) {
            data = this.cache[id]
        } else {
            data = await request(id);
            this.cache[id] = data;  // 데이터를 새로 받아온 경우 캐시에 저장
        }

        this.setState({
            ...this.state,
            items: data,
            isRoot: false,
            path
        });
        this.setState({
            ...this.state,
            isLoading: false
        });
    } else if(target.dataset.type === "FILE") {
        this.setState({
            ...this.state,
            selectedImage: target.dataset.src
        });
    } else {}
}

// init

init = async () => {
    this.setState({
        ...this.state,
        isLoading: true
    });

    const data = await request();

    if (data) {
        this.setState({
            ...this.state,
            items: data,
            path: [{
                name: "root",
                id: 0
            }],
            isRoot: true,
        });
        this.cache[0] = data;  // 캐시에 저장
    }
    this.setState({
        ...this.state,
        isLoading: false
    });
}
이 외의 디렉토리를 이동하는 역할을 하는 Nodes의 onBackClick함수와 BreadCrumb의 onClick 함수에서 api와 직접 소통하지 않고 캐시된 데이터에 접근하도록 합니다.
this.breadCrumb = new Breadcrumb({
    $app,
    initialState: this.state.path,
    onClick: target => {
        const targetId = target.dataset.id;
        const currentNode = this.state.path[this.state.path.length-1];

        if(targetId !== currentNode.id) {
            const targetIndex = parseInt(target.dataset.index);
            const path = [...this.state.path];
            path.splice(targetIndex + 1);

            this.setState({
                ...this.state,
                items: this.cache[targetId], // 캐시된 데이터에 접근
                isRoot: path.length === 1 ? true : false,
                path
            });
        }
    }
});

// Nodes

onBackClick: () => {
    const path = [...this.state.path];
    path.pop();
    const { id } = path[path.length-1];
    this.setState({
        ...this.state,
        items: this.cache[id],  // 캐시된 데이터에 접근
        isRoot: path.length === 1 ? true : false,
        path
    });
}
가산점 항목
- ES6 모듈 형태로 작성시 가산점
- API 호출 시 async, await문을 사용한 경우 가산점
- API 호출 중 에러가 발생했을 때 처리한 경우 가산점
- 의존성이 느슨한 구조로 작성한 경우 가산점
- 오류가 발생했음을 사용자에게 인지 시킨 경우 가산점
1편에서도 말씀드렸듯이 async와 await은 api통신 때문에 기본적으로 적용해오며 진행하였습니다.
에러가 발생했을 때를 처리한 경우
에러 처리는 try-catch문을 사용하여 진행하였습니다.
api의 request함수와 App.js에서 api와 통신하는 init함수, Nodes의 onClick함수에 try-catch문을 적용해줍니다.
api.js
export const request = async (nodeId) => {
    const targetURL = nodeId ? `${END_POINT}/${nodeId}` : END_POINT;
    try {
        const res = await fetch(targetURL);

        if (res.ok) {
            return res.json();
        }
    } catch (e) {
        throw e;
    }
}
App.js
// nodes onClick
onClick: async (target) => {
    if (target.dataset.type === "DIRECTORY") {
        this.setState({
            ...this.state,
            isLoading: true
        });

        const name = target.innerText;
        const id = target.dataset.id;
        let data;

        try {
            const path = [...this.state.path];
            path.push({name, id});

            if (this.cache[id]) {
                data = this.cache[id]
            } else {
                data = await request(id);
                this.cache[id] = data;
            }

            this.setState({
                ...this.state,
                items: data,
                isRoot: false,
                path
            });
        } catch (e) {
            alert("에러가 발생했습니다.");
            throw new Error(`에러가 발생했습니다. ${e.message}`);
        } finally {
            this.setState({
                ...this.state,
                isLoading: false
            });
        }
    } else if(target.dataset.type === "FILE") {
        this.setState({
            ...this.state,
            selectedImage: target.dataset.src
        });
    } else {}
}

===========================================

// init 함수
    init = async () => {
        this.setState({
            ...this.state,
            isLoading: true
        });

        try {
            const data = await request();

            if (data) {
                this.setState({
                    ...this.state,
                    items: data,
                    path: [{
                        name: "root",
                        id: 0
                    }],
                    isRoot: true,
                });
                this.cache[0] = data;
            }
        } catch (e) {
            alert("에러가 발생했습니다.");
            throw new Error(`에러가 발생했습니다. ${e.message}`);
        } finally {
            this.setState({
                ...this.state,
                isLoading: false
            });
        }
    }
여기까지 고양이 사진첩 만들기 과제에 대한 풀이였습니다.
전체 코드는 저의 깃허브에 저장소에 올라가 있으니 필요하다면 참고해주세요.