이 글은 사이드 프로젝트에서 알림 기능을 구현해보면서, FCM을 활용해 iOS 앱에 푸시 알림 기능을 구현하는 과정을 설명한 글입니다.
iOS 알림을 보내는 방법
iOS에서 알림을 보내는 방법은 크게 두 가지가 있습니다.
첫 번째, Local Notifications(로컬 알림)이 있습니다. 로컬 알림은 앱 내부에서 직접 트리거 되며, 특정 시간에 알림을 보내고 싶을 때 사용합니다. 인터넷 연결이 필요가 없고, 사용자가 정한 시간이나 이벤트에 맞춰 알림을 보낼 수 있습니다.
두 번째, Push Notifications(서버에서 보내는 알림)이 있습니다. 여기서 작게 두가지 방법으로 나뉩니다. 하나는 APNs(Apple Push Notification Service)가 있습니다. APNs는 Apple이 제공하는 푸시 알림 서비스로 Apple에 제공하는 모든 기능에 최적화 되어있는 서비스라고 할 수 있습니다. 두 번째는 FCM(Firebase Cloud Messaging)이 있습니다. FCM은 Google에서 제공하는 푸시 알림 서비스로 멀티플랫폼도 가능하며, APNs를 통해 iOS에 알림을 보내지만, 자체적인 푸시 알림 관리 인터페이스와 기능을 제공합니다.
이 방법 중에서 팀원들과 논의한 결과, 안드로이드의 개발 가능성도 있기 때문에 FCM을 사용해서 해보려고 합니다.
1단계: APNs 키 발급하기
-
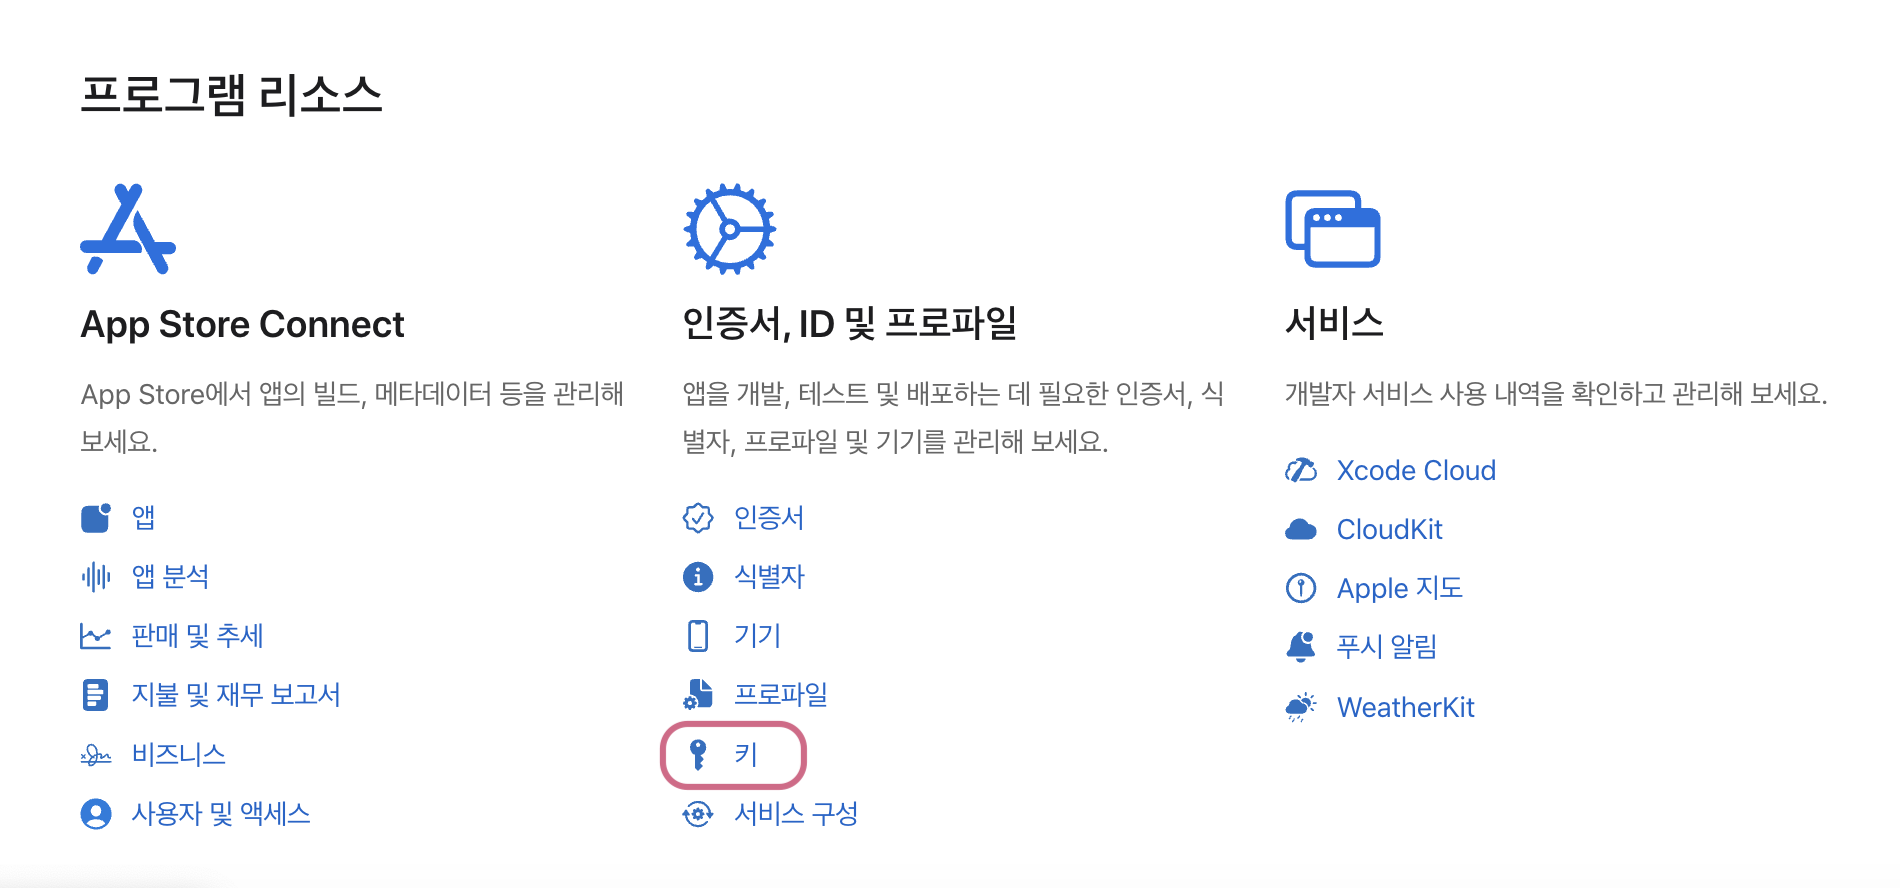
Key 발급을 위해 developer/account 에서 키에 들어가줍니다.
-
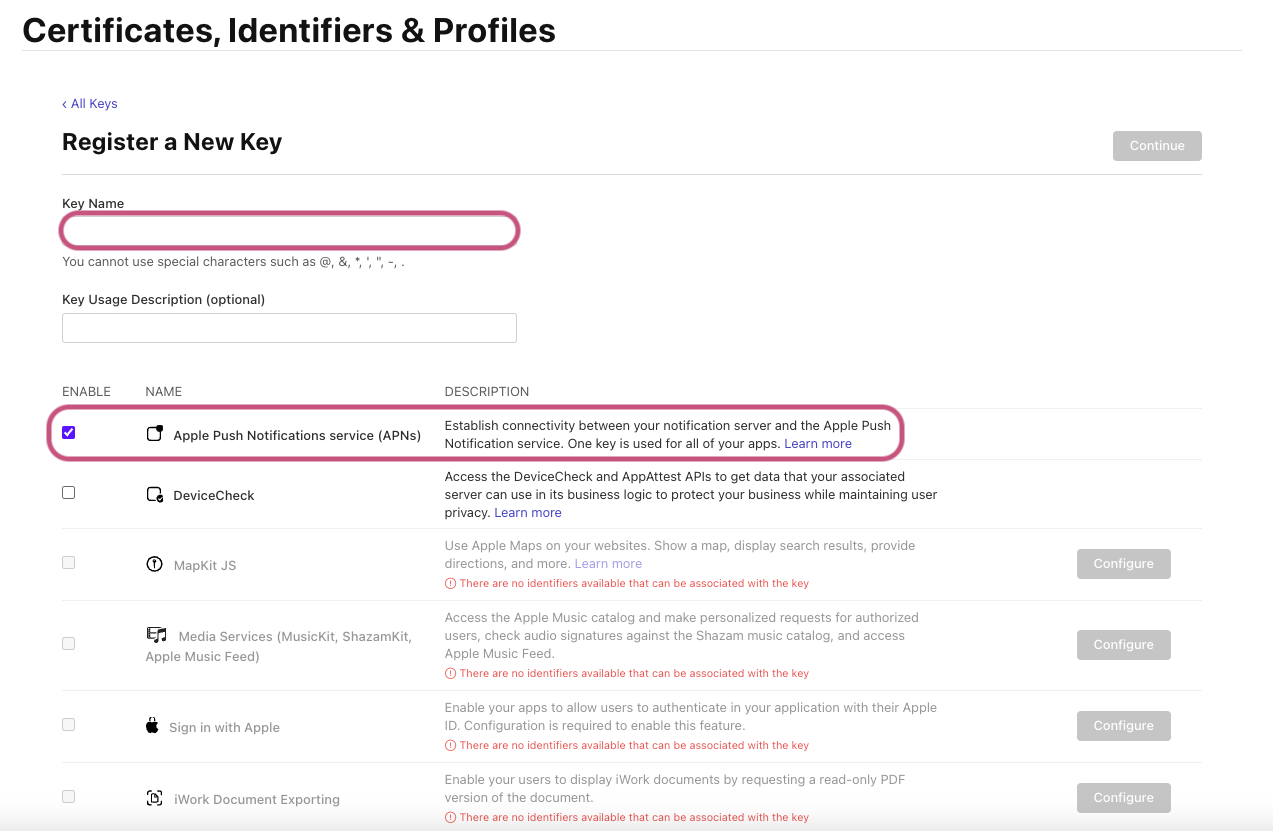
Create a key 버튼을 눌러 키를 생성합니다.

-
Key Name을 작성하고 APNs의 ENABLE에 체크합니다.
-
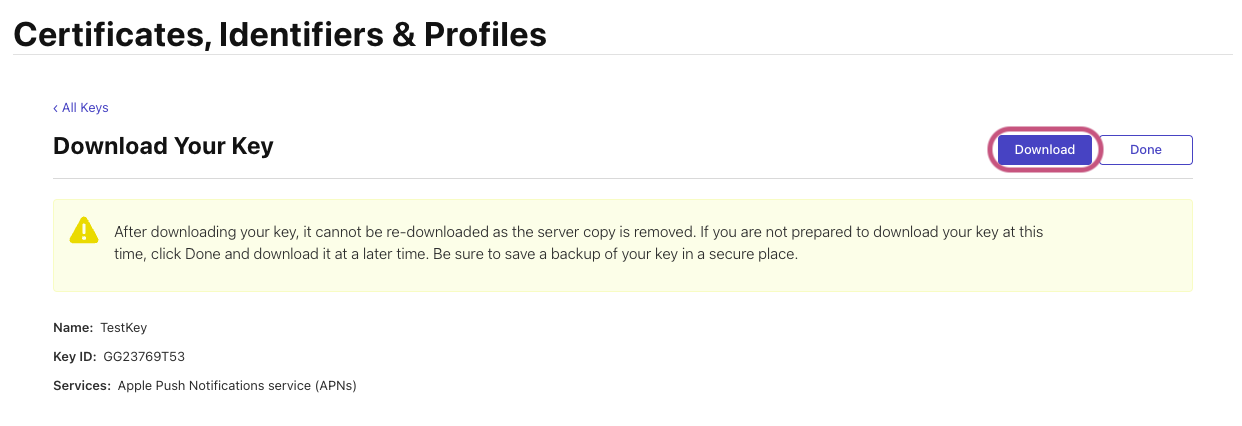
단계를 넘어가면 Download 클릭해서 다운로드를 합니다. (보관에 주의!)
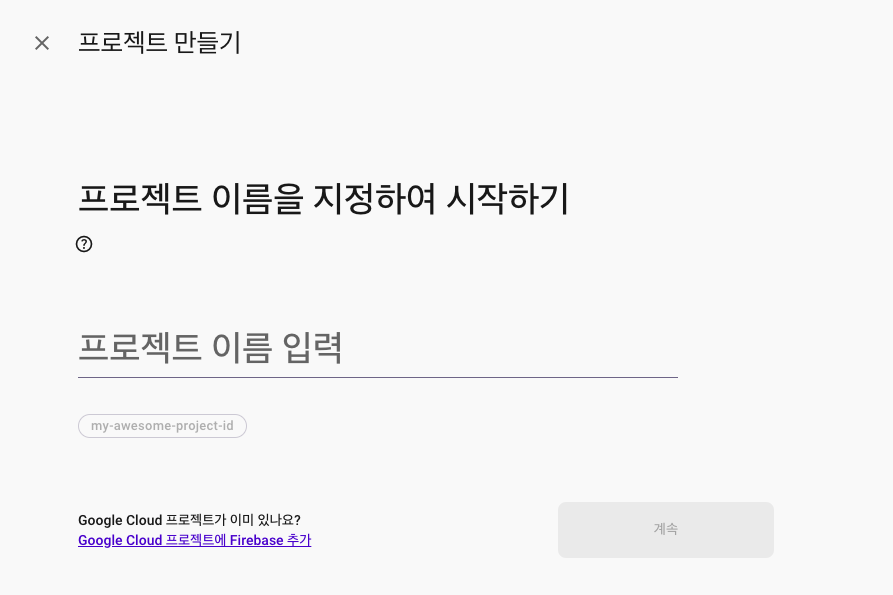
2단계: Firebase 설정하기
-
Firebase에 기존 프로젝트가 없다면, 새 프로젝트를 생성합니다.
-
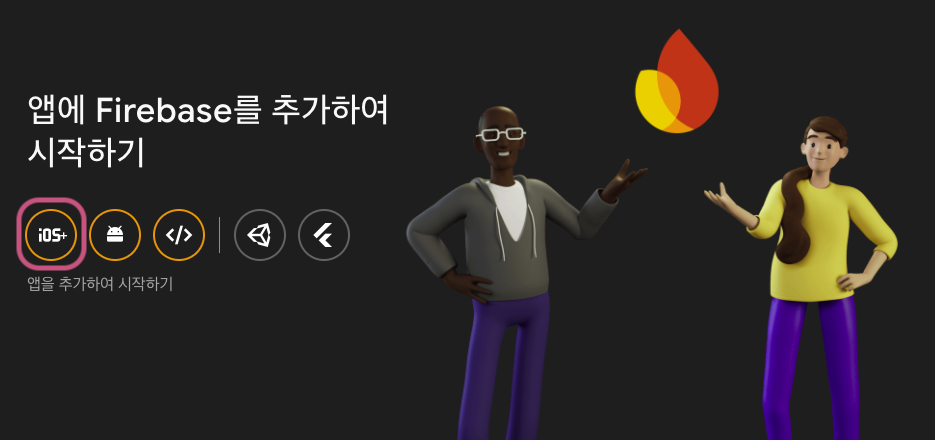
iOS버튼을 클릭하여 앱을 추가합니다.
-
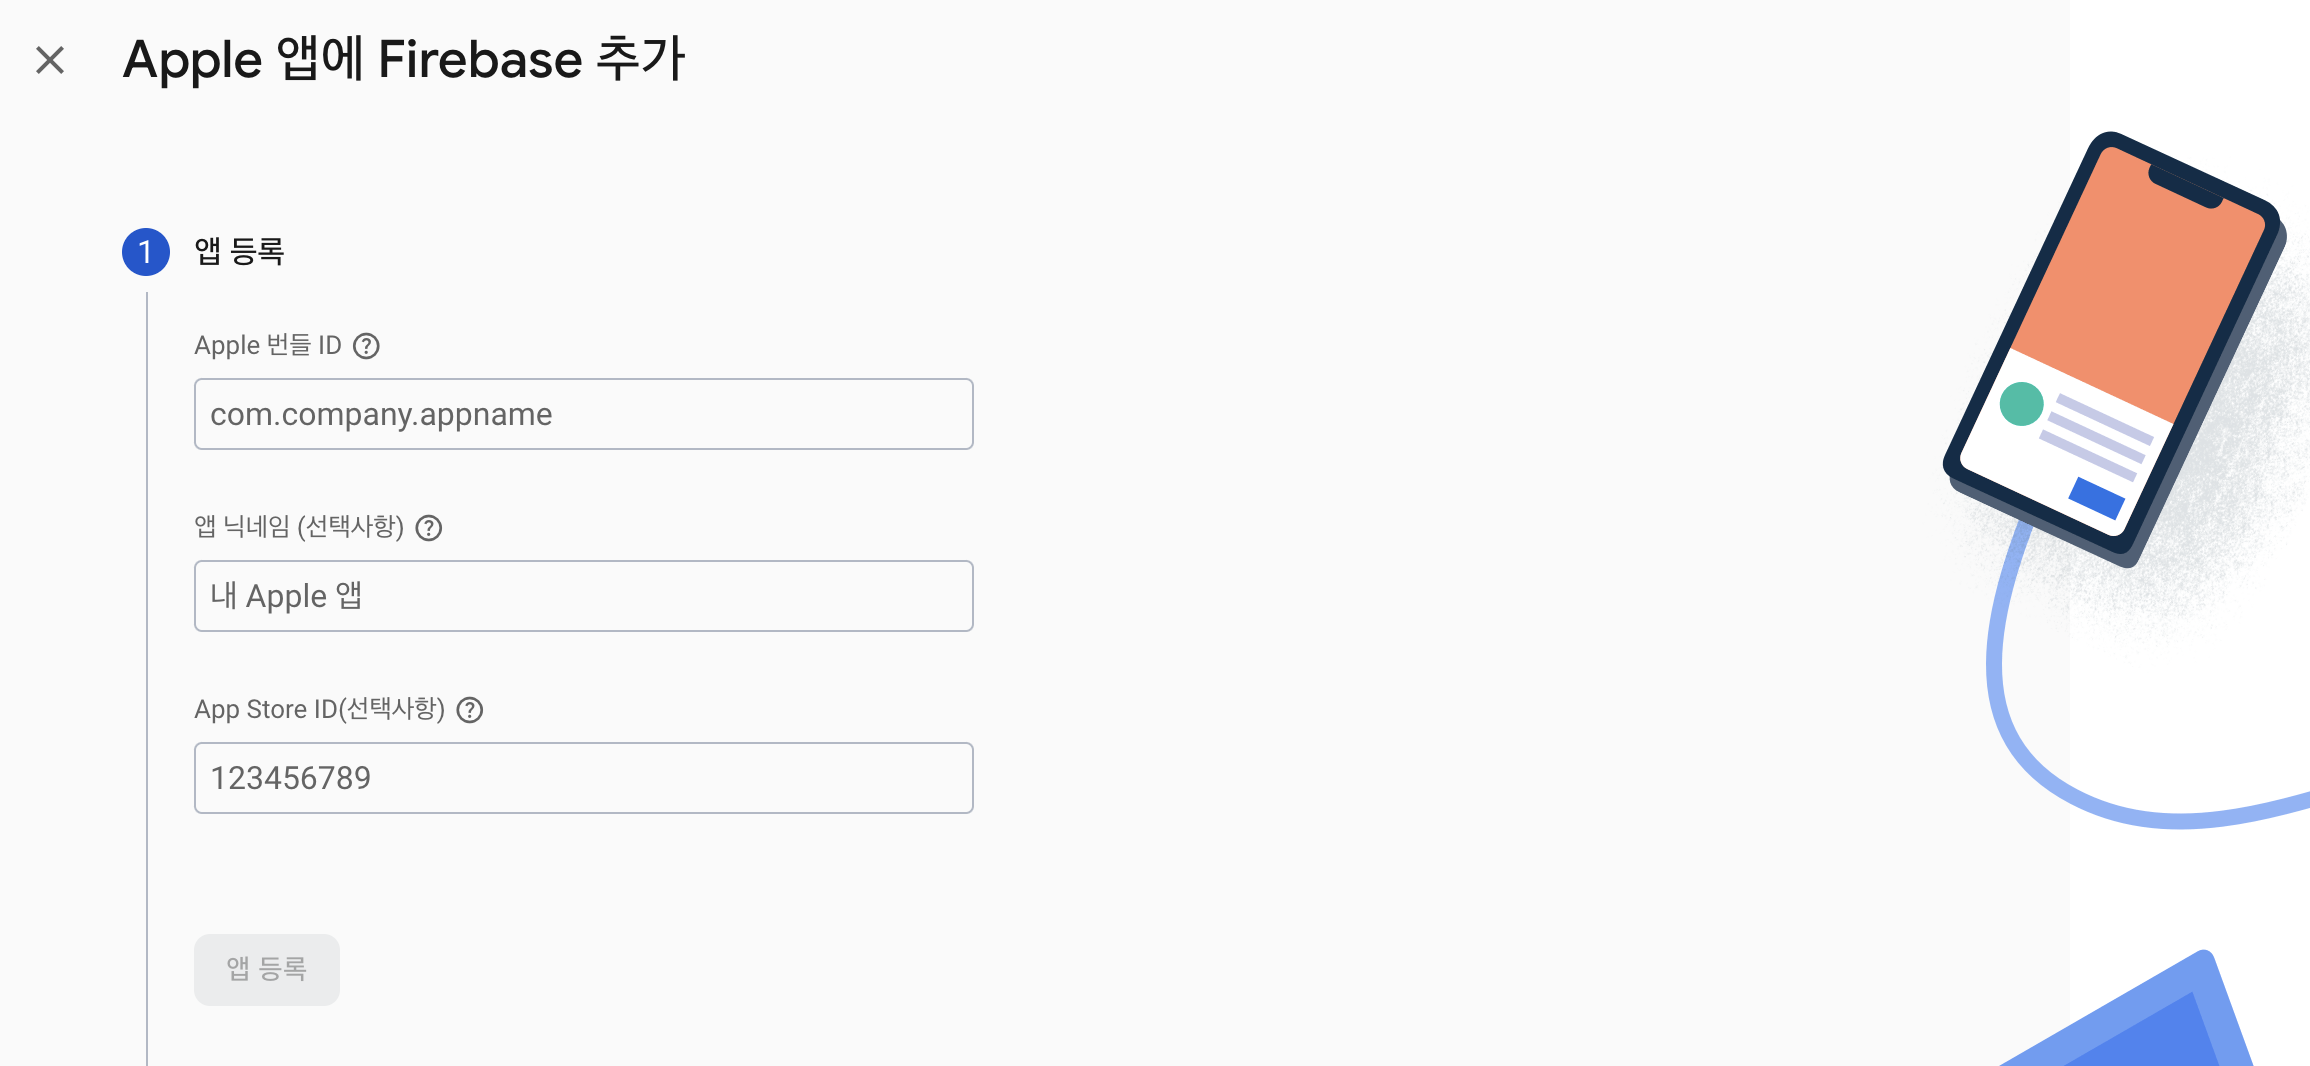
Apple 번들 ID와 프로젝트 번들 ID를 일치시킨 후 안내대로 따라갑니다.
-
프로젝트 설정 > 클라우드 메시징 > APNs 인증키 업로드를 합니다.
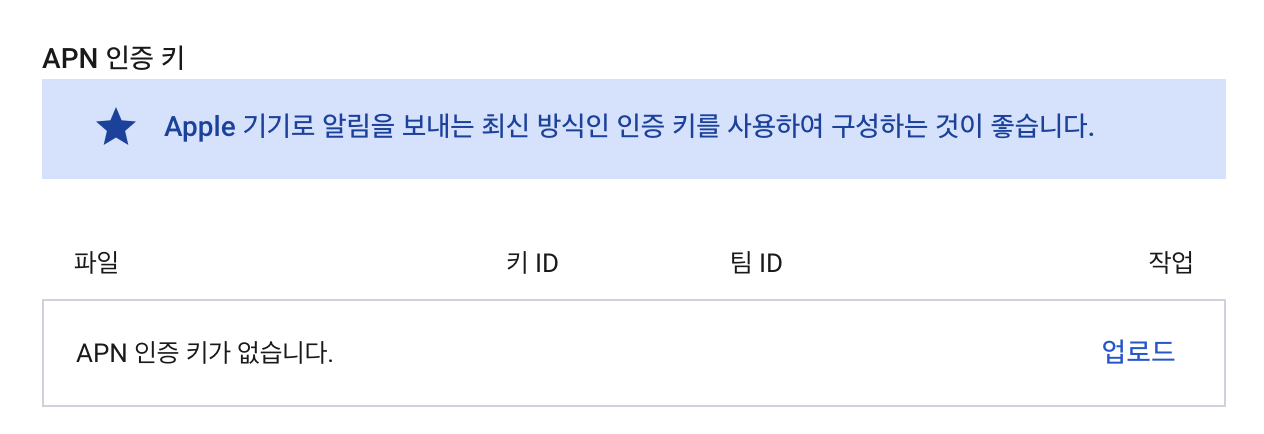

APNs 인증키는 developer에서 받았던 키를 넣어주고
키 ID는 developer > Certificates, Identifiers & Profiles에서 확인하고
팀 ID는 developer > Membership에서 확인하면 됩니다.
3단계: Xcode 설정하기
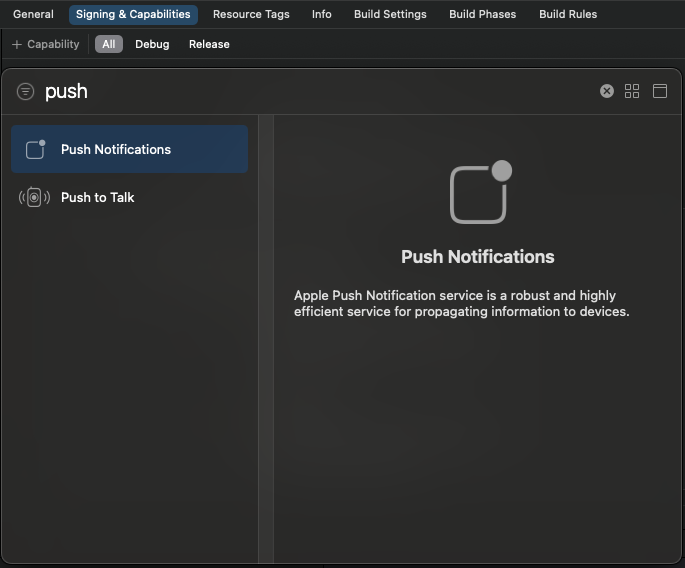
- Xcode project > Signing & Capabilities > + Capabability 클릭하여 Push Notifications을 추가합니다.
- AppDelegate의
application(_:didFinishLaunchingWithOptions:)메서드에서 FirebaseApp 공유 인스턴스를 구성해줍니다.
import UIKit
import FirebaseCore

func application(_ application: UIApplication, didFinishLaunchingWithOptions launchOptions: [UIApplication.LaunchOptionsKey: Any]?) -> Bool {
	FirebaseApp.configure() // 초기화 코드 추가
    return true
}
SwiftUI를 사용하는 경우에는 앱 대리자를 만들고 UIApplicationDelegateAdaptor 또는 NSApplicationDelegateAdaptor를 통해 App 구조체에 연결해야 합니다.
@main
struct YourApp: App {
  // register app delegate for Firebase setup
  @UIApplicationDelegateAdaptor(AppDelegate.self) var delegate

  var body: some Scene {
    WindowGroup {
      NavigationView {
        ContentView()
      }
    }
  }
}
- 애플리케이션이 시작될 때 또는 적절한 시점에 원격 알림에 앱을 등록합니다. 다음과 같이
registerForRemoteNotifications를 호출합니다.
UNUserNotificationCenter.current().delegate = self

let authOptions: UNAuthorizationOptions = [.alert, .badge, .sound]
UNUserNotificationCenter.current().requestAuthorization(
  options: authOptions,
  completionHandler: { _, _ in }
)

application.registerForRemoteNotifications()- 등록 토큰을 수신하기 위해 메시지를
application(_:didFinishLaunchingWithOptions:)메서드에 설정합니다.
Messaging.messaging().delegate = self- 빌드 후에 콘솔 창의 FCM 토큰을 복사해둡니다.
전체 Appdelegate 코드
import UIKit
import FirebaseCore
import FirebaseMessaging

@main
class AppDelegate: UIResponder, UIApplicationDelegate {


    func application(_ application: UIApplication, didFinishLaunchingWithOptions launchOptions: [UIApplication.LaunchOptionsKey: Any]?) -> Bool {
        FirebaseApp.configure() // 초기화 코드 추가

        UNUserNotificationCenter.current().delegate = self

        let authOptions: UNAuthorizationOptions = [.alert, .badge, .sound]
        UNUserNotificationCenter.current().requestAuthorization(
            options: authOptions,
            completionHandler: { _, _ in }
        )

        application.registerForRemoteNotifications()

        Messaging.messaging().delegate = self

        return true
    }

    // MARK: UISceneSession Lifecycle

    func application(_ application: UIApplication, configurationForConnecting connectingSceneSession: UISceneSession, options: UIScene.ConnectionOptions) -> UISceneConfiguration {
        // Called when a new scene session is being created.
        // Use this method to select a configuration to create the new scene with.
        return UISceneConfiguration(name: "Default Configuration", sessionRole: connectingSceneSession.role)
    }

    func application(_ application: UIApplication, didDiscardSceneSessions sceneSessions: Set<UISceneSession>) {
        // Called when the user discards a scene session.
        // If any sessions were discarded while the application was not running, this will be called shortly after application:didFinishLaunchingWithOptions.
        // Use this method to release any resources that were specific to the discarded scenes, as they will not return.
    }
}

extension AppDelegate: UNUserNotificationCenterDelegate {

}

extension AppDelegate: MessagingDelegate {
    func messaging(_ messaging: Messaging, didReceiveRegistrationToken fcmToken: String?) {
      print("Firebase registration token: \(String(describing: fcmToken))")

      let dataDict: [String: String] = ["token": fcmToken ?? ""]
      NotificationCenter.default.post(
        name: Notification.Name("FCMToken"),
        object: nil,
        userInfo: dataDict
      )
      // TODO: If necessary send token to application server.
      // Note: This callback is fired at each app startup and whenever a new token is generated.
    }
}
4단계: Test 하기
-
대상 기기에 앱을 설치하고 실행합니다. Apple 기기에서는 원격 알림을 수신할 수 있는 권한 요청을 수락 버튼을 눌러야 합니다.
-
앱을 기기 백그라운드 상태로 만듭니다.
-
Firebase Console에서 메시지 페이지를 열고 프로젝트를 선택합니다.
-
첫 번째 메시지인 경우 첫 번째 캠페인 만들기를 선택합니다.
-
Firebase 알림 메시지를 선택하고 만들기를 선택합니다.

-
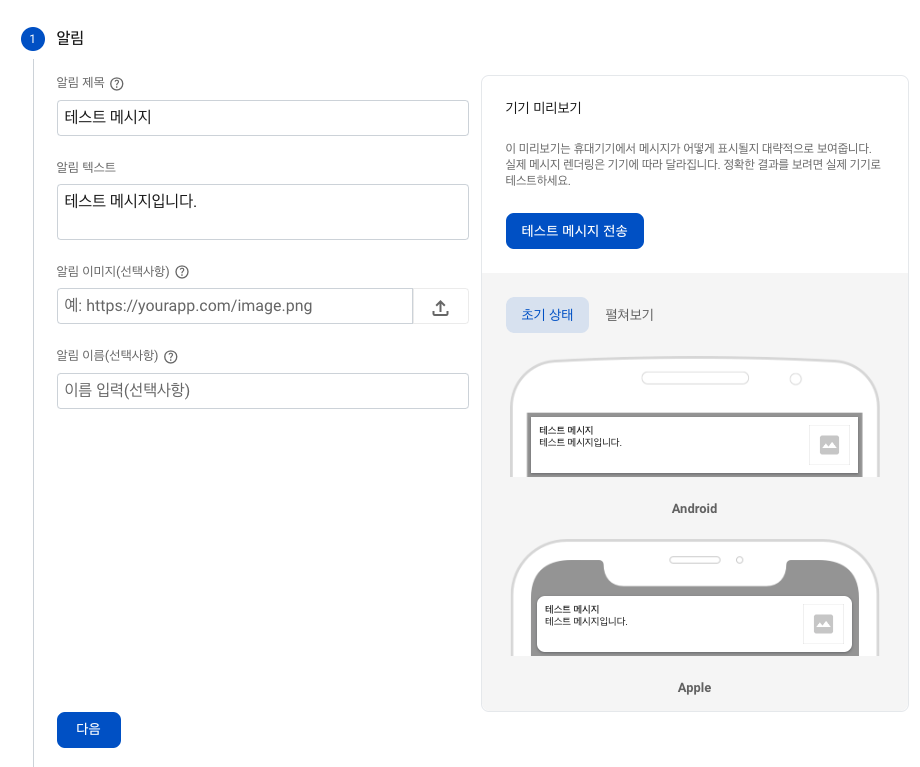
보낼 알림의 제목, 텍스트를 작성하고 테스트 메시지 전송을 클릭합니다.
-
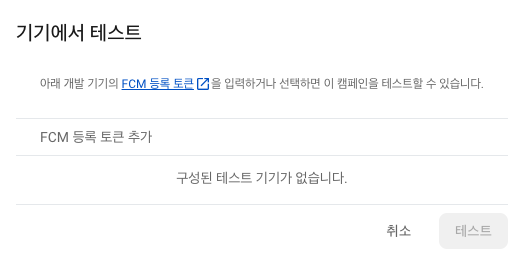
FCM 등록 토큰 추가 필드에 아까 복사해둔 FCM 토큰을 입력합니다.
-
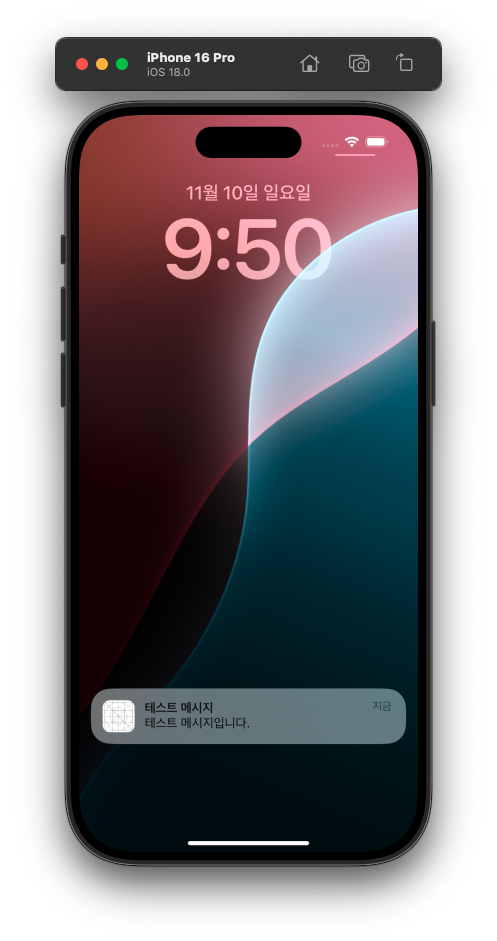
다음을 누르고 안내대로 하면 이렇게 테스트 메시지가 옵니다!!
마무리
APNs 키 설정부터 Firebase 연동, FCM 토큰 수신, 테스트 메시지 전송까지 각 단계를 진행하면서 조금이나마(?) 푸시 알림의 작동 원리를 이해할 수 있었습니다. 추후에는 실시간 데이터를 활용하거나 특정 사용자 그룹을 대상으로 알림을 보내는 등 더욱 발전된 기능을 써보려고 합니다.
