Deeplearning - chapter5

머신러닝의 기본요소
MNIST에 백색 잡음 픽셀과 0 픽셀을 추가하기
(train_images, train_labels), _ = mnist.load_data()
train_images = train_images.reshape((60000, 28 * 28))
train_images = train_images.astype("float32")- mnist.loaddata() 함수를 사용하여 MNIST 데이터셋을 로드합니다. 이때, 변수는 로드된 데이터셋 중 검증 데이터셋을 나타냅니다.
. 이 예제에서는 검증 데이터셋을 사용하지 않기 때문에 _ 변수로 무시합니다.
-
train_images 배열을 28x28 크기의 이미지 데이터를 784차원 벡터로 변환합니다. 이를 위해 reshape() 함수를 사용
-
train_images 배열의 값을 0과 1 사이의 값으로 정규화합니다. astype() 함수를 사용하여 배열의 데이터 타입을 float32로 변환한 뒤, 255로 나누어서 정규화합니다.
백색 잡음과 0을 추가한 MNIST 데이터에서 모델 훈련하기
def get_model():
    model = keras.Sequential([
        layers.Dense(512, activation="relu"),
        layers.Dense(10, activation="softmax")
    ])
    model.compile(optimizer="rmsprop",
                  loss="sparse_categorical_crossentropy",
                  metrics=["accuracy"])
    return model
- keras.Sequential()은 층을 순서대로 쌓아 모델을 생성하는 함수입니다.
- loss="sparse_categorical_crossentropy"는 희소한 레이블을 가지는 다중 클래스 분류 문제에 대해 사용되는 손실 함수입니다. 예측값과 실제값 간의 교차 엔트로피(cross-entropy)를 계산하여 손실을 구합니다.
검증 정확도 비교 그래프 그리기
import matplotlib.pyplot as plt-
Matplotlib의 pyplot 모듈을 사용하여 그래프를 그리고 있습니다
-
plt.plot() : 그리기 , plt.show() : 보여주기
랜덤하게 섞은 레이블로 MNIST 모델 훈련하기
random_train_labels = train_labels[:]
np.random.shuffle(random_train_labels)
- np.random.shuffle() : 무작위로 섞어버린다.
model.compile(optimizer="rmsprop",
              loss="sparse_categorical_crossentropy",
              metrics=["accuracy"])
model.fit(train_images, random_train_labels,
          epochs=100,
          batch_size=128,
validation_split=0.2)- model.compile() 함수는 모델의 학습 과정을 설정
손실 함수, 최적화 알고리즘, 평가 지표 등을 지정 - model.fit() 함수는 모델을 학습
입력 데이터와 정답 데이터를 이용하여 모델의 가중치(weight)를 업데이트합니다.
학습 데이터, 검증 데이터, 에포크 수, 배치 크기 등을 설정 - validation_split 을 이용하면, 별도의 검증 데이터를 마련하지 않고도 학습 데이터 중 일부를 검증 데이터로 사용할 수 있으므로, 편리하게 모델을 학습
잘못된 높은 학습률로 MNIST 모델 훈련하기
  model.compile(optimizer=keras.optimizers.RMSprop(1.),
              loss="sparse_categorical_crossentropy",
              metrics=["accuracy"])
- optimizer=keras.optimizers.RMSprop(1.) : 최적화 알고리즘으로 RMSprop을 사용하며, 학습률(learning rate)은 1.0으로 설정됩니다. RMSprop은 기울기의 제곱값에 대한 이동 평균을 이용하여 학습률을 조절하는 최적화 알고리즘입니다.
- RMSprop(1.)------>>>>> .RMSprop(1e-2),
: () 안의 값은 학습률이다 - learning rate
성능이 많이 올랐다 : 30-> 89
loss 값이 줄어든다고 하여 무조건 좋은 것 x - > overfitting될 가능성 0
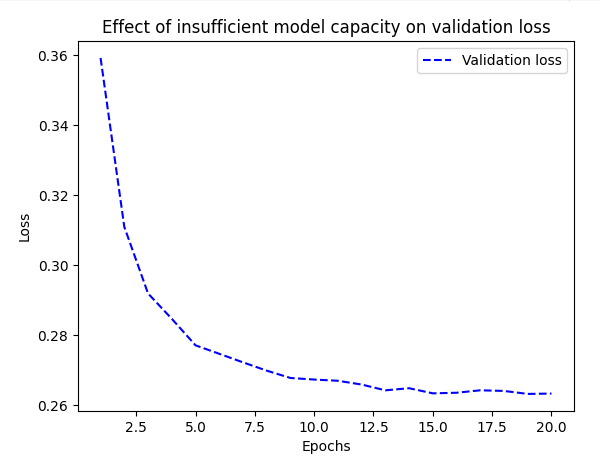
model = keras.Sequential([
	layers.Dense(96,activation=  "relu"),
    layers.Dense(96,activation = "relu"),
layers.Dense(10, activation = "softmax"),])- relu : 비선형성
가중치 규제 추가하기
model = keras.Sequential([
    layers.Dense(16,
                 kernel_regularizer=regularizers.l2(0.002),
                 activation="relu"),
- kernel_regularizer=regularizers.l2(0.002) : Dense 층의 가중치에 L2 규제를 적용합니다. regularizers.l2(0.002)는 L2 규제 객체를 생성하며, 규제 강도(regularization strength)를 0.002로 설정합니다. L2 규제는 가중치의 크기를 제한하여 모델이 과적합되지 않도록 합니다. 이를 통해 모델이 일반화(generalization)되도록 도와줍니다.
케라스에서 사용할 수 있는 가중치 규제
from tensorflow.keras import regularizers
regularizers.l1(0.001)
regularizers.l1_l2(l1=0.001, l2=0.001)
-
regularizers.l1(0.001) : L1 규제 객체를 생성하며, 규제 강도(regularization strength)를 0.001로 설정합니다. L1 규제는 가중치의 절대값을 사용하여 가중치의 크기를 제한하는 방법입니다.
-
regularizers.l1_l2(l1=0.001, l2=0.001) : L1-L2 규제 객체를 생성하며, L1 규제와 L2 규제의 규제 강도를 각각 0.001로 설정합니다. L1-L2 규제는 가중치의 절대값과 제곱값을 모두 사용하여 가중치의 크기를 제한하는 방법입니다.
드롭아웃 추가
IMDB 모델에 드롭아웃 추가하기
model = keras.Sequential([
layers.Dense(16, activation="relu"),
layers.Dropout(0.5),
layers.Dense(16, activation="relu"),
layers.Dropout(0.5),
layers.Dense(1, activation="sigmoid")
])
- layers.Dropout(0.5) : Dropout 층을 추가합니다. Dropout은 학습과정에서 랜덤하게 일부 뉴런을 비활성화하여, 과적합을 방지하는 방법 중 하나입니다. 매개변수로는 일부 뉴런을 비활성화시킬 확률을 지정합니다. 위 코드에서는 50%의 확률로 뉴런을 비활성화시킵니다.