- screen 폴더안에 homeScreen과 route페이지 3개를 만들었다.
push(), pop()
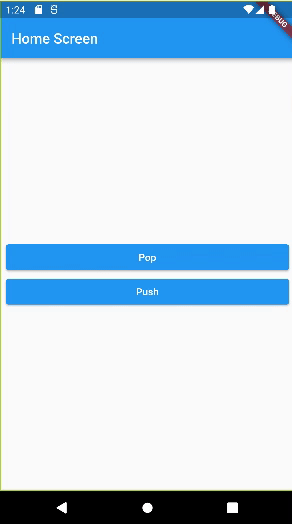
- 페이지를 넘어갈 때는 Navigator에 push라는 메서드를 사용한다.
import 'package:flutter/material.dart';
import 'package:navigation/screen/route_one_screen.dart';
class HomeScreen extends StatelessWidget {
const HomeScreen({Key? key}) : super(key: key);
Widget build(BuildContext context) {
return Scaffold(
appBar: AppBar(
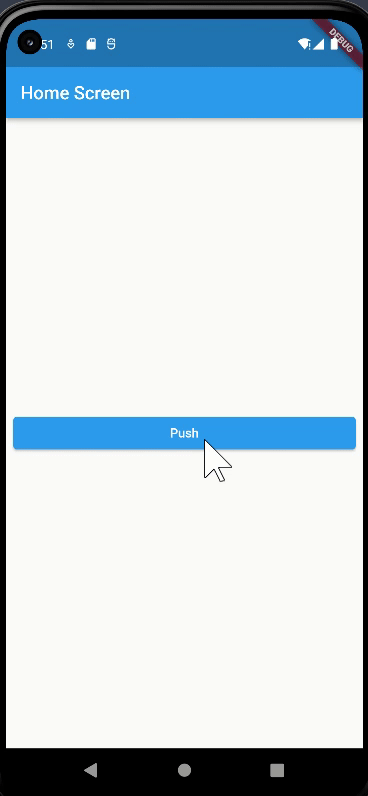
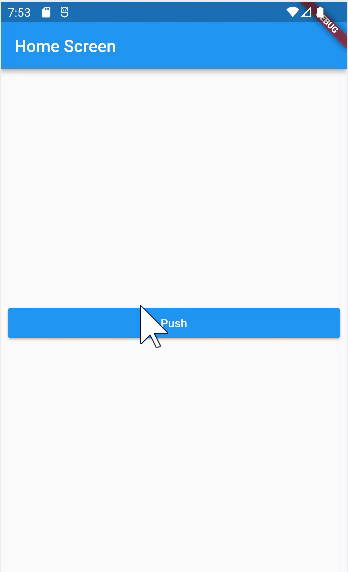
title: const Text('Home Screen'),
),
body: Padding(
padding: const EdgeInsets.symmetric(horizontal: 8.0),
child: Column(
mainAxisAlignment: MainAxisAlignment.center,
crossAxisAlignment: CrossAxisAlignment.stretch,
children: [
ElevatedButton(
onPressed: () {
Navigator.of(context).push(
MaterialPageRoute(
builder: (BuildContext context) => RouteOneScreen(),
),
);
},
child: const Text('Push')),
],
),
),
);
}
}- ElevatedButton을 사용해서 RouteOneScreen으로 넘어가는 버튼을 생성했다.
-
Navigator.of(context)는 위젯트리에서 가장 가까운 Navigator를 가져다주는 역할을 한다. - 현재 MaterialApp을 사용하고 있기 때문에
MaterialPageRoute를 사용하고builder함수에는 새로운 페이지에 해당하는 위젯을 리턴해주면 된다.
- Push 버튼을 누르면 RouteOneScreen으로 페이지 이동이된다.
import 'package:flutter/material.dart';
class RouteOneScreen extends StatelessWidget {
const RouteOneScreen({Key? key}) : super(key: key);
Widget build(BuildContext context) {
return Scaffold(
appBar: AppBar(
title: const Text('Route One'),
),
body: Padding(
padding: const EdgeInsets.symmetric(horizontal: 8.0),
child: Column(
mainAxisAlignment: MainAxisAlignment.center,
crossAxisAlignment: CrossAxisAlignment.stretch,
children: [
ElevatedButton(
onPressed: () {
Navigator.of(context).pop();
},
child: const Text('Pop'),
),
],
),
),
);
}
}
- RouteOneScreen에서 다시 이전 페이지로 이동할 때는
Navigator.of(context)에pop()메서드를 사용하면 된다.
- 우선 중복된 코드를 정리하기 위해 MainLayout이라는 위젯을 만들어 정리를 한다.
import 'package:flutter/material.dart';
class MainLayout extends StatelessWidget {
final String title;
final List<Widget> children;
변경되는 값은 appbar에 title값과 ElevatedButton이기 때문에 변수로 만들어 관리해준다.
const MainLayout({
required this.title,
required this.children,
Key? key,
}) : super(key: key);
Widget build(BuildContext context) {
return Scaffold(
appBar: AppBar(
title: Text(title),
),
body: Padding(
padding: const EdgeInsets.symmetric(horizontal: 8.0),
child: Column(
mainAxisAlignment: MainAxisAlignment.center,
crossAxisAlignment: CrossAxisAlignment.stretch,
children: children,
),
),
);
}
}값 넘겨주기
-
기본적으로 값을 넘겨줄 때는 변수를 선언해서 넘겨준다.
-
값을 받을 페이지에 number라는 변수를 만들고 HomeScreen에서 그 값을 입력해준다.
-
값을 돌려받을 때는 pop()에 돌려 받을 값을 넣고 HomeScreen에 onPressed 함수를 async로 바꾸어주면 된다.
--- RouteOneScreen ---
import 'package:flutter/material.dart';
import 'package:navigation/layout/main_layout.dart';
class RouteOneScreen extends StatelessWidget {
final int number;
const RouteOneScreen({
required this.number,
Key? key,
}) : super(key: key);
Widget build(BuildContext context) {
return MainLayout(
title: 'Route One',
children: [
Text(
number.toString(),
textAlign: TextAlign.center,
),
ElevatedButton(
onPressed: () {
Navigator.of(context).pop();
},
child: const Text('Pop'),
),
],
);
}
}
--- HomeScreen ---
import 'package:flutter/material.dart';
import 'package:navigation/layout/main_layout.dart';
import 'package:navigation/screen/route_one_screen.dart';
class HomeScreen extends StatelessWidget {
const HomeScreen({Key? key}) : super(key: key);
Widget build(BuildContext context) {
return MainLayout(
title: 'Home Screen',
children: [
ElevatedButton(
onPressed: () async {
final result = await Navigator.of(context).push(
MaterialPageRoute(
builder: (BuildContext context) => RouteOneScreen(
number: 123,
),
),
);
print(result);
},
child: const Text('Push'),
),
],
);
}
}
Arguments 사용하기
- RouteOne에서 RouteTwoScreen으로 이동하는 버튼을 만들고 RouteTwoScreen으로 넘겨줄 arguments 값 789를 작성한다.
class RouteOneScreen extends StatelessWidget {
final int number;
const RouteOneScreen({
required this.number,
Key? key,
}) : super(key: key);
Widget build(BuildContext context) {
return MainLayout(
title: 'Route One',
children: [
Text(
number.toString(),
textAlign: TextAlign.center,
),
ElevatedButton(
onPressed: () {
Navigator.of(context).pop(456);
},
child: const Text('Pop'),
),
ElevatedButton(
onPressed: () {
Navigator.of(context).push(
MaterialPageRoute(
builder: (_) => RouteTwoScreen(),
settings: RouteSettings(
arguments: 789,
),
),
);
},
child: Text('Push'),
)
],
);
}
}
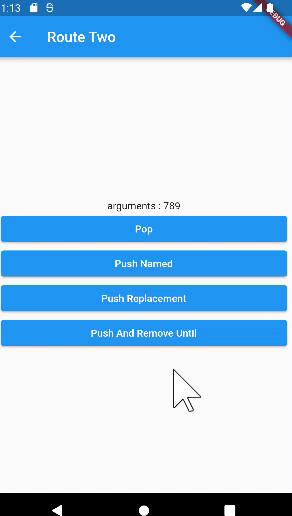
- RouteTwo에서는 값을 받아야하니 arguments를 생성하고,
ModalRoute를 사용하여 값을 받는다. - ModalRoute의 .of(context)를 사용해서 위젯트리에서 가장 가까운 ModalRoute를 가지고 올 수 있다.
- ModalRoute는 풀스크린을 의미하기 때문에 여기서 가까운 위젯은 Build가 실행되면서 생성된 RouteTwoScreen을 의미한다.
class RouteTwoScreen extends StatelessWidget {
const RouteTwoScreen({Key? key}) : super(key: key);
Widget build(BuildContext context) {
final arguments = ModalRoute.of(context)!.settings.arguments;
return MainLayout(
title: 'Route Two',
children: [
Text(
'arguments : ${arguments}',
textAlign: TextAlign.center,
),
ElevatedButton(
onPressed: () {
Navigator.of(context).pop();
},
child: Text('Pop'),
),
],
);
}
}Named Route
- push 메소드 방식의 페이지 이동말고 Named Route를 사용해서 페이지를 이동하는 코드를 작성해보겠다.
- MaterialApp에 routes 값을 Map의 형태로 작성한다.
- 각 스크린에 따라 라우트이름을 붙여준다. 편의상
'/','/one'이런 형태로 작성했다. - MaterialApp의 home 값을 initialRoute를 사용해서 home을 설정한다.
--- HomeScreen ---
void main() {
  runApp(
    MaterialApp(
      //home: HomeScreen(),
      initialRoute: '/',
      routes: {
        '/': (context) => HomeScreen(),
        '/one': (context) => RouteOneScreen(),
        '/two': (context) => RouteTwoScreen(),
        '/three': (context) => RouteThreeScreen(),
      },
    ),
  );
}- RouteTwoScreen에서 RouteThreeScreen로 가는 Push버튼을 만들고 RouteThreeScreen에서는 뒤로가는 Pop버튼을 만든다.
- 이번에는 push 메서드가 아닌 pushNamed 메서드를 사용한다.
- 첫번째 인자로 라우트네임을 작성하고 두번째 인자로는 arguments를 작성할 수 있다. arguments는 위에서 사용한 것과 마찬가지로 다음 페이지에 넘겨주는 값을 말한다.
--- RouteTwoScreen ---
ElevatedButton(
onPressed: () {
Navigator.of(context).pushNamed(
'/three',
arguments: 999,
);
},
child: Text('Push Named'),
)
--- RouteThreeScreen ---
class RouteThreeScreen extends StatelessWidget {
const RouteThreeScreen({Key? key}) : super(key: key);
Widget build(BuildContext context) {
final arguments = ModalRoute.of(context)!.settings.arguments;
return MainLayout(
title: 'Route Three',
children: [
Text(
'arguments : ${arguments}',
textAlign: TextAlign.center,
),
ElevatedButton(
onPressed: () {
Navigator.of(context).pop();
},
child: Text('Pop')),
],
);
}
}- 작성한 코드를 실행해보면 다음과 같다.
push 메소드...
pushReplacement
--- RouteTwoScreen ---
ElevatedButton(
          onPressed: () {
            Navigator.of(context).pushReplacement(
              MaterialPageRoute(
                builder: (_) => RouteThreeScreen(),
              ),
            );
          },
          child: Text('Push Replacement'),
)- RouteTwoScreen에 버튼을 추가했다.
- Navigator.of(context)에 pushReplacement 메소드를 작성했고 코드를 실행해보았다.
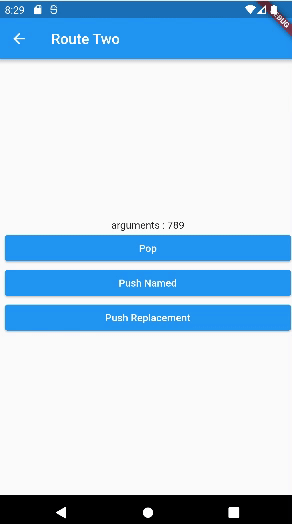
- RouteTwo에서
Push Replacement버튼을 누르고 RouteThree로 이동했다. RouteThree에서 pop버튼을 눌러 뒤로가기를 했더니 RouteOne 페이지로 이동하였다. - 지금까지는 스택형식으로 페이지를 이동했다.
[HomeScreen, RouteOneScreen, RouteTwoScreen]에서 push를 하면
[HomeScreen, RouteOneScreen, RouteTwoScreen, RouteThreeScreen]이렇게 페이지가 쌓이고 pop()을 하면RouteThreeScreen이 사라지면서
[HomeScreen, RouteOneScreen, RouteTwoScreen]순서로 바뀐다. - 그런데
pushReplacement메소드를 사용하면[HomeScreen, RouteOneScreen, RouteTwoScreen]에서RouteTwoScreen가RouteThreeScreen로 대체되서[HomeScreen, RouteOneScreen, RouteThreeScreen]가 된다. 그래서RouteThreeScreen에서 pop을 하면RouteOneScreen이 출력되게 된다. pushReplacement는 push와 마찬가지로 Named Route를 사용할 수 있다.
pushAndRemoveUntil
--- RouteTwoScreen ---
ElevatedButton(
          onPressed: () {
            Navigator.of(context).pushAndRemoveUntil(
                MaterialPageRoute(
                  builder: (_) => RouteThreeScreen(),
                ),
                (route) => false);
          },
          child: Text('Push And Remove Until'),
)RouteTwoScreen에서pushAndRemoveUntil메소드를 사용하여 버튼을 만들었다.pushAndRemoveUntil은 라우트를 설정할 수 있는데, 만약 라우트에 false를 설정하고 버튼을 눌러RouteThreeScreen에 이동하게 되면 나머지 페이지들이 삭제가 된다.- 라우트 값에 name을 설정하게 되면 설정된 Named Route를 제외한 나머지가 삭제가 된다.
ElevatedButton(
          onPressed: () {
            Navigator.of(context).pushAndRemoveUntil(
                MaterialPageRoute(
                  builder: (_) => RouteThreeScreen(),
                ),
                (route) => route.settings.name == '/');
          },
          child: Text('Push And Remove Until'),
        )
pop 메소드...
maybePop
- HomeScreen에서 pop을 하면 어떻게 될까? pop버튼을 만들어서 눌러 보겠다.
- HomeScreen에서 pop을 하면 아무것도 화면에 뜨지 않고 에러가 발생하게 된다. 왜냐하면 HomeScreen 이전에 페이지가 존재하지 않기 때문이다.
- 어러한 것을 방지하기 위해 maybePop이라는 메소드가 존재한다.
ElevatedButton(
          onPressed: () {
            Navigator.of(context).maybePop();
          },
          child: Text('Maybe Pop'),
        ),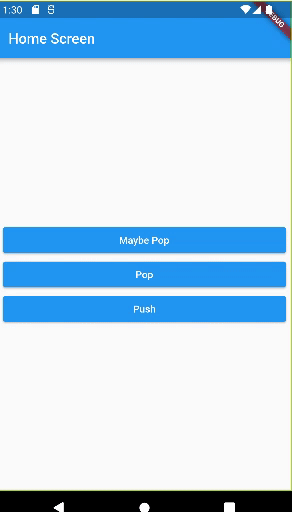
- 이전 페이지가 존재하지 않을 때 maybePop을 누르면 페이지가 넘어가지 않는다.
canPop
- canPop은 maybePop과 작동방식은 같지만 Pop이 가능한지 여부를 묻고 true, false를 반환하게 된다.
WillPopScope
- 안드로이드 경우 스마트폰 자체에 뒤로가기 버튼이 있다. 앱사용 중에 이 버튼을 누르게 되면 앱이 종료가 되는데 이 기능을 사용하지 못하게 할 수 있다.
Widget build(BuildContext context) {
    return WillPopScope(
      onWillPop: () async {
        // true - pop 가능
        // false - pop 불가능
        return false;
      },
      child: MainLayout(
        title: 'Home Screen',
        children: [.....]
)- 상위 위젯을 WillPopScope으로 wrapping하고 onWillPop이라는 파라미터를 사용한다.
- 함수를 받고 async를 사용한다. 만약 함수가 false를 리턴하면 시스템적으로 뒤로가기가 불가능하게 된다.