[CI/CD] Deploying via GitHub Actions, AWS EC2 & Docker Image
Deploying your project is a crucial step in the software development process and marks a significant milestone. However, it can often feel challenging! In this guide, I’ll walk you through how I deployed a simple project I created for an interview round and demonstrate one of the easiest ways to deploy your project.
Overview
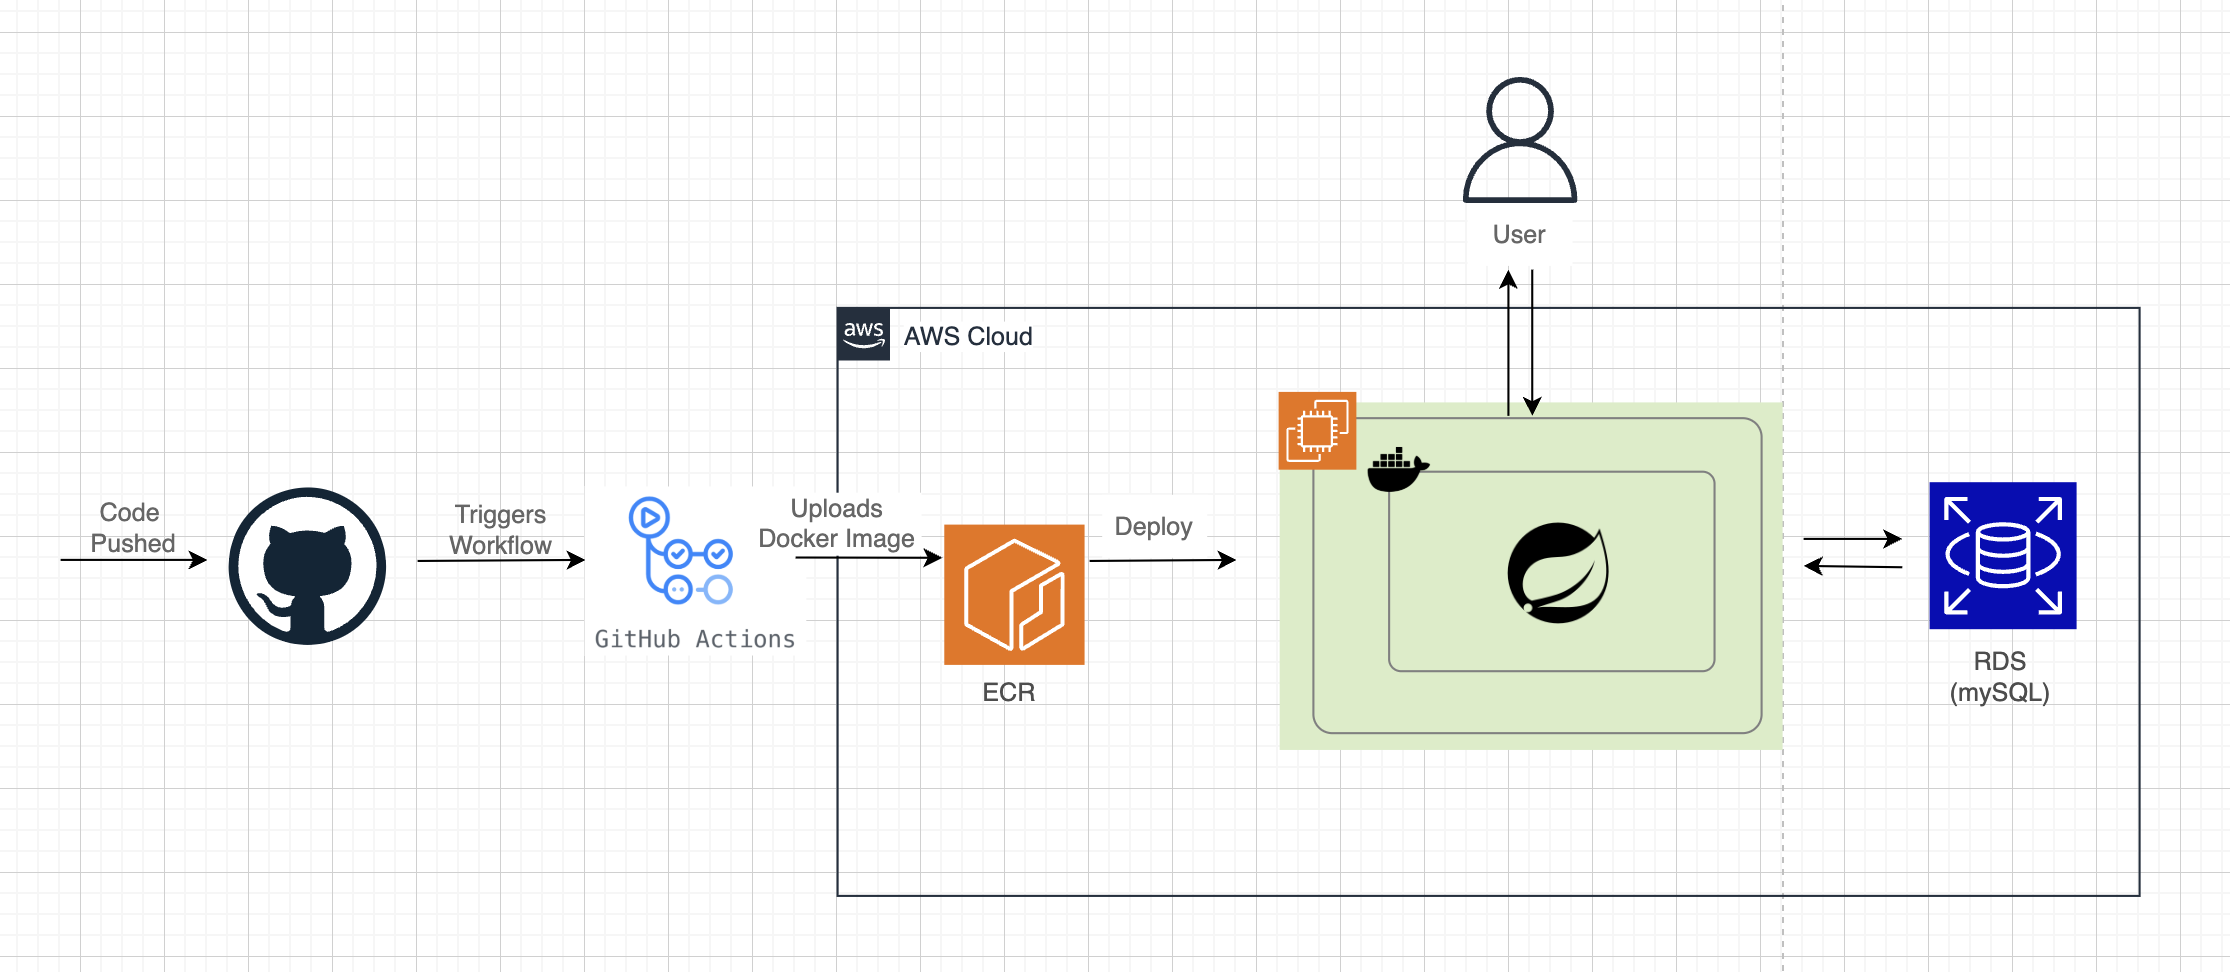
First, here is an overview of my service architecture.
- I use Github Actions to initiate and manage the flow of my deployment. In Github Actions I created a workflow file which is a script that contains commands, telling it what to do.
- With my code, I build a docker image using the dockerfile in my repository and push the image to ECR (Elastic Container Registry)
- Then my EC2 (you can easily think of this as a virtual compter) which has docker downloaded, pulls this docker image from ECR and deploys a docker container.
- Since my project has a database, I user Amazon's RDS to handle it.
Writing the Workflow file
- Each step I want the file to execute is descibed by the 'name'.
- This workflow file is triggered when I push the code to the remote main branch because that's when I want my code to be deployed.
- The key to this workflow file's deployment being successful is in having all of the correct and necessary github secret values, which will be discussed later.
name: CI/CD Pipeline
on:
  push:
    branches:
      - main
jobs:
  build-and-deploy:
    runs-on: ubuntu-latest
    env:
      AWS_ACCOUNT_ID: ${{ secrets.AWS_ACCOUNT_ID }}
      AWS_REGION: ap-northeast-2
      ECR_REPOSITORY: careerthon
      IMAGE_TAG: latest
      ECR_REGISTRY: ${{ secrets.AWS_ACCOUNT_ID }}.dkr.ecr.ap-northeast-2.amazonaws.com

    steps:
      - name: Checkout Code
        uses: actions/checkout@v3

      - name: Configure AWS Credentials
        uses: aws-actions/configure-aws-credentials@v2
        with:
          aws-access-key-id: ${{ secrets.AWS_ACCESS_KEY_ID }}
          aws-secret-access-key: ${{ secrets.AWS_SECRET_ACCESS_KEY }}
          aws-region: ${{ env.AWS_REGION }}

      - name: Log in to Amazon ECR
        uses: aws-actions/amazon-ecr-login@v2

      - name: Set up JDK 17
        uses: actions/setup-java@v3
        with:
          java-version: '17'
          distribution: 'temurin'

      - name: Cache Gradle dependencies
        uses: actions/cache@v3
        with:
          path: |
            ~/.gradle/caches
            ~/.gradle/wrapper/
          key: ${{ runner.os }}-gradle-${{ hashFiles('**/*.gradle*', '**/gradle-wrapper.properties') }}
          restore-keys: |
            ${{ runner.os }}-gradle-

      - name: Grant Execute Permission for Gradle Wrapper
        run: chmod +x gradlew

      - name: Build with Gradle
        run: ./gradlew build

      - name: Build and Push Docker Image
        run: |
          # Build the image with a tag format 'latest'
          docker build -t ${{env.ECR_REGISTRY}}/${{env.ECR_REPOSITORY}}:${{env.IMAGE_TAG}} .
          # Push the image with the tag 'latest' to ECR
          docker push ${{env.ECR_REGISTRY}}/${{env.ECR_REPOSITORY}}:${{env.IMAGE_TAG}}
          echo "image=${{env.ECR_REGISTRY}}/${{env.ECR_REPOSITORY}}:${{env.IMAGE_TAG}}" >> $GITHUB_OUTPUT

      - name: Deploy Docker container to EC2
        run: |
          echo "${{ secrets.EC2_PRIVATE_KEY }}" > private_key.pem
          chmod 600 private_key.pem
          ssh -o StrictHostKeyChecking=no -i private_key.pem ubuntu@${{ secrets.EC2_IP }} <<EOF
          aws ecr get-login-password --region ${{ env.AWS_REGION }} | docker login --username AWS --password-stdin ${{ secrets.AWS_ACCOUNT_ID }}.dkr.ecr.${{ env.AWS_REGION }}.amazonaws.com
          docker pull ${{ secrets.AWS_ACCOUNT_ID }}.dkr.ecr.${{ env.AWS_REGION }}.amazonaws.com/${{ env.ECR_REPOSITORY }}:${{ env.IMAGE_TAG }}
          docker stop careerthon || true
          docker rm careerthon || true
          docker run -d --name careerthon -p 8080:8080 \
            -e DB_HOST=${{ secrets.DB_HOST }} \
            -e DB_NAME=${{ secrets.DB_NAME }} \
            -e DB_PORT=${{ secrets.DB_PORT }} \
            -e DB_USERNAME=${{ secrets.DB_USERNAME }} \
            -e DB_PASSWORD=${{ secrets.DB_PASSWORD }} \
            -e JWT_KEY=${{ secrets.JWT_KEY }} \
            ${{ secrets.AWS_ACCOUNT_ID }}.dkr.ecr.${{ env.AWS_REGION }}.amazonaws.com/${{ env.ECR_REPOSITORY }}:${{ env.IMAGE_TAG }}
          EOF
Configurations
The configurations here that I am refering to is the environmental variables. The environmental variables declared throughout the project for the different tech stacks to be connected together.
Configuraitons in applications.properties
The environment variables declared here will be filled in by the workflow file (specifically your github secrets). The variables declared in this file are used to connect the program to its database (Amazon's RDS in my case), and to use JWT in User authentication.
💡 A JWT secret key is a string used to sign and verify JSON Web Tokens (JWTs). It ensures that the token is valid and hasn't been tampered with. 💡
spring.application.name=careerthon_interview

spring.datasource.url=jdbc:mysql://${DB_HOST}:${DB_PORT}/${DB_NAME}
spring.datasource.username=${DB_USERNAME}
spring.datasource.password=${DB_PASSWORD}

spring.datasource.driver-class-name=com.mysql.cj.jdbc.Driver

spring.jpa.hibernate.ddl-auto=update

spring.jpa.properties.hibernate.show_sql=true
spring.jpa.properties.hibernate.format_sql=true
spring.jpa.properties.hibernate.use_sql_comments=true

jwt.secret.key=${JWT_KEY}
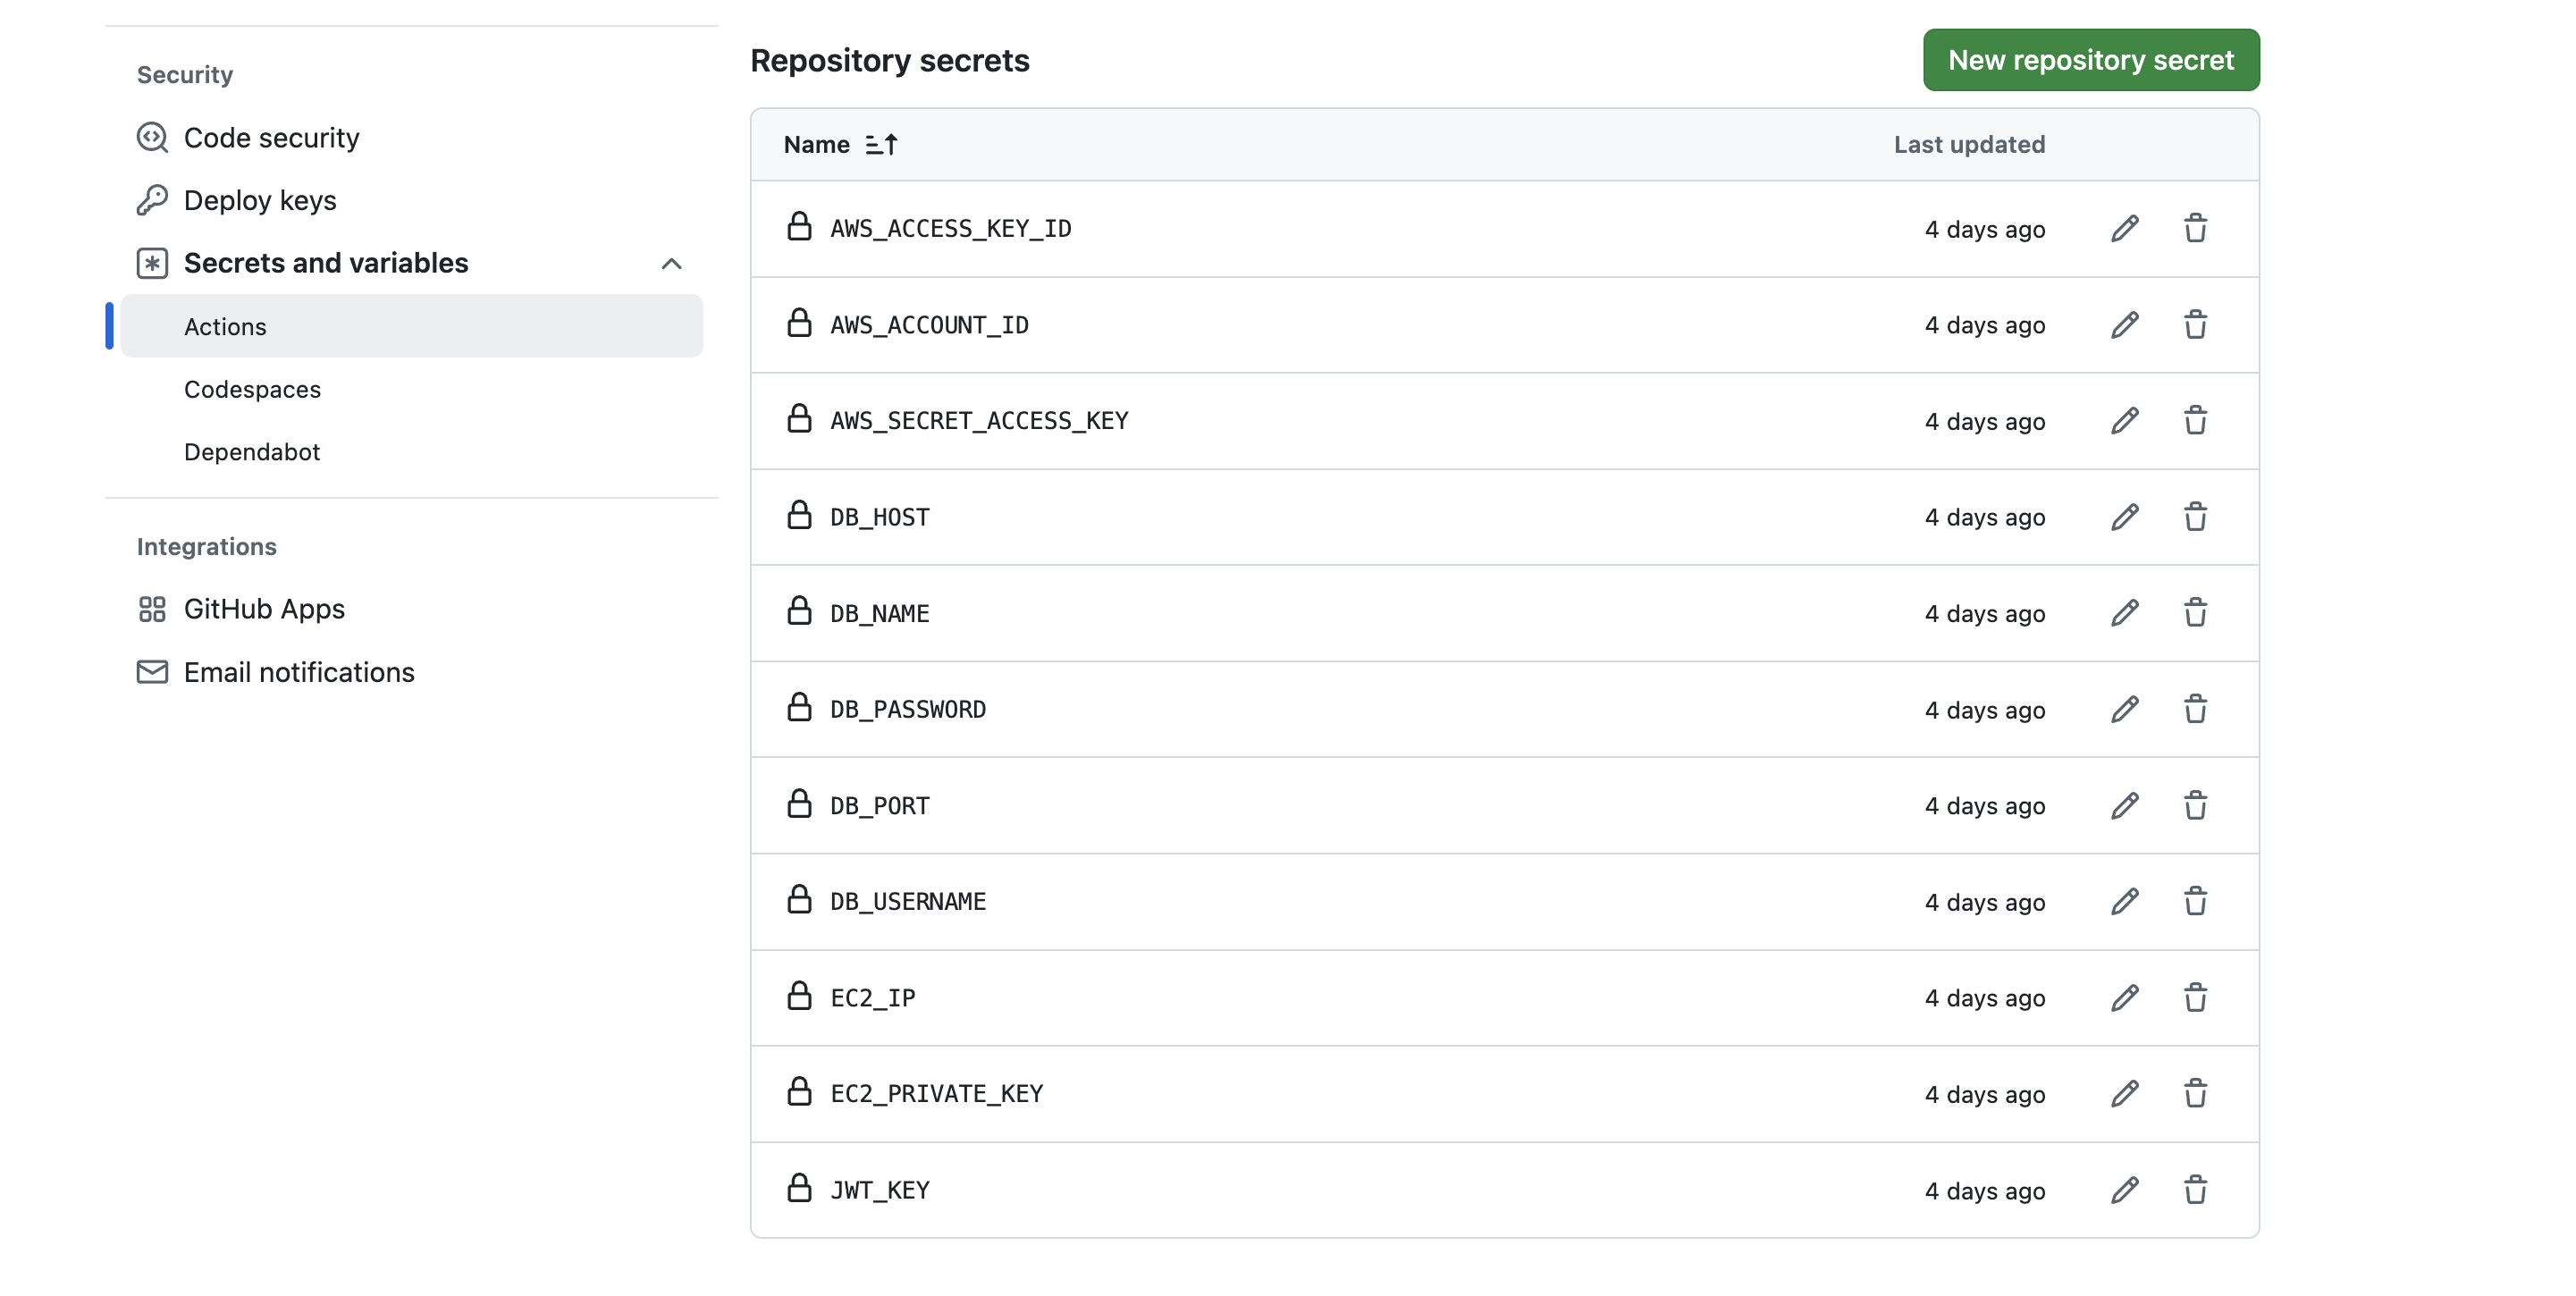
Github Secrets
You can add secrete variables by going to your repository > Settings > Secrets and variables > Actions > Repository secrets
You have to ALL of the variables that you declared to use in your workflow file which is the following in my case:
-
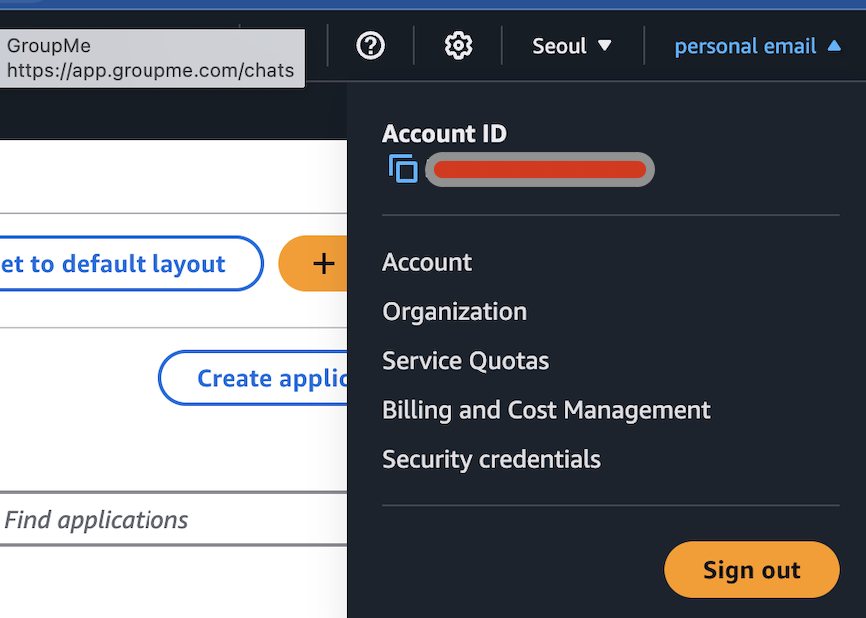
AWS_ACCOUNT_ID: is the 12 digit number that I covered in red in the image below.
-
AWS_ACCESS_KEY_ID & AWS_SECRET_ACCESS_KEY can be found in the IAM user's page
-
DB_HOST: end point url
-
DB_NAME: name of the database in RDS, you need to create a database and enter that name.
-
DB_PASSWORD: The master password set during my RDS configuration
-
DB_PORT: port number that the DB will connect to
-
DB_USERNAME: The master username set during my RDS configuration
-
EC2_IP: Public IP of your EC2
-
JWT_KEY: your jwt key
Setting up the EC2
- Download docker and AWS CLI
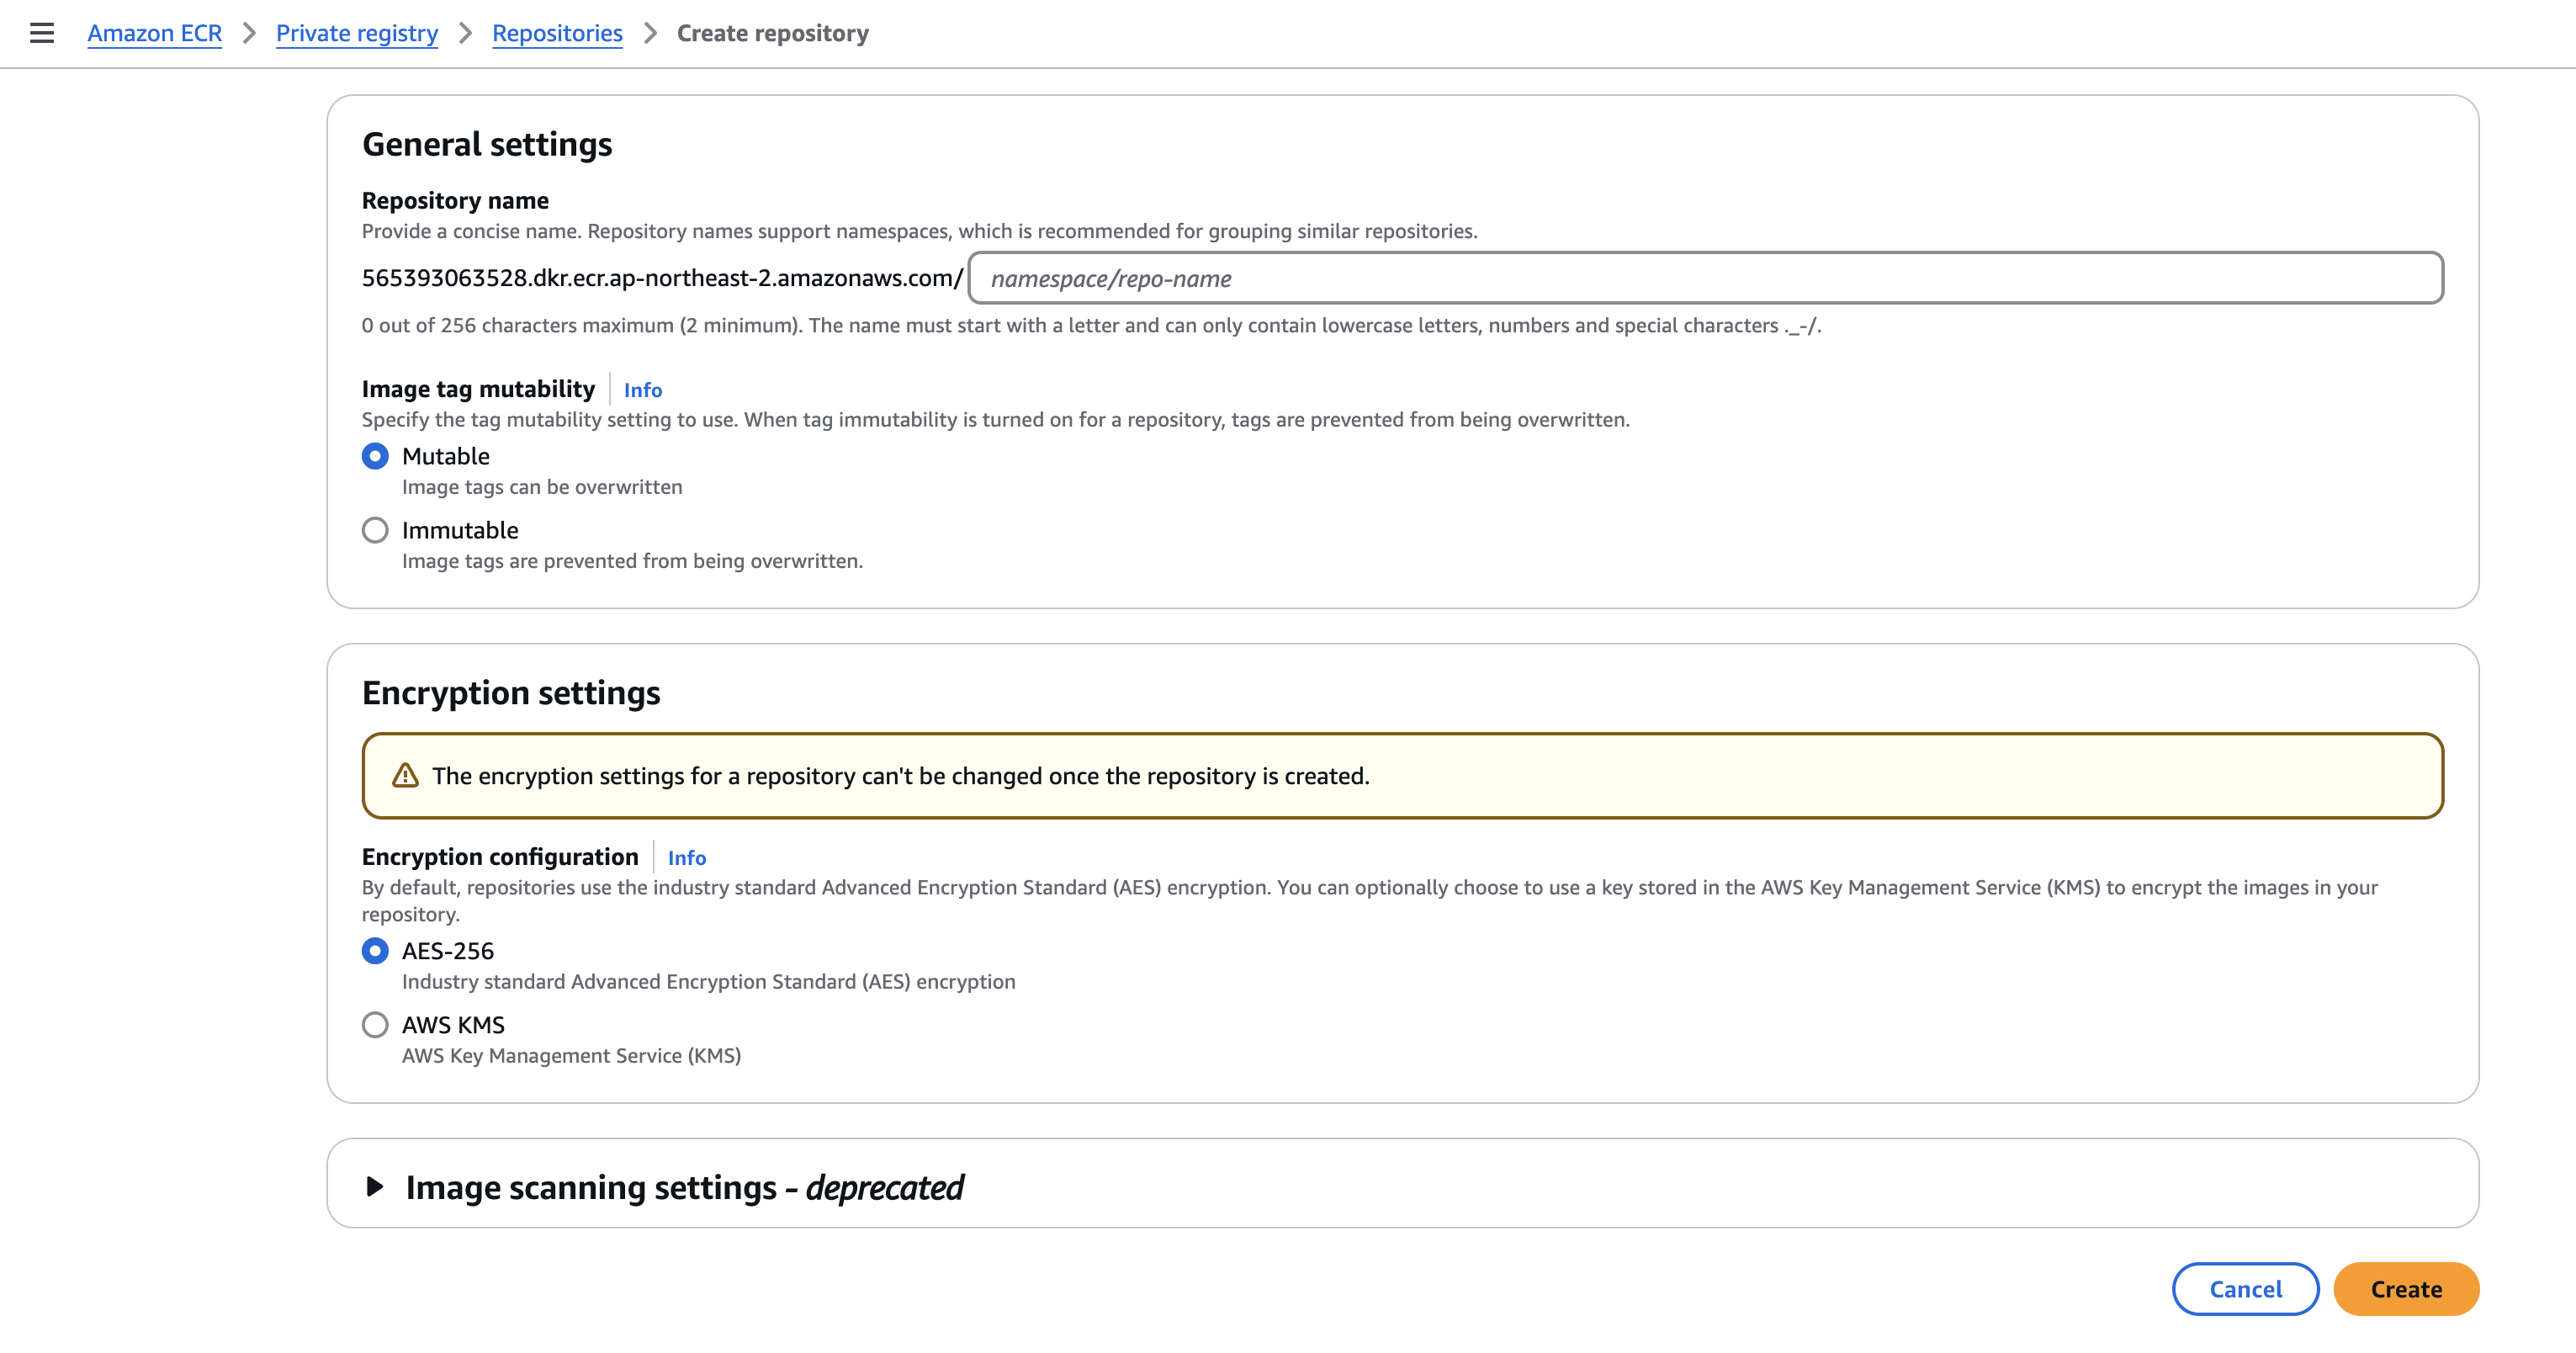
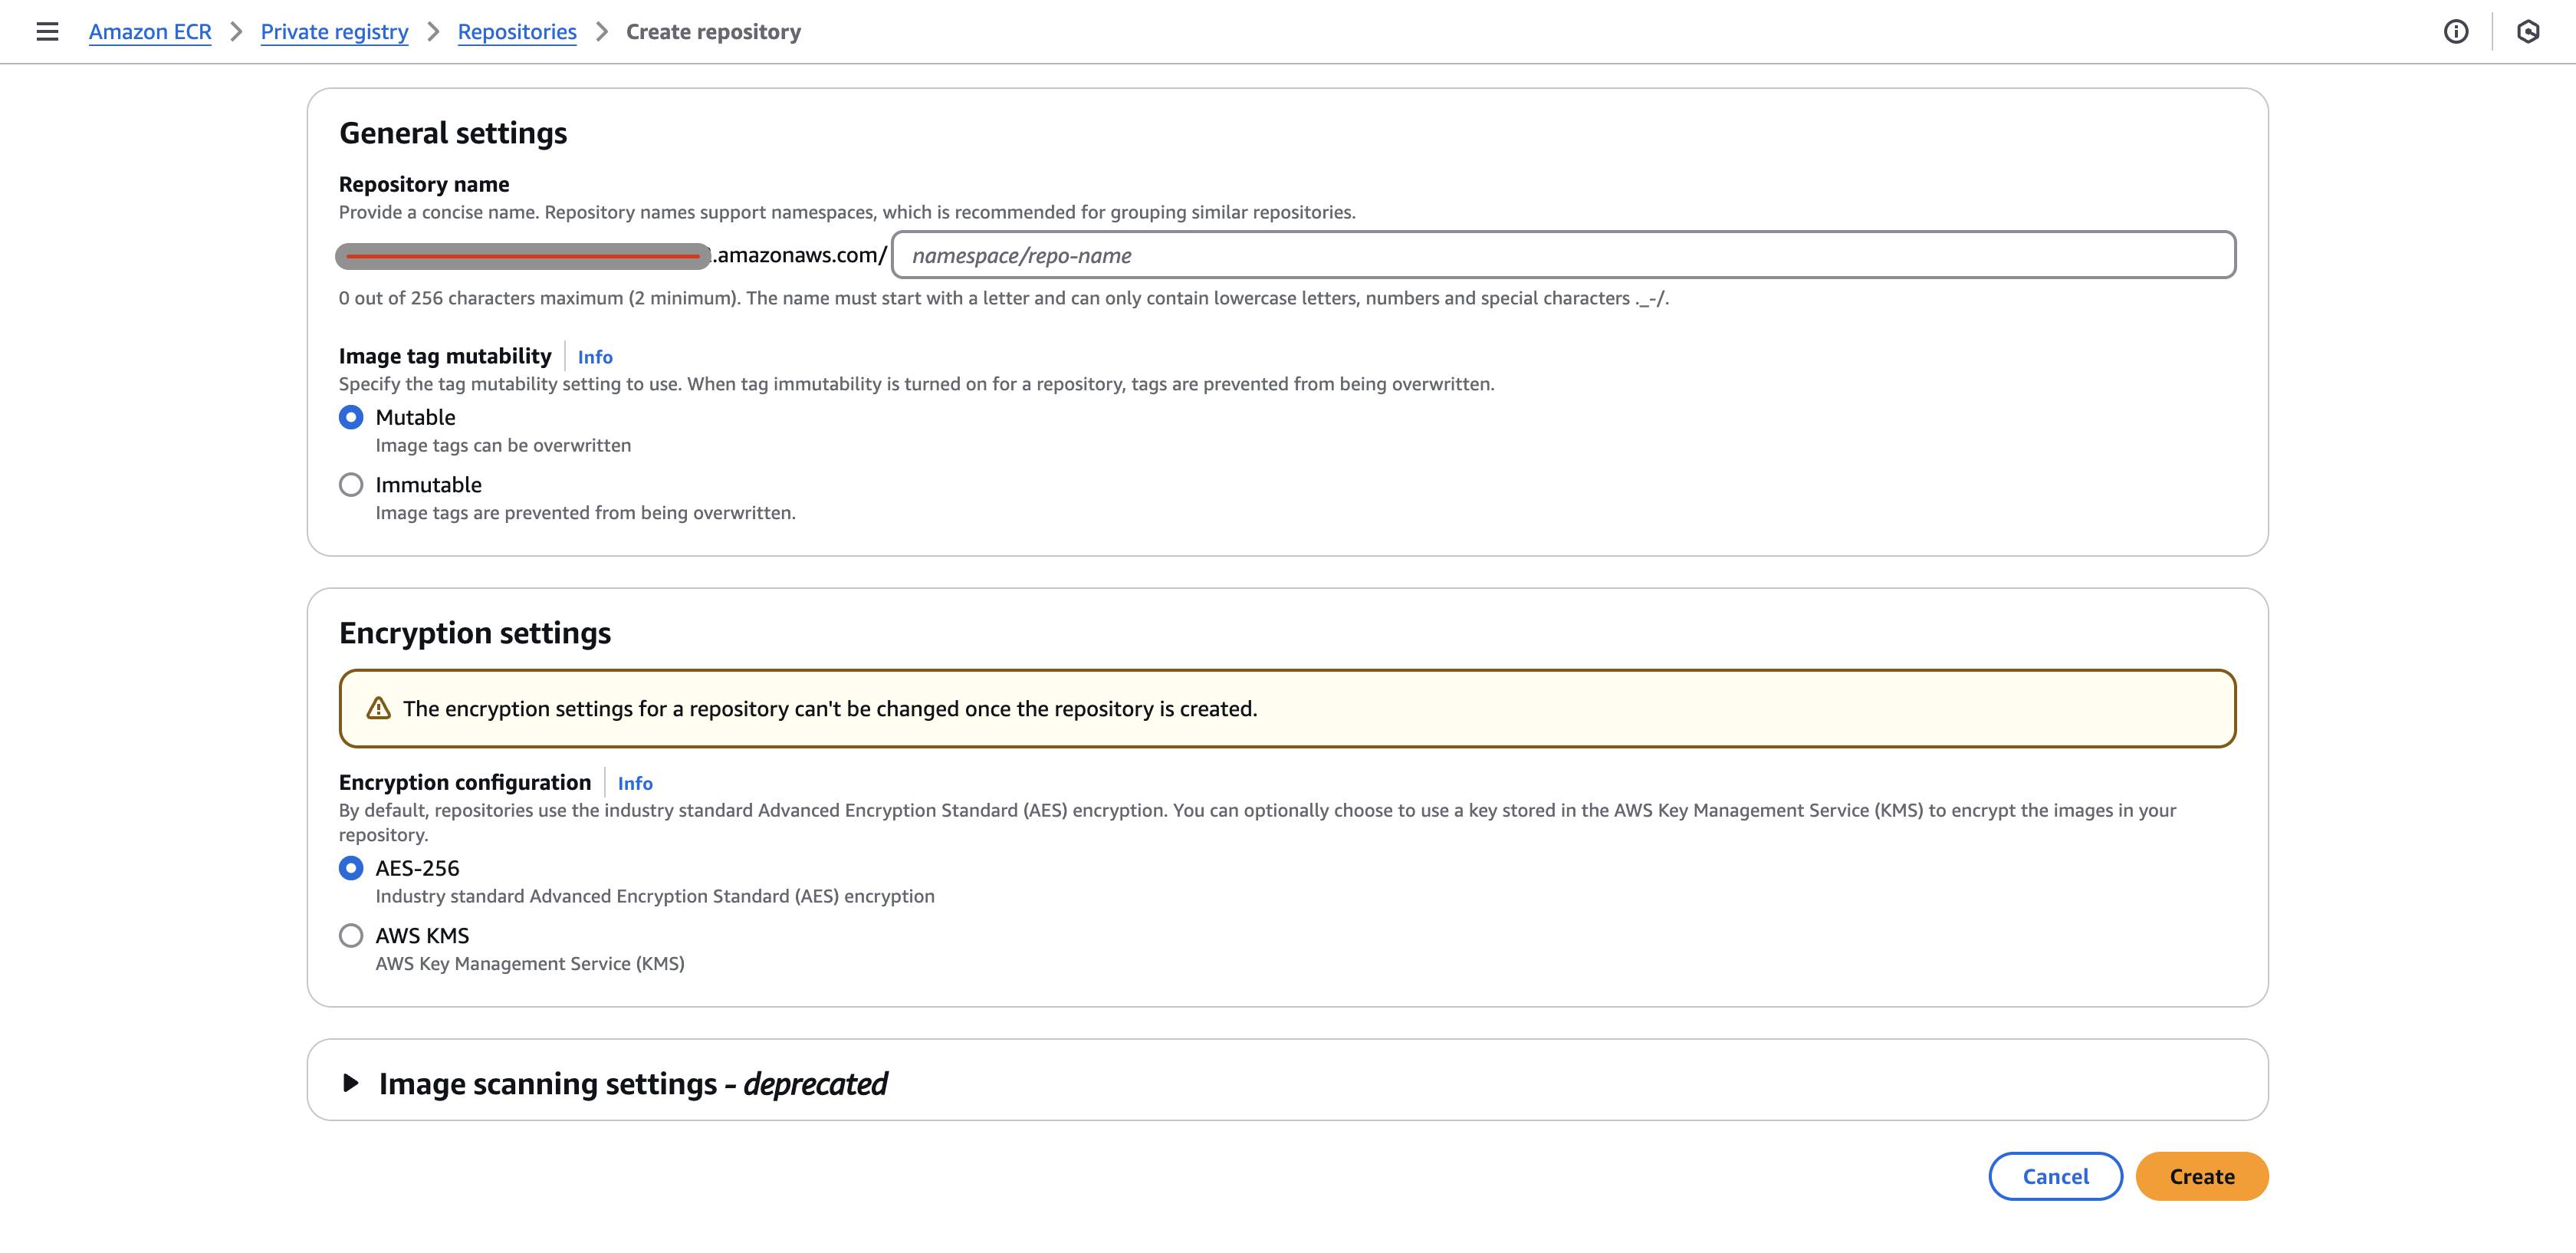
Setting up ECR
- Create a repository that is mutable using AES-256
- making the repository mutable was convenient for me because I would update my docker image everytime there is a push to the main branch in my repository.
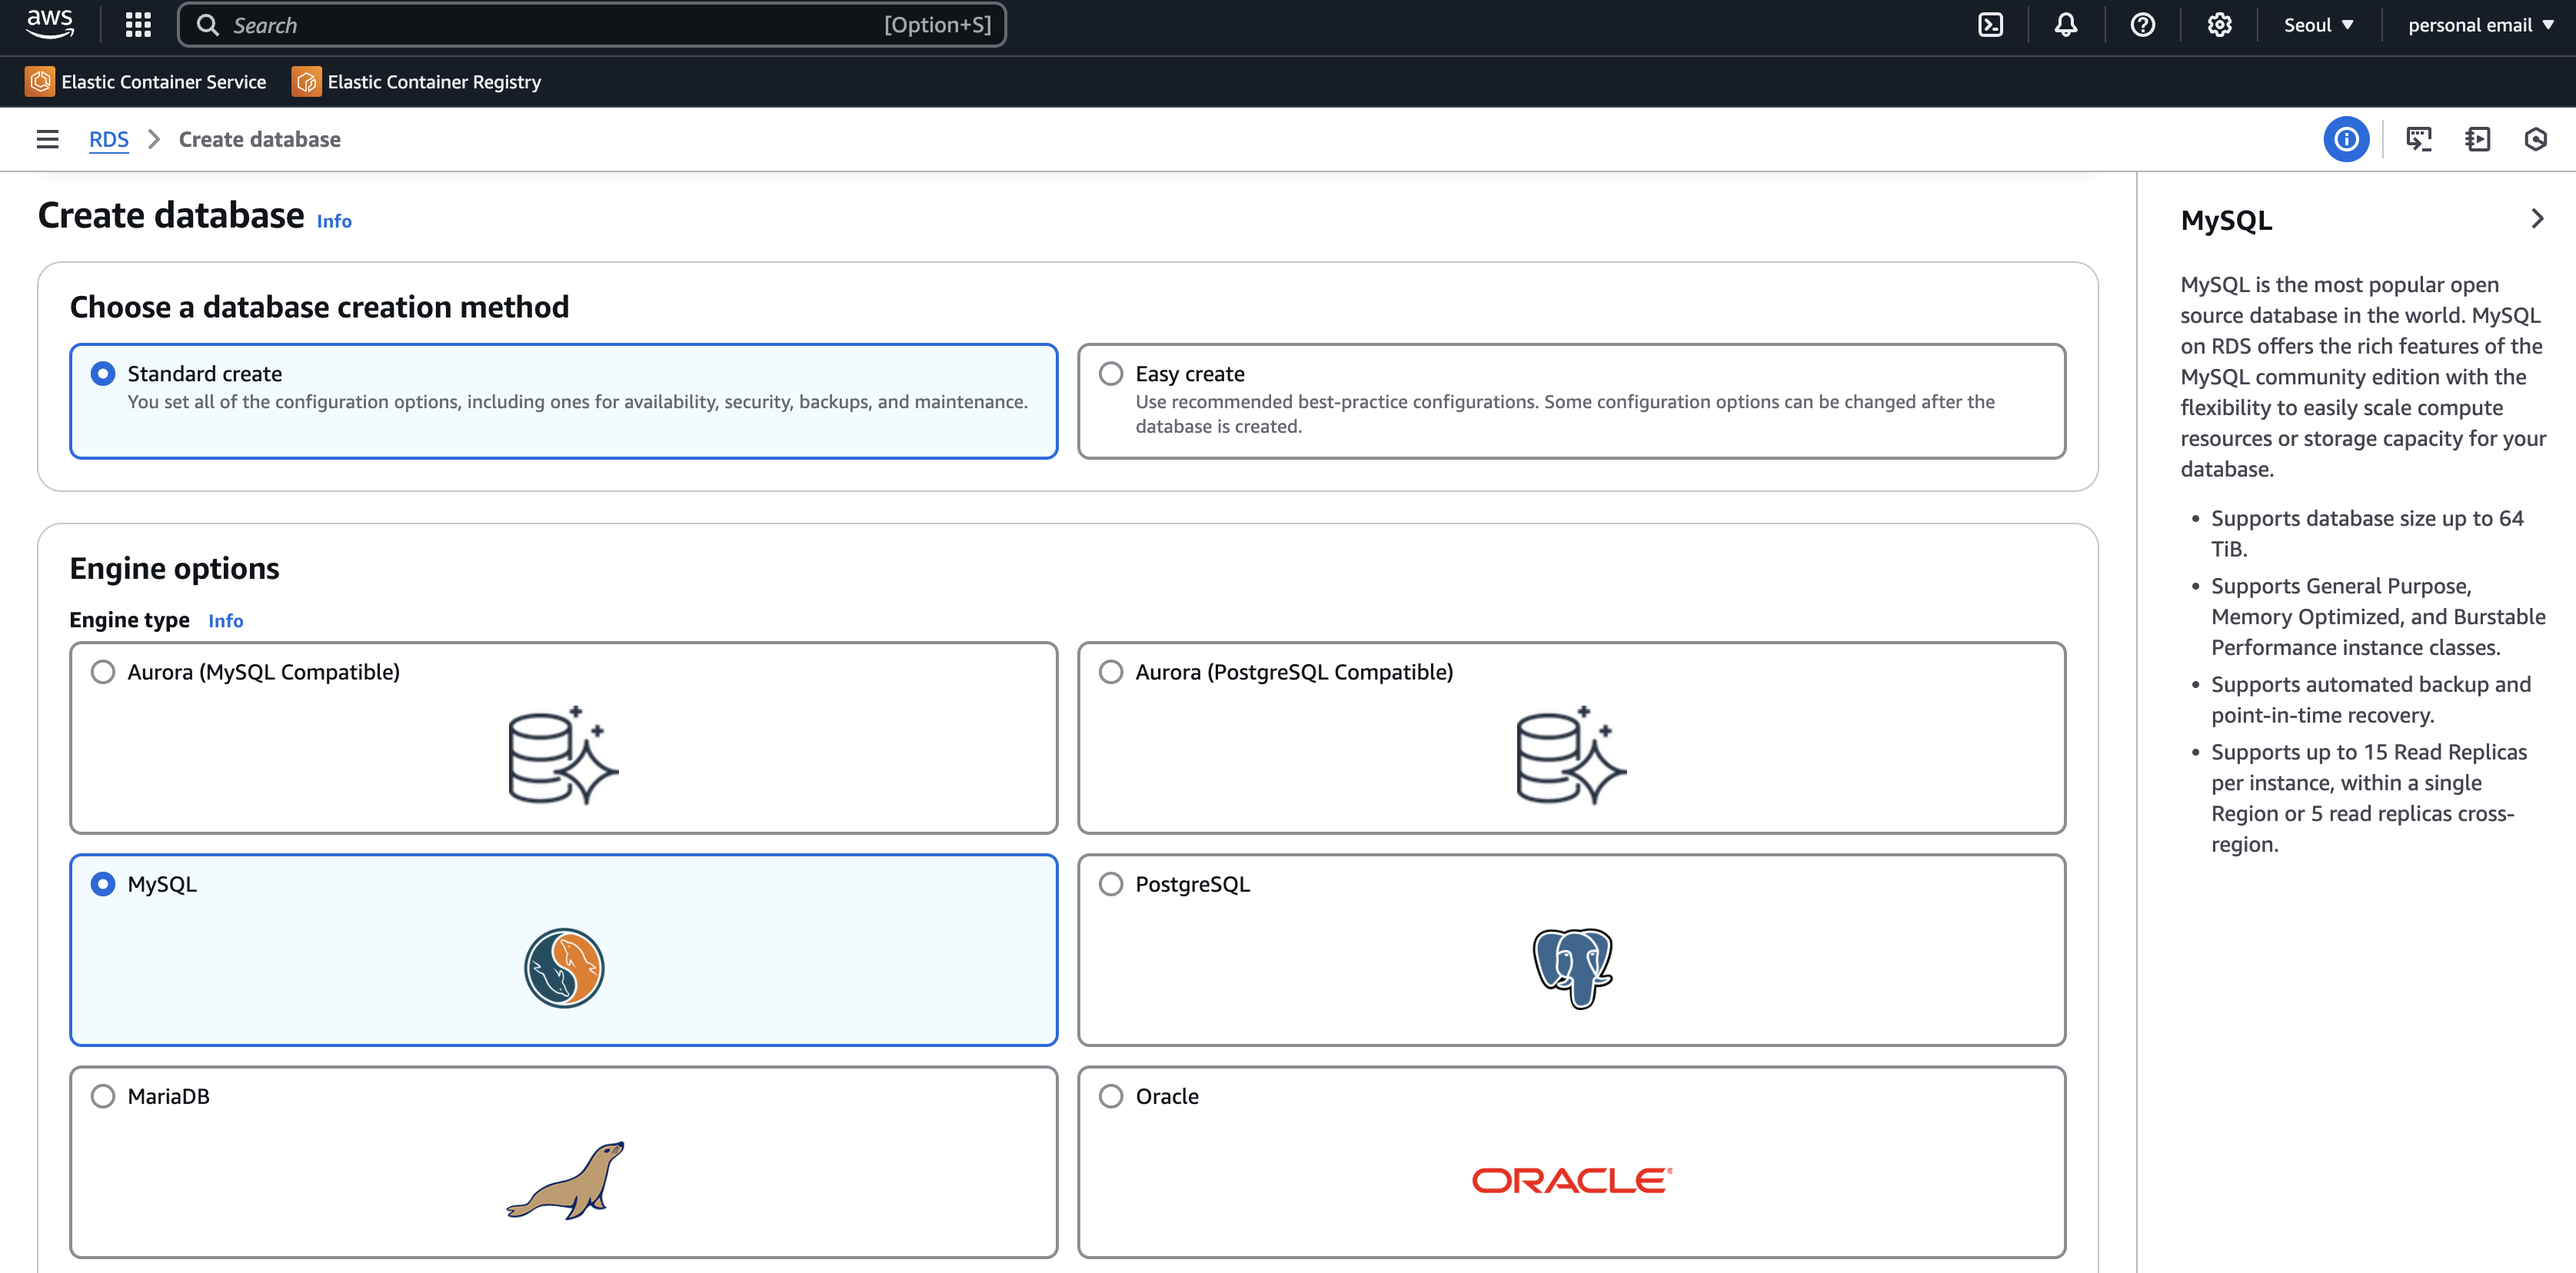
Setting up RDS
I created database using standard create and MySQL
Github Link
You can check out the detail files of this project here: https://github.com/sjkimplus/careerthon_interview