개요
- 자동차 번호판을 가장 잘 탐지할 수 있는 object detection 모델들을 학습하고 평가해보기 위해 다양한 detection 모델을 쉽게 사용할 수 있는 mmdetection을 사용하기로 했다.
왜 mmdetection을 사용하였는가?
- facebook의 detectron2가 존재하지만 transformer 모델들은 없었음
- huggingface는 transformer들은 존재하지만 cnn 계열의 모델들이 없었음
- 따라서 모두 있는 mmdection으로 평가를 돌려보기로 함
커스텀 데이터 학습을 위해 준비할 것
- COCO format의 데이터 : CLP 데이터 셋으로 준비하였음
- 나는 segmentation의 정보는 없는 bbox로만 할 예정임
- 커스텀 데이터를 사용하여 원하는 모델을 학습하기 위해 몇 가지 수정을 해야한다.
- 기본적으로 폴더 구조는 아래와 같다
- configs
- base
- datasets
- models
- schedules
- 여러 모델들..
- base
-
config/base/datasets
- 사용할 데이터들을 load할 때 필요하게 되는 py
-
config/base/models
- 백본 모델들이 들어가는 느낌
-
config/base/schedules
- lr, epoch, optimizer를 건들 수 있음
-
config/{사용할 모델들}/{사용할 모델.py}
- 이 부분이 제일 중요하다.
- 본인이 사용할 모델의 config를 복사하고 나서, 안에 내용들을 입맛에 맞게 변경하면 됨
- 나는 clp를 여러가지 모델로 돌릴 것이기에 일단 config 폴더에 clp라는 폴더를 생성하였음
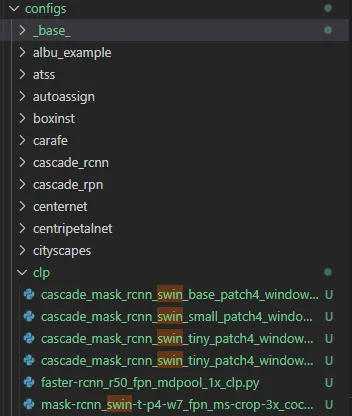
- configs
datasets.py 수정 방법
- coco_detection.py의 내용을 copy
- 새로운 py를 생성 후, 아래와 같이 변경
dataset_type = 'CLP'
data_root = '/root/dataset_clp/'- 이 후, mmdetection/mmdet/datasets/으로 진입
- 위에서 말한 dataset_type에 맞도록 클래스 명을 가진 py를 생성 (난 clp.py로 생성하였음)
-
내용은 coco.py를 복사한다
@DATASETS.register_module() class CLP(BaseDetDataset): """Dataset for COCO.""" METAINFO = { 'classes': ('License Plate'), # palette is a list of color tuples, which is used for visualization. 'palette': [(220, 20, 60)] } COCOAPI = COCO # ann_id is unique in coco dataset. ... ... -
클래스 명을 변경, METAINFO의 내용을 변경한다.
- 이 때, METAINFO의 classes이름, ‘License Plate’를 annotation에 존재하는 클래스 이름으로 해야 한다.
-
models.py 수정 방법
- 만약 사용하려는 모델이 여기서의 모델을 참조한다면 해당 모델도 수정하는 과정이 필요하다.
- 만약 config.py에서 fast-rcnn_r50_fpn.py를 base로 두었다면 해당 모델의 내용을 복사하여 새로 만든다.
- 나는 fast-rcnn_r50_fpn_clp.py 라고 생성하였다.
- 변경할 내용 :
-
num_classes : 기본적으로 coco에 맞춰 80으로 되어있기에 데이터 셋에 맞는 클래스 수로 모두 변경한다. 나는 clp 한 개의 클래스이므로 1로 변경하였음
-
mask 부분 : 만약 segmenation 목적이 아닌 데이터 셋이라면 mask 정보가 없어야 하므로 이를 주석처리한다. (모두)
-
아래의 블로그에서 참조하였음
-
schedules.py 수정 방법
- 간단하므로 생략하겠다. 사용자가 원하는 대로 수정하면 된다.
Config.py 수정방법
- 나는 SwinTransformer를 object detection에 사용할 예정이였기에 이를 예시로 든다.
#
# bash ./tools/dist_train.sh \
#     /root/mmdetection/configs/clp/mask-rcnn_swin-t-p4-w7_fpn_ms-crop-3x_coco.py \
#     2 \
# 각 모델의 base가 되는(참조하는) py들 (각 py에 들어가서 수정해줄 필요가 있다)
_base_ = [
    '../_base_/models/mask-rcnn_r50_fpn_clp.py',
    '../_base_/datasets/clp_detection.py',
    '../_base_/schedules/schedule_clp.py', '../_base_/default_runtime.py'
]

pretrained = 'https://github.com/SwinTransformer/storage/releases/download/v1.0.0/swin_tiny_patch4_window7_224.pth'  # noqa

model = dict(
    # type='MaskRCNN',
    backbone=dict(
        _delete_=True,
        type='SwinTransformer',
        embed_dims=96,
        depths=[2, 2, 6, 2],
        num_heads=[3, 6, 12, 24],
        window_size=7,
        mlp_ratio=4,
        qkv_bias=True,
        qk_scale=None,
        drop_rate=0.,
        attn_drop_rate=0.,
        drop_path_rate=0.2,
        patch_norm=True,
        out_indices=(0, 1, 2, 3),
        with_cp=False,
        convert_weights=True,
        init_cfg=dict(type='Pretrained', checkpoint=pretrained)),
    neck=dict(in_channels=[96, 192, 384, 768]))

# augmentation strategy originates from DETR / Sparse RCNN
train_pipeline = [
    dict(type='LoadImageFromFile', backend_args={{_base_.backend_args}}),
    # dict(type='LoadAnnotations', with_bbox=True, with_mask=True),
    dict(type='LoadAnnotations', with_bbox=True, with_mask=False),
    dict(type='RandomFlip', prob=0.5),
    dict(
        type='RandomChoice',
        transforms=[[
            dict(
                type='RandomChoiceResize',
                scales=[(480, 1333), (512, 1333), (544, 1333), (576, 1333),
                        (608, 1333), (640, 1333), (672, 1333), (704, 1333),
                        (736, 1333), (768, 1333), (800, 1333)],
                keep_ratio=True)
        ],
                    [
                        dict(
                            type='RandomChoiceResize',
                            scales=[(400, 1333), (500, 1333), (600, 1333)],
                            keep_ratio=True),
                        dict(
                            type='RandomCrop',
                            crop_type='absolute_range',
                            crop_size=(384, 600),
                            allow_negative_crop=True),
                        dict(
                            type='RandomChoiceResize',
                            scales=[(480, 1333), (512, 1333), (544, 1333),
                                    (576, 1333), (608, 1333), (640, 1333),
                                    (672, 1333), (704, 1333), (736, 1333),
                                    (768, 1333), (800, 1333)],
                            keep_ratio=True)
                    ]]),
    dict(type='PackDetInputs')
]
train_dataloader = dict(dataset=dict(pipeline=train_pipeline))

max_epochs = 36
train_cfg = dict(max_epochs=max_epochs)

# learning rate
param_scheduler = [
    dict(
        type='LinearLR', start_factor=0.001, by_epoch=False, begin=0,
        end=1000),
    dict(
        type='MultiStepLR',
        begin=0,
        end=max_epochs,
        by_epoch=True,
        milestones=[27, 33],
        gamma=0.1)
]

# optimizer
optim_wrapper = dict(
    type='OptimWrapper',
    paramwise_cfg=dict(
        custom_keys={
            'absolute_pos_embed': dict(decay_mult=0.),
            'relative_position_bias_table': dict(decay_mult=0.),
            'norm': dict(decay_mult=0.)
        }),
    optimizer=dict(
        _delete_=True,
        type='AdamW',
        lr=0.0001,
        betas=(0.9, 0.999),
weight_decay=0.05))- 나는 기본 모델의 옵션을 가지고 와서 그대로 사용하려고 하였기에 별도의 옵션은 선택하지 않았다.
- 중요한 점 : dict(type='LoadAnnotations', with_bbox=True, with_mask=True),
- 만약 segmentation을 사용하지 않을 것 이라면 with_mask=False로 변경해야 함
- 중요한 점 : dict(type='LoadAnnotations', with_bbox=True, with_mask=True),
결과 분석하는 방법
- mmdetection tutorials : https://mmdetection.readthedocs.io/en/latest/user_guides/useful_tools.html#visualize-models
python tools/analysis_tools/analyze_logs.py plot_curve log.json --keys loss_cls --legend loss_cls- 위와 같은 식으로 사용하는데 나는 왜 work_dirs/모델이름/log.json이 존재하지 않는지, 생각해보았다.
- 일단 config파일에서 훈련을 진행할 때, log_config에 대한 내용을 꼭 작성해야 한다.
log_config = dict(
    interval=100,
    hooks=[
        dict(type='TextLoggetHook'),
        # dict(type='TensorboardLoggerHook')
    ])
log_level = 'INFO'
dist_params = dict(backend='nccl')
에러 발생 시, KeyError [’gt_instance’]

모든 것에 질문을 던지자