H2 DB 설치형 말구, 스프링이 실행될 때 함께 실행되는 tcp server 모드를 사용해봅시다.
H2 DB tcp 모드로 실행하고, JPA로 데이터도 가져와봅시다.
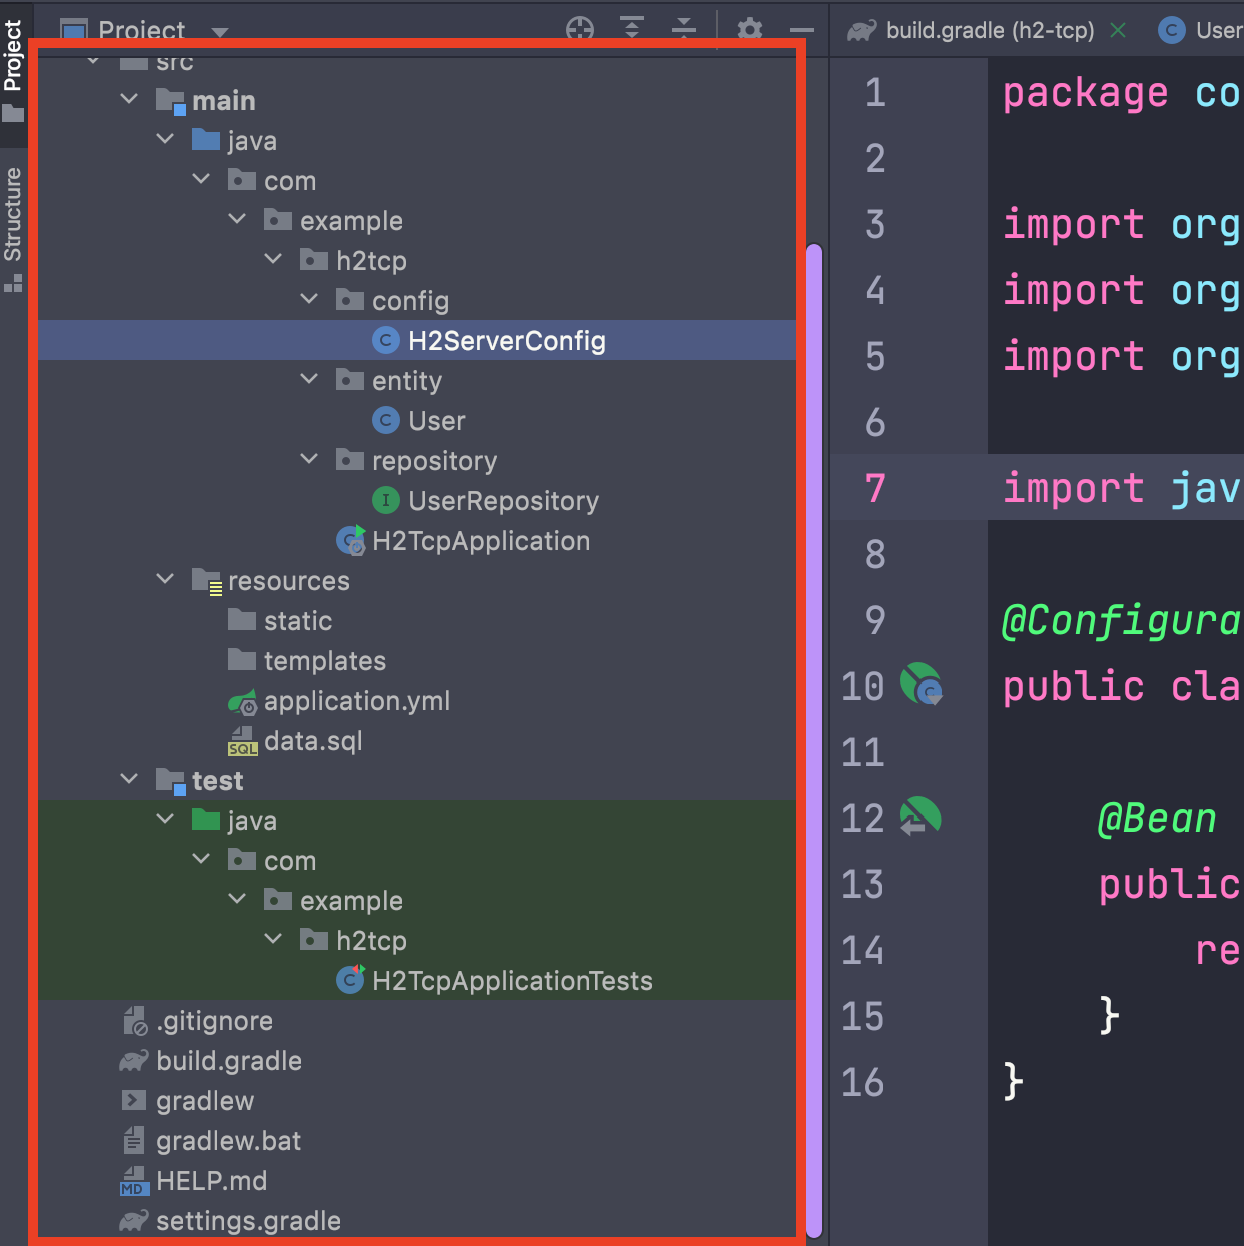
0. 구조
파일 6개만 작성해봅니다.
1. build.gradle
실행용, 테스트용으로 h2 db 설정해주었습니다.
plugins {
id 'org.springframework.boot' version '2.6.2'
id 'io.spring.dependency-management' version '1.0.11.RELEASE'
id 'java'
}
group = 'com.example'
version = '0.0.1-SNAPSHOT'
sourceCompatibility = '11'
repositories {
mavenCentral()
}
dependencies {
// 톰캣
implementation 'org.springframework.boot:spring-boot-starter-web'
// 쿼리 테스트를 위한 JPA
implementation 'org.springframework.boot:spring-boot-starter-data-jpa'
// h2 db compileOnly로 설정 스프링 기동될때 같이 실행되도록
compileOnly 'com.h2database:h2'
// 롬복 getter 편하게 사용
compileOnly 'org.projectlombok:lombok'
annotationProcessor 'org.projectlombok:lombok'
// 스프링 부트
testImplementation 'org.springframework.boot:spring-boot-starter-test'
// 테스트 코드를 위한 h2 db
testImplementation 'com.h2database:h2'
}
test {
useJUnitPlatform()
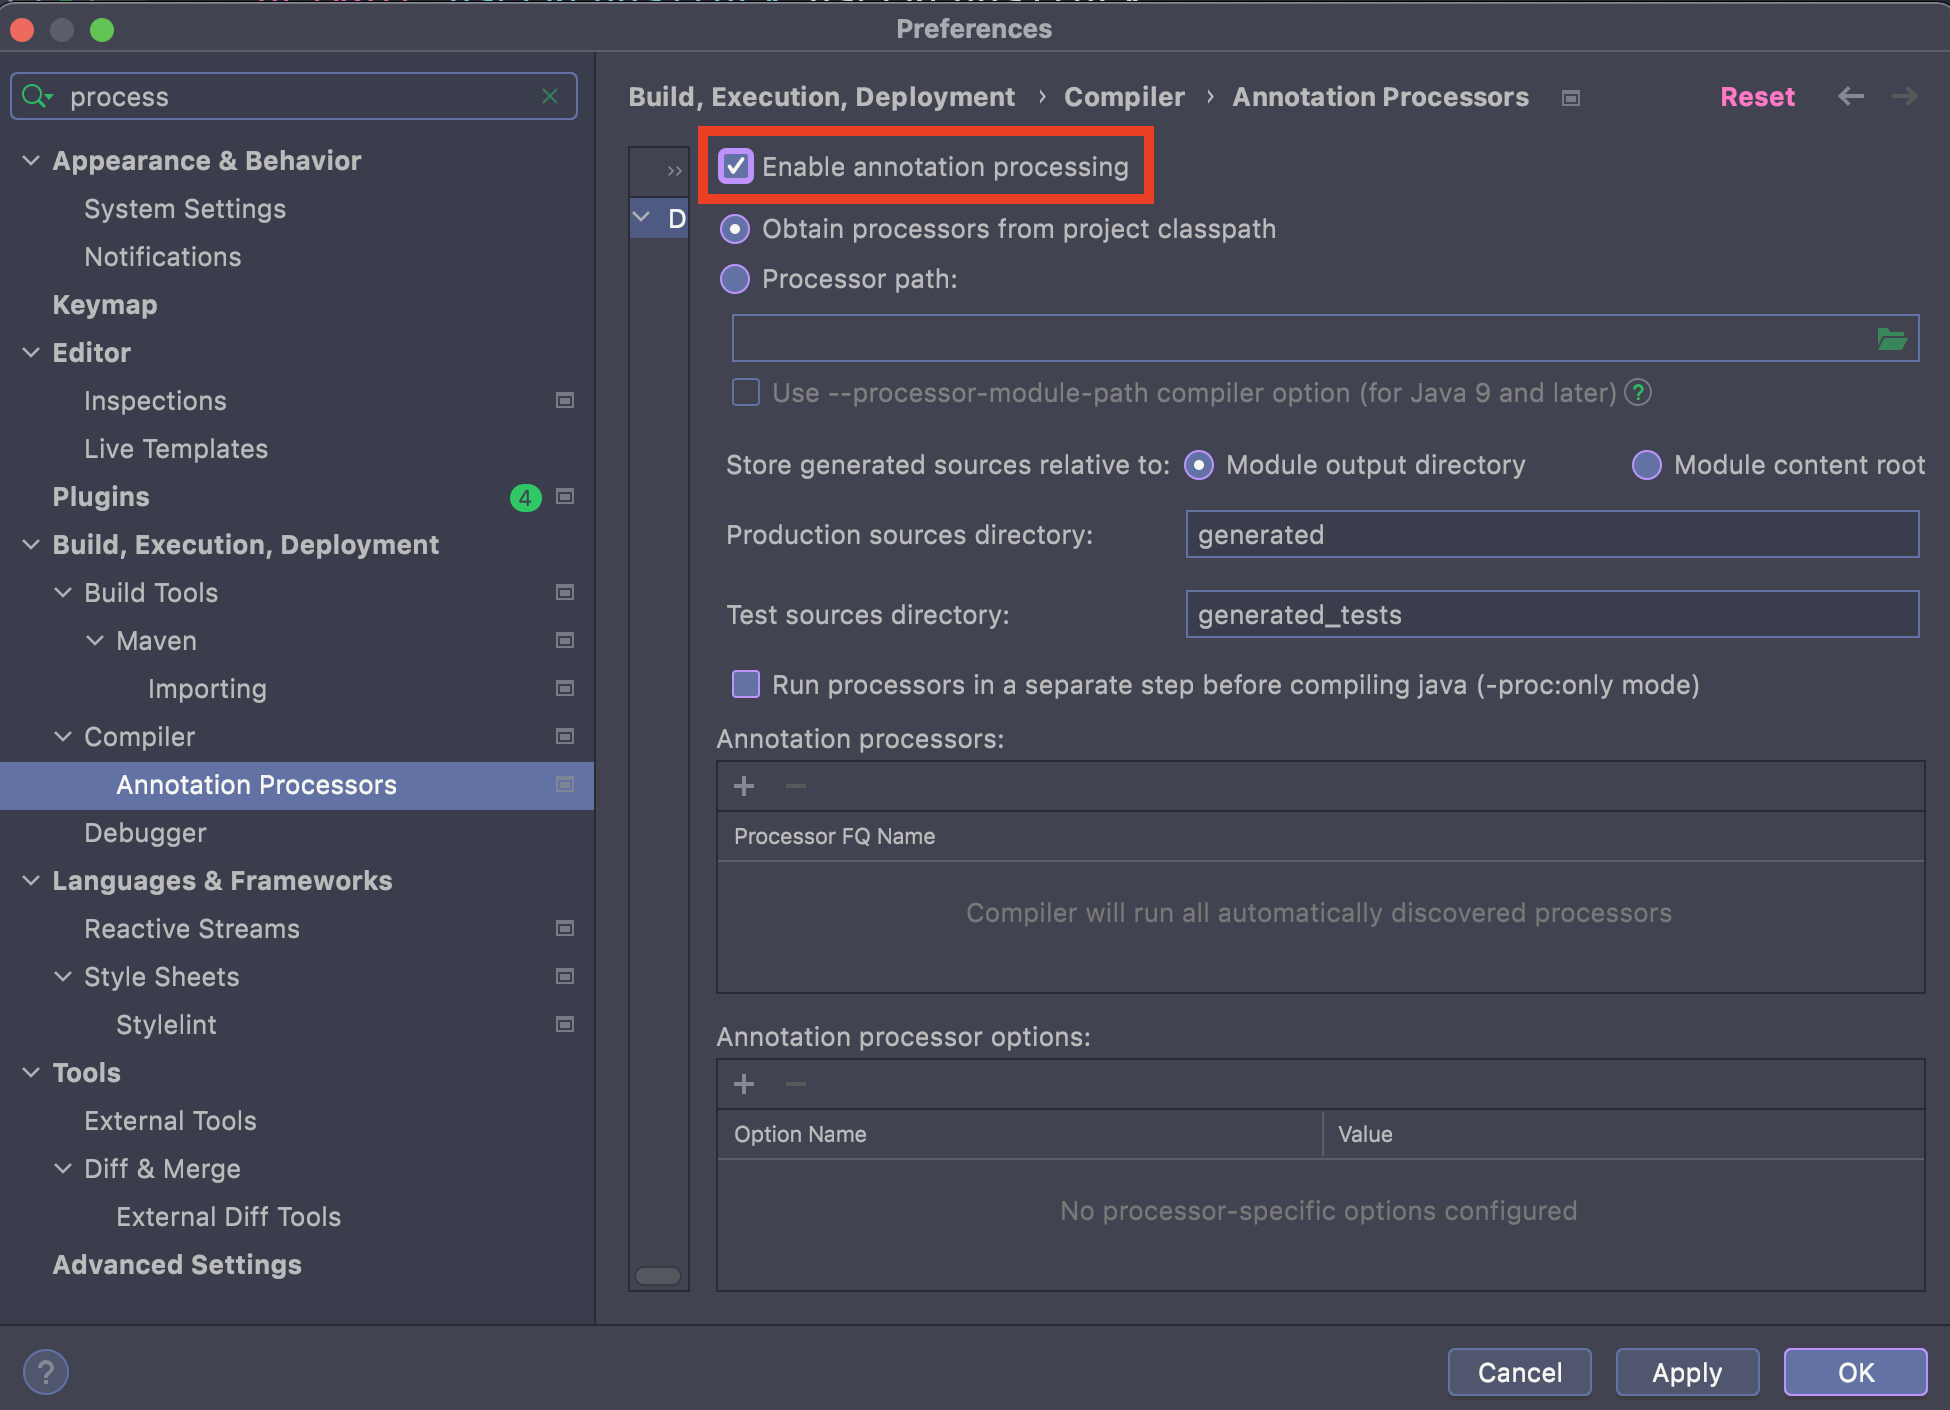
}롬복 사용했으니까 Enable annotation processing 체크해줍니다.
2. config
tcp서버 모드로 실행되도록 작성 후 bean에 등해줍니다.
package com.example.h2tcp.config;

import org.h2.tools.Server;
import org.springframework.context.annotation.Bean;
import org.springframework.context.annotation.Configuration;

import java.sql.SQLException;

@Configuration
public class H2ServerConfig {

    @Bean
    public Server h2TcpServer() throws SQLException {
        return Server.createTcpServer().start();
    }
}
3. entity
package com.example.h2tcp.entity;

import lombok.Getter;
import org.springframework.data.annotation.CreatedDate;
import org.springframework.data.annotation.LastModifiedDate;

import javax.persistence.*;
import java.time.LocalDateTime;

@Getter
@Entity
public class User {

    @Id
    @GeneratedValue(strategy = GenerationType.IDENTITY)
    private Long id;

    @Column(name = "user_name")
    private String name;

    @CreatedDate
    @Column(name = "created_date")
    private LocalDateTime createdDate;

    @LastModifiedDate
    @Column(name = "modified_date")
    private LocalDateTime modifiedDate;
}
4. repository
package com.example.h2tcp.repository;

import com.example.h2tcp.entity.User;
import org.springframework.data.jpa.repository.JpaRepository;
import org.springframework.stereotype.Repository;

public interface UserRepository extends JpaRepository<User, Long> {
}
5. 야믈파일
entity로 테이블이 생성된 후 data.sql로 데이터 초기화하기 위해서는 다음 설정이 필요합니다.
defer-datasource-initialization: true 꼭 넣어줍니다.
권장되는 설정은 아닌데 테스트 용으로 사용합니다.
spring:
  datasource:
    url: jdbc:h2:mem:test-db
    driver-class-name: org.h2.Driver
    username: sa
  h2:
    console:
      enabled: true
  jpa:
    show-sql: true
    hibernate:
      ddl-auto: create
    defer-datasource-initialization: true
  output:
    ansi:
      enabled: always
logging:
  level:
    org.hibernate.type: trace
server:
  port:
    8080
6. data.sql
INSERT INTO user(user_name, created_date, modified_date)
VALUES ( 'playerOne', now(), now());
7. 스프링 실행
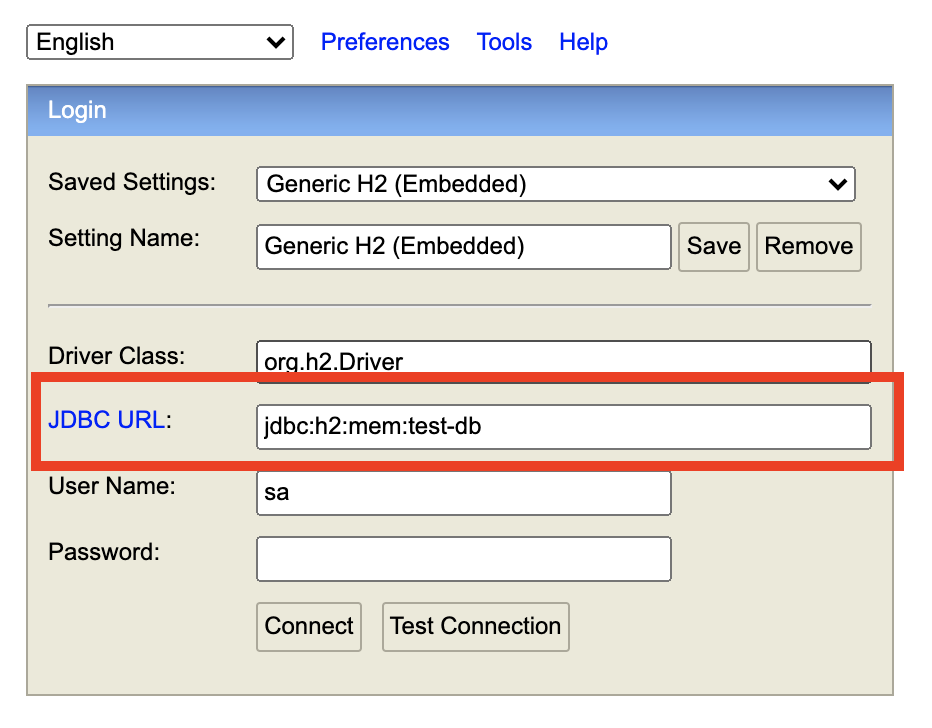
http://localhost:8080/h2-console 에서 확인 가능합니다.
JDBC URL에는 야믈 파일에서 작성한 pring.datasource.url을 적어줍니다.
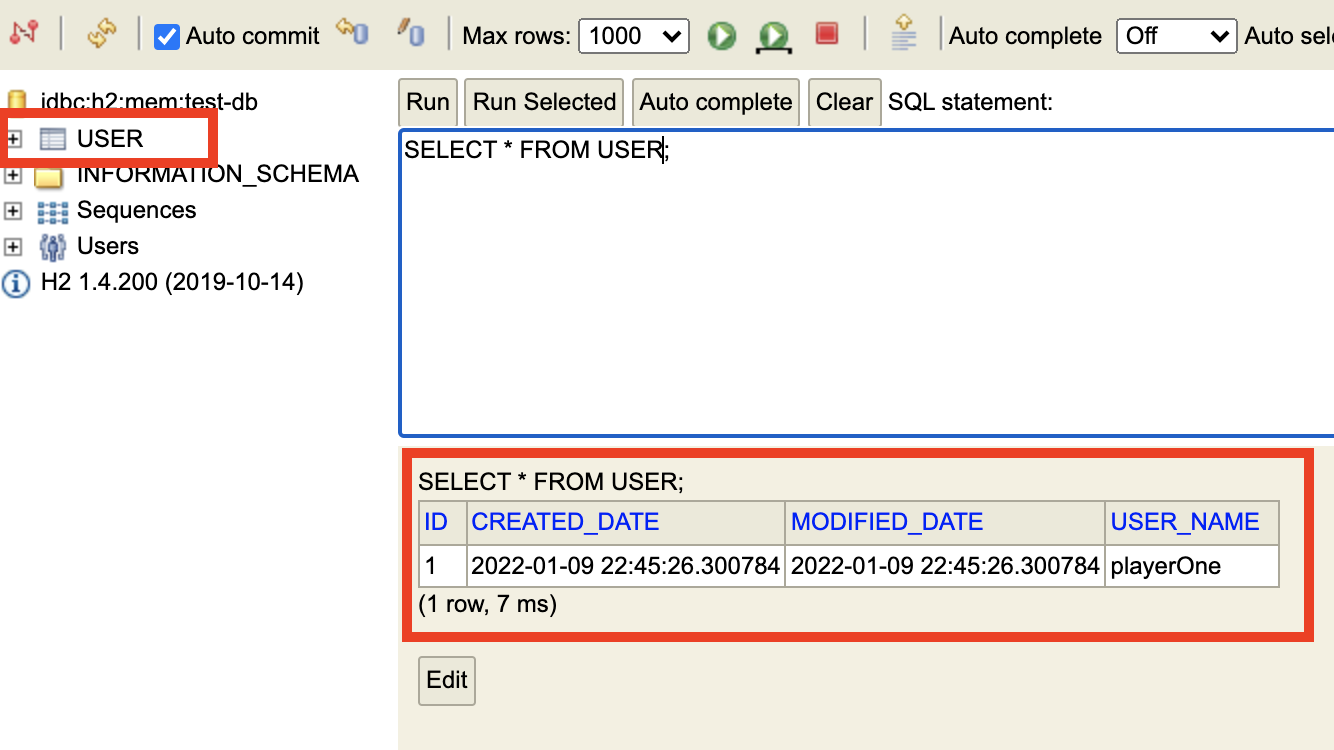
데이터 초기화도 잘 진행되었습니다.
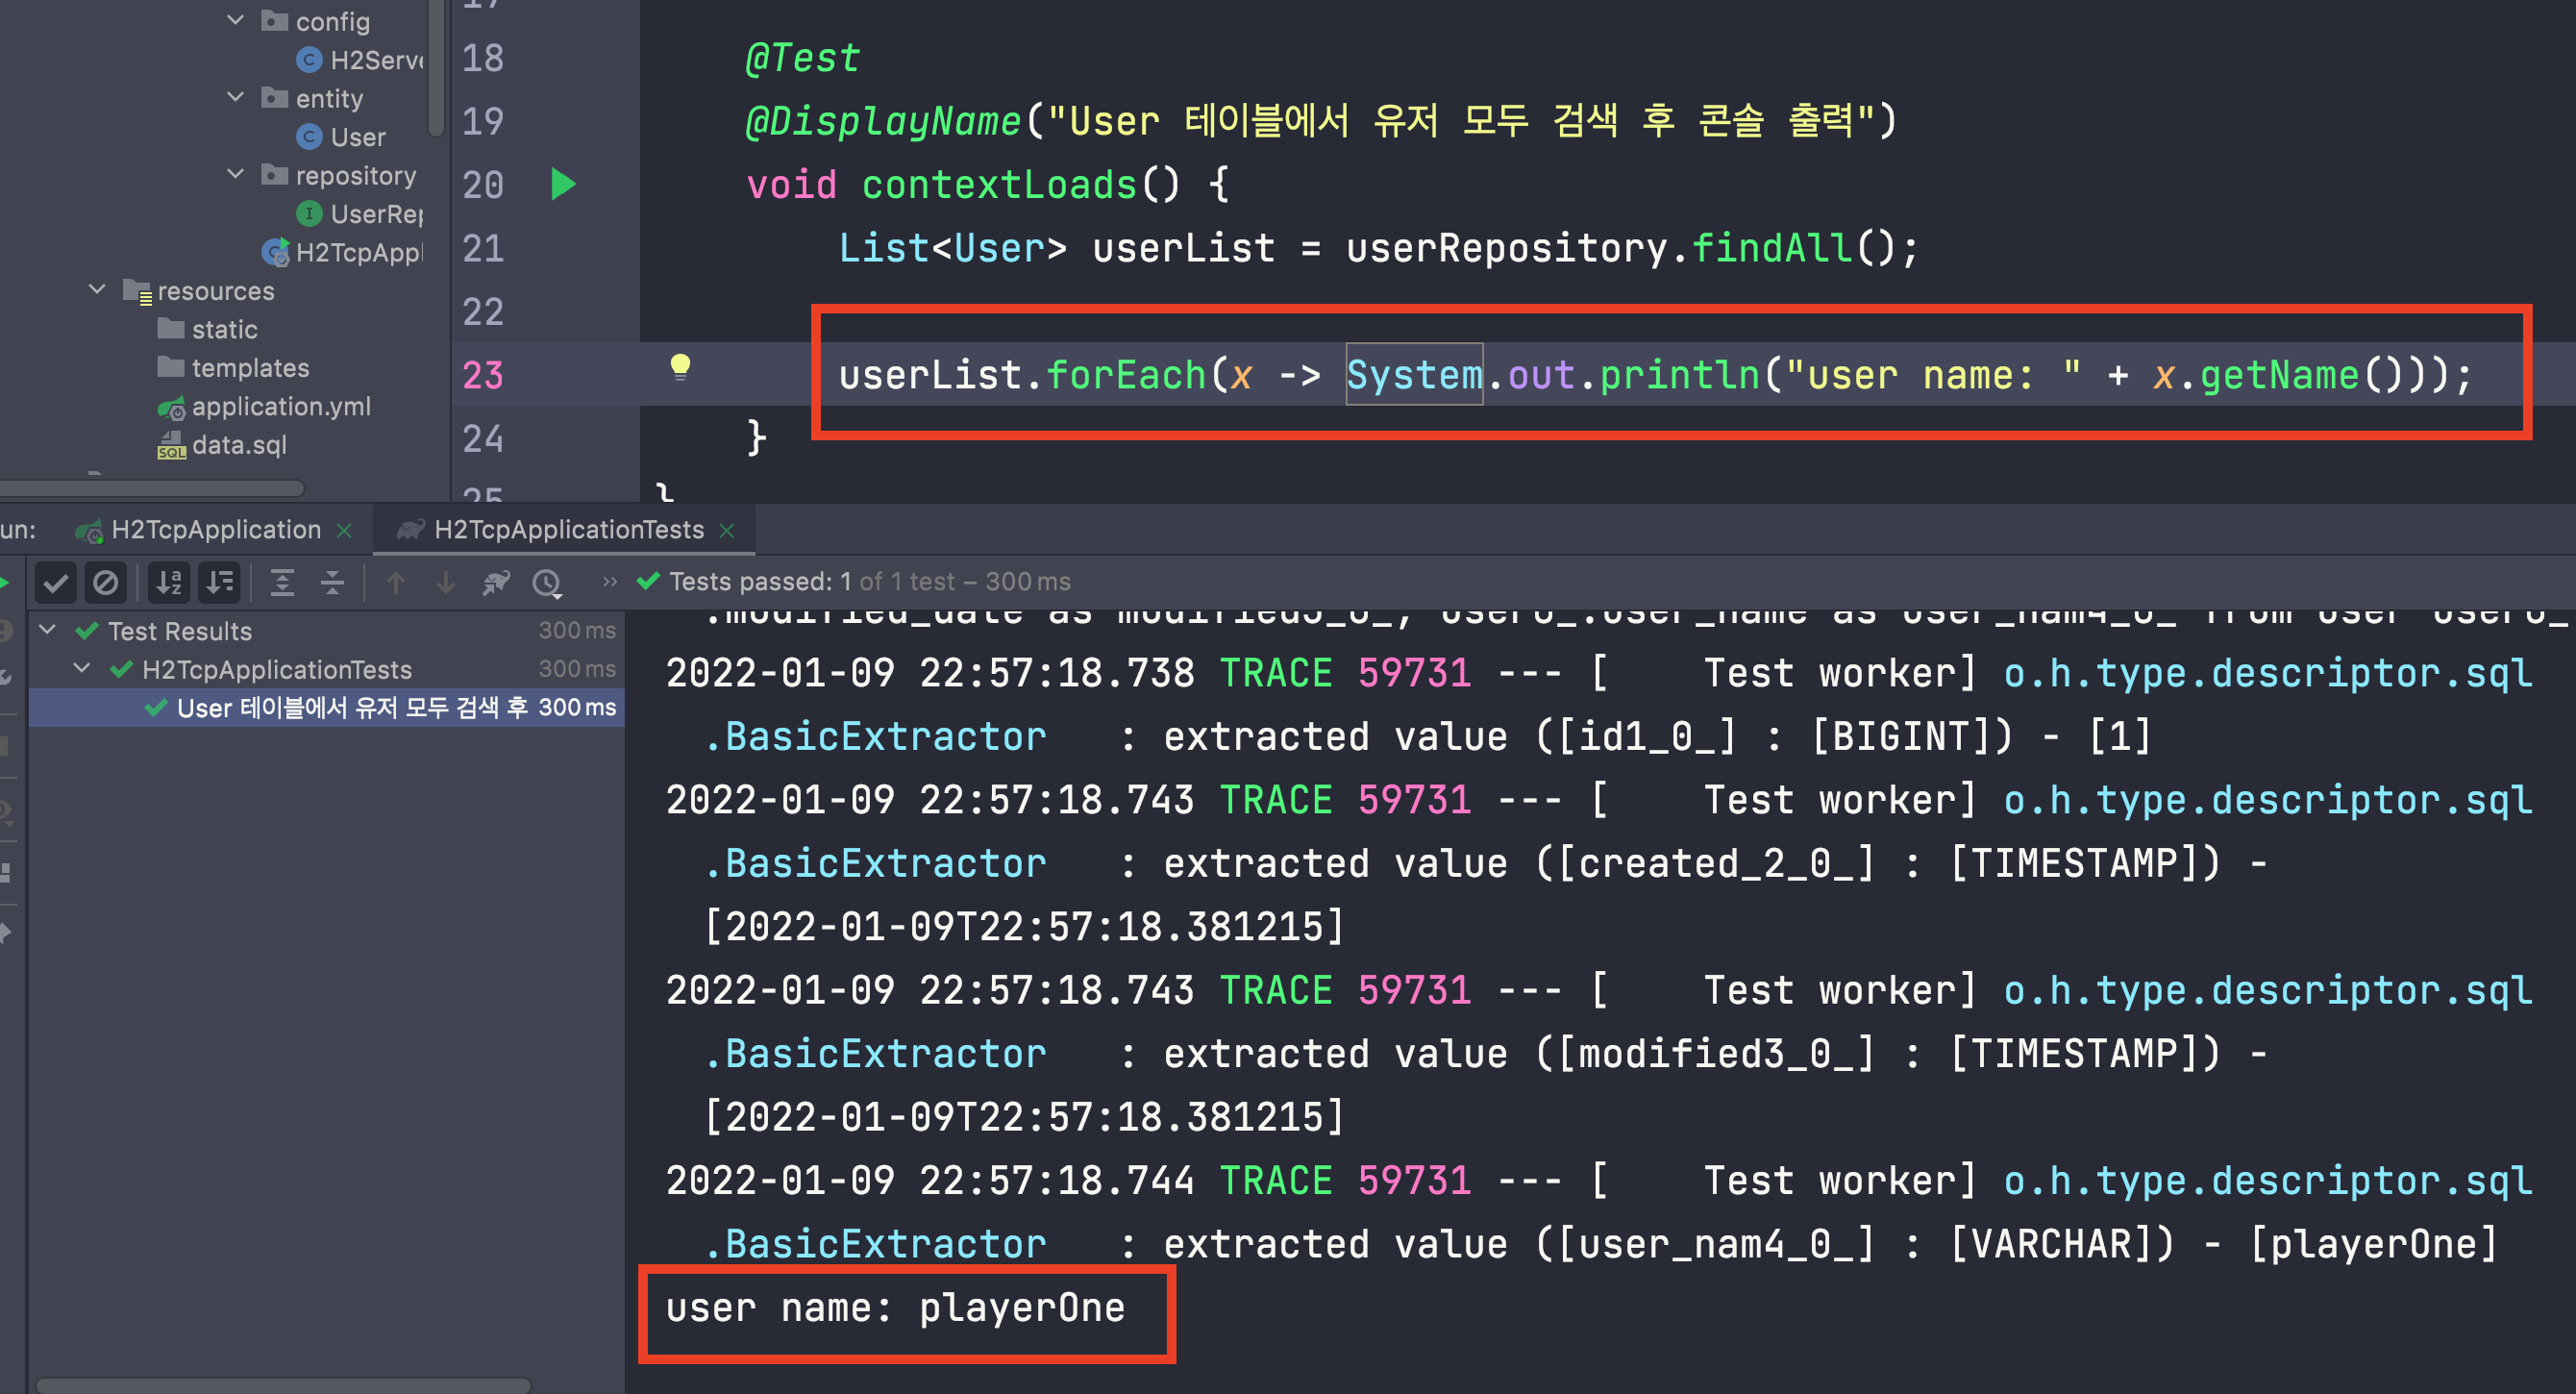
8. 테스트 코드
package com.example.h2tcp;

import com.example.h2tcp.entity.User;
import com.example.h2tcp.repository.UserRepository;
import org.junit.jupiter.api.DisplayName;
import org.junit.jupiter.api.Test;
import org.springframework.beans.factory.annotation.Autowired;
import org.springframework.boot.test.context.SpringBootTest;

import java.util.List;

@SpringBootTest
class H2TcpApplicationTests {

    @Autowired
    private UserRepository userRepository;

    @Test
    @DisplayName("User 테이블에서 유저 모두 검색 후 콘솔 출력")
    void contextLoads() {
        List<User> userList = userRepository.findAll();

        userList.forEach(x -> System.out.println("user name: " + x.getName()));
    }
}
테스트코드에서도 H2 DB의 데이터를 잘 받아옵니다.

callmeskye