v-for
v-for지시문을 사용하여 배열을 기반으로 항목 목록을 렌더링 할 수 있다.
index.html
<div id="vue-app">
      <h1>Looping through lists</h1>
      <ul>
        <li v-for="character in characters">{{ character }}</li>
      </ul>
    </div>
app.js
new Vue({
  el: "#vue-app",
  data: {
    name: "smooth",
    characters: ["Mario", "Luigi", "Yoshi", "Bowser"],
    users: [
      { name: "Ryu", age: 25 },
      { name: "Yoshi", age: 35 },
      { name: "Ken", age: 55 }
    ]
  },
  methods: {}
});

index
내부 v-for블록에는 부모 범위 속성에 대한 모든 액세스 권한이 있다.
<ul>
        <li v-for="(user, index) in users">
          {{ index }} . {{ user.name }} - {{ user.age }}
        </li>
</ul>
Template
template v-if과 마찬가지로 <template>태그를 사용하여 v-for여러 요소의 블록을 렌더링 할 수도 있다. 예를 들면 다음과 같다.
Mutiple Instance
Vue 객체를 사용해서 여러개의 인스턴스를 만들 수 있다.
index.html
<h1>Multiple Vue instances</h1>
  <div id="vue-app-one">
    <h2>{{title}}</h2>
    <p>{{greet}}</p>
  </div>
  <div id="vue-app-two">
    <h2>{{title}}</h2>
    <p>{{greet}}</p>
    <button v-on:click="changeTitle">Change App One Title</button>
  </div>
app.js
const one = new Vue({
  el: "#vue-app-one",
  data: {
    title: "One"
  },
  methods: {},
  computed: {
    greet: function() {
      return "Hello from app one";
    }
  }
});

const two = new Vue({
  el: "#vue-app-two",
  data: {
    title: "Two"
  },
  methods: {
    changeTitle: function() {
      one.title = "Title changed";
    }
  },
  computed: {
    greet: function() {
      return "Hello from app two";
    }
  }
});
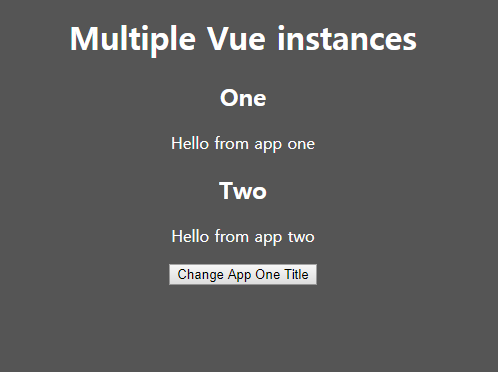
two 객체에서 one.title을 변형시키는 것도 가능하고 객체의 밖에서 값을 바꿔도 바뀌게 된다.

Front-end 개발 공부일지