
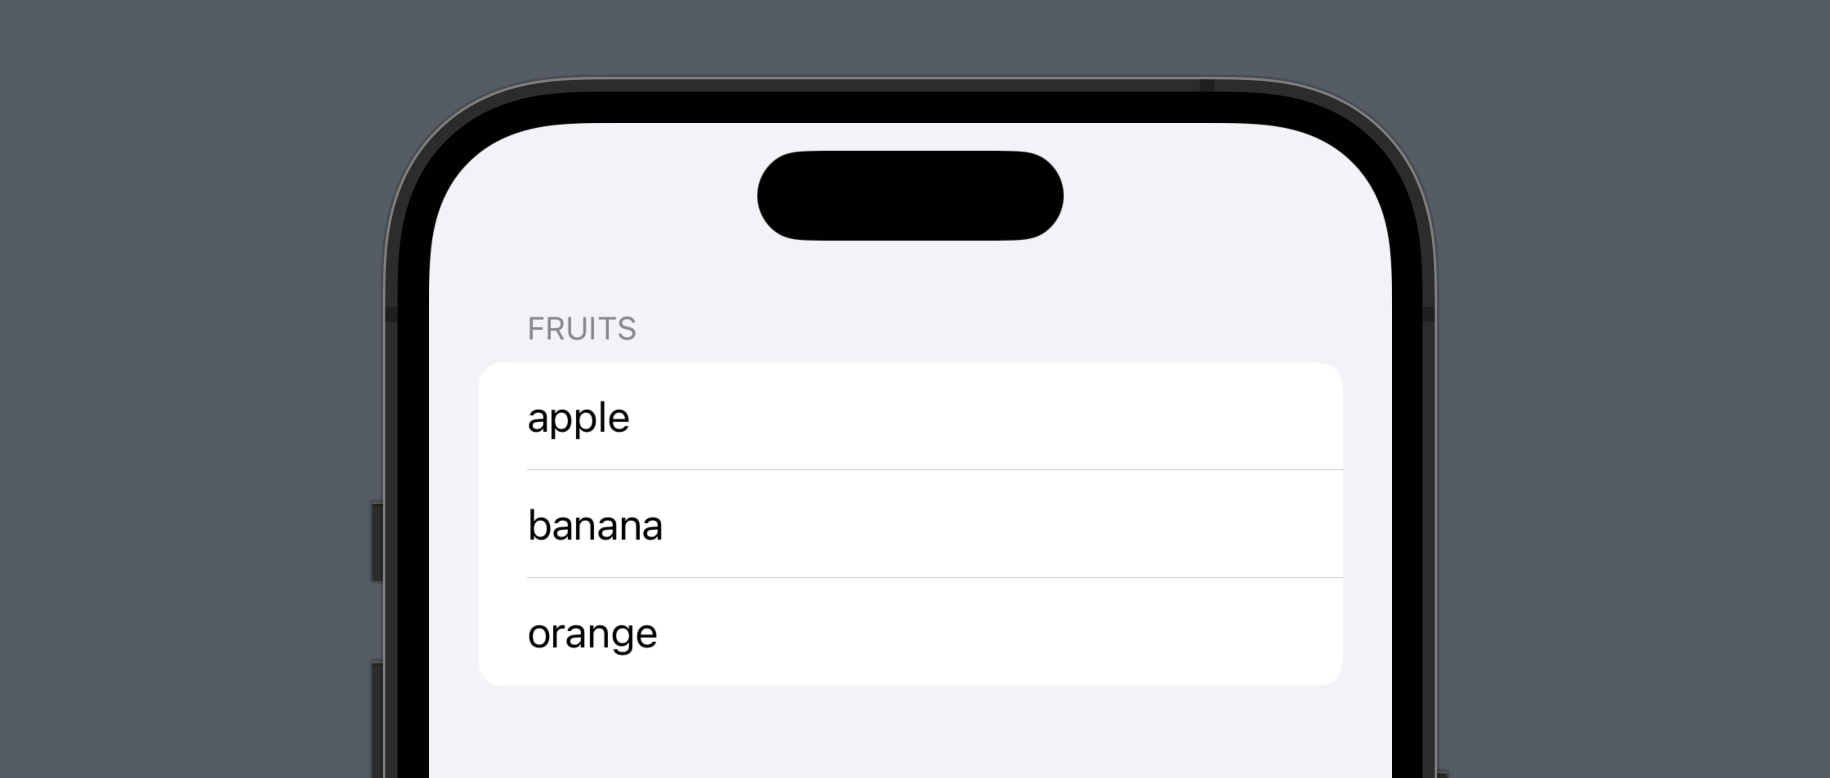
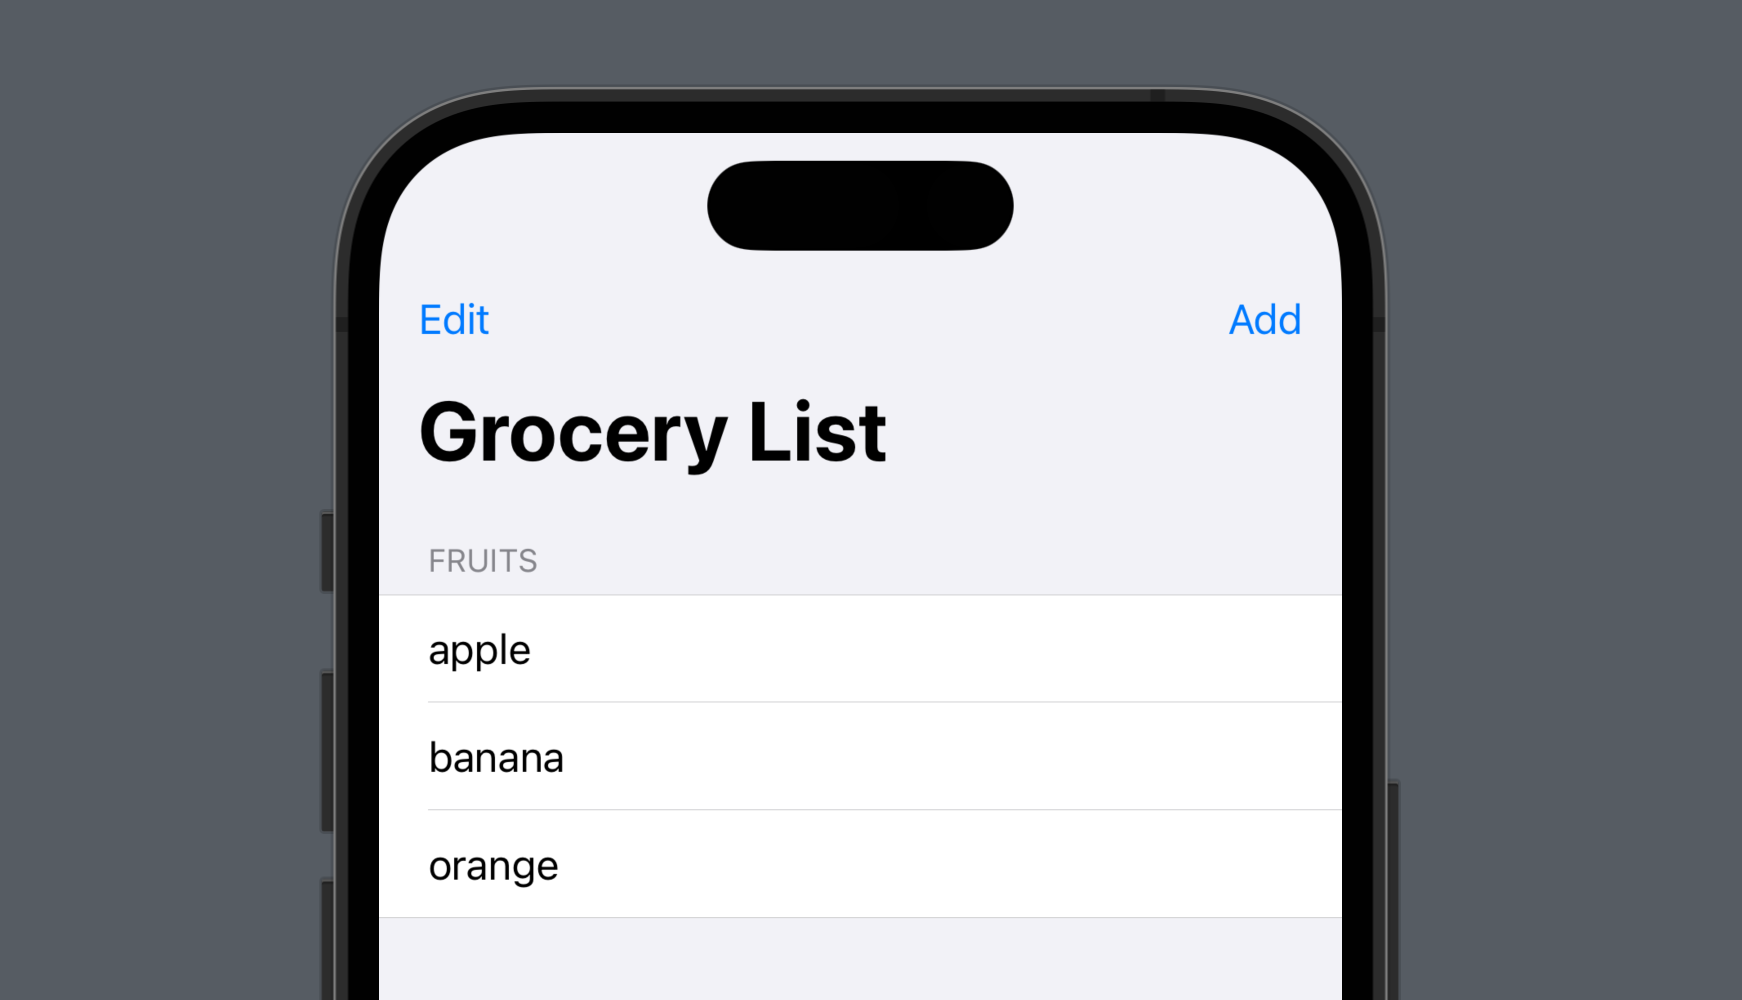
List
- 데이터를 목록 형태로 보여주는 뷰
List Contents
- List 생성자에 뷰를 전달하면, 뷰 하나의
row하나씩 표현한다.
List {
	Text("apple") // 첫 번째 row
	Text("banana") // 두 번째 row
	Text("oragne") // 세 번째 row
}id로 식별할 수 있는 데이터를 받아ForEach를 활용하여 동적으로 뷰를 생성할 수 있다.
struct ListStudy: View {

    @State var fruits: [String] = [
        "apple", "banana", "orange"
    ]

    var body: some View {
        List {
        	// fruits 배열을 나타내는 리스트 뷰
            ForEach(fruits, id: \.self) { fruit in
                Text(fruit)
            }
        }
    }
}
Section
- Section을 활용하여 List 내의 데이터를 그룹핑하고
header와footer를 추가할 수 있다.
struct ListStudy: View {

    @State var fruits: [String] = [
        "apple", "banana", "orange"
    ]

    var body: some View {
        List {
            Section { // 데이터 Section 추가
                ForEach(fruits, id: \.self) { fruit in
                    Text(fruit)
                }
            } header: { // header 추가
                Text("Fruits")
            }
        }
    }
}
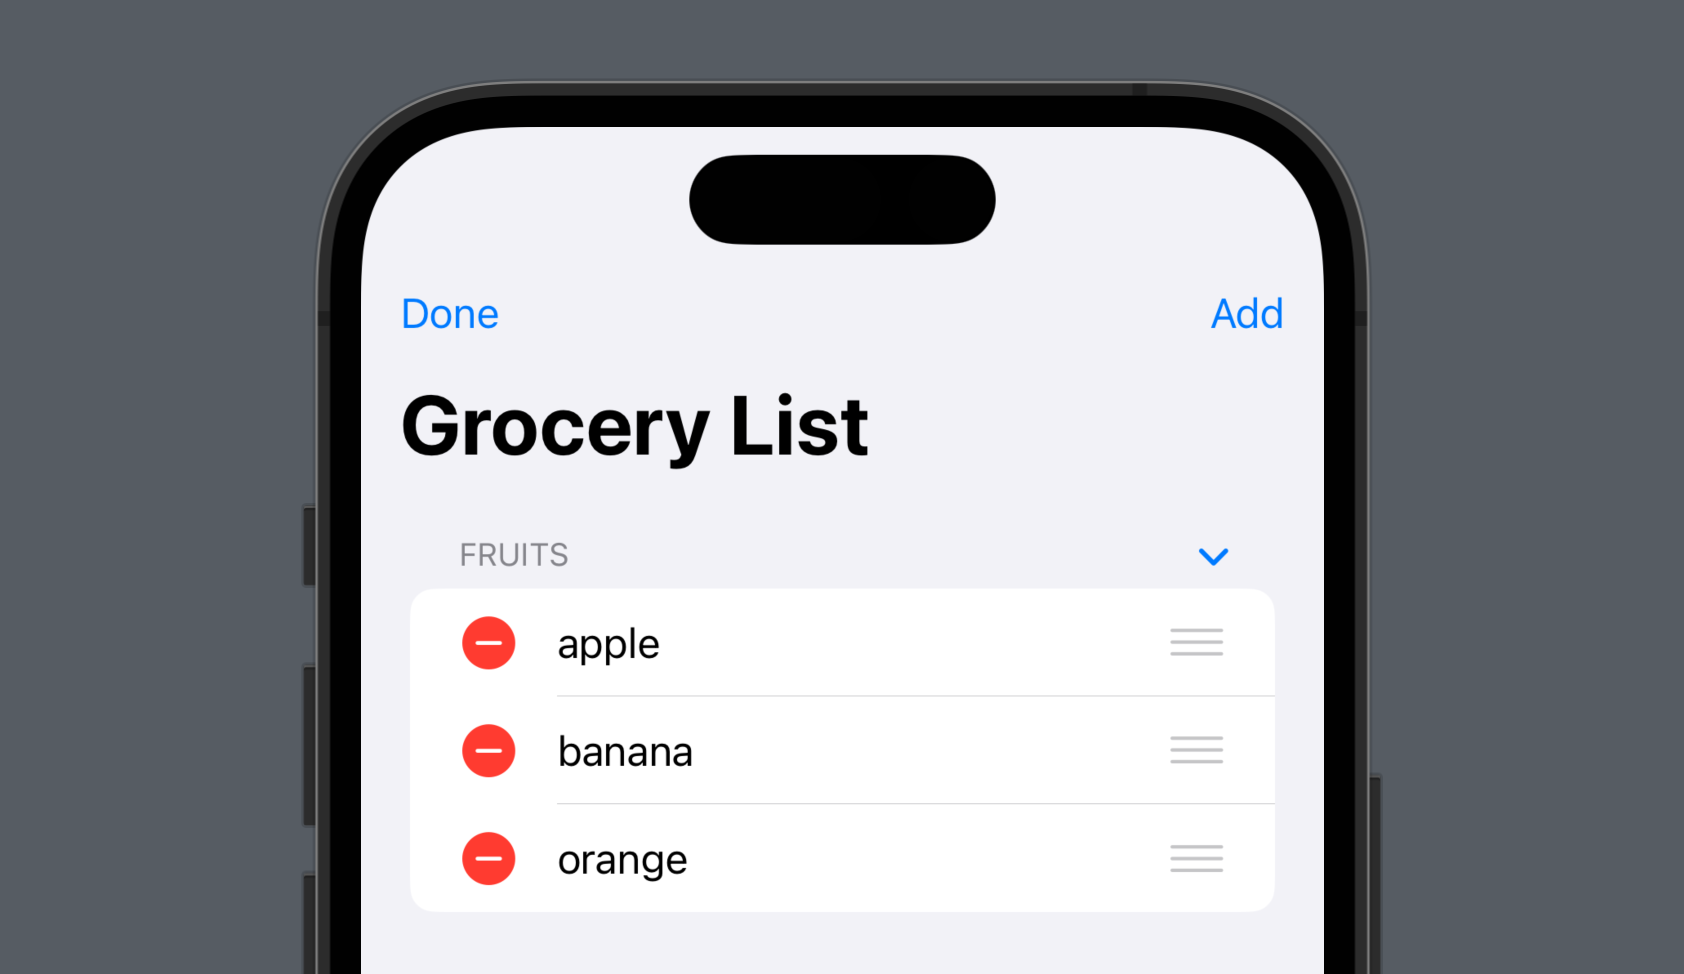
onDelete
onDelete를 활용하여 사용자가 List 내의 데이터를 삭제할 수 있다.indexSet은 Swift의Foundation프레임워크에 포함된 자료구조 중 하나로, 정수 값의 집합을 나타내며, 일반적으로 컬렉션의 인덱스를 저장하거나 전달하는 데 사용된다.
struct ListStudy: View {

    @State var fruits: [String] = [
        "apple", "banana", "orange"
    ]

    var body: some View {
        List {
            Section {
                ForEach(fruits, id: \.self) { fruit in
                    Text(fruit)
                }
                // List 내의 데이터 삭제
                .onDelete { indexSet in
                    fruits.remove(atOffsets: indexSet)
                }
            } header: {
                Text("Fruits")
            }
        }
    }
}
fruits.remove(atOffsets: indexSet)코드를delete라는 함수로 추출하고,onDelete()메서드에perform파라미터를 사용하여 바로delete함수를 호출할 수 있다.
struct ListStudy: View {

    @State var fruits: [String] = [
        "apple", "banana", "orange"
    ]

    var body: some View {
        List {
            Section {
                ForEach(fruits, id: \.self) { fruit in
                    Text(fruit)
                }
                // perform 파라미터를 사용하여 바로 delete 함수 호출
                .onDelete(perform: delete(indexSet:))
            } header: {
                Text("Fruits")
            }
        }
    }

    func delete(indexSet: IndexSet) {
        fruits.remove(atOffsets: indexSet)
    }
}- Trailing Closure 구문을 활용하여
delete의 파라미터를 생략할 수 있다.
struct ListStudy: View {

    @State var fruits: [String] = [
        "apple", "banana", "orange"
    ]

    var body: some View {
        List {
            Section {
                ForEach(fruits, id: \.self) { fruit in
                    Text(fruit)
                }
                // delete 함수의 파라미터 생략
                .onDelete(perform: delete)
            } header: {
                Text("Fruits")
            }
        }
    }

    func delete(indexSet: IndexSet) {
        fruits.remove(atOffsets: indexSet)
    }
}
onMove
onMove를 활용하여 사용자가 List 내의 데이터 순서를 변경할 수 있다.onMove를 활용하기 위해서는 Editing Mode에 진입해야되기 때문에, List를 NavigationView 안에 넣고EditButton()를 추가하는 작업이 선행되어야 한다.
struct ListStudy: View {

    @State var fruits: [String] = [
        "apple", "banana", "orange"
    ]

    var body: some View {
    	// NaviationView 추가
        NavigationView {
            List {
                Section {
                    ForEach(fruits, id: \.self) { fruit in
                        Text(fruit)
                    }
                    .onDelete(perform: delete)
                    // List 내의 데이터 순서 변경
                    .onMove { indices, newOffset in
                        fruits.move(fromOffsets: indices, toOffset: newOffset)
                    }
                } header: {
                    Text("Fruits")
                }
            }
            .navigationTitle("Grocery List")
            .navigationBarItems(leading: EditButton()) // EditButton 추가
        }
    }

    func delete(indexSet: IndexSet) {
        fruits.remove(atOffsets: indexSet)
    }
}
fruits.move(fromOffsets: indices, toOffset: newOffset)코드를move라는 함수로 추출하고,onMove()메서드에perform파라미터를 사용하여 바로move함수를 호출할 수 있다.delete와 마찬가지로 Trailing Closure 구문을 활용하여move의 파라미터를 생략할 수 있다.
struct ListStudy: View {

    @State var fruits: [String] = [
        "apple", "banana", "orange"
    ]

    var body: some View {
        NavigationView {
            List {
                Section {
                    ForEach(fruits, id: \.self) { fruit in
                        Text(fruit)
                    }
                    .onDelete(perform: delete)
                    // perform 파라미터를 사용하여 바로 move 함수 호출 및 move 함수의 파라미터 생략
                    .onMove(perform: move)
                } header: {
                    Text("Fruits")
                }
            }
            .navigationTitle("Grocery List")
            .navigationBarItems(leading: EditButton())
        }
    }

    func move(indices: IndexSet, newOffset: Int) {
        fruits.move(fromOffsets: indices, toOffset: newOffset)
    }
    func delete(indexSet: IndexSet) {
        fruits.remove(atOffsets: indexSet)
    }
}
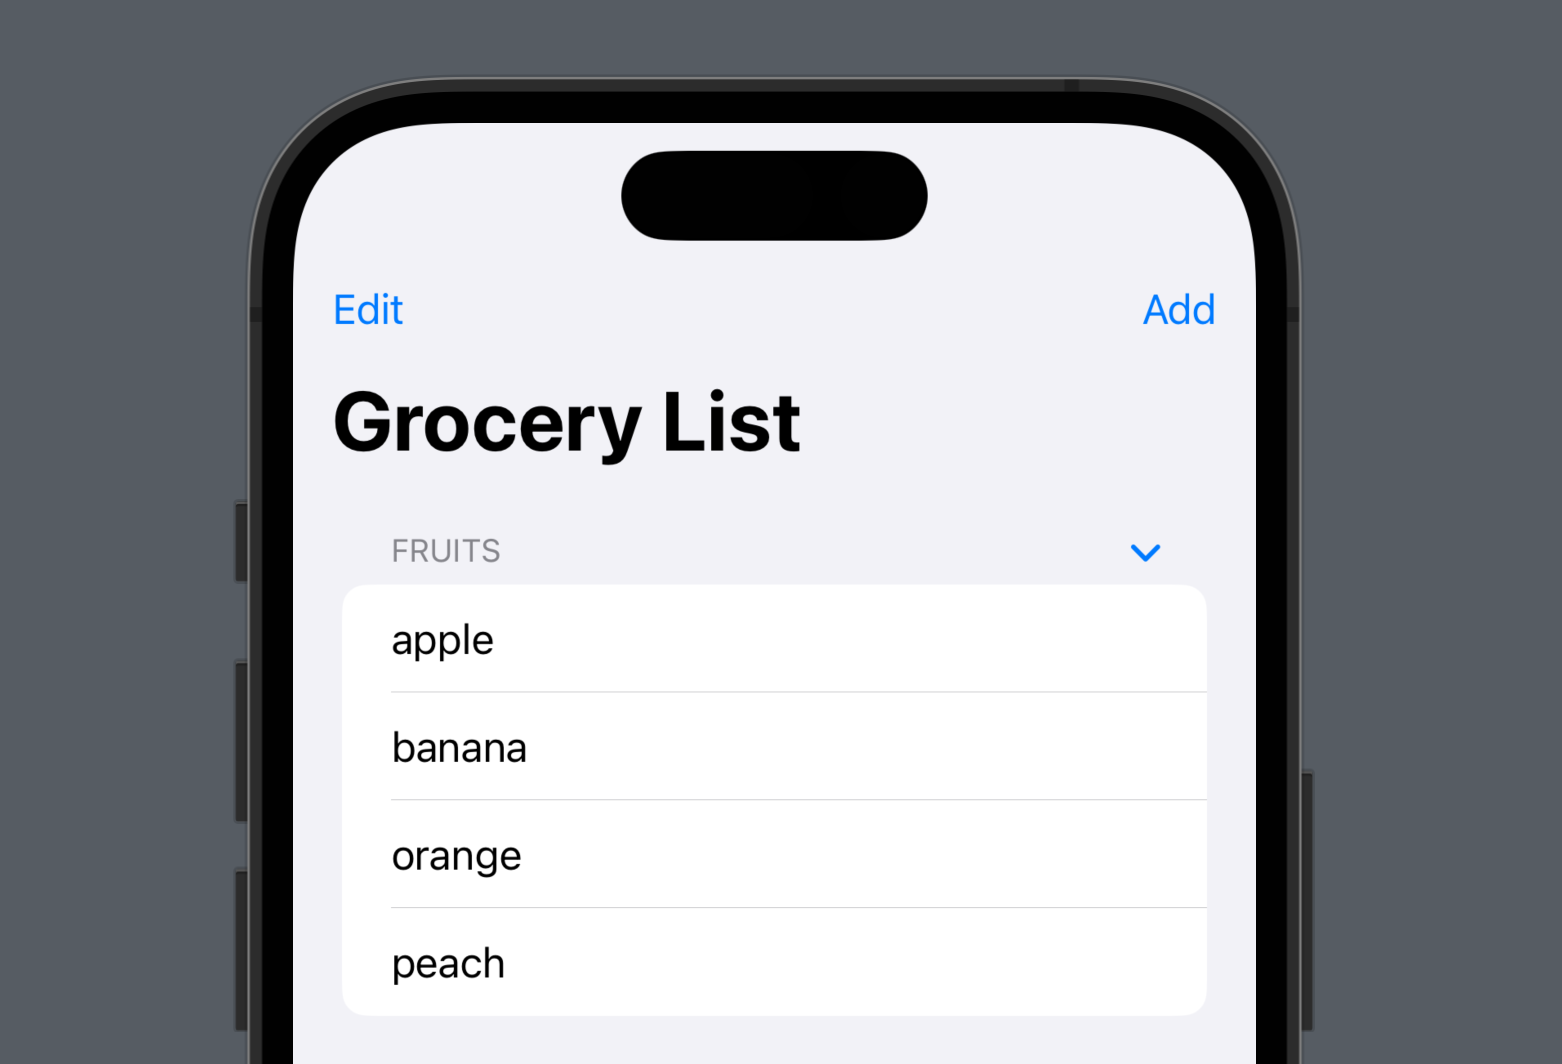
add
NavigationBarItems에 항목 추가 버튼을 생성하여 List 내의 새로운 데이터를 추가할 수 있다.
struct ListStudy: View {

    @State var fruits: [String] = [
        "apple", "banana", "orange"
    ]

    var body: some View {
        NavigationView {
            List {
                Section {
                    ForEach(fruits, id: \.self) { fruit in
                        Text(fruit)
                    }
                    .onDelete(perform: delete)
                    .onMove(perform: move)
                } header: {
                    Text("Fruits")
                }
            }
            .navigationTitle("Grocery List")
            .navigationBarItems(
                leading: EditButton(),
                // 항목 추가 버튼 생성
                trailing:
                    Button("Add", action: {
                        add()
                    })
            )
        }
    }

    //항목 추가 함수 생성
    func add() {
        fruits.append("peach")
    }
    func move(indices: IndexSet, newOffset: Int) {
        fruits.move(fromOffsets: indices, toOffset: newOffset)
    }
    func delete(indexSet: IndexSet) {
        fruits.remove(atOffsets: indexSet)
    }
}- 항목을 추가하는 버튼 자체를 하나의 뷰로 정리할 수 있다.
struct ListStudy: View {

    @State var fruits: [String] = [
        "apple", "banana", "orange"
    ]

    var body: some View {
        NavigationView {
            List {
                Section {
                    ForEach(fruits, id: \.self) { fruit in
                        Text(fruit)
                    }
                    .onDelete(perform: delete)
                    .onMove(perform: move)
                } header: {
                    Text("Fruits")
                }
            }
            .navigationTitle("Grocery List")
            .navigationBarItems(
                leading: EditButton(),
                trailing: addButton // 항목 추가 버튼 뷰
            )
        }
    }

    // 항목 추가 버튼 뷰 생성
    var addButton: some View {
        Button("Add") {
            add()
        }
    }

    func add() {
        fruits.append("peach")
    }
    func move(indices: IndexSet, newOffset: Int) {
        fruits.move(fromOffsets: indices, toOffset: newOffset)
    }
    func delete(indexSet: IndexSet) {
        fruits.remove(atOffsets: indexSet)
    }
}
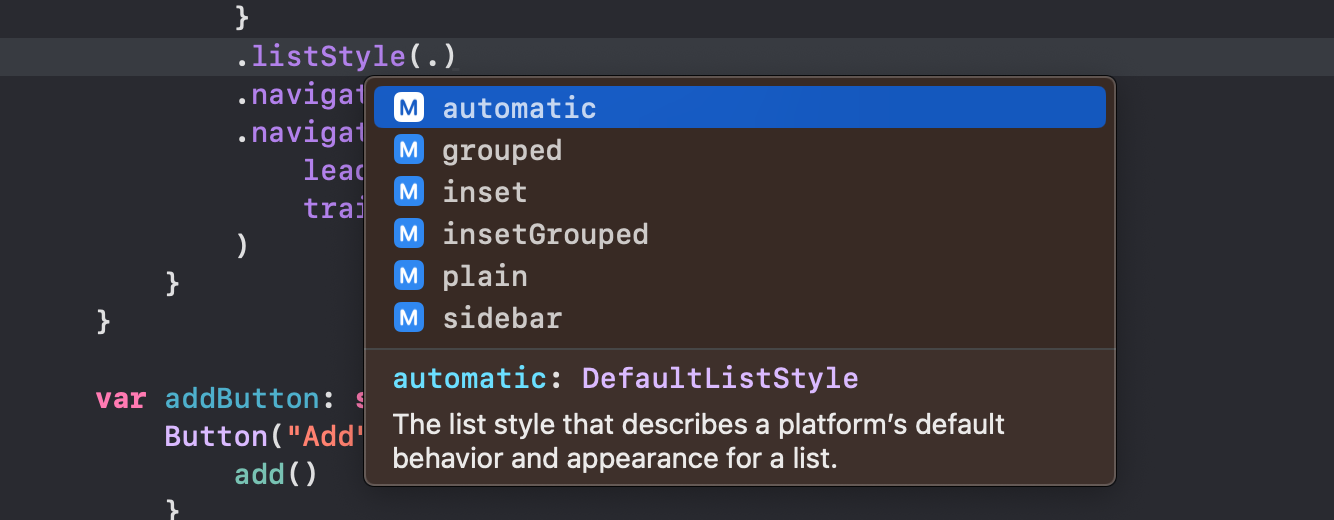
ListStyle
- List 뷰의
listStylemodifier를 통해 다양한 스타일을 적용할 수 있다.
NavigationView {
	List {
		Section {
			ForEach(fruits, id: \.self) { fruit in
				Text(fruit)
			}
			.onDelete(perform: delete)
			.onMove(perform: move)
		} header: {
			Text("Fruits")
		}
	}
	.listStyle(.grouped) // List 스타일 변경
	.navigationTitle("Grocery List")
	.navigationBarItems(
		leading: EditButton(),
		trailing: addButton
	)
}
Customizing
accentColor,listRowBackground등과 함께 List 구성 요소들에 다양한 modifier를 추가하여 List를 원하는 모습으로 커스터마이징 할 수 있다.
NavigationView {
    List {
        Section {
            ForEach(fruits, id: \.self) { fruit in
                Text(fruit)
                	// row 스타일 변경
                    .font(.headline)
                    .foregroundColor(.white)
                    .padding()
            }
            .onDelete(perform: delete)
            .onMove(perform: move)
            // row 배경색 추가
            .listRowBackground(Color.blue)
        } header: {
        	// header 이미지 추가
            HStack {
                Image(systemName: "flame.fill")
                Text("Fruits")
            }
        }
    }
    // List 강조 색 변경
    .accentColor(.green)
    .navigationTitle("Grocery List")
    .navigationBarItems(
        leading: EditButton(),
        trailing: addButton
    )
}
// NavigationView 강조 색 변경
.accentColor(.red)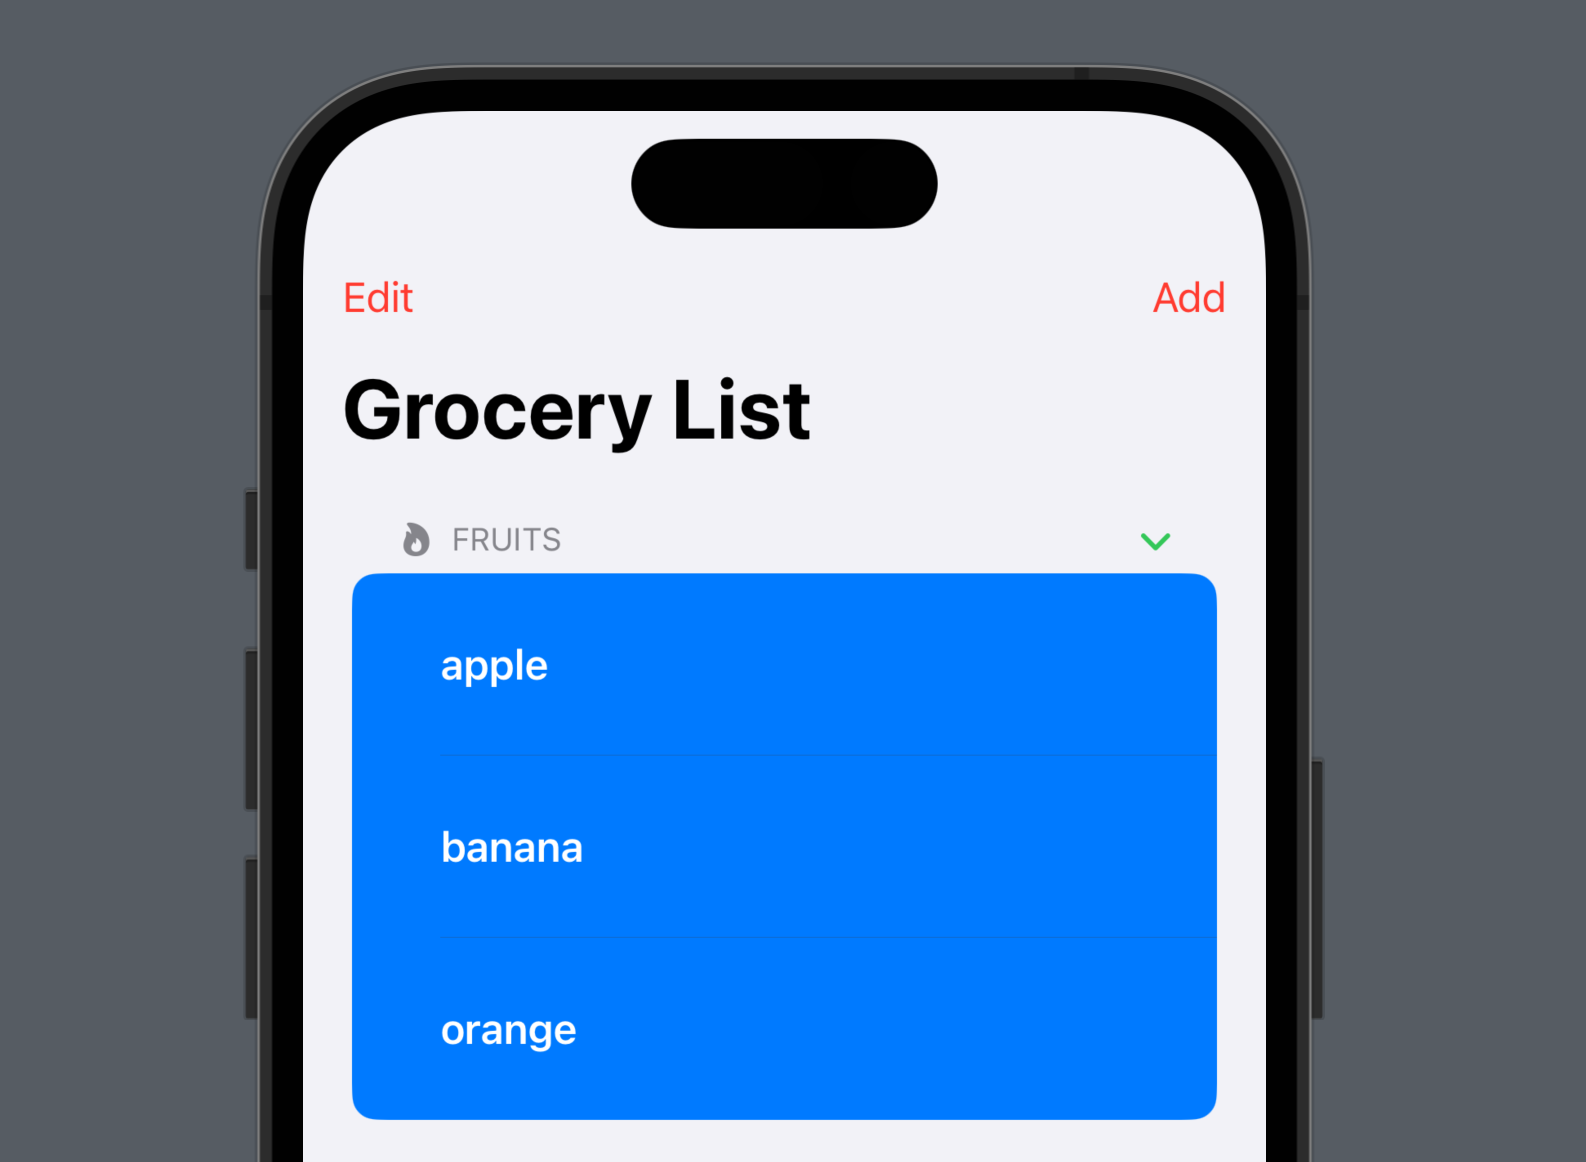

iOS Developer | Product Designer @snacknam