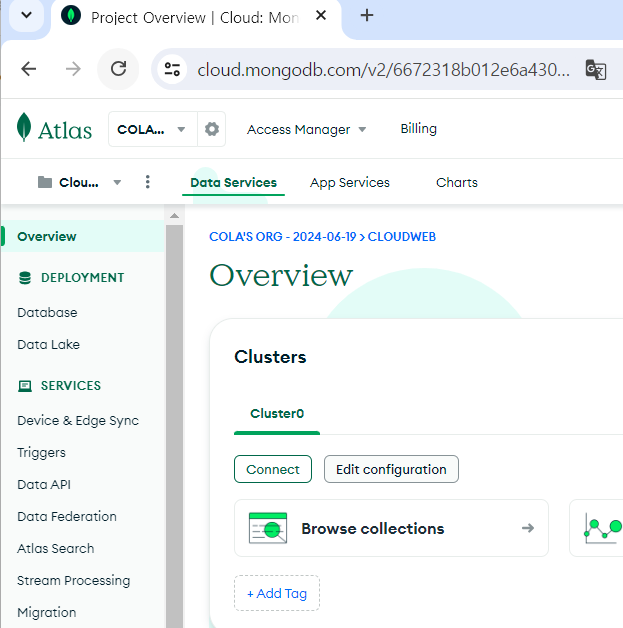
몽고DB와 Node.js 연결
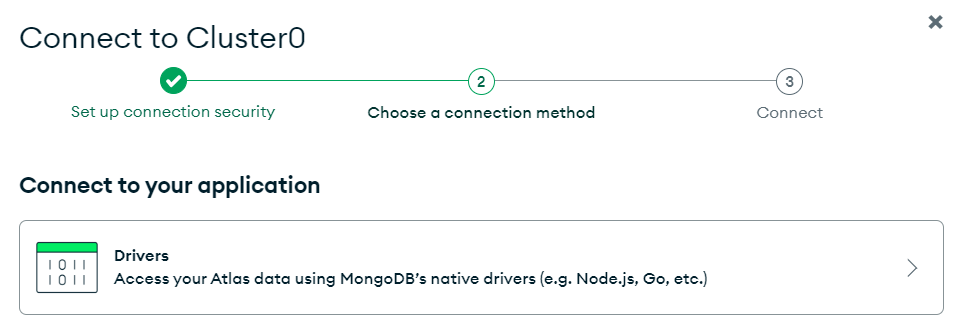
Connect를 눌러 Drivers 선택
접속 코드 복사 후 <password> 부분에 설정했던 비밀번호로 변경
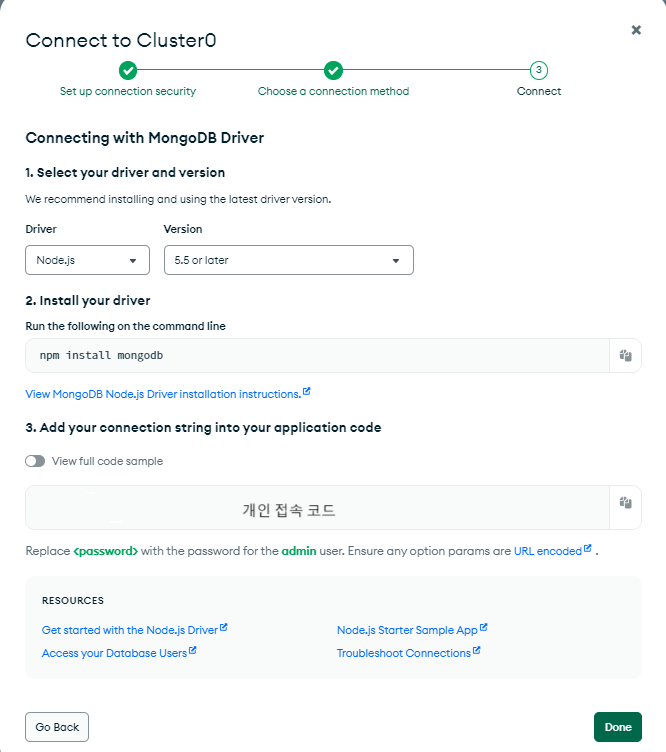
라이브러리 설치
npm 패키지 설치
npm initNode.js express 모듈 설치
npm i express몽고DB 라이브러리 설치
npm i mongodb몽고DB 라이브러리를 이용하여 mongoclient라는 객체를 생성
이 객체를 사용하여 몽고DB에 접속하고 제어 가능
const mongoclient = require('mongodb').MongoClient;몽고DB와의 접속 코드 작성
서버가 시작되었을 때 먼저 몽고DB에 접속을 시도하고 접속이 성공하면 listen() 함수에 의해 8080 포트를 열고 대기
'8080 server ready...'가 출력되면 서버가 정상 동작하는 것
const express = require('express');
const app = express();

const mongoclient = require('mongodb').MongoClient;
const url = `개인 접속 코드`;
mongoclient.connect(url)
    .then(client=>{
        app.listen(8080, function () {
            console.log('8080 server ready...');
        });
    })
    .catch(err=>{
        console.log(err);
    });
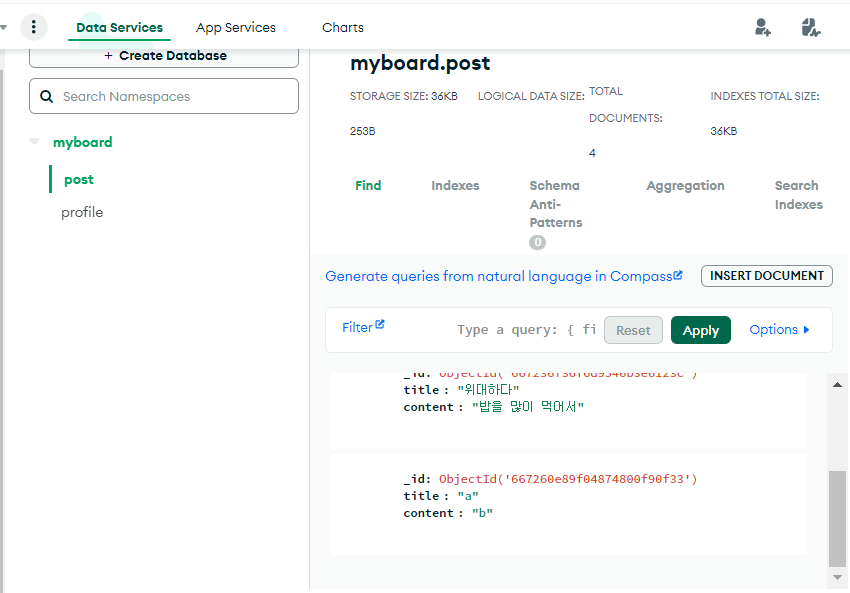
컬렉션에 접근하여 데이터 출력
const express = require('express');
const app = express();

const mongoclient = require('mongodb').MongoClient;
const url = `개인 접속 코드`;

let mydb;
mongoclient.connect(url)
    .then(client=>{
        mydb = client.db('myboard');        //데이터베이스 객체 초기화
        mydb.collection('post')				//collection() 함수를 통해 컬렉션에 접근, CRUD 가능
            .find()							//모든 데이터를 읽어올 때 find() 함수 사용
            .toArray()						//find() 함수로 읽어온 데이터를 배열의 형태로 가져오기 위해 toArray() 함수 이용
            .then(result=>{
                console.log(result);
            });
    })
    .catch(err=>{
        console.log(err);
    });
요청 시 데이터 조회
const express = require('express');
const app = express();

const mongoclient = require('mongodb').MongoClient;
const url = `개인 접속 코드`;

let mydb;
mongoclient.connect(url).then(client => {
    mydb = client.db('myboard');
    app.listen(8080, function() {
        console.log("8080 server ready...");
    });
});

app.get('/list', function(req, res) {
    mydb.collection('post')
        .find()
        .toArray()
        .then(result=>{
            console.log(result);
    });
});
화면에서 입력한 데이터 서버로 보내기
Get 방식
app.get('/enter', function(req, res) {      //요청 성공 시 콜백 함수에서 sendFile() 함수를 사용하여
    res.sendFile(__dirname+'/enter.html');  //enter.html 파일을 웹 브라우저로 보냄
});
req에 담겨진 post 방식의 요청 데이터는 body-parser라는 라이브러리를 통해 읽어올 수 있음
(post 방식은 데이터를 http 메시지의 body에 담아서 전송하기 때문)
body-parser 라이브러리 설치
npm i body-parser라이브러리를 사용하기 위해 모듈을 require하고 미들웨어 사용을 코드에 등록
const bodyParser = require('body-parser')
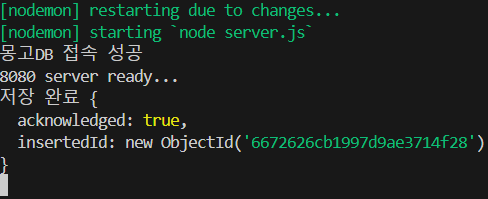
app.use(bodyParser.urlencoded({extended:true});app.post('/save', function(req, res) {
console.log("저장완료");
console.log(req);
});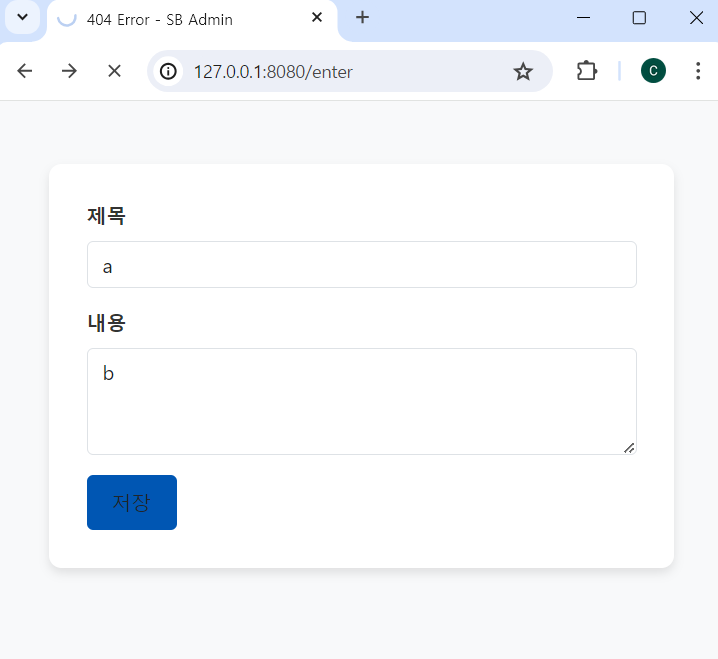
몽고DB에 폼 입력 데이터 저장
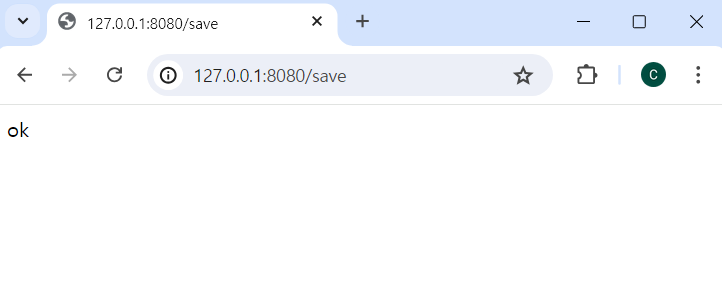
app.post('/save', (req, res) => {
        mydb.collection('post').insertOne({
            title:req.body.title,
            content:req.body.content
        }).then(result => {
            console.log('저장 완료', result);
            res.send('ok');
        });
EJS
동적인 결과를 정적인 html 파일에 담는 기능 제공
EJS 설치
npm install ejsEJS를 사용하기 위해 코드 추가
app.set('view engine', 'ejs');-
템플릿 엔진은 'views' 폴더를 기본 작업 환경으로 인식하기 때문에 'views' 폴더를 생성 후 앞으로 생성할 EJS 파일은 모두 'views' 안에 만들어야 함
-
템플릿 엔진을 사용하는 목적은 데이터를 정적인 페이지에 출력하는 것, 이를 위해 서버에서 EJS 파일을 렌더링 시 데이터를 전달할 함수
res.render()호출
render(렌더링할 파일, 파일에 전달할 데이터)
app.get('/list', function(req, res) {
        mydb.collection('post')
            .find()
            .toArray()
            .then(result=>{
                console.log(result);
                // res.send(result);
                // res.sendFile(__dirname+"/list.html");
                res.render('list.ejs', {data:result});
            });
    });
EJS 사용 문법
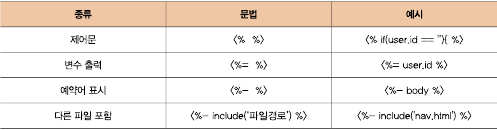
		<tbody>
        <%for (let i = 0; i < data.length; i++) {%>
          <tr>
            <td><%=data[i].title%></a></td>
            <td><%=data[i].content%></td>
            <td><button class = 'delete btn btn-outline-danger' >삭제</button></td>
          </tr>
        <% } %>
        </tbody>
JSTL과 유사