Cloudinary에서 AWS S3로 이미지 저장소 마이그레이션 - 완벽 가이드
들어가며
프로젝트 초기에는 Cloudinary를 이미지 저장소로 사용했다. Cloudinary는 이미지 업로드, 리사이징, 최적화, CDN까지 모든 기능을 제공하는 올인원 플랫폼이다. 프론트엔드에서 직접 API를 호출할 수 있어 개발 속도가 빠르다는 장점이 있다.
하지만 팀 회의 결과, 비용 최적화와 인프라 통합을 위해 AWS S3로 이전하기로 결정했다. S3는 단순 파일 스토리지이기 때문에 Cloudinary처럼 자동으로 제공되던 기능들을 직접 구현해야 했다.
이 글에서는 S3 설정부터 Spring Boot 백엔드 구성, React 프론트엔드에서의 이미지 업로드 구현, 그리고 실제 개발 중 마주친 모든 문제들을 해결하는 과정을 단계별로 정리한다.
왜 서버 저장이 아닌 전용 스토리지인가?
서버에 직접 이미지를 저장하는 방식은 다음과 같은 문제가 있다.
- 서버 용량을 직접 관리해야 함
- 배포할 때마다 파일 유실 위험
- 트래픽이 몰리면 성능 저하로 직결
요즘은 이미지는 전용 스토리지 서비스로 보내고, 서버는 URL만 관리한다.
User
 ↓ (이미지 선택)
React (TipTap Editor)
 ↓ (multipart/form-data)
Spring Boot Upload API
 ↓ (S3 업로드)
Public URL 반환
 ↓
React Editor에 이미지 삽입
이 방식의 장점은 명확하다.
- 서버 디스크 관리 필요 없음
- CDN 덕분에 빠른 이미지 로딩
- 트래픽이 늘어도 스토리지가 감당
- CI/CD 시 파일 유실 없음
1. AWS S3 버킷 생성
AWS 콘솔에 로그인한 후 S3 서비스로 이동한다.
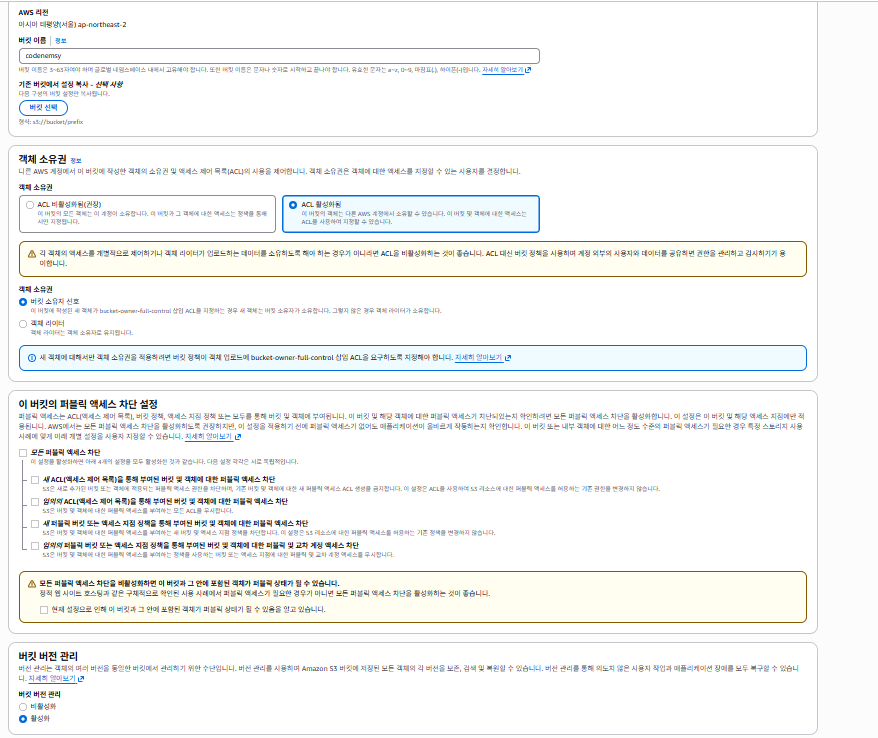
버킷 만들기
- "버킷 만들기" 클릭
- 버킷 이름 입력 (전역적으로 고유해야 함)
- 리전 선택:
ap-northeast-2(서울) - 퍼블릭 액세스 차단 설정: 기본값 유지
- "버킷 만들기" 클릭
2. IAM 사용자 생성 및 액세스 키 발급
S3에 프로그래밍 방식으로 접근하려면 IAM 사용자와 액세스 키가 필요하다.
IAM 사용자 생성
- IAM 콘솔 → 좌측 메뉴 "사용자" 클릭
- "사용자 생성" 클릭
- 사용자 이름 입력
- "직접 정책 연결" 선택
AmazonS3FullAccess정책 체크- "사용자 생성" 클릭
액세스 키 발급
- 생성된 사용자 클릭
- "보안 자격 증명" 탭 → "액세스 키 만들기"
- "AWS 외부에서 실행되는 애플리케이션" 선택
- 액세스 키와 비밀 액세스 키를 안전한 곳에 복사
3. Windows 환경 변수 설정
발급받은 AWS 자격 증명을 환경 변수로 등록한다. 코드에 직접 키를 넣지 않아 보안이 강화된다.
환경 변수 등록
Windows 검색창에서 "환경 변수" 입력 후 아래 세 개의 변수를 등록한다.
| 변수 이름 | 값 |
|---|---|
AWS_ACCESS_KEY_ID | 발급받은 액세스 키 |
AWS_SECRET_ACCESS_KEY | 발급받은 비밀 액세스 키 |
AWS_REGION | ap-northeast-2 |
중요
환경 변수 변경 후에는 IntelliJ IDEA를 완전히 종료하고 재시작해야 새로운 환경 변수를 인식한다.
4. Spring Boot 프로젝트 설정
build.gradle 의존성 추가
dependencies {
    // AWS SDK v2 - S3
    implementation 'software.amazon.awssdk:s3:2.25.39'

    // 파일 업로드 검증
    implementation 'org.springframework.boot:spring-boot-starter-validation'
}
application.yml
AWS SDK v2는 환경 변수를 자동으로 읽기 때문에 별도 설정이 필요 없다. 버킷 이름과 파일 업로드 크기 제한만 추가한다.
spring:
  servlet:
    multipart:
      max-file-size: 20MB
      max-request-size: 30MB

aws:
  s3:
    bucket: your-bucket-name
S3Config 클래스
S3Client를 Bean으로 등록한다.
@Configuration
public class S3Config {

    @Bean
    public S3Client s3Client() {
        return S3Client.builder()
                .region(Region.AP_NORTHEAST_2)
                .build();
    }
}
5. S3ImageService 구현
이미지 업로드 로직을 담당하는 서비스를 작성한다.
@Service
@RequiredArgsConstructor
public class S3ImageService {

    private final S3Client s3Client;

    @Value("${aws.s3.bucket}")
    private String bucketName;

    public String uploadImage(MultipartFile file) throws IOException {
        String fileName = UUID.randomUUID() + "_" + file.getOriginalFilename();
        String key = "images/" + fileName;

        PutObjectRequest putObjectRequest = PutObjectRequest.builder()
                .bucket(bucketName)
                .key(key)
                .contentType(file.getContentType())
                .build();

        s3Client.putObject(putObjectRequest,
                RequestBody.fromInputStream(file.getInputStream(), file.getSize()));

        return String.format("https://%s.s3.%s.amazonaws.com/%s",
                bucketName, "ap-northeast-2", key);
    }
}
6. FileUploadController 작성
프론트엔드에서 이미지를 받아 S3에 업로드하고 URL을 반환한다.
@RestController
@RequiredArgsConstructor
@RequestMapping("/upload")
public class FileUploadController {

    private final S3ImageService imageService;

    @PostMapping("/image")
    public ResponseEntity<String> uploadImage(@RequestParam("file") MultipartFile file) throws Exception {
        String url = imageService.uploadImage(file);
        return ResponseEntity.ok(url);
    }
}
백엔드 설정이 완료되었다. 이제 프론트엔드를 구현한다.
7. React 프론트엔드 - 이미지 압축 라이브러리 설치
이미지 파일은 크기가 크기 때문에 업로드 전에 압축한다.
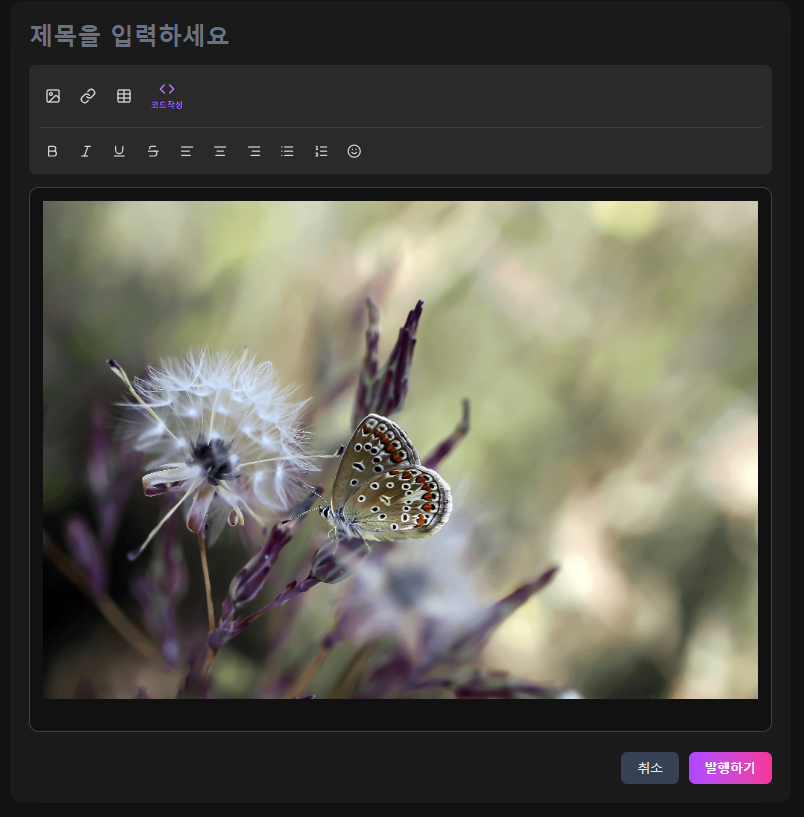
npm install browser-image-compression8. Toolbar 컴포넌트 - 이미지 업로드 구현
문제 1: 업로드 중 사용자 피드백 부재
초기 구현에서는 이미지를 선택하고 업로드가 완료될 때까지 아무런 피드백이 없었다. 사용자는 업로드가 진행 중인지 알 수 없어 답답함을 느낀다.
해결: 로딩 스피너 추가
업로드 중임을 시각적으로 표시하기 위해 회전하는 로딩 스피너를 추가한다.
import imageCompression from "browser-image-compression";
import axios from "axios";
const Toolbar = ({ editor }) => {
if (!editor) return null;
const addImage = async () => {
const input = document.createElement("input");
input.type = "file";
input.accept = "image/*";
input.click();
input.onchange = async () => {
const file = input.files?.[0];
if (!file) return;
// 이미지 압축
const compressed = await imageCompression(file, {
maxSizeMB: 10,
maxWidthOrHeight: 1920,
});
const pos = editor.state.selection.from;
// 로딩 스피너 삽입
const loadingHTML = `
<div class="image-loading-wrapper">
<div class="spinner"></div>
<p>이미지 업로드 중...</p>
</div>
`;
editor.chain().focus().insertContentAt(pos, loadingHTML).run();
try {
const formData = new FormData();
formData.append("file", compressed);
const res = await axios.post(
"http://localhost:8090/upload/image",
formData,
{ headers: { "Content-Type": "multipart/form-data" } }
);
const url = typeof res.data === "string" ? res.data : res.data.url;
if (!url) throw new Error("이미지 URL 없음");
// 로딩 스피너 제거
const loadingNode = editor.state.doc.nodeAt(pos);
const loadingSize = loadingNode ? loadingNode.nodeSize : 0;
editor
.chain()
.focus()
.setTextSelection({ from: pos, to: pos + loadingSize })
.deleteSelection()
.run();
// 이미지 삽입 (연속 삽입을 위해 splitBlock 사용)
editor
.chain()
.focus()
.setTextSelection(pos)
.splitBlock()
.insertContent({
type: "image",
attrs: { src: url },
})
.splitBlock()
.run();
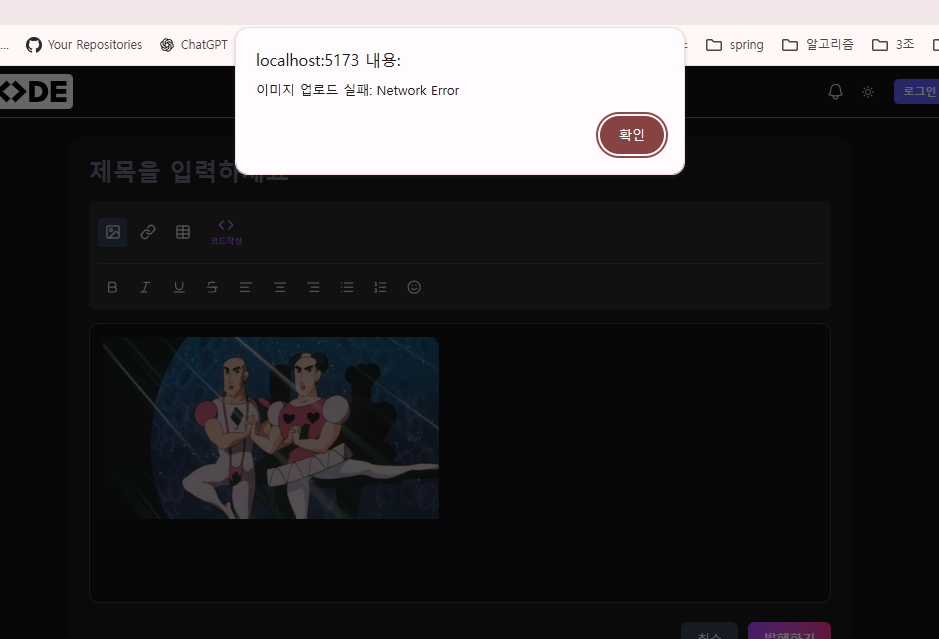
} catch (err) {
console.error("이미지 업로드 실패:", err);
alert("이미지 업로드 실패");
}
};
};
return (
<div className="toolbar">
<button onClick={addImage} type="button">
이미지 추가
</button>
</div>
);
};9. CSS 스타일 - 로딩 스피너
로딩 스피너가 회전하도록 CSS를 추가한다.
@keyframes spin {
  0% { transform: rotate(0deg); }
  100% { transform: rotate(360deg); }
}

.image-loading-wrapper {
  text-align: center;
  padding: 20px;
  background-color: #f9f9f9;
  border-radius: 8px;
  margin: 10px 0;
}

.spinner {
  border: 4px solid #f3f3f3;
  border-top: 4px solid #3498db;
  border-radius: 50%;
  width: 40px;
  height: 40px;
  animation: spin 1s linear infinite;
  margin: 0 auto;
}

.image-loading-wrapper p {
  margin-top: 10px;
  color: #666;
  font-size: 14px;
}
10. 드래그 앤 드롭 문제 해결
문제 2: 드래그 앤 드롭 시 브라우저가 이미지를 새 탭으로 열어버림
사용자가 이미지를 에디터로 드래그 앤 드롭하면 브라우저의 기본 동작으로 인해 에디터가 사라지고 이미지만 표시되는 새 탭이 열린다. 이는 에디터의 drop 이벤트를 제대로 가로채지 못했기 때문이다.
해결: drop 이벤트 직접 처리
에디터 DOM 요소에 직접 drop 이벤트 리스너를 등록하고 브라우저의 기본 동작을 막는다.
import { useEffect } from "react";

const EditorComponent = () => {
  const editor = useEditor({
    extensions: [StarterKit, Image],
    content: "",
  });

  useEffect(() => {
    if (!editor) return;

    const editorElement = document.querySelector(".ProseMirror");
    if (!editorElement) return;

    const uploadImageFromFile = async (file) => {
      if (!file || !file.type.startsWith("image/")) {
        alert("이미지 파일만 업로드 가능합니다.");
        return;
      }

      const compressed = await imageCompression(file, {
        maxSizeMB: 10,
        maxWidthOrHeight: 1920,
      });

      const pos = editor.state.selection.from;

      const loadingHTML = `
        <div class="image-loading-wrapper">
          <div class="spinner"></div>
          <p>이미지 업로드 중...</p>
        </div>
      `;

      editor.chain().focus().insertContentAt(pos, loadingHTML).run();

      try {
        const formData = new FormData();
        formData.append("file", compressed);

        const res = await axios.post(
          "http://localhost:8090/upload/image",
          formData,
          { headers: { "Content-Type": "multipart/form-data" } }
        );

        const url = typeof res.data === "string" ? res.data : res.data.url;
        if (!url) throw new Error("이미지 URL 없음");

        const loadingNode = editor.state.doc.nodeAt(pos);
        const loadingSize = loadingNode ? loadingNode.nodeSize : 0;

        editor
          .chain()
          .focus()
          .setTextSelection({ from: pos, to: pos + loadingSize })
          .deleteSelection()
          .run();

        editor
          .chain()
          .focus()
          .setTextSelection(pos)
          .splitBlock()
          .insertContent({ type: "image", attrs: { src: url } })
          .splitBlock()
          .run();
      } catch (err) {
        console.error("이미지 업로드 실패:", err);
        alert("이미지 업로드 실패");
      }
    };

    const handleDrop = async (e) => {
      e.preventDefault();
      e.stopPropagation();

      const files = e.dataTransfer?.files;
      if (!files || files.length === 0) return;

      await uploadImageFromFile(files[0]);
    };

    const handleDragOver = (e) => {
      e.preventDefault();
      e.stopPropagation();
    };

    editorElement.addEventListener("drop", handleDrop);
    editorElement.addEventListener("dragover", handleDragOver);

    return () => {
      editorElement.removeEventListener("drop", handleDrop);
      editorElement.removeEventListener("dragover", handleDragOver);
    };
  }, [editor]);

  return (
    <div>
      <Toolbar editor={editor} />
      <EditorContent editor={editor} />
    </div>
  );
};
11. 이미지 압축이 필요한 이유
문제 3: 대용량 이미지 업로드 실패
Spring Boot의 기본 파일 업로드 크기 제한은 1MB이다. 요즘 스마트폰 사진은 5MB를 넘는 경우가 많아 업로드가 실패한다.
시도 1: Spring Boot 설정 변경
spring:
  servlet:
    multipart:
      max-file-size: 20MB
      max-request-size: 30MB
하지만 이것만으로는 부족하다. 외부 스토리지도 파일 크기 제한이 있다.

해결: 클라이언트 선압축
브라우저에서 업로드 전에 이미지를 압축한다. 이미 위 코드에 적용되어 있다.
const compressed = await imageCompression(file, {
  maxSizeMB: 10,
  maxWidthOrHeight: 1920,
});
이렇게 하면 다음과 같은 효과가 있다.
- 업로드 시간 단축
- 서버 대역폭 절약
- 스토리지 용량 절약
- 외부 스토리지 제한 회피
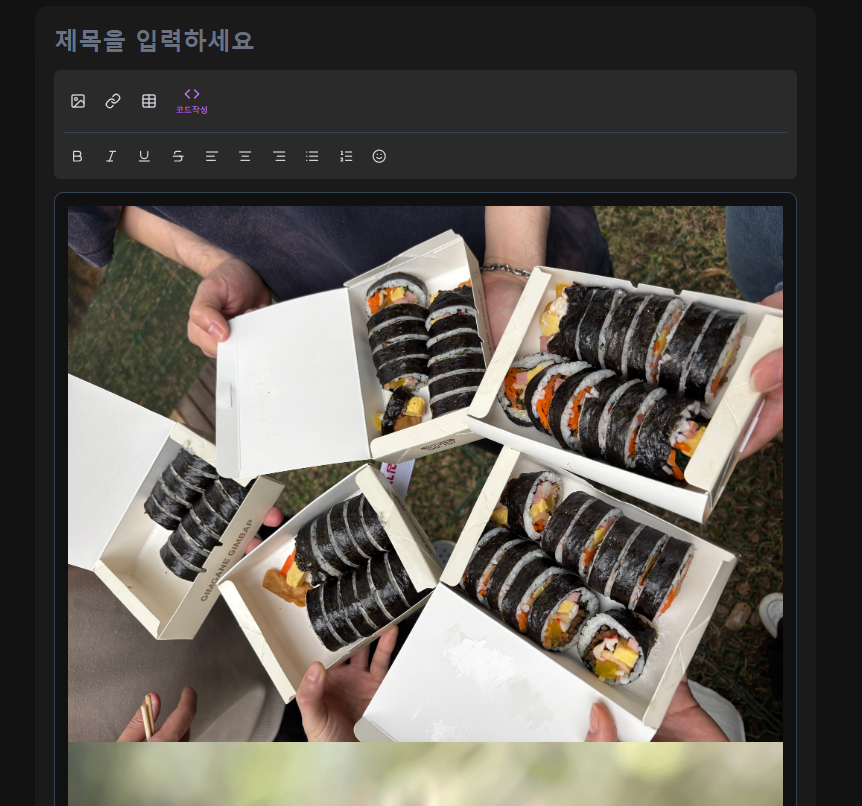
12. 이미지 연속 삽입 문제
문제 4: 이미지를 연속으로 삽입하면 이전 이미지가 덮어써짐
이미지를 한 장 넣고 바로 또 다른 이미지를 넣으면 이전 이미지가 사라지고 새 이미지로 교체되는 문제가 발생한다.
원인: setImage()는 수정 명령이다
editor.chain().focus().setImage({ src });이 명령은 현재 커서 위치의 이미지를 수정하는 명령이다. 새로운 이미지를 추가하는 명령이 아니다.
해결: insertContent로 새 블록 생성
editor
  .chain()
  .focus()
  .insertContent([
    { type: "image", attrs: { src: url } },
    { type: "paragraph" }
  ])
  .run();
또는 위 코드처럼 splitBlock()을 사용한다.
editor
  .chain()
  .focus()
  .splitBlock()
  .insertContent({ type: "image", attrs: { src: url } })
  .splitBlock()
  .run();
왜 paragraph가 필요한가
이미지 두 개가 붙어 있으면 브라우저가 한 블록으로 판단한다. 커서가 이미지 위에 머물게 되고 다음 삽입 명령이 기존 이미지를 수정하게 된다. 문단이 있어야 커서 위치가 안정적으로 유지된다.
13. 최종 정리
구현 완료 기능
- AWS S3 연동 - IAM 사용자 생성, 액세스 키 발급, 환경 변수 설정
- Spring Boot 백엔드 - S3Client 설정, 이미지 업로드 서비스, REST API 구현
- 이미지 압축 - browser-image-compression을 사용하여 업로드 전 크기 최적화
- 로딩 UI - 업로드 중 회전하는 스피너 표시로 사용자 경험 개선
- 드래그 앤 드롭 - 에디터에 이미지를 드래그하여 업로드 가능
- 연속 이미지 삽입 - splitBlock을 사용하여 이미지가 덮어써지지 않도록 처리
- 에러 처리 - 업로드 실패 시 로딩 스피너 제거 및 사용자에게 알림
핵심 포인트
| 문제 | 해결 방법 |
|---|---|
| 업로드 중 피드백 없음 | 로딩 스피너 HTML 삽입 후 완료 시 제거 |
| 드래그 앤 드롭 시 새 탭 열림 | drop, dragover 이벤트에 preventDefault 적용 |
| 대용량 이미지 업로드 실패 | browser-image-compression으로 선압축 |
| 연속 이미지 삽입 시 덮어쓰기 | splitBlock() 또는 paragraph 추가 |
추가 개선 가능한 부분
- CloudFront CDN 적용 - S3 URL을 CloudFront를 통해 제공하여 이미지 로딩 속도 향상
- 이미지 리사이징 - Lambda@Edge에서 이미지 크기별 자동 리사이징
- 파일명 규칙 - 날짜별, 사용자별 폴더 구조로 S3 버킷 정리
- IAM 권한 최소화 - S3FullAccess 대신 특정 버킷에만 PutObject 권한 부여
- 업로드 진행률 표시 - axios onUploadProgress를 사용하여 퍼센트 표시
이제 Cloudinary에서 S3로 완전히 이전했으며, 사용자 친화적인 이미지 업로드 기능을 갖춘 에디터를 구축했다.