- 프로젝트 구조와 흐름 기본
@Controller
@RequestMapping("/sample")
@Log4j2
public class SampleController {
    @GetMapping("/ex1")
    public String ex1() {
        return "/sample/ex1";
    }
    /*
    @GetMapping("/ex1")
    public void ex1() {
        log.info("ex1..............");
    }
    */
}- controller에 /sample/ex1로 매핑 되어있다.
- 같은 경로로 리턴할 경우 resources - templates 안의 sample/ex1.html로 가게 된다.
- 주석 내 처럼 void타입으로 하면 매핑경로와 같은 템플릿으로 알아서 이동한다.
🚀 thymeleaf의 기본 사용법 1
<!DOCTYPE html>
<html lang="en" xmlns:th="http://www.thymeleaf.org">
<head>
    <meta charset="UTF-8">
    <title>Title</title>
</head>
<body>
<style>
    .target {
        background-color: orangered;
    }

</style>
<ul>
    <li th:each="dto, state : ${list}" th:class="${dto.sno % 5 == 0} ? 'target'">
        [[${state.index}]] --- [[${dto}]] --- [[${state.count}]]
    </li>

    <br>

    <th:block th:each="dto, state : ${list}">
        <li th:class="${dto.sno % 5 == 0} ? 'target'">
            [[${state.index}]] --- [[${dto}]] --- [[${state.count}]]
        </li>
    </th:block>

</ul>
</body>
</html>- thymeleaf 사용하려면 html 속성에 다음을 추가한다.
xmlns:th="http://www.thymeleaf.org"
-
jsp에서 처럼 스크립트릿이나 jstl로 인하여 기본적인 html의 구조가 깨지는 경우가 거의 없다.
-
th:text, th:value 속성으로 태그에 글자를 넣을 수도 있고, [[ ]]도 이용가능하다.
-
태그 '안에' th:each, th:if등을 이용할 수 있고 th:class에 삼항연산자를 결합하여 class속성 부여할지 말지도 결정할 수 있다.
-
반복문에 변수 하나를 더 지정할 수 있는데, 상태 객체라 하여 순번과 관련된 기능들을 이용할 수 있다.
-
유용한 th:block : 화면에서 태그로 생성되지 않고 루프 처리 같은 용도로 사용된다.
🚀 thymeleaf의 기본 사용법 2
- 링크처리와 #temporals.format( )
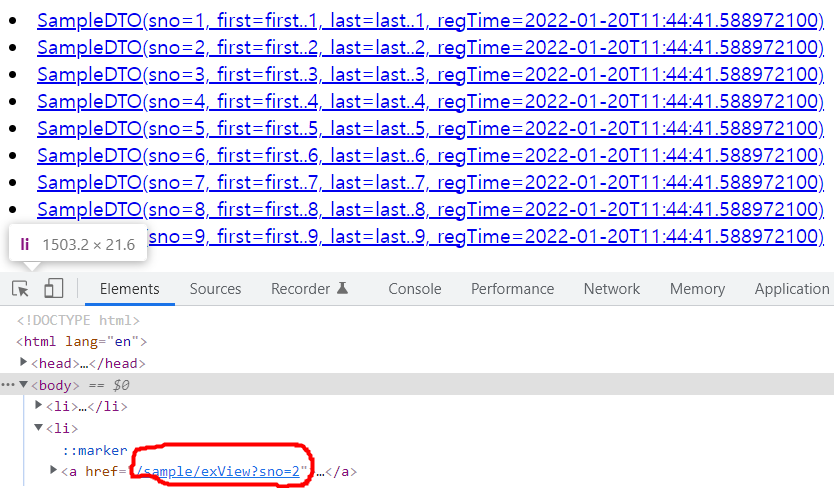
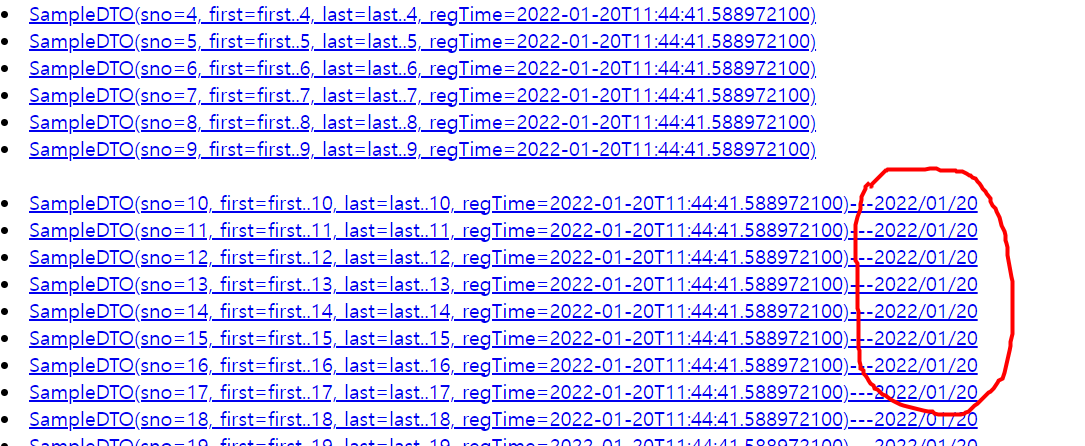
<li th:each="dto : ${list}" th:if="${dto.sno < 10}">
    <a th:href="@{/sample/exView(sno=${dto.sno})}">[[${dto}]]</a>
</li>

<br/>

<li th:each="dto : ${list}" th:if="${dto.sno >= 10}">
    <a th:href="@{/sample/exView/{sno}(sno=${dto.sno})}">
        [[${dto}]]---[[ ${#temporals.format(dto.regTime, 'yyyy/MM/dd')}]]
    </a>
</li>-
위의 li태그는 리스트를 돌며 sno가 10미만인 dto들에게 링크를 거는 것이다.
-
이렇게 링크를 처리하면 아래 그림처럼 나온다. (쿼리스트링)
- 아래의 li태그는 sno가 10 이상인 dto 들에게 링크를 부여한다.(path)
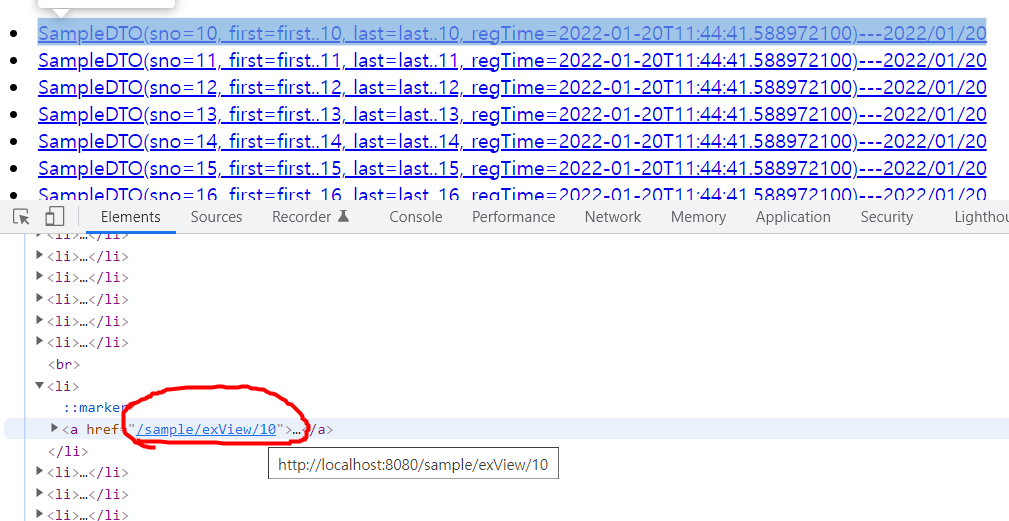
- #temporal.format을 사용하면 지정한 포멧으로 바인딩 한다.
사용할 수 있는 이유는 의존성에 java8time 항목이 추가되었기 때문이다.(설정 포스팅 참고)
🚀 thymeleaf의 기본 사용법 3 - include 처리
- 다음 장에서 사용될 예제를 만든다.
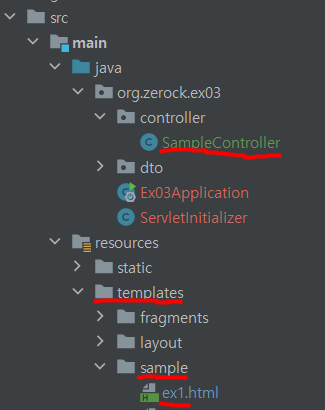
- resources 구조
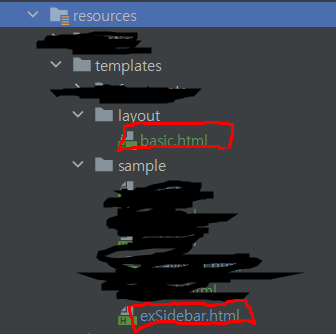
- 레이아웃으로 사용될 basic.html (요약)
<!DOCTYPE html>
<html lang="en" xmlns:th="http://www.thymeleaf.org">

  <th:block th:fragment="setContent(content)">

    <head>

      ...

    </head>
    <body>

      ...

            <div class="container-fluid">
                <th:block th:replace="${content}"></th:block>
            </div>

      ...

    </body>

  </th:block>

</html>
- 마치 article처럼 사용될 exSidebar.html
<!DOCTYPE html>
<html lang="en" xmlns:th="http://www.thymeleaf.org">
<th:block th:replace="~{layout/basic :: setContent(~{this::content})}">
    <th:block th:fragment="content">
        <h1>exSidebar Page</h1>
    </th:block>
</th:block>-
th:replace 속성은 어떤 조각(fragment)을 가져오는 것이다.
-
어떤 경로의 html파일 중 th:fragment 속성이 있는 것을 지칭할 수 있다.
-
html파일 자체를 가지고 올 수도 있다.
-
파라미터로 받아올 수도 있다.
-
-
exSidebar에 content라는 이름의 조각이 있다.
-
해당 조각을 basic.html에 넘겨줌과 동시에
-
exSidebar 내용을 content를 준 basic으로 갈아버린다.
-
그 basic에는 content를 가지고 있다.
-
멋지게 만든 레이아웃에 content를 넣는다.