달력
처음에는 그냥 Calendar 컴포넌트 하나만 만들어서 사용하려 했다.
근데 안에는 테이블이 들어가는데 이 테이블도 Table 컴포넌트를 따로 만들어 나중에 쓰고싶었다.
그래서 테이블 컴포넌트를 먼저 만들었다.
이 Table 컴포넌트는 다른 프로젝트에서도 재사용이 가능하다.
그 후 Table을 사용해 Calendar를 제작했는데
과정은 여기에 자세하게 적어놨다.
이제 달력까지 제작했으니 안에 들어갈 컴포넌트를 생성할 일만 남았다.
CalendarItem 컴포넌트
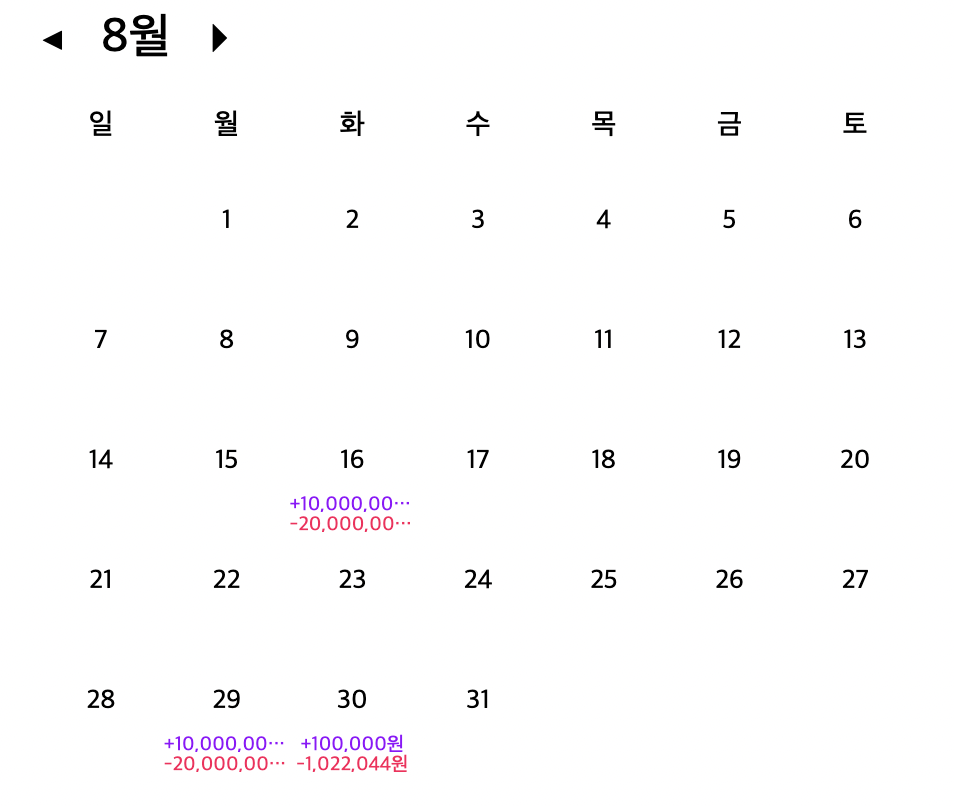
캘린더 아이템은 날짜, 지출, 수입 세가지를 나타낸다.
그래서 props로 month, date를 받으면 useSelector를 사용해 해당 정보를 받아왔다.
interface CalendarItemProps {
  month: number;
  date: number;
}
const CalendarItem = ({ month, date }: CalendarItemProps) => {
const { income, spending } = useAppSelector(state => {
const receipts = state.accountBook.receipts.find(
receipt =>
receipt.timeDate?.day === date && receipt.timeDate.month === month,
);
return {
income: receipts?.income,
spending: receipts?.spending,
};
});
return (
<>
<CalendarItem>
<Date>{date}</Date>
<Income>
{income && `+${income?.toLocaleString('ko-KR')}원`}
</Income>
<Spending>
{spending && `${spending.toLocaleString('ko-KR')}원`}
</Spending>
</CalendarItem>
</>
);
};store에서 날짜, 월이 동일하면 데이터를 불러오게 했는데 저게 맞는방식인지 모르겠다.
이번 프로젝트를 끝내고 한번 찾아봐야 할것같다.
그 후 Table에 넣기위한 배열을 만들 때 render부분에 CalendarItem을 넣어줬다.
이런식으로
const calendar = useMemo(() => {
    const datas = calendarGenerator(year, month);
    const components: TTableData[] = [];

    // 주 반복
    datas.forEach((week, idx) => {
      const weeks: TTableColumns[] = [];

      // 일 반복
      week.forEach((date, idx) => {
        weeks.push({
          key: date ? `y_${month}_${date}` : `null${idx}`,
          render: date ? (
            <CalendarItem
              month={month}
              date={date}
              />
          ) : (
            <span />
          ),
        });
      });

      // 해당 주의 컴포넌트들
      const weekData: TTableData = {
        id: `w_$${month}${idx}`,
        columns: weeks,
      };
      components.push(weekData);
    });

    return components;
  }, [year, month]);
Calendar 컴포넌트
위에서 만든 calendar 변수를 Table에 넣어주면 Calendar 컴포넌트는 완성이다.
<Table
  headers={titles}
  rows={calendar}
/>
끗. 아래는 결과물이다.

기록하는 블로그