- 프로젝트 생성 시 dependencies 빌드 추가
build.gradle
dependencies {
	implementation 'org.springframework.boot:spring-boot-starter-thymeleaf'
	implementation 'org.springframework.boot:spring-boot-starter-web'
	compileOnly 'org.projectlombok:lombok'
	developmentOnly 'org.springframework.boot:spring-boot-devtools'
	annotationProcessor 'org.springframework.boot:spring-boot-configuration-processor'
	annotationProcessor 'org.projectlombok:lombok'
	testImplementation 'org.springframework.boot:spring-boot-starter-test'
}- application.properties 에 전반적 설정 저장
# 서버 포트 80으로 변경
server.port=80

# Spring devTools 관련 설정
spring.devtools.livereload.enabled=true
spring.devtools.restart.enabled=true
spring.thymeleaf.cache=false
# 변경사항 바로 바로 새로고침 되도록 캐시 사용 비활성화

# 로깅 레벨 지정
# trace < debug < info < warn < error < fatal
logging.level.com.home.demo=debug- 브라우저에서 메인페이지 요청시 받아줄 controller
@Controller : 요청에 따라 알맞은 서비스 호출 할지 제어 + 서비스 결과에 따라 어떤 응답을 할지 제어
요청/응답 제어 역할 명시 + Bean 등록
IOC(제어의 역전)
package com.home.demo.controller;

import org.springframework.stereotype.Controller;
import org.springframework.web.bind.annotation.RequestMapping;

@Controller
public class MainController {

	// "/" 주소 요청 시 해당 메서드와 매핑
	// - 메인 페이지 지정시에는 "/" 작성 가능
	// 메인페이지 들어오자마자 비지니스 로직 돌아야하는 경우에
	// 정보들을 가지고 main 페이지 띄워줄 때
	@RequestMapping("/")
	public String mainPage() {

		/* forward : 요청 위임
		 *
		 * thymeleaf : Spring Boot 에서 사용하는 템플릿 엔진
		 *
		 * thymeleaf 를 이용한 html 파일로 forward 시
		 * 사용되는 접두사, 접미사가 존재
		 *
		 * 접두사 : classpath:/templates/
		 * 접미사 : .html
		 * src/main/resources/templates/common/main.html
		 * */

		return "common/main";
	}
}
main.html
타임리프 이용하려면 html 태그 안에 속성 추가해줘야함
xmlns:th="http://www.thymeleaf.org"
타임리프 문법을 사용하겠다 선언한 것
<html lang="ko" xmlns:th="http://www.thymeleaf.org"><head>
<meta charset="UTF-8">
<meta name="viewport" content="width=device-width, initial-scale=1.0">
<title>Thymeleaf</title>
</head>
<body>
<h1>Thymeleaf</h1>
<h3>1. 템플릿 엔진</h3>
<pre>
템플릿 양식과 특정 데이터 모델에 따른 입력 자료를 합성하여
결과 문서(응답 화면)를 출력하는 것
-> 만들어둔 화면(html)에 데이터를 추가하여 하나의 html로 만들어서 응답
(JSP도 템플릿 엔진)
<a href="https://www.thymeleaf.org/">타임리프 홈페이지</a>
웹 및 독립실행형 환경 모두를 위한 최신 서버 측 Java 템플릿 엔진
-> 웹 실행 == 요청 시 포워드 되는 화면
-> 독립실행 == html 파일 실행(인터넷 연결X)
HTML 파일에서 th 속성을 이용해
컨트롤러로 부터 전달받은 데이터를 이용해 동적 페이지를 만들 수 있음
Spring Boot에서는 JSP가 아닌 Thymeleaf 사용을 권장하고 있음
</pre>
<ol>
<li>
<a href="/example/ex1">타임리프 예제1</a>
</li>
</ol>
</body>
</html>example Controller
Model
-
Spring 에서 데이터 전달 역할을 하는 객체
-
org.springframework.ui 패키지
-
기본 scope : request
-
@SessionAttributes 와 함께 사용 시 session scope 변환
[기본 사용법]
Model.addAttribute("key", value);
package com.home.demo.controller;
import org.springframework.stereotype.Controller;
import org.springframework.ui.Model;
import org.springframework.web.bind.annotation.GetMapping;
import org.springframework.web.bind.annotation.RequestMapping;
import jakarta.servlet.http.HttpServletRequest;
import lombok.extern.slf4j.Slf4j;
@RequestMapping("example") // /example 로 시작하는 주소를 해당 컨트롤러에 매핑 (공통 주소 매핑)
@Controller // 요청/응답 제어 역할 명시 + Bean 등록
@Slf4j // lombok 라이브러리가 제공하는 log 객체 자동 생성해주는 어노테이션
public class ExampleController {
// /example/ex1 GET 방식 요청 매핑
@GetMapping("ex1")
public String ex1(HttpServletRequest req, Model model) {
// argument resolver 가 바인딩 시켜줌
/* scope 내장객체 범위
* page < request < session < application
* */
// request scope
req.setAttribute("test1", "HttpServletRequest로 전달한 값");
model.addAttribute("test2", "Model로 전달한 값");
return "example/ex1"; // templates/example/ex1.html 요청 위임
}
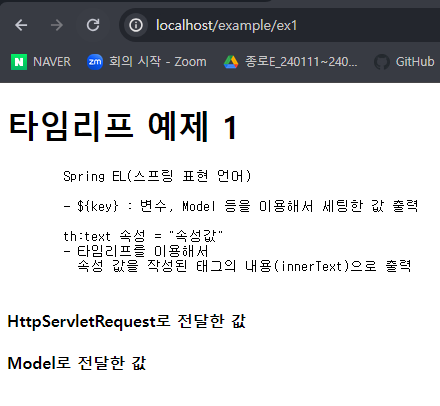
}ex1.html
Thymeleaf 사용시 html 설정
<html lang="ko" xmlns:th="http://www.thymeleaf.org">th:text 사용법
th:text="${key}"
작성하면 태그 안에 가져온 value 가 들어가서 출력됨
<!DOCTYPE html>
<!-- th 속성 추가 네임스페이스 선언 : 이 html에서 타임리프 사용하겠다. -->
<html lang="ko" xmlns:th="http://www.thymeleaf.org">
<head>
    <meta charset="UTF-8">
    <meta name="viewport" content="width=device-width, initial-scale=1.0">
    <title>타임리프 예제 1</title>
</head>
<body>
    <h1>타임리프 예제 1</h1>

    <pre>
        Spring EL(스프링 표현 언어)
        <!-- jsp에서 사용한 EL과 똑같이 생김 -->
        - ${key} : 변수, Model 등을 이용해서 세팅한 값 출력

        th:text 속성 = "속성값"
        - 타임리프를 이용해서
          속성 값을 작성된 태그의 내용(innerText)으로 출력
    </pre>

    <h4 th:text="${test1}">test1 값</h4>
    <h4 th:text="${test2}">test2 값</h4>
</body>
</html>
html 화면
th 속성은 출력된 화면(응답화면)에서 보여지지 않음 -> 해석된 후 사라짐
th:block 태그
- Thymeleaf 에서 제공하는 유일한 태그
html
<th:block th:text="${productName}">상품명</th:block>
<br>
<span th:text="${productName}">상품명</span>
controller
model.addAttribute("productName", "종이컵");model 에 productName 세팅해둠
출력 결과

th:block 사용된 후 태그가 날아감 남아있지 않음 태그가 필요 없을 때 사용
해석된 후 사라지기 때문에 조건문이나 반복문과 같이 사용하는 경우가 많음
html
<head>
	<style>
        .price {
            color: red;
        }
    </style>
</head>
<body>
    <span class="price">
        <th:block th:text="${price}">가격</th:block>원
    </span>
</body>
span 태그 안에 th:block 이 사라지면서 span 태그 안에 가격만 남은 것처럼 돼서 css 가 먹힘
th:each
th:each="item : ${List 또는 배열}"
-
향상된 for문
-
List 또는 배열 길이 만큼 반복
-
매 반복시 마다 List 또는 배열의 요소를 차례대로 꺼내 item 변수에 저장 (item 변수명은 자유롭게 작성)
controller 에서 List 에 값 넣어줌
List<String> fruitList = new ArrayList<>();
fruitList.add("사과");
fruitList.add("딸기");
fruitList.add("바나나");

model.addAttribute("fruitList", fruitList);
html
    <ul>
        <th:block th:each="fruit : ${fruitList}">
            <li th:text="${fruit}">과일명</li>
        </th:block>
    </ul>
html 화면

th:each 사용 안하고 똑같이 출력하려면 인덱스 번호 넣어주면 됨
    <ul>
        <li th:text="${fruitList}">과일목록</li>

        <li th:text="${fruitList[0]}">0 번 인덱스 과일</li>
        <li th:text="${fruitList[1]}">1 번 인덱스 과일</li>
        <li th:text="${fruitList[2]}">2 번 인덱스 과일</li>
    </ul>
th:object 속성
th:object 속성 + *{필드명}
- th:object 속성 : 해당 태그 내에서 지정된 객체의 필드를 쉽게 접근하게 하는 속성
- *{} : th:object로 지정된 객체의 필드를 접근할 때 사용하는 작성법
Spring EL 같은 경우 getter 가 필수로 작성되어있어야함
-> ${Student.getName()} == ${Student.name}
getter 대신 필드명 호출하는 형식으로 작성하는데 자동으로 getter 호출하기 때문에 (내부적으로)
controller
Student std = new Student();
std.setStudentNo("12345");
std.setName("홍길동");
std.setAge(22);

model.addAttribute("std", std);
html
<ul th:object="${std}">
	<li th:text="*{studentNo}">학번</li>
	<li th:text="*{name}">이름</li>
	<li th:text="*{age}">나이</li>
</ul>
ul 태그 밖에서 사용하면 안됨
th:object 사용 안하고 출력하려면 key.필드명으로 불러와야함
<ul>
    <li th:text="${std}">std 객체</li>
    <li th:text="${std.studentNo}">학번</li>
    <li th:text="${std.name}">이름</li>
    <li th:text="${std.age}">나이</li>
</ul>
th:each 와 th:object 속성
controller
DTO 객체 List 이용해서 html로 전달
List<Student> stdList = new ArrayList<>();

stdList.add(new Student("11111", "김일번", 20));
stdList.add(new Student("22222", "김이번", 21));
stdList.add(new Student("33333", "김삼번", 22));

model.addAttribute("stdList", stdList);
html
th:each가 설정된 태그 전체(tr)가 반복됨
td만 반복되는 게 아님
<table border="1">
	<thead>
		<tr>
			<th>학번</th>
			<th>이름</th>
			<th>나이</th>
		</tr>
	</thead>

	<tbody>
		<tr th:each="std : ${stdList}" th:object="${std}">
			<td th:text="*{studentNo}">학번</td>
			<td th:text="*{name}">이름</td>
			<td th:text="*{age}">나이</td>
		</tr>
	</tbody>
</table>
th:object 사용 안하면 이렇게 불줘야함
<td th:text="${std.studentNo}"></td>${param.key}
key == name 속성값
request에 존재하는 parameter값 얻어와 출력
요청을 보내는 html
<form action="/example/ex2" method="post">
    <h4>타임리프 예제2</h4>

    이름 : <input type="text" name="inputName"> <br>
    나이 : <input type="number" name="inputAge"> <br>
    <br>

    색상 :
    Red <input type="checkbox" name="color" value="Red">
    Green <input type="checkbox" name="color" value="Green">
    Blue <input type="checkbox" name="color" value="Blue">

    <button>제출하기</button>
</form>
요청 받은 controller에서 html로 요청 위임
@PostMapping("ex2") // /example/ex2 POST 방식 매핑
public String ex2() {
// 요청 보낼 때 html 에서 name 속성값으로 보냄
// request scope -> inputName="홍길동", inputAge=20, color=[Red, Green, Blue]
return "example/ex2";
// 요청 받은 내용을 다시 위임했을 때 값을 그대로 사용할 수 있음
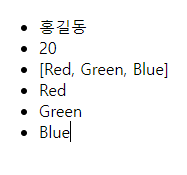
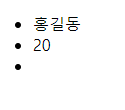
}응답하는 html
    <ul>
        <li th:text="${param.inputName}">제출된 이름</li>
        <li th:text="${param.inputAge}">제출된 나이</li>

        <!-- 같은 name 속성 값을 가진 파라미터는 배열로 전달 -->
        <li th:text="${param.color}">체크된 색상</li>

        <!-- 전달된 파라미터가 없으면 null == 빈칸 -->

        <!-- 반복할 배열/리스트가 존재하지 않으면 반복 X -->
        <li th:each="c : ${param.color}" th:text="${c}"></li>
    </ul>
html 출력 화면
color 값 3개 다 체크했을 때
color 값 체크 안했을 때
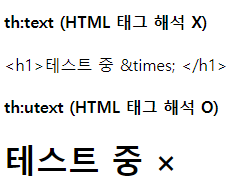
th:utext
th:text = "속성값"
- 해당 태그에 "속성값"을 내용으로 출력
- 단, html 태그, 특수문자 해석 X (innerText)
th:utext = "속성값"
- 해당 태그에 "속성값"을 내용으로 출력
- 단, html 태그, 특수문자 해석 O (innerHTML)
controller
@PostMapping("ex2") // /example/ex2 POST 방식 매핑
public String ex2(Model model) {
// 요청 보낼 때 html 에서 name 속성값으로 보냄
// request scope -> inputName="홍길동", inputAge=20, color=[Red, Green, Blue]
model.addAttribute("str", "<h1>테스트 중 × </h1>");
return "example/ex2";
// 요청 받은 내용을 다시 위임했을 때 값을 그대로 사용할 수 있음
}html
    <div>
        <h4>th:text (HTML 태그 해석 X)</h4>
        <th:block th:text="${str}"></th:block>
    </div>

    <div>
        <h4>th:utext (HTML 태그 해석 O)</h4>
        <th:block th:utext="${str}"></th:block>
    </div>
출력 결과
th:text="|문자열 + ${key}|"
- 해당 요소의 내용으로 "문자열" + 변수값 출력
html
<p th:text="|th:text의 str => ${str}|"></p>
<p th:utext="|th:utext의 str => ${str}|"></p>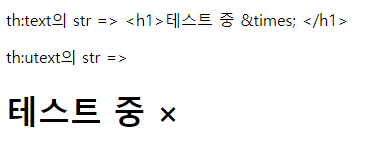
th:text/th:utext 대신하는 특수 기호 (괄호)
<p>입력 받은 이름 : [[${param.inputName}]]</p>

<p th:text="|입력 받은 이름 : ${param.inputName}|"></p>
위에 두개 똑같은 결과 값 출력됨

[(${str})]
th:text="#{}"
messages.properties 파일 생성
프로젝트 전체적으로 사용할 메세지, 값을 저장하는 파일
UTF-8 설정
app.name=demoProject4html
<h3 th:text="#{app.name}">앱 이름</h3>
th:src 속성
th:src 속성 : 타임리프를 이용해서 경로 작성
(옆에 작성된 값을 이용해서 src 속성 추가)
messages.properties 파일
경로 작성
user.default.image=/images/cats/cat1.jpghtml 에서 경로 불러서 사용하기
<img th:src="#{user.default.image}">
th:href @{} 사용
타임리프를 이용한 쿼리스트링 작성법
controller
	@GetMapping("ex3")
	public String ex3(Model model) {

		// Model : 데이터 전달용 객체 (request scope)

		model.addAttribute("boardNo", 10);

		model.addAttribute("key", "제목");
		model.addAttribute("query", "검색어");

		return "example/ex3";
	}
html
<li>
    <!-- ** 타임리프를 이용한 쿼리스트링 작성법 ** -->
    <a th:href="@{/board(key=${key}, query=${query})}">@{} 사용</a>
    <!-- /board?key=제목&query=검색어 -->
</li>
controller
	@GetMapping("ex3")
	public String ex3(Model model) {

		// Model : 데이터 전달용 객체 (request scope)

		model.addAttribute("boardNo", 10);

		model.addAttribute("key", "글쓴이");
		model.addAttribute("query", "짱구의 하루");

		return "example/ex3";
	}
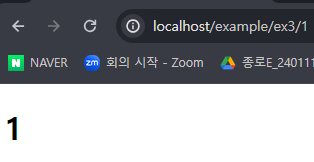
@PathVariable
주소 중 일부분을 변수 값처럼 사용
해당 어노테이션으로 얻어온 값은 request scope 에 세팅
html
<ul>
    <li>
        <a href="/example/ex3/1">/example/ex3/1</a>
    </li>
    <li>
        <a href="/example/ex3/2">/example/ex3/2</a>
    </li>
    <li>
        <a href="/example/ex3/3">/example/ex3/3</a>
    </li>

    <li>
        <a th:href="@{/example/ex3/{number}(number=${boardNo})}">@{/example/ex3/{number}(number=${boardNo})}</a>
        <!-- number 자리에 boardNo를 넣겠다 -->
    </li>
</ul>
controller
	@GetMapping("ex3")
	public String ex3(Model model) {

		// Model : 데이터 전달용 객체 (request scope)

		model.addAttribute("boardNo", 10);

		return "example/ex3";
	}

    @GetMapping("ex3/{number}") // 클릭한 거에 따라 number 값 달라짐
	public String pathVariableTest(@PathVariable("number") int number) { // 요청 주소에 써있는 변수명 그대로 써줘야함
		// 받아온 number 값을 변수처럼 사용할 수 있음
		// 주소 중에 {number} 부분의 값을 가져와 매개변수에 저장
		// + request scope 에 세팅

		log.debug("number : " + number);
		// number : 1
		// number : 2
		// number : 3

		return "example/testResult";
	}
첫번째 a 태그 클릭 결과
boardNo 세팅한 a 태그 클릭 결과
th:if / th:unless
controller 값 세팅
	@GetMapping("ex4")
	public String ex4(Model model) {

		Student std = new Student("67890", "잠만보", 22);

		model.addAttribute("std", std);

		return "example/ex4";
	}
th:if = ${조건식}
- 조건식이 true 인 경우에만 해당 속성이 작성된 요소를 화면에 출력
html
    <th:block th:if="${std == null}">
        <!-- request scope에 std 속성이 없을 경우 출력됨 -->
        <h4>std 없음</h4>
    </th:block>
출력된 화면 없음
- 조건식에 변수명/값 하나만 작성한 경우
if문에 작성된 값이 있으면(값 != null) -> true
if문에 작성된 값이 없으면(값 == null) -> false
    <h4 th:if="${std}">std 있음</h4>

    <h4 th:if="${temp}">temp 있음</h4>
출력화면

th:unless = ${조건식}
- 조건식이 false인 경우에만 해당 속성이 작성된 요소를 화면에 출력
html
    <th:block th:unless="${std == null}">
        <!-- std != null -->
        <!-- request scope에 std 속성이 있을 경우 -->
        <!-- std가 null이 아님 조건식 false라서 이 안에 들어와 있는 게 출력됨 -->
        <h4>std 있음</h4>
    </th:block>
th:switch / th:case
controller 값 세팅
@GetMapping("ex4")
public String ex4(Model model) {
model.addAttribute("num", 100);
return "example/ex4";
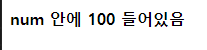
}html
    <!-- request 속성 "num" 값에 따라서 알맞은 case 실행 -->
    <th:block th:switch="${num}">
        <h4 th:case="100">num 안에 100 들어있음</h4>
        <h4 th:case="200">num 안에 200 들어있음</h4>
        <h4 th:case="300">num 안에 300 들어있음</h4>

        <!-- th:case="*" == default (나머지인 경우)" -->
        <h4 th:case="*">나머지</h4>
    </th:block>
출력 화면