Asset 초기설정
커스텀컬러 지정하기
코드로 CustomColor지정
Extension으로 초기화 설정하기 (rgb 255.0 나누기설정 및 Hex값 초기화)
extension UIColor {
    // rgb로 초기화하는 경우 255.0 디폴트 설정
    convenience init(red: Int, green: Int, blue: Int, a: Int = 0xFF) {
        self.init(
            red: CGFloat(red) / 255.0,
            green: CGFloat(green) / 255.0,
            blue: CGFloat(blue) / 255.0,
            alpha: CGFloat(a) / 255.0
        )
    }

    // Hex초기화
    convenience init(hex: Int) {
        self.init(
            red: (hex >> 16) & 0xFF,
            green: (hex >> 8) & 0xFF,
            blue: hex & 0xFF
        )
    }

    // 알파값(투명도를 포함한 Hex초기화)
    convenience init(hexWithAlpha: Int) {
        self.init(
            red: (hexWithAlpha >> 16) & 0xFF,
            green: (hexWithAlpha >> 8) & 0xFF,
            blue: hexWithAlpha & 0xFF,
            a: (hexWithAlpha >> 24) & 0xFF
        )
    }

		enum Colors {
			static let customRed: UIColor = { UIColor(hex: 0x67776) }()
		}
}
코드로 다크모드지원하기
let color = UIColor { (traitCollection) -> UIColor in
    if traitCollection.userInterfaceStyle == .dark {
        return UIColor.systemGreen
    } else {
        return UIColor.systemRed
    }
}

view.backgroundColor = color
→ 인터페이스빌더에서 커스텀컬러 사용불가능
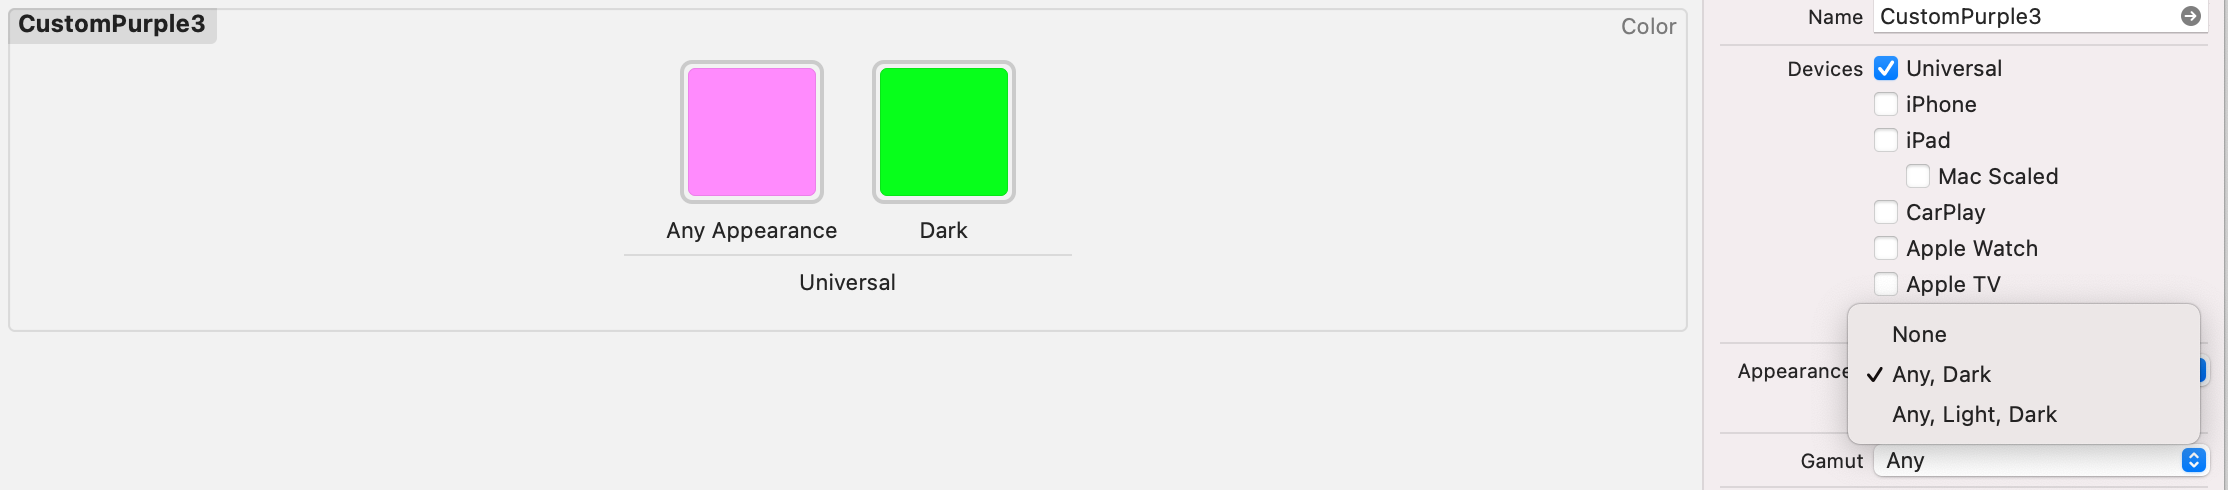
Asset에 ColorSet추가
-
asset 폴더로 이동한 후 New ColorSet
-
Inspector탭에서 원하는 컬러색상 지정
-
다크모드를 지원한다면 Inspector탭에서 Appearance속성을 변경해서 컬러를 추가하면됩니다.
-
UIColor(named: "ColorSet명")사용- extension으로 사용하면 편리
extension UIColor {
    class var ColorSet명: UIColor? { return UIColor(named: "ColorSet명") }
}
→ 오타위험이 있다., 다크모드 지원이 간편하다.
커스텀폰트 지정하기
폰트파일 사용해서 추가하는 경우
- 프로젝트에 폰트파일 추가
- Target Membership과 Copy if you needed 체크 확인 한 후 추가하기
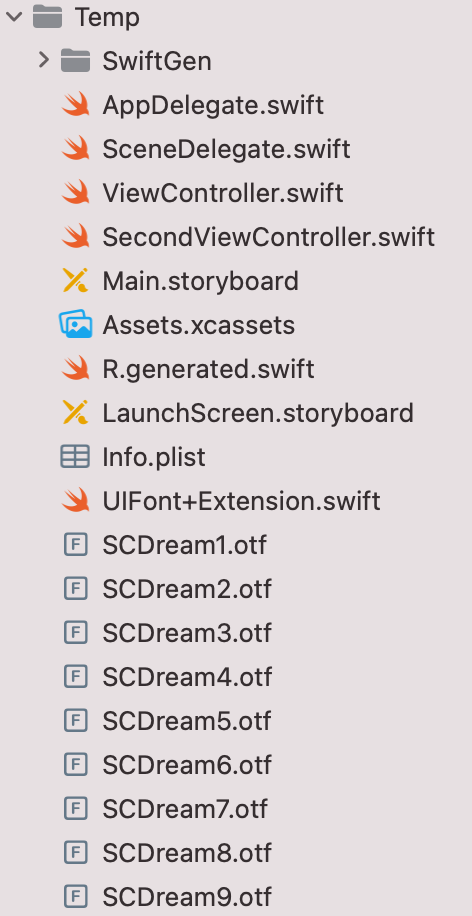
- Target Membership과 Copy if you needed 체크 확인 한 후 추가하기
- info.plist에서 Fonts provided by application속성 추가 후 Value에 파일명추가
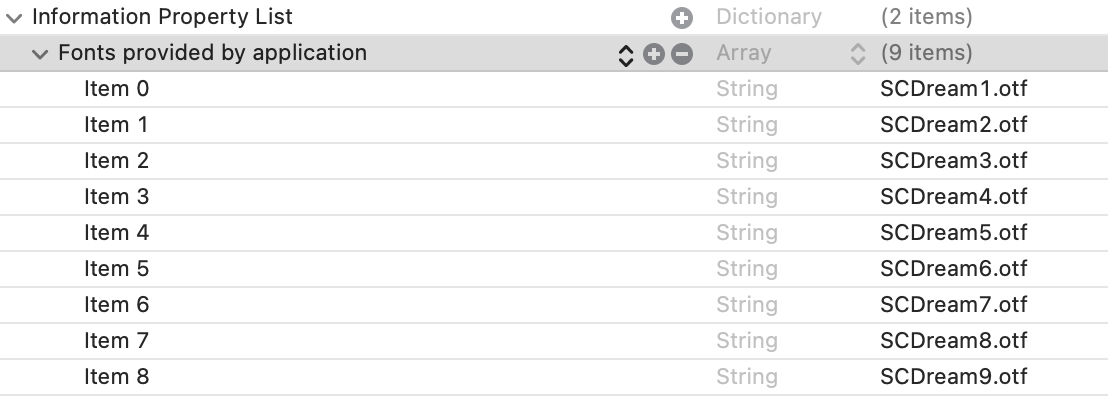
label.font = UIFont(name: "S-CoreDream-1Thin", size: 51)처럼 사용
SwiftGen, R.Swift라이브러리
R.Swift라이브러리
프로젝트의 리소스들을 자동완성 및 Strong Type을 시켜주는 라이브러리
💡 안드로이드에서는 R이라는 클래스를 이용해 모든 리소스를 관리한다고 합니다.
사용하는 이유?
- 컴파일 시간을 체크할 수 있습니다.
- 자동완성기능 제공 (이름을 생각해서 작성하지 않아도 됩니다.)
- Type화를 통해서 어떤 값을 반환하는지 추측할 수 있습니다.
- R.swift파일에
사용방법
Podfile에pod 'R.swift추가pod install- 타겟의
Build Phases에서New Run Script Phase Run Script에"$PODS_ROOT/R.swift/rswift" generate "$SRCROOT/R.generated.swift"코드를 추가한 후Build Phases의 순서를 변경해주어야합니다.
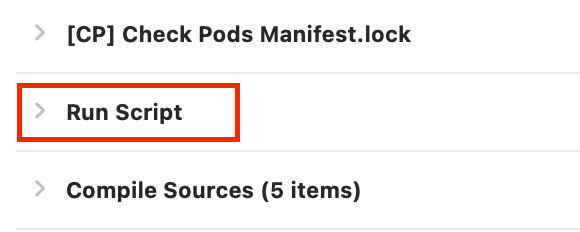
Run Script의Output Files에$SRCROOT/R.generated.swift코드를 추가합니다.- 이 과정을 통해 빌드과정에서 리소스가 루트폴더에
R.generated.swift파일로 추가됩니다. - 🚨 프로그래밍 과정 중 리소스를 추가한다면 새로운
R.generated.swift파일로 변경하면 바로 수정되서 편리합니다.(가끔 바로 Xcode상에서 수정안되는문제)
- 이 과정을 통해 빌드과정에서 리소스가 루트폴더에
- 프로젝트에 생성된
Copy items if needed를 체크해제한 후R.generated.swift를 추가합니다.Copy items if needed: 복사하지 않고 파일원본 이동
Swiftgen라이브러리
프로젝트 리소스들을 자동완성 시켜주는 라이브러리
사용하는 이유?
- 리소스를 문자열로 접근할 때 에러발생을 최소화할 수 있습니다.
- 자동완성으로 편리하게 사용가능합니다.
- 리소스의 변경이 일어났을 때 에러를 빠르게 찾을 수 있다.
사용방법 (CocoaPod)
Podfile에pod 'SwiftGen', '~> 6.0’추가pod install- 터미널(프로젝트루트폴더)에서
./Pods/SwiftGen/bin/swiftgen config init실행swiftgen.yml파일을 생성하는 과정
- 프로젝트에 생성된
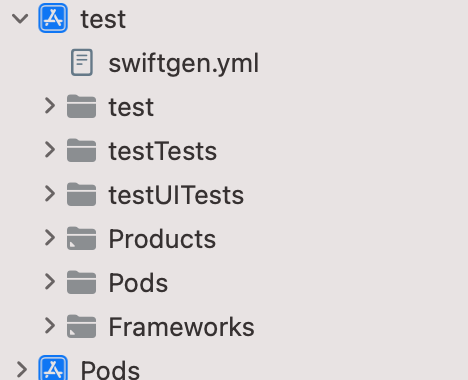
Copy items if needed를 체크해제한 후swiftgen.yml를 추가합니다.- 🚨 위치는 프로젝트 네비게이터 바로 아래
- 🚨 위치는 프로젝트 네비게이터 바로 아래
-
swiftgen.yml파일 작성하기strings: inputs: test/Base.lproj filter: .+\.strings$ outputs: - templateName: structured-swift5 output: test/Generated/Strings.swift xcassets: inputs: - test/Assets.xcassets outputs: - templateName: swift5 output: test/Generated/Assets.swift- 루트디렉토리명 : test
- 생성된 swift파일 저장하기 위한 폴더 Generated생성합니다.
-
터미널(프로젝트루프폴더)에서
./Pods/SwiftGen/bin/swiftgen실행- 🚨 리소스를 자주변경한다면 터미널말고
Run Script에 작성해서 사용할 수 있다.
- 🚨 리소스를 자주변경한다면 터미널말고

7. Generated 폴더에 생성된 Assets.swift와 Strings.swift를 xcode로 이동 후 사용하면 됩니다.

- 느낀점 : 🤔 Localization을 할 때는 SwiftGen이 strings파일을 처리할 때 좀 더 편리한 것 같고, 다른 리소스에 사용하기에는 R.Swift가 편리하지만 파일이 좀 더 큰 것 같다.
UITextField
텍스트필드 Singline
밑줄 UIView로 넣는 방식
override func viewDidLayoutSubviews() {
    let borderLine = UIView()
    borderLine.frame = CGRect(x: 0, y: Double(textField.frame.height) - 2, width: Double(textField.frame.width), height: 2)
    borderLine.backgroundColor = UIColor.systemGreen.cgColor

		textField.borderStyle = .none
    self.addSubview(borderLine)
}
밑줄 CALayer로 넣는 방식
override func viewDidLayoutSubviews() {
    let bottomLine = CALayer()
    bottomLine.frame = CGRect(x: 0, y: textField.frame.height - 2, width: textField.frame.width, height: 2)
    bottomLine.backgroundColor = UIColor.systemGreen.cgColor

    textField.borderStyle = .none
    textField.layer.addSublayer(bottomLine)
}- 두가지 방법 모두 상관 없고 y좌표를 텍스트필드 높이에서 일정높이 아래에 위치시키고 height로 굵기를 지정할 수 있습니다.
- 🚨 viewDidLoad에서는 오토레이아웃규칙이 모두 적용되지 않기 때문에 viewDidLayoutSubviews()에서 실행해야합니다.
- 자주 사용한다면 UITextField에 Extension으로 사용하면 편리하게 사용할 수 있을 것 같습니다.
화면 키보드 가리는 현상해결 - IQKeyboardManager라이브러리
UITextField 및 UITextView를 사용하는 경우 키보드가 화면을 가리는 경우 처리를 도와주는 라이브러리
사용방법(CocoaPod)
-
Podfile에pod 'IQKeyboardManagerSwift'추가 -
pod install -
AppDelegate.swift파일import IQKeyboardManagerSwift @main class AppDelegate: UIResponder, UIApplicationDelegate { func application(_ application: UIApplication, didFinishLaunchingWithOptions launchOptions: [UIApplication.LaunchOptionsKey: Any]?) -> Bool { IQKeyboardManager.shared.enable = true return true } }
커스텀화하기
import IQKeyboardManagerSwift

@main
class AppDelegate: UIResponder, UIApplicationDelegate {
    func application(_ application: UIApplication, didFinishLaunchingWithOptions launchOptions: [UIApplication.LaunchOptionsKey: Any]?) -> Bool {

      IQKeyboardManager.shared.enable = true
      IQKeyboardManager.shared.enableDebugging = true //키보드에 관한 정보들을 확인할 수 있습니다.
      IQKeyboardManager.shared.enableAutoToolbar = true // 기본으로 생성되는 툴바옵션 사용여부

      IQKeyboardManager.shared.overrideKeyboardAppearance = true // 기본제공 키보드Appearance 변경여부
      IQKeyboardManager.shared.keyboardAppearance = .dark // 기본제공 키보드Appearance 다크색으로 변경

      IQKeyboardManager.shared.keyboardDistanceFromTextField = 100.0 // 키보드와 텍스트요소와의 거리지정
      IQKeyboardManager.shared.toolbarTintColor = .systemGreen // 툴바색상 변경가능 (overrideKeyboardAppearance 함께 쓰면 적용안됨)
      IQKeyboardManager.shared.toolbarDoneBarButtonItemText = "확인" // 툴바 Done버튼 텍스트변경
      IQKeyboardManager.shared.toolbarDoneBarButtonItemImage = UIImage(systemName: "star.fill") // 툴바 Done버튼 이미지변경
      IQKeyboardManager.shared.shouldShowToolbarPlaceholder = true // 툴바 중간에 텍스트요소의 placeholder를 표시합니다.
      IQKeyboardManager.shared.placeholderFont = UIFont(name: "Setting", size: 15) // 툴바 placeholder의 폰트지정
      IQKeyboardManager.shared.shouldResignOnTouchOutside = true // 화면에서 텍스트요소의 바깥부분 누르면 사라지도록 지정
      IQKeyboardManager.shared.shouldPlayInputClicks = false // 툴바의 화살표이동할 때 소리여부

      return true
    }
}- AutoToolbar

참고링크
- 커스텀컬러
- CustomColor 생성과 관리는 어떤방식이 효율적일까요? - https://wodyios.tistory.com/11
- HexColor Swift에서 적용하기 - https://sosoingkr.tistory.com/31
- 김종권의 iOS앱 개발 알아가기 - https://ios-development.tistory.com/686
- 커스텀폰트
- TTF
vsOTF 차이점 - https://zeddios.tistory.com/198
- TTF
- IQKeyboardManager
- SwiftGen
- 공식 깃허브 - https://github.com/SwiftGen/SwiftGen
- 제드 블로그 - https://zeddios.tistory.com/1017?category=682196
- dev.ssun 블로그 - https://hyesunzzang.tistory.com/230
- SwiftGen in Xcode 11 - https://www.youtube.com/watch?v=DHmenm94PlI
- raywenderlich - https://www.raywenderlich.com/23709326-swiftgen-tutorial-for-ios
- R.swift
- 공식 깃허브 - https://github.com/mac-cain13/R.swift
- 제드 블로그 - https://zeddios.tistory.com/1016
- 5anniversary - https://blog.5anniversary.dev/50
- UITextField Singline