form & input
<form action="경로~~" method="어떤방식으로 서버에 전달할지">
  <input type="여러가지 있음">
</form>- 폼 만들고 싶을 때 사용
- input 태그는 닫는태그 없음
input의 자주쓰는 type
<input type="text">
<input type="email">
<input type="password">
<input type="radio">
<input type="file">
<input type="checkbox">
<input type="submit">
<select>
  <option>옵션1</option>
</select>
<textarea></textarea>
input에 넣는 속성들
<input placeholder="어쩌구" value="어쩌구" name="age">placeholder는 배경 글자,
value는 미리 입력된 값,
name은 서버 기능개발에 필요한 인풋의 이름을 설정 가능.
또한 input을 html 속성으로 css 셀렉터 사용할 수 있다
input[type=email] {
  color : grey
}
input의 type속성이 email인 요소만 찾아서 스타일을 줄 수 있다.
폼에서 특히 유용하게 사용할 수 있다.
전송버튼
<form action="경로~~">
  <button type="submit">전송</button>
  <input type="submit">
</form>
두가지가 있음.
(form 태그 안에 있어야 잘 작동)
만들어 보았을 때,
html
<form>
  <input type="text" class="text-input" />
  <input type="text" class="text-input" />
  <input type="submit" class="text-input" />
  <button type="button" class="text-input">전송</button>
</form>
css
위 코드처럼 모두 동등한 스타일을 주고싶을 때 각각 클래스 선언하면 너무 길어지니까
input {
  padding: 10px;
  font-size: 20px;
  border: 2px solid black;
  border-radius: 5px;
}
이렇게 한번에 선언해서 쓸 수도 있음. 하지만, 타입별 차이를 둬야 할때는
input [type=text] {
  padding: 10px;
  font-size: 20px;
  border: 2px solid black;
  border-radius: 5px;
}- input [속성명=속성값]
이렇게 지정해주는 문법도 있다.
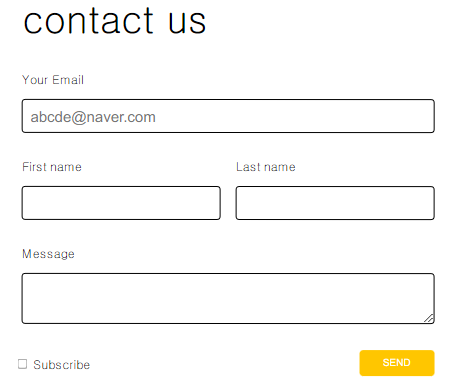
만들어보기
label 태그
<input type="checkbox" id="subscribe">
<label for="subscribe">누르기</label>
label과 for 속성을 적절히 활용하면
input대신 label을 눌러도 input을 선택할 수 있다.
(input의 id, label의 for 이름을 똑같이 맞춰주기)
혹은 <input>에 제목이 필요할 때, h, p태그 말고 <label>태그를 가끔 이용할 수 있다.
유용함!!
