
📢 Handler 다뤄보기
WEB1 폴더에 작성했다.
func main() {
	http.HandleFunc("/", func(w http.ResponseWriter, r *http.Request) {
		fmt.Fprint(w, "Hello World")
	})

	http.HandleFunc("/bar", func(w http.ResponseWriter, r *http.Request) {
		fmt.Fprint(w, "Hello Bar!")
	})

	http.ListenAndServe(":3000", nil)
}
HandleFunc : 어떤 request가 들어왔을 때 어떤 일을 할 것인지 핸들러를 등록하는 함수
/ -> 첫 번째 인덱스 페이지를 나타낸다.
w : Response를 write할 수 있는 인자
r : 사용자가 요청한 Request정보를 가지고 있는 인자
fmt.Fprint(w, "Hello World") : Hello World라는 response를 줘라
ListenAndServe : 웹 서버가 구동되고 Request를 기다리는 상태가 됨(3000포트에서 기다림)
주소에 http://localhost:3000라고 치면 첫 번째 핸들러가 돌아가고

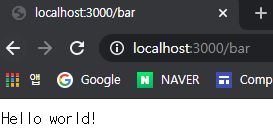
주소에 http://localhost:3000/bar라고 치면 두 번째 핸들러가 돌아간다.
즉 경로에 맞는 핸들러가 돌아간다.
💊 핸들러의 다양한 방법
type fooHandler struct{}

func (f *fooHandler) ServeHTTP(w http.ResponseWriter, r *http.Request) {
	fmt.Fprint(w, "Hello Foo!")
}

func barHandler(w http.ResponseWriter, r *http.Request) {
	fmt.Fprint(w, "Hello Bar!")
}

func main() {
	http.HandleFunc("/", func(w http.ResponseWriter, r *http.Request) { // 루트 주소
		fmt.Fprint(w, "Hello World")
	})

	http.HandleFunc("/bar", barHandler)

	http.Handle("/foo", &fooHandler{})

	http.ListenAndServe(":3000", nil)
}
HandleFunc : 함수를 직접 등록
Handle : 인스턴스 형태로 등록(인스턴스를 만들고 거기에 해당하는 인터페이스를 구현)
여기까지는 http에 정적으로 등록했는데
새로운 라우터 인스턴스를 만들어서 그 인스턴스를 넘겨주는 방식으로 구현
mux := http.NewServeMux()
mux.HandleFunc("/", func(w http.ResponseWriter, r *http.Request) {
	fmt.Fprint(w, "Hello World")
})

mux.HandleFunc("/bar", barHandler)
mux.Handle("/foo", &fooHandler{})
http.ListenAndServe(":3000", mux)
request에서 input값을 뽑아보기
request에 필요한 argument(input)값을 넣을 수 있다.
func barHandler(w http.ResponseWriter, r *http.Request) {
	// URL에서 argument를 뽑아냄
	name := r.URL.Query().Get("name")
	if name == "" {
		name = "world"
	}
	fmt.Fprintf(w, "Hello %s!", name) // 그 값을 출력
}
차이점 비교해보기

📢 JSON 다뤄보기
WEB2 폴더에 작성했다.
web browger가 request를 보낼 때 request에 JSON형태의 데이터를 보내고 server가 다시 JSON형태의 데이터를 response해주는 코드이다.
type User struct {
	FirstName string
	LastName  string
	Email     string
	CreatedAt time.Time
}

type fooHandler struct{}

func (f *fooHandler) ServeHTTP(w http.ResponseWriter, r *http.Request) {
	user := new(User)
	err := json.NewDecoder(r.Body).Decode(user) // NewDecoder는 io.Reader를 인자로 받고 Body는 io.Reader를 포함하고 있다.
	if err != nil {
		w.WriteHeader(http.StatusBadRequest) // hear로 오류가 있다는 것을 알려줌
		fmt.Fprint(w, "Bad Request: ", err)  // body에 에러를 알려줌
		return
	}
	user.CreatedAt = time.Now()

	data, _ := json.Marshal(user) // 인터페이스를 받아서 json형태로 바꿔주는 메소드(byte와 err를 리턴함)
	w.WriteHeader(http.StatusCreated)
	fmt.Fprint(w, string(data))
}
?name=bar 처럼은 url에 데이터를 넣는 것이기때문에 안되고 body에 넣어야한다.
chrome http client app설치 후 확인해보기

firstname과 lastname에 값이 없는 이유는 json에서 쓰는 방식하고 go에서 쓰는 방식이 다르기 때문이다.
따라서 맞춰줘야한다.
type User struct {
	FirstName string	`json:"first_name"`
	LastName  string	`json:"last_name"`
	Email     string	`json:"email"`
	CreatedAt time.Time	`json:"created_at"`
}
annotation을 사용 : 설명을 붙여준다.
json에서는 이렇게 쓰인다 라는 의미

잘 들어간 것을 확인할 수 있다.
하지만 JSON포멧으로 나오는 것이 아니라 한 줄로 나온다. 그 이유는 웹이 보았을 때 content-type을 text로 인식하기 때문
따라서 JSON이라고 알려줘야한다.
w.WriteHeader(http.StatusCreated)위에 추가
w.Header().Add("content-type", "application/json")

정상적인 형태로 잘 나온것을 확인할 수 있다.